Timecard Entries
Agave Sync enables you to sync Procore Timecards to Vista PR Timecard Entry.
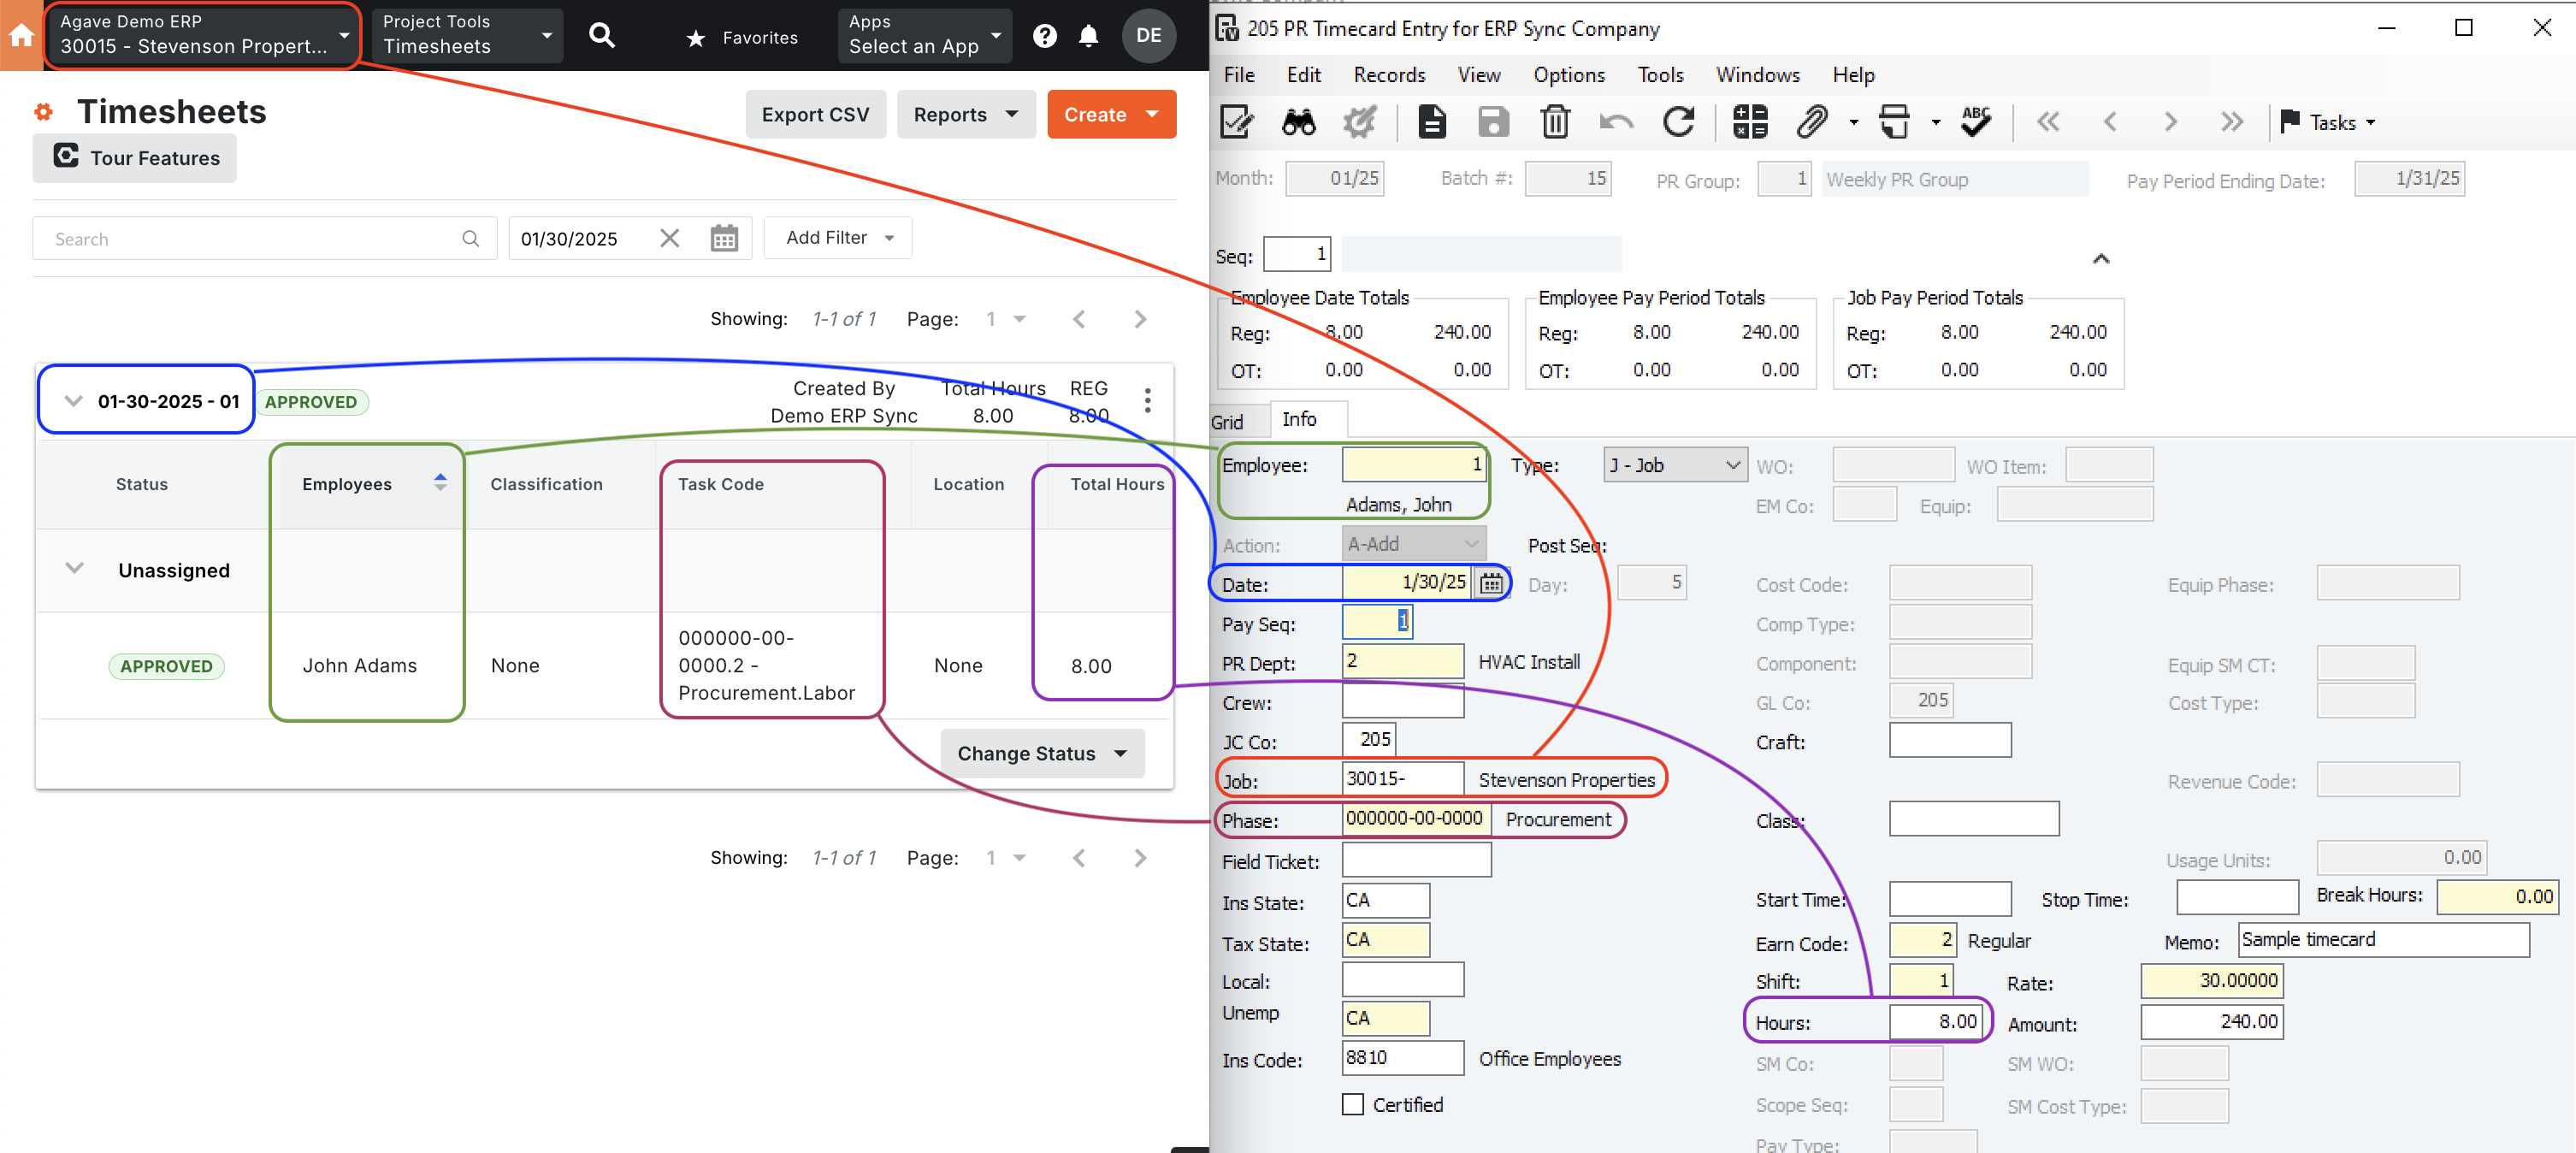
Visual Mapping

Video Tutorial
FAQs and Common Error Messages
Are there any pre-requisites to syncing Timecard Entries?
Yes:
- The Project, Employee, and Budget Codes associated with the Timecard Entry must be synced, and
- Your Procore Time Types and Vista PR Earnings Codes must match (see below).
How does Agave Sync determine the Batch ID when syncing Timecard Entries to Vista?
Agave Sync determines the Batch ID by:
- Checking for an Existing Batch ID: Agave Sync looks for an open Batch ID with the correct Batch Month, PR End Date, and PR Group. If it finds one created by the Agave Vista user, it uses that Batch ID.
- Creating a New Batch ID if None Exists: if no suitable Batch ID exists, the Agave Sync Vista user creates a new Batch ID for the first synced timecard. This newly created Batch ID is then used for subsequent syncs.
How does Agave Sync determine the PR End Date?
Agave Sync will default to Saturday of each week as the PR End date.
If you use a different day of the week than Saturday, let your Agave Account Manager know and they can apply a setting to use that day.
How is the Batch Month determined When Syncing Timecard Entries?
When syncing Timecard Entries to Vista, Agave Sync uses the month of the PR End Date.
For example, if a Timecard Entry has a date of "2/28/2025", but the PR End Date is "3/3/2025", the Batch Month will be set to "3/25".
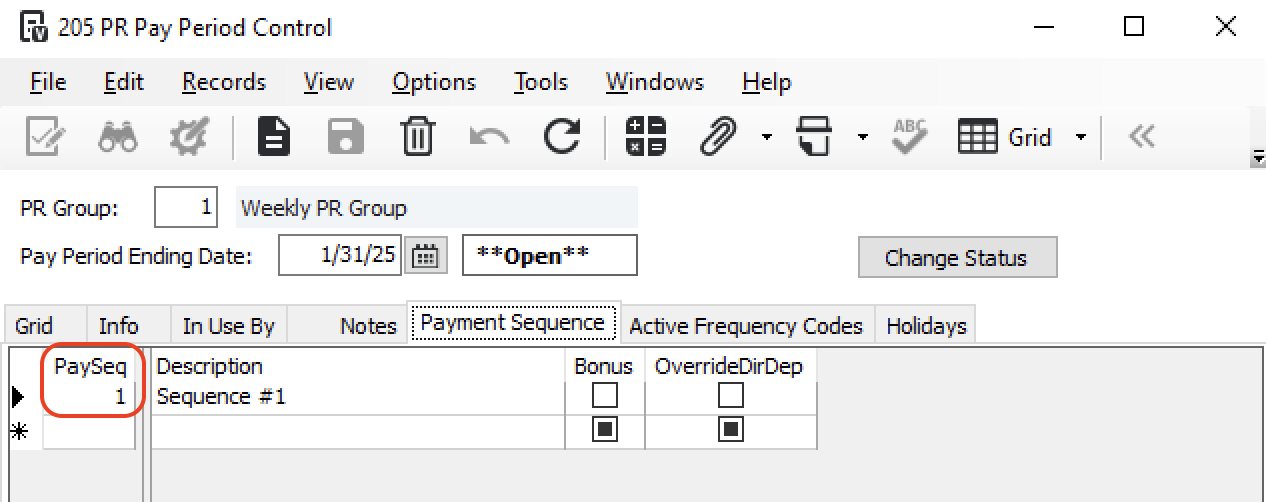
How does Agave Sync Determine the PR Pay Sequence?
Agave Sync applies a default Pay Sequence for all Timecards synced from your PM System to Vista.
You can determine your Pay Sequence by going to PR Pay Period Control, selecting the relevant PR Group, and pressing the Payment Sequence tab:
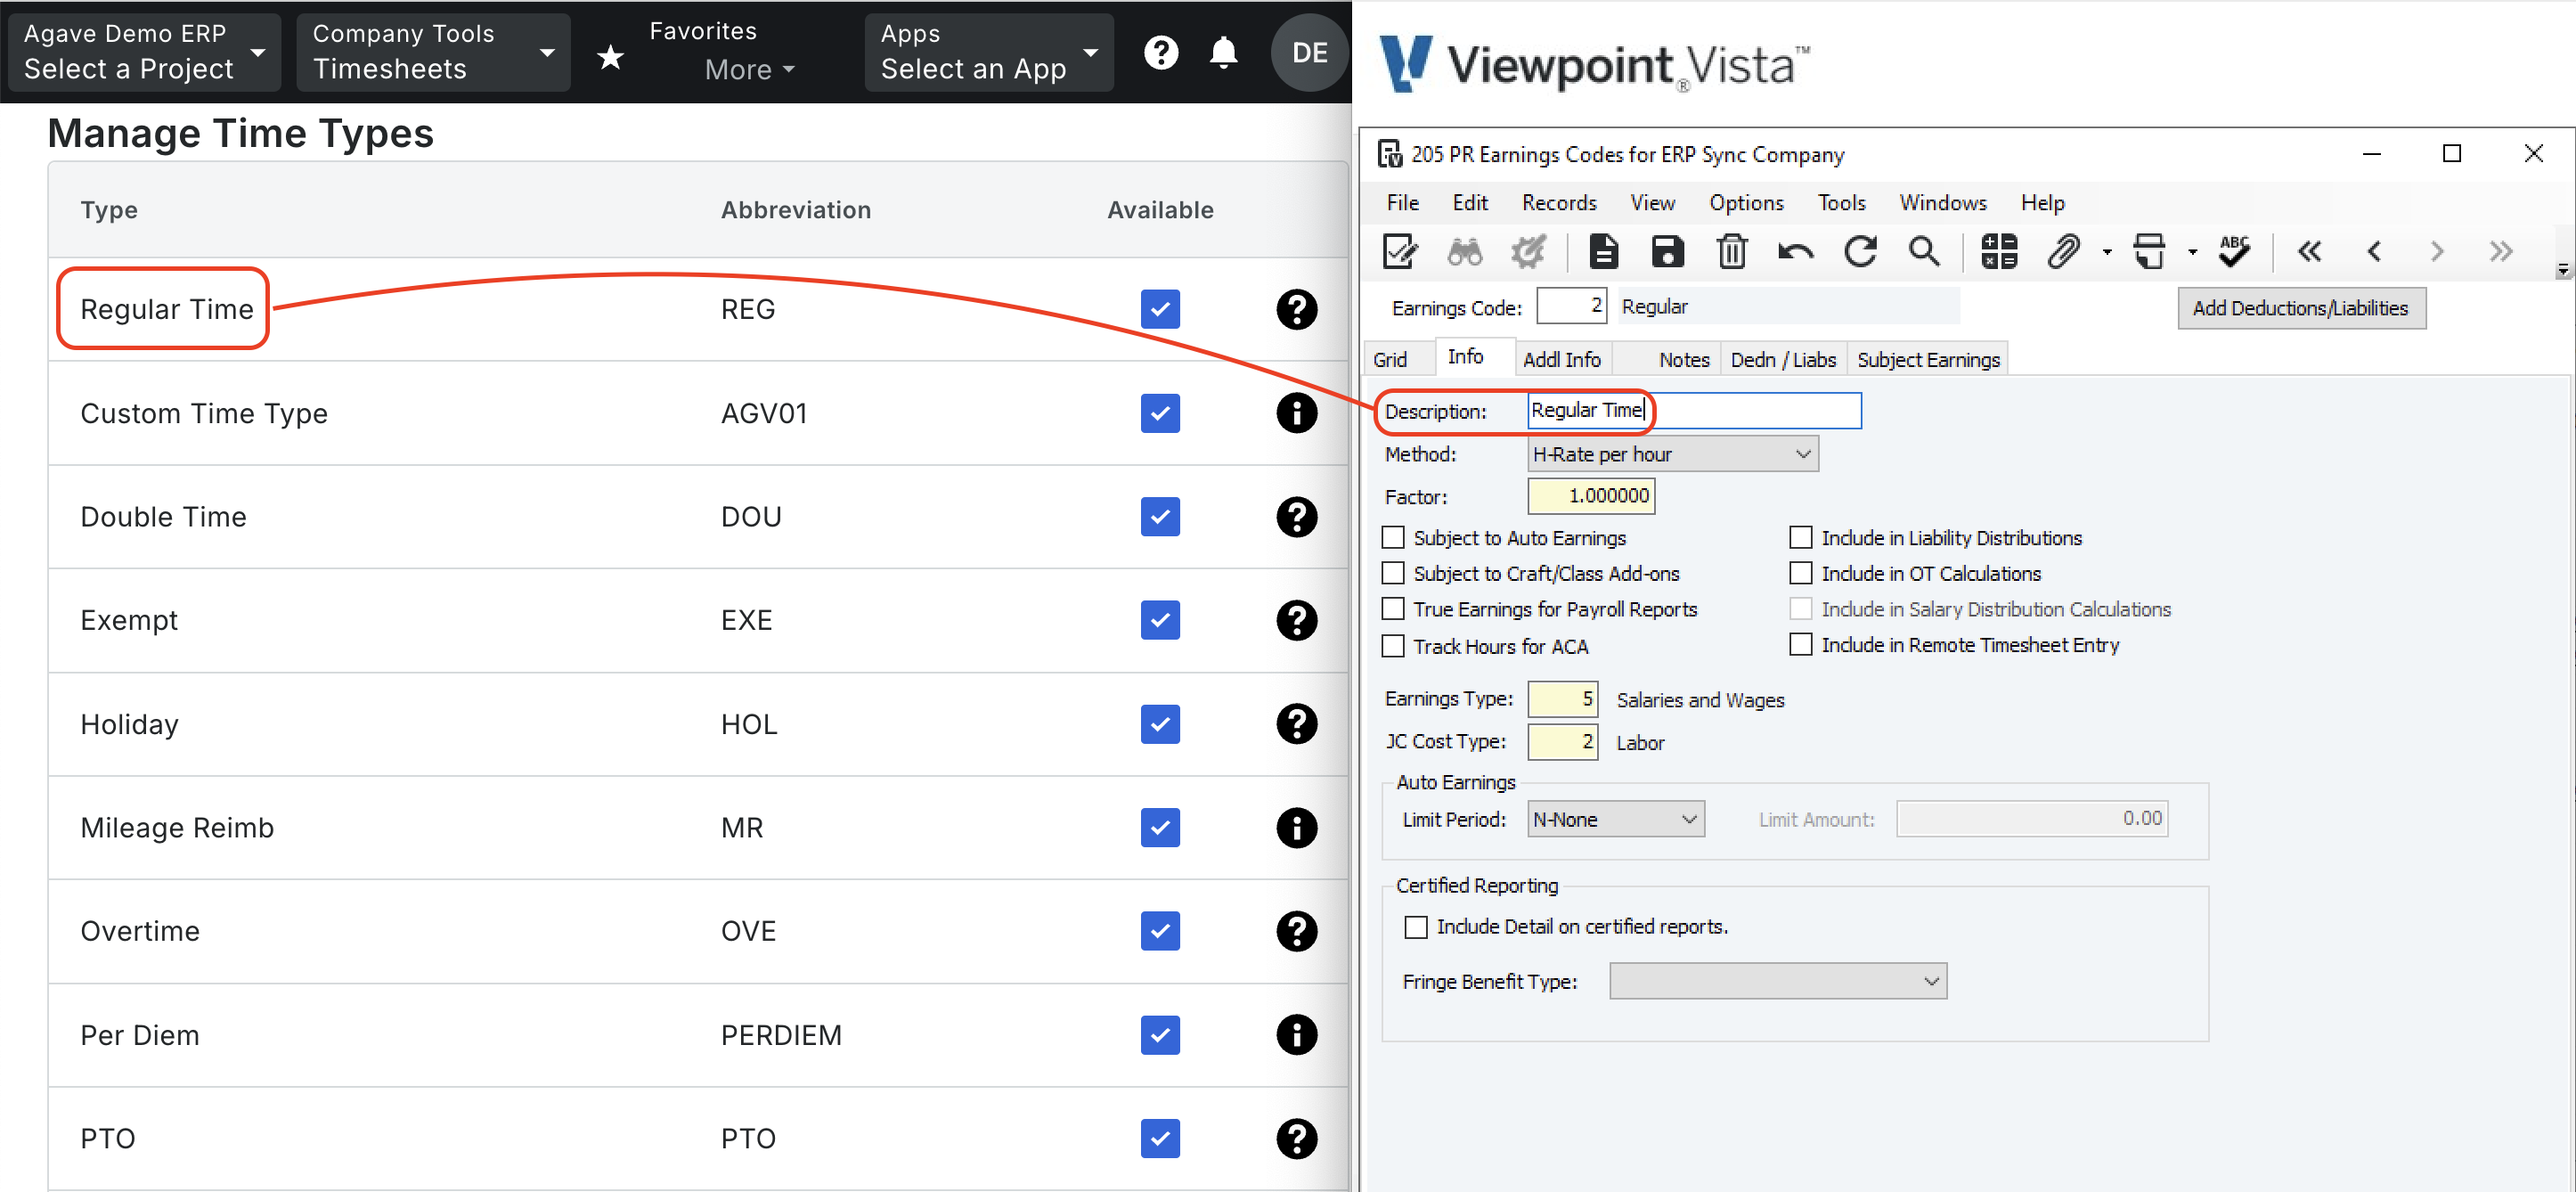
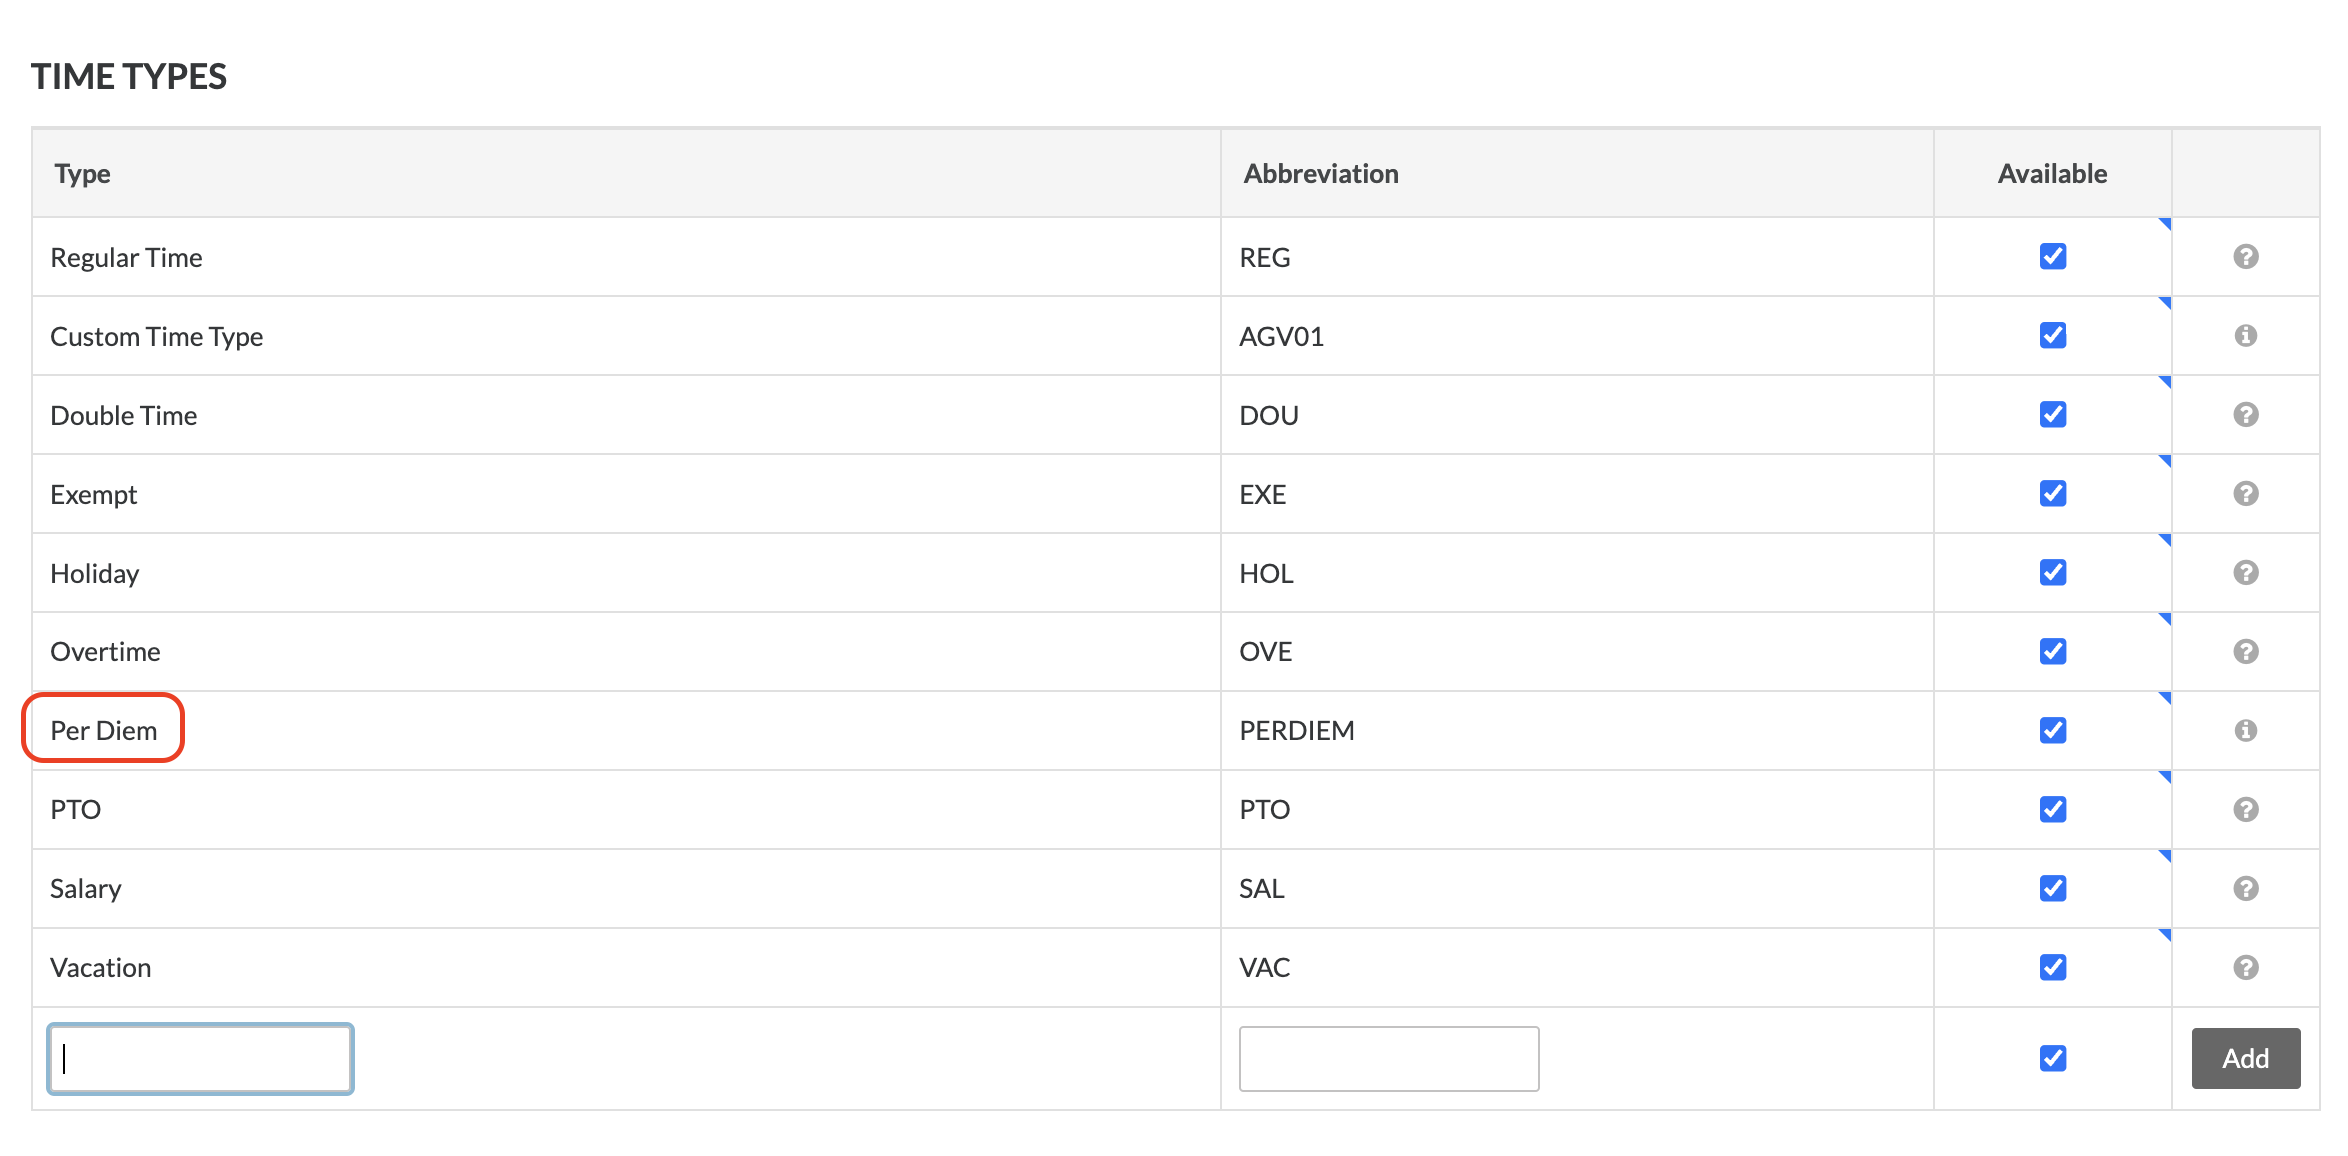
Procore Time Types and Vista PR Earnings Codes
To sync Procore Time Types with Vista PR Earnings Codes, you will need to have the Vista PR Earnings Code description match the text of the Procore Time Type. To have these match, you could either:
- Retitle the Vista PR Earnings Codes to match the text of Procore's standard Time Types. Note, Procore's standard Time Types include:
- "Regular Time",
- "Double Time",
- "Exempt",
- "Holiday",
- "Overtime",
- "PTO",
- "Salary", and
- "Vacation"
- Add custom Time Types in Procore that match your Vista Earnings Codes. To learn more about adding custom Time Types, see Procore's documentation.
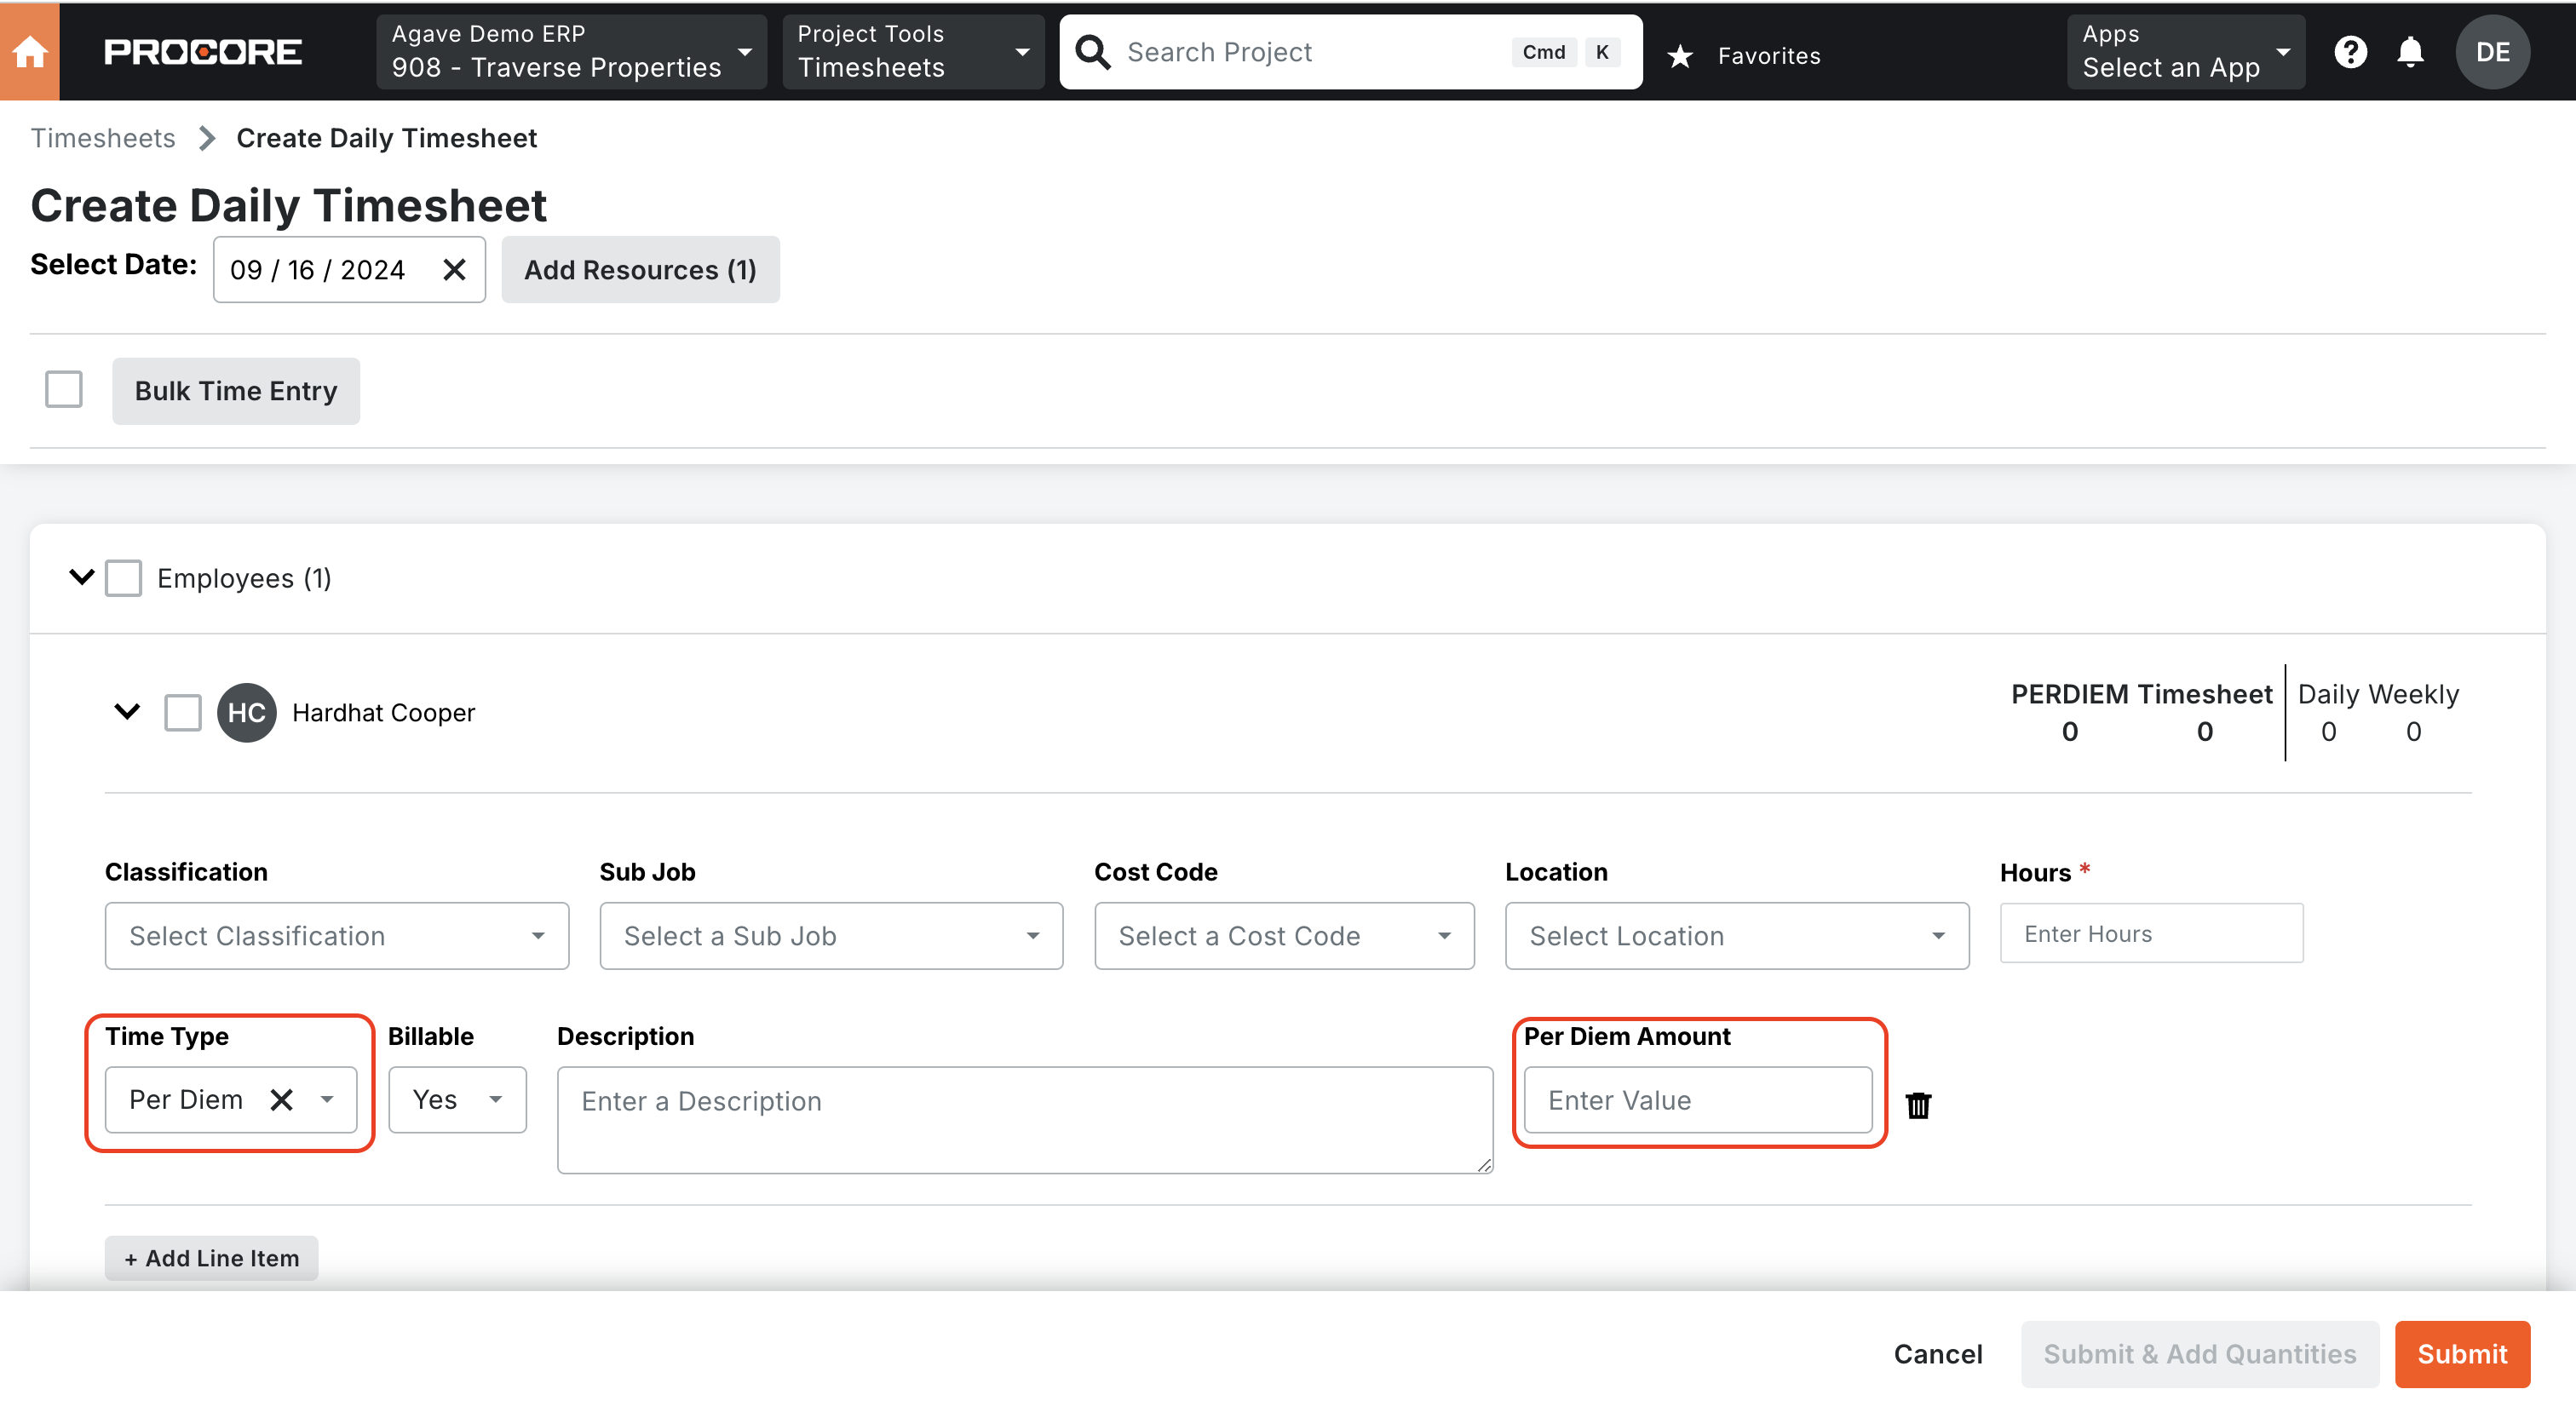
How do I enable Per Diem Timecards?
You can enable Per Diem Timecards by completing the following steps:
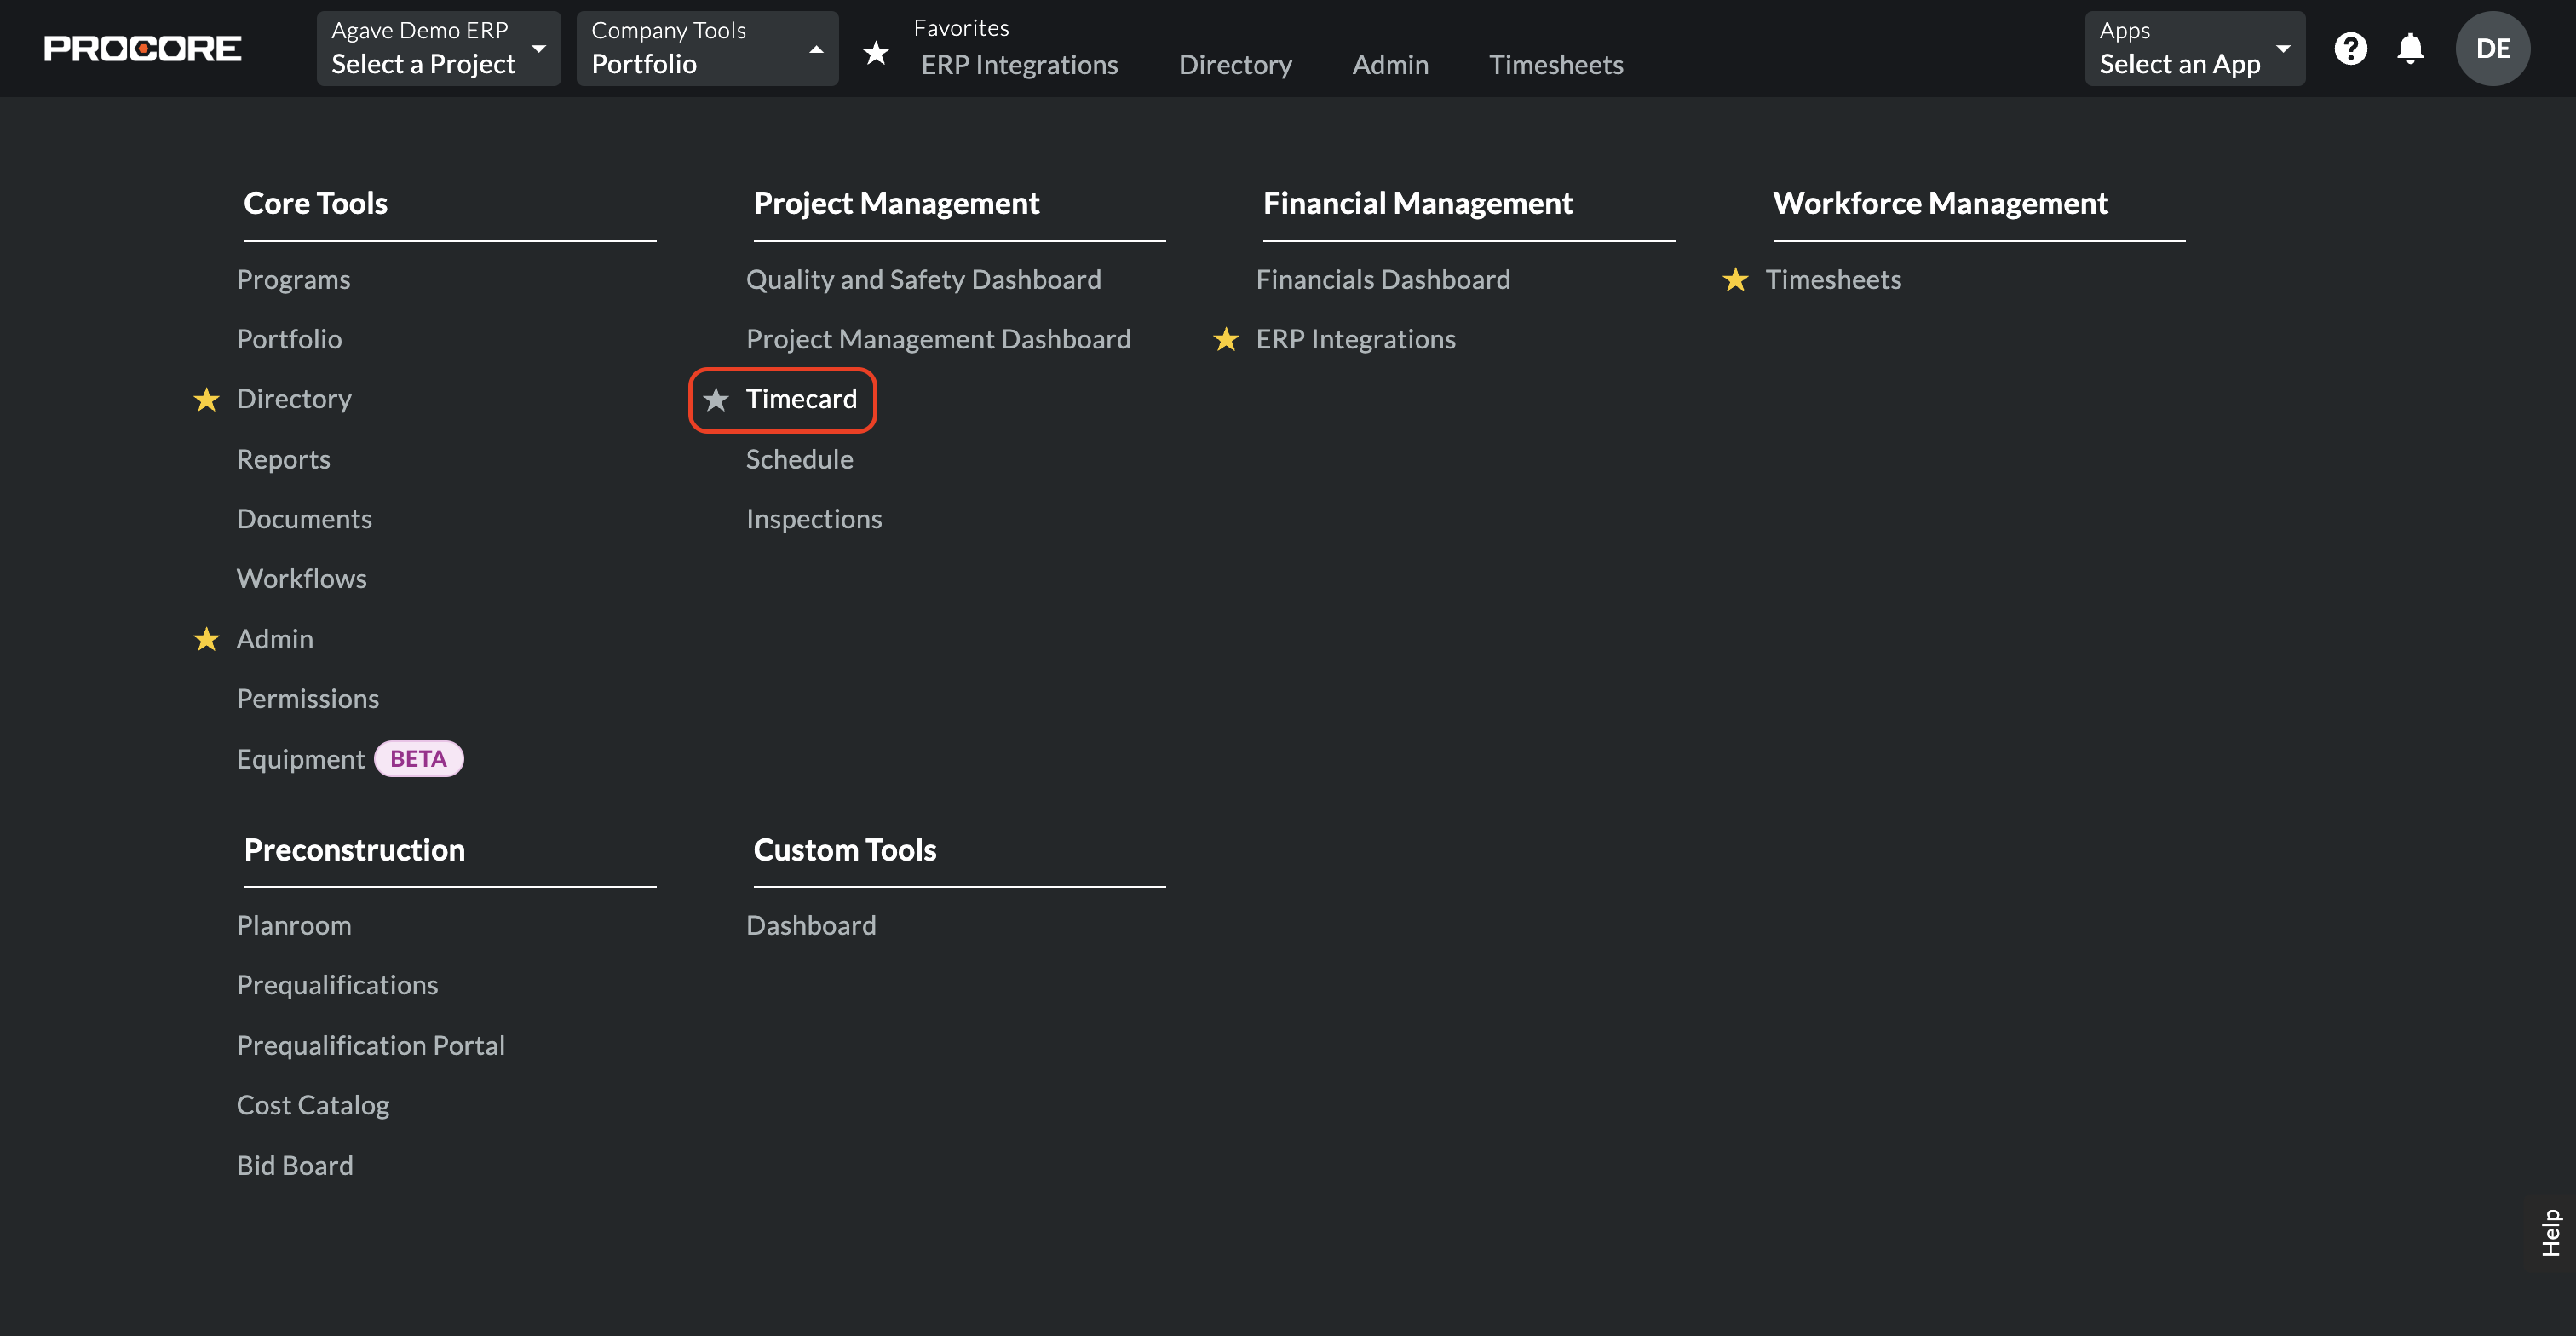
- From the Procore main page, select Company Tools --> Timecard.
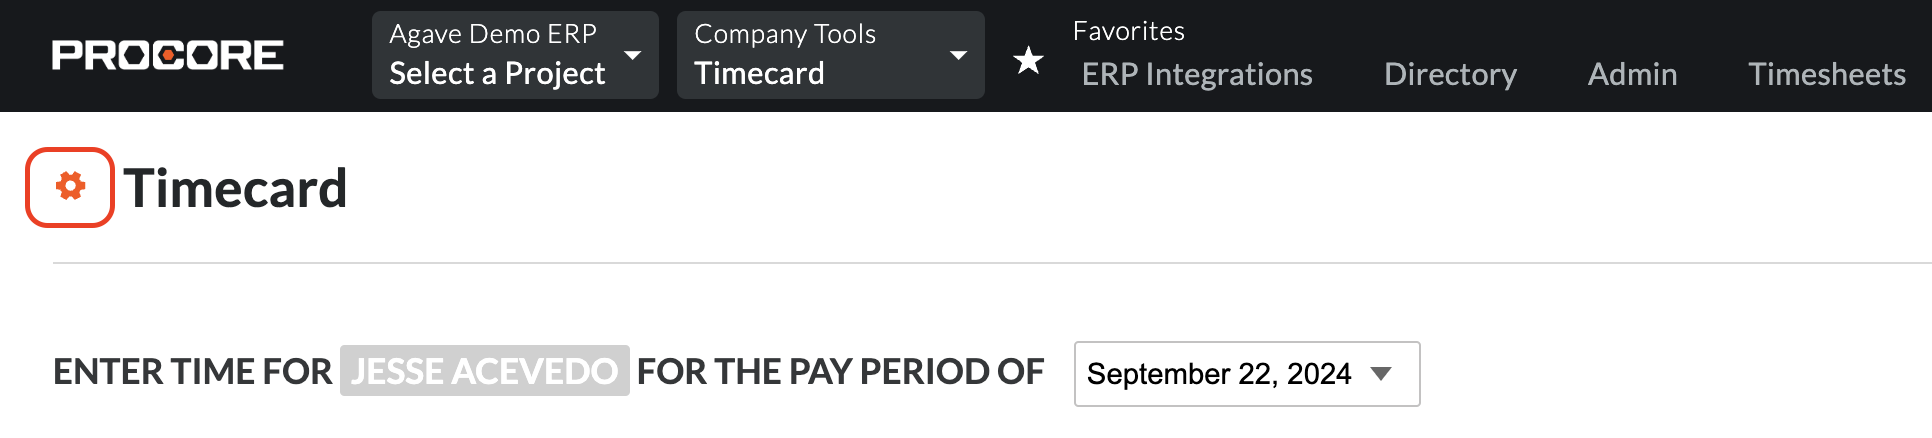
- Select the gear icon for settings.
- Add a Time Type that matches the Earn Code Description value in 1 above. Notify your Agave Account Manager of the name of this Time Type so they can enable a setting for you.
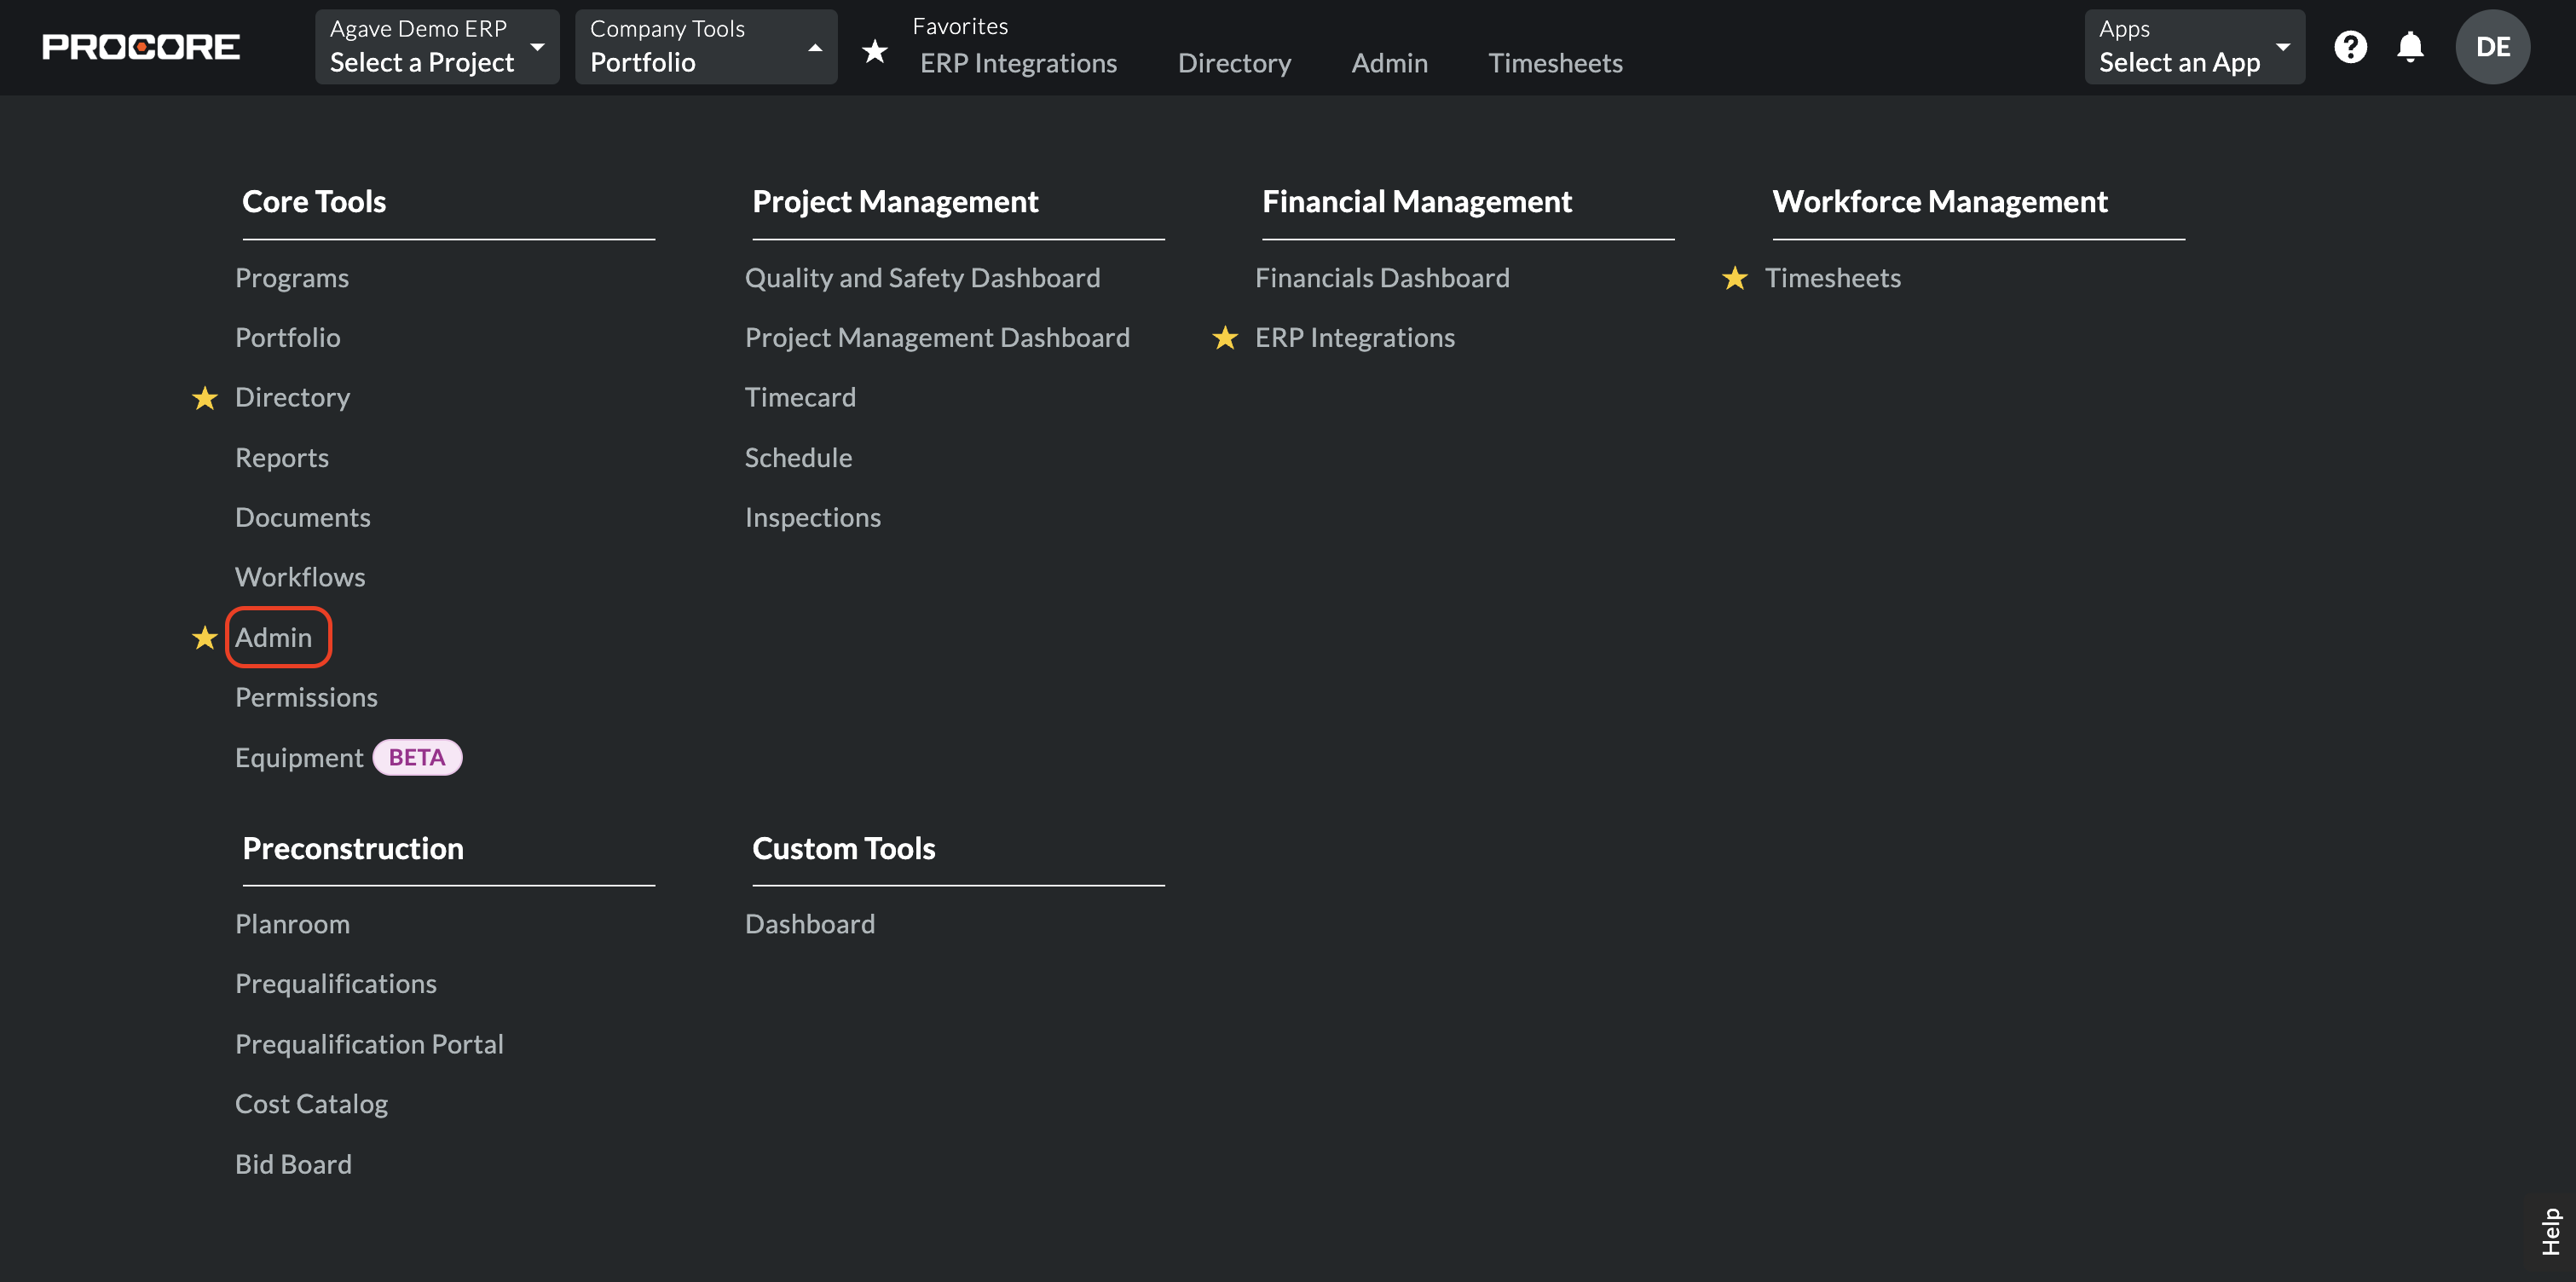
- From the Procore main page, select Company Tools-->Admin.
- Scroll down to Timesheets on the right-hand navigation.
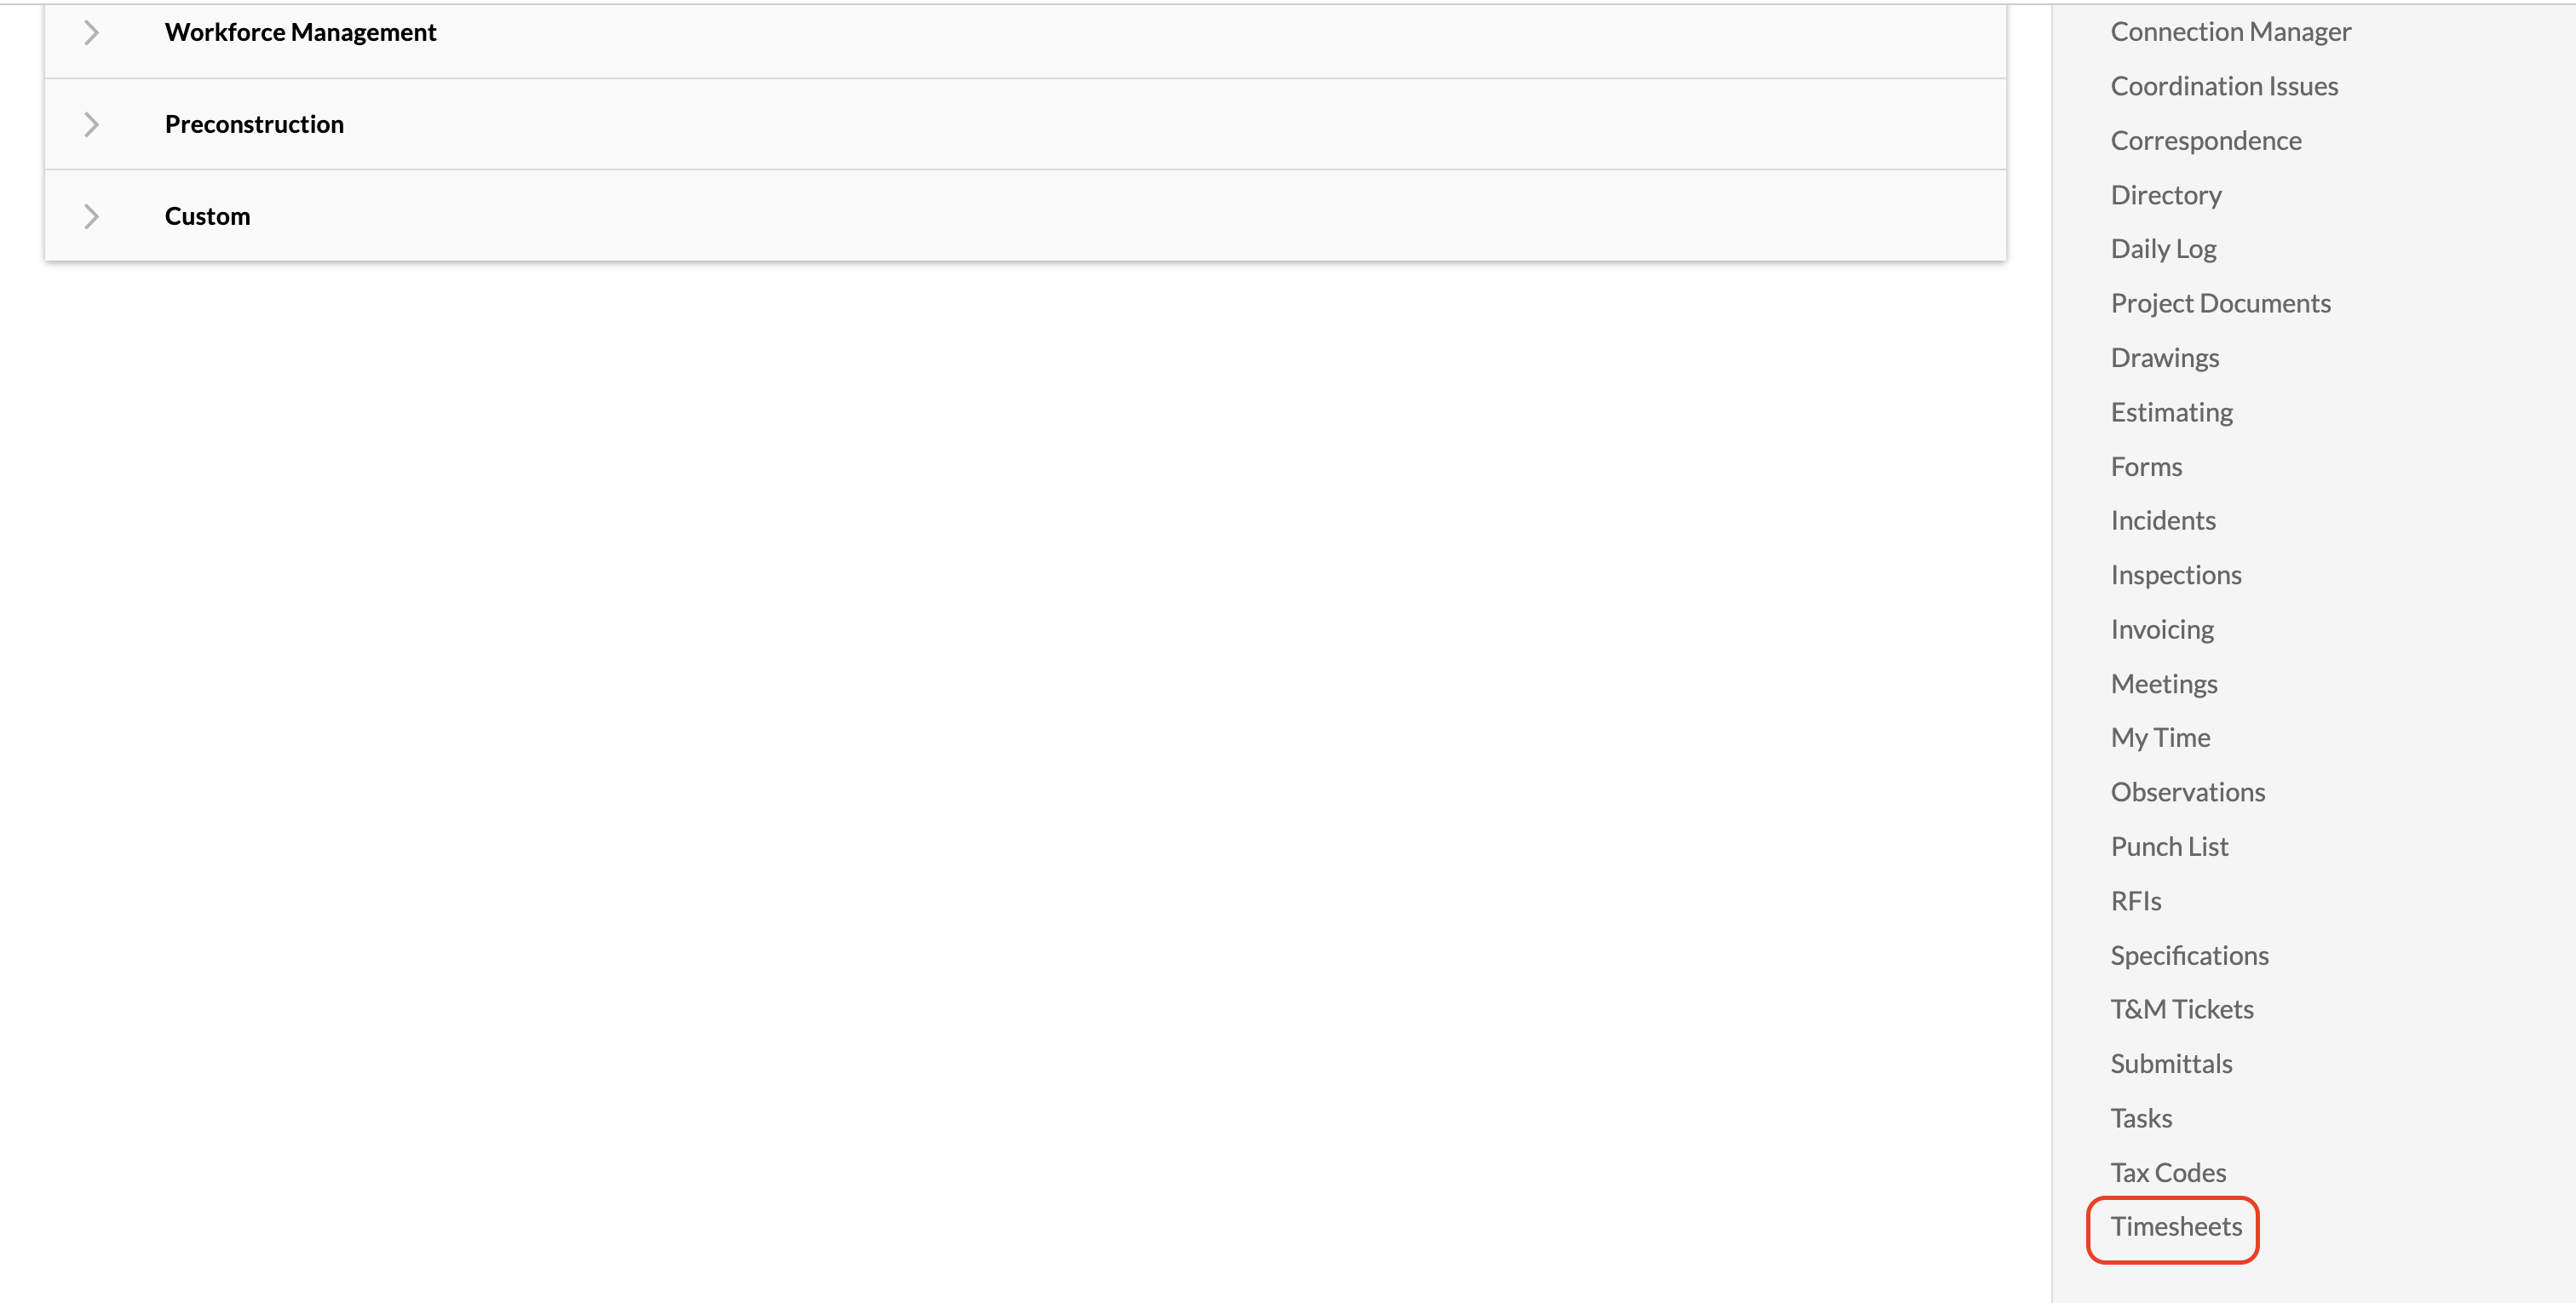
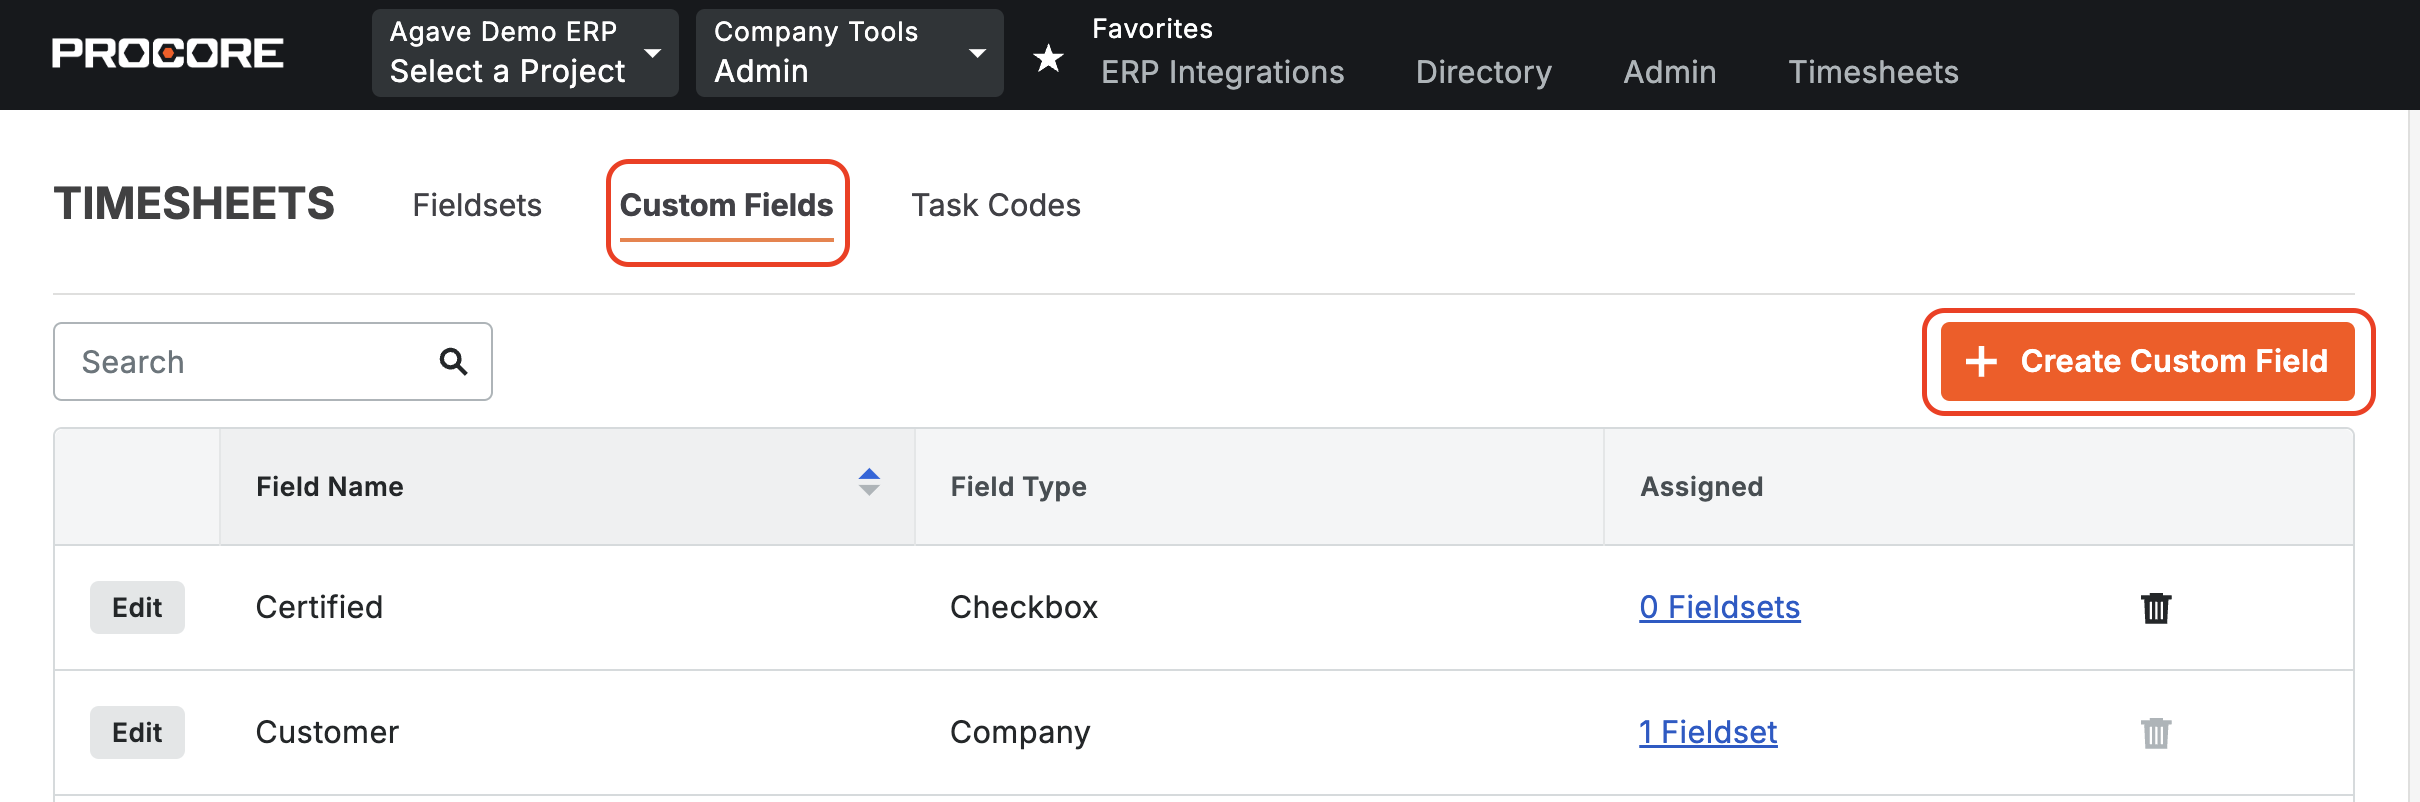
- Select the Custom Fields tab. Press Create Custom Field.
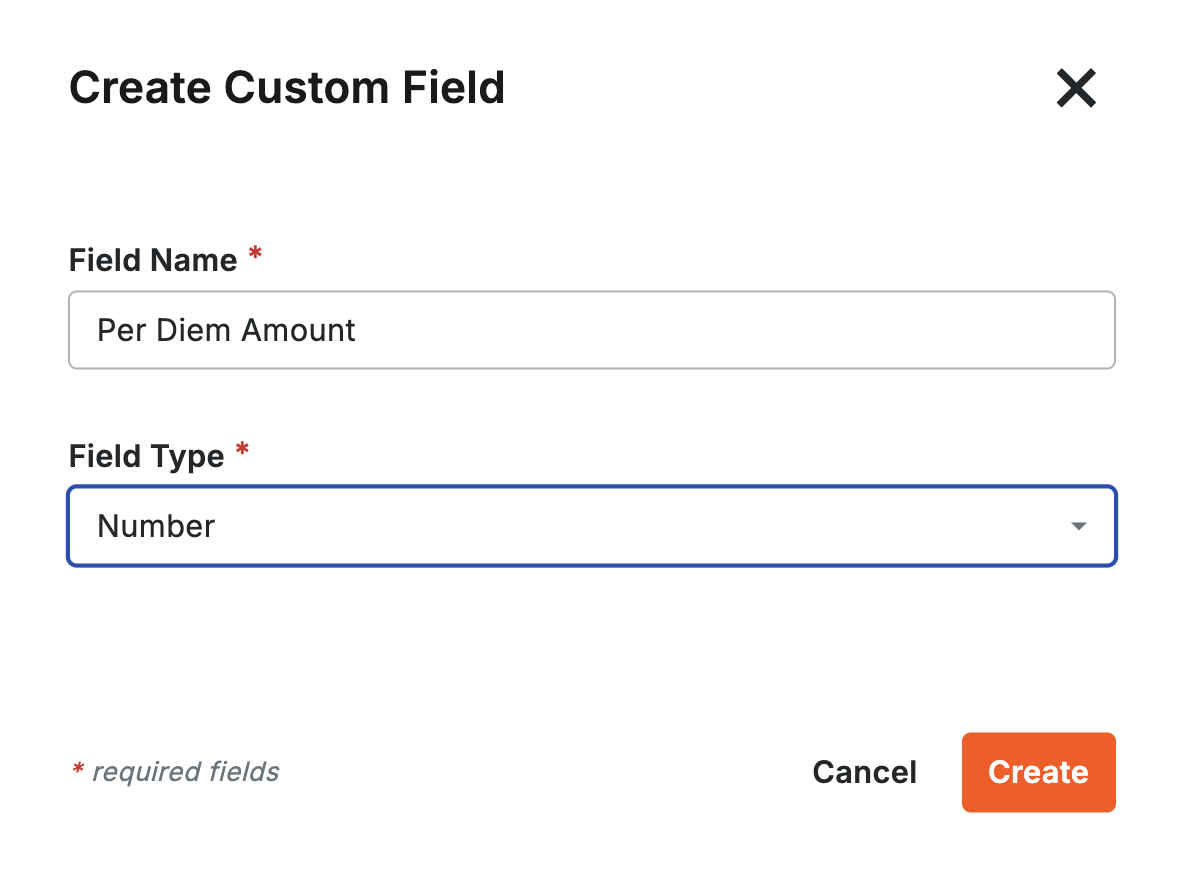
- Type "Per Diem Amount" for the Field Name and select "Number" as the Field Type.
- Go to the Fieldset. You can use an existing fieldset that is not the Procore default, or add a new Fieldset and call it "Foundation Integration".
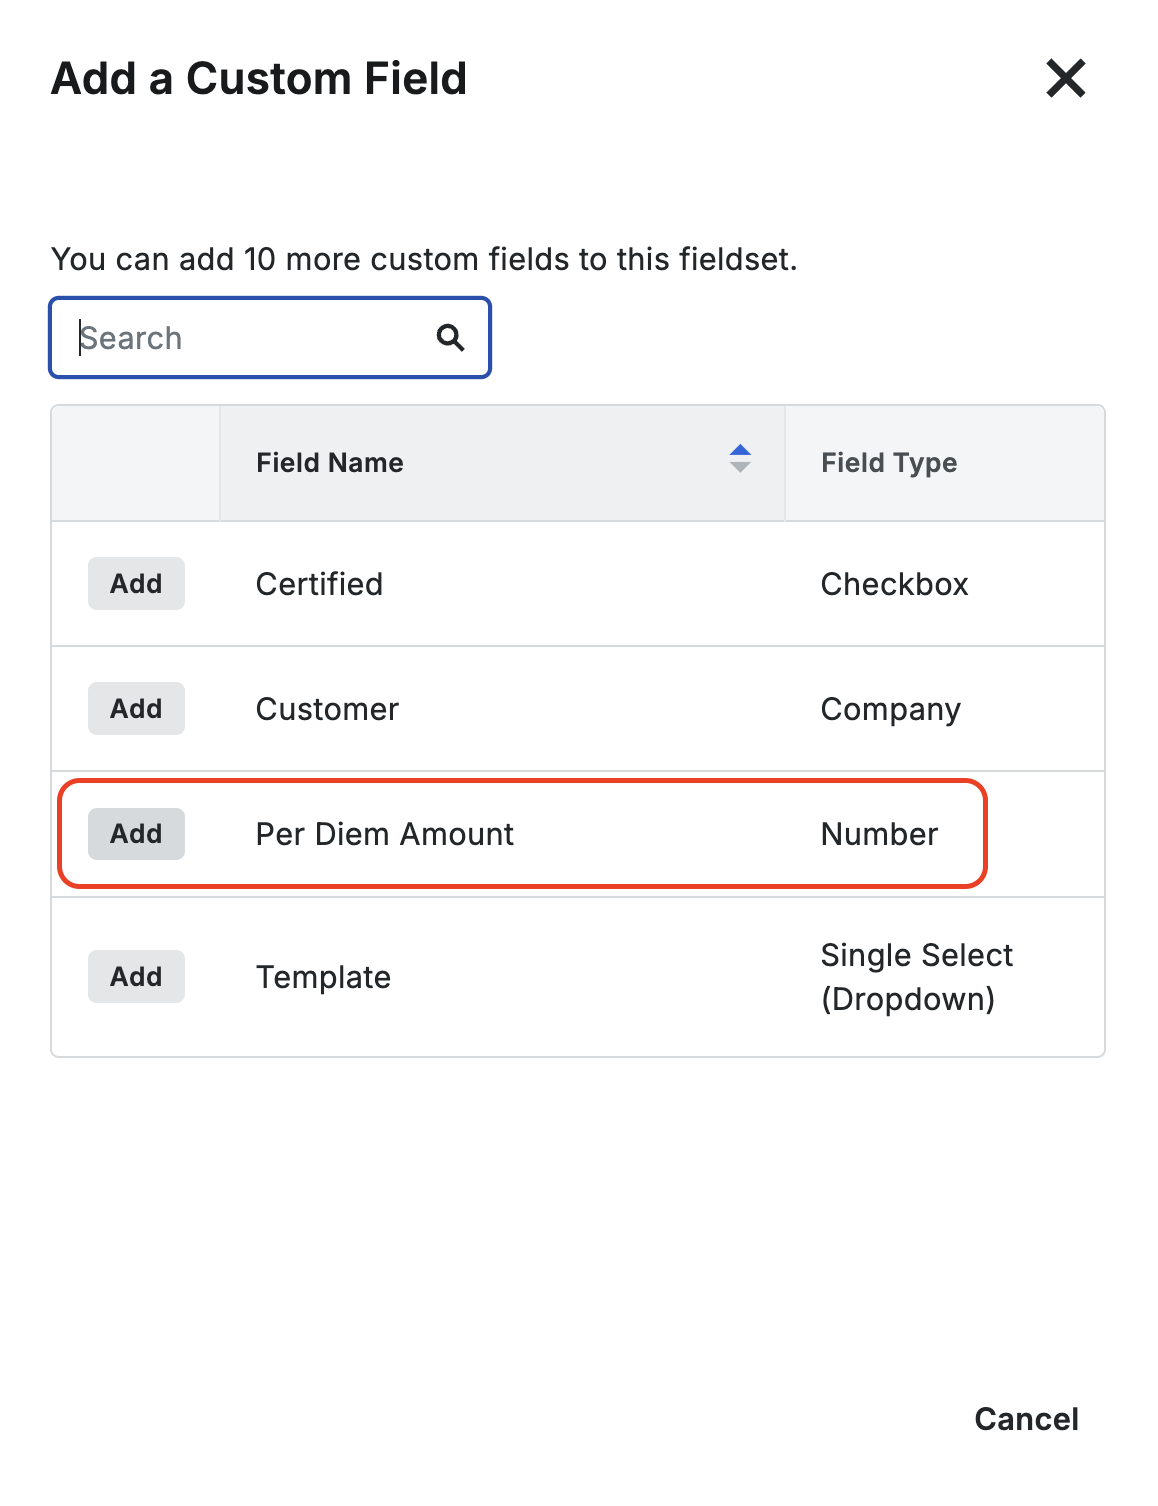
- Scroll to the bottom. Select Add Custom Field. Select Choose From Existing.

- Press Add next to the the field you added above (i.e. "Per Diem Amount").
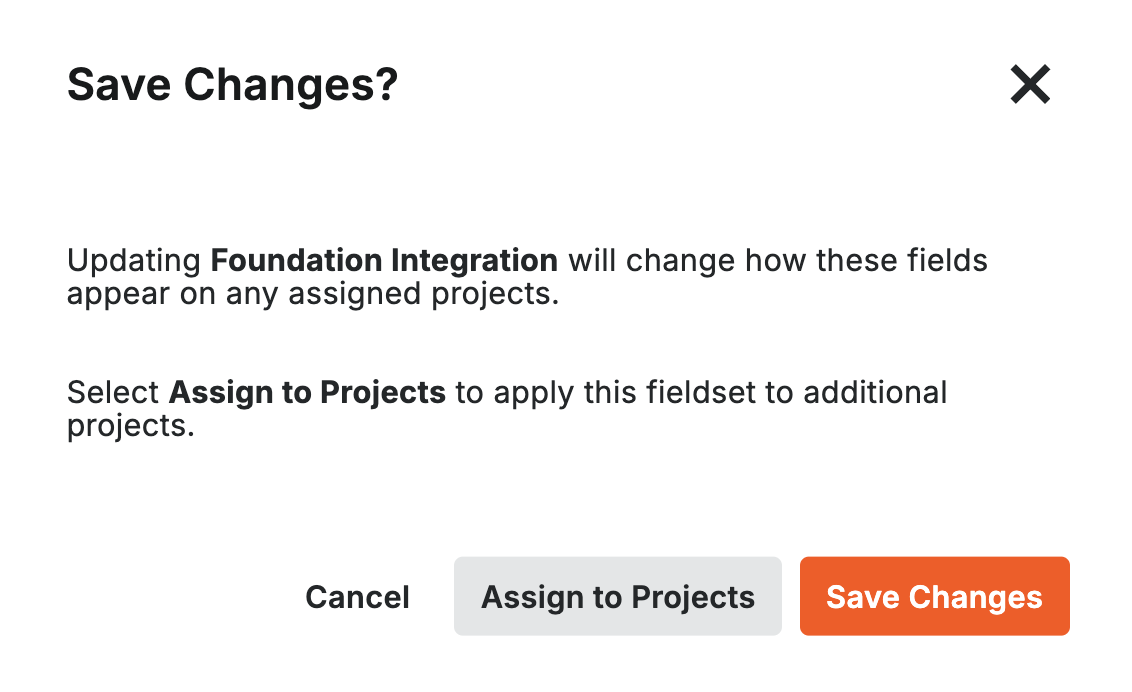
- In the bottom right corner, press Save. Then press Save Changes.

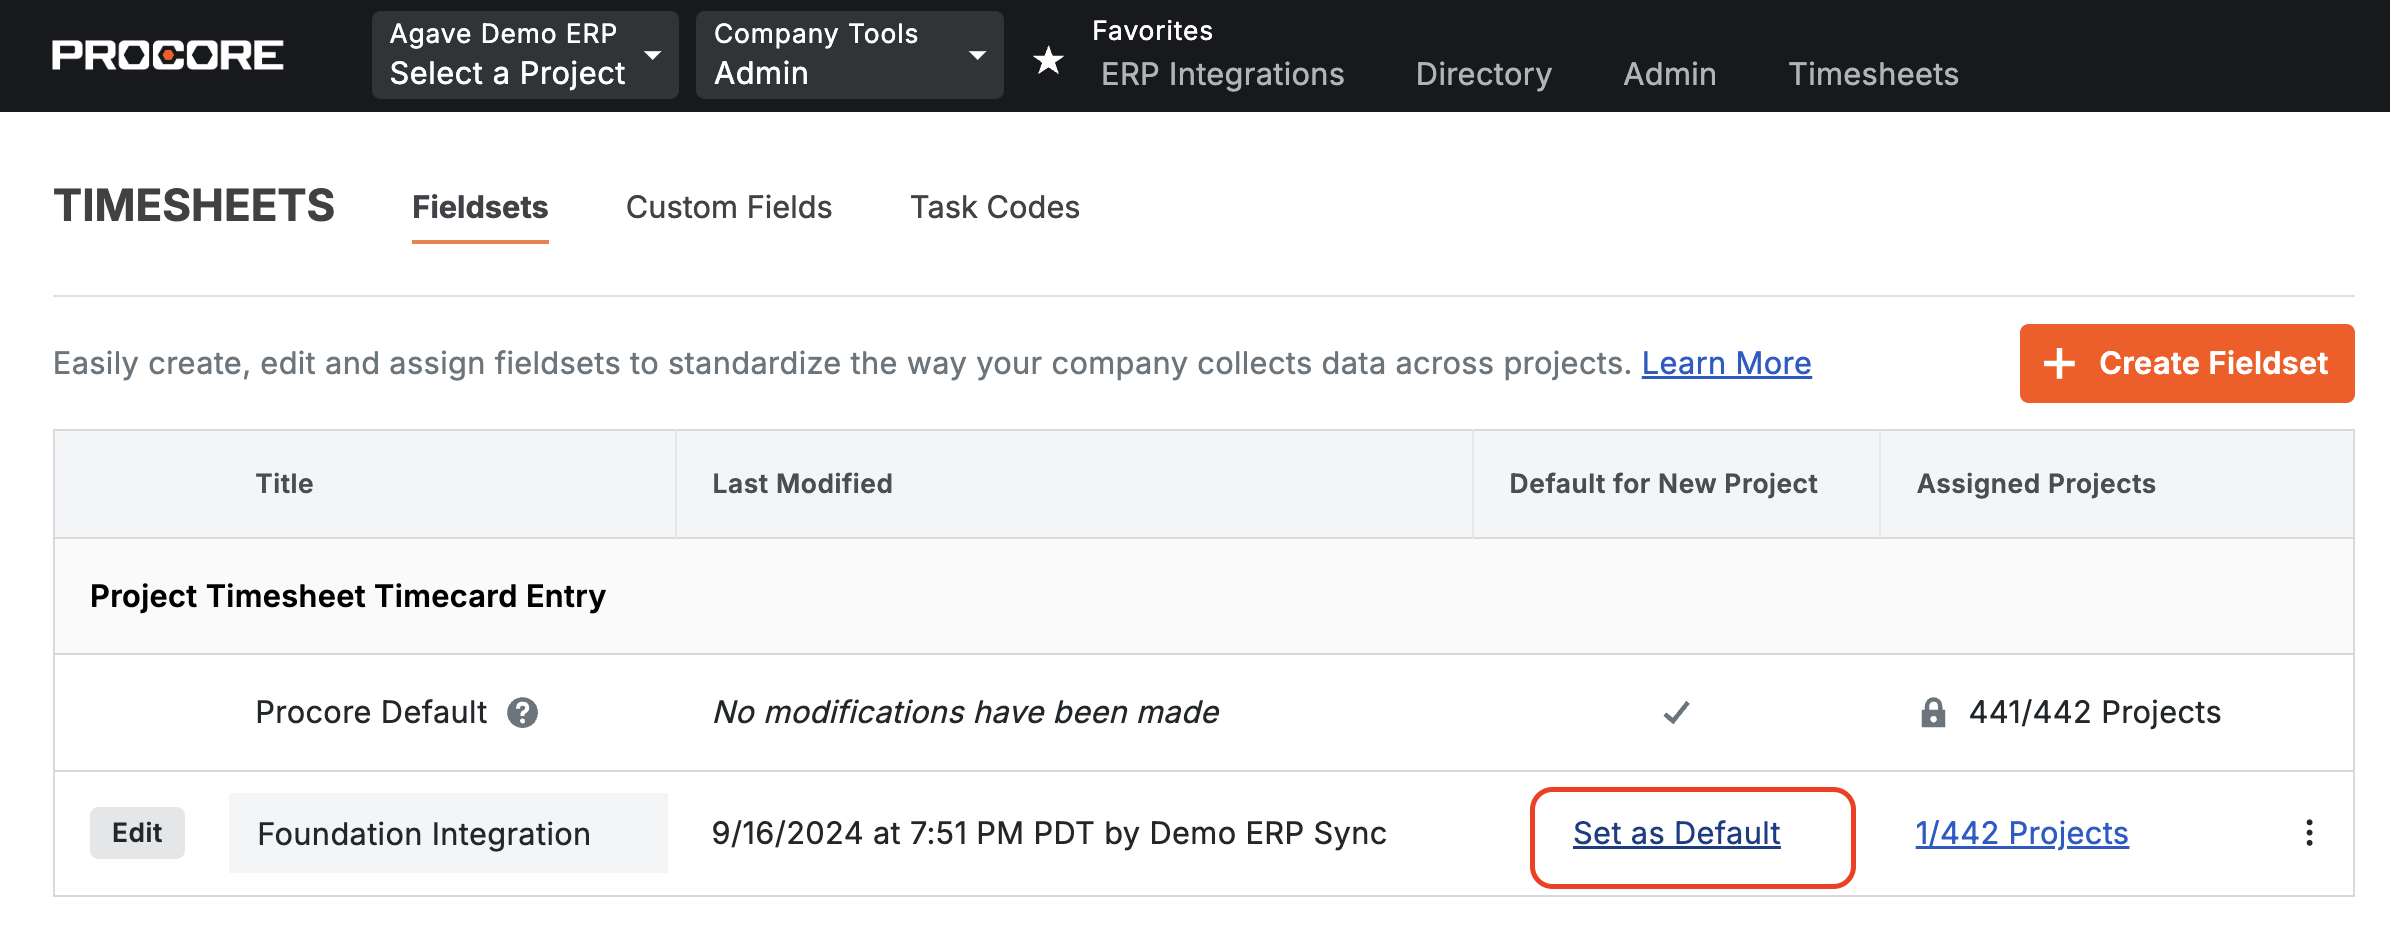
- On the fieldsets page, under "Default for New Project" press Set as Default. You may also need to assign these amounts to existing Projects under "Assigned Projects".
You should now be able to see an input for "Per Diem Amount" in your Procore Timecards.