Authentication
Getting Started
There are two steps to authenticate Agave with your Deltek ComputerEase instance:
- Set up ODBC access, and
- Install and enable the Agave Connector.
As a reminder:
- For single-tenant hosted (cloud) instances of ComputerEase, you will need access to the Desktops view in the ComputerEase website. Note, you typically need Admin-level permissions to access this view.
- For on-premise instances of ComputerEase, we recommend having an ability to log into the ComputerEase server with a user that has Admin-level permissions.
Step 1: Set Up ODBC Access
The following step applies to both single-tenant hosted (cloud) and on-premise ComputerEase instances.
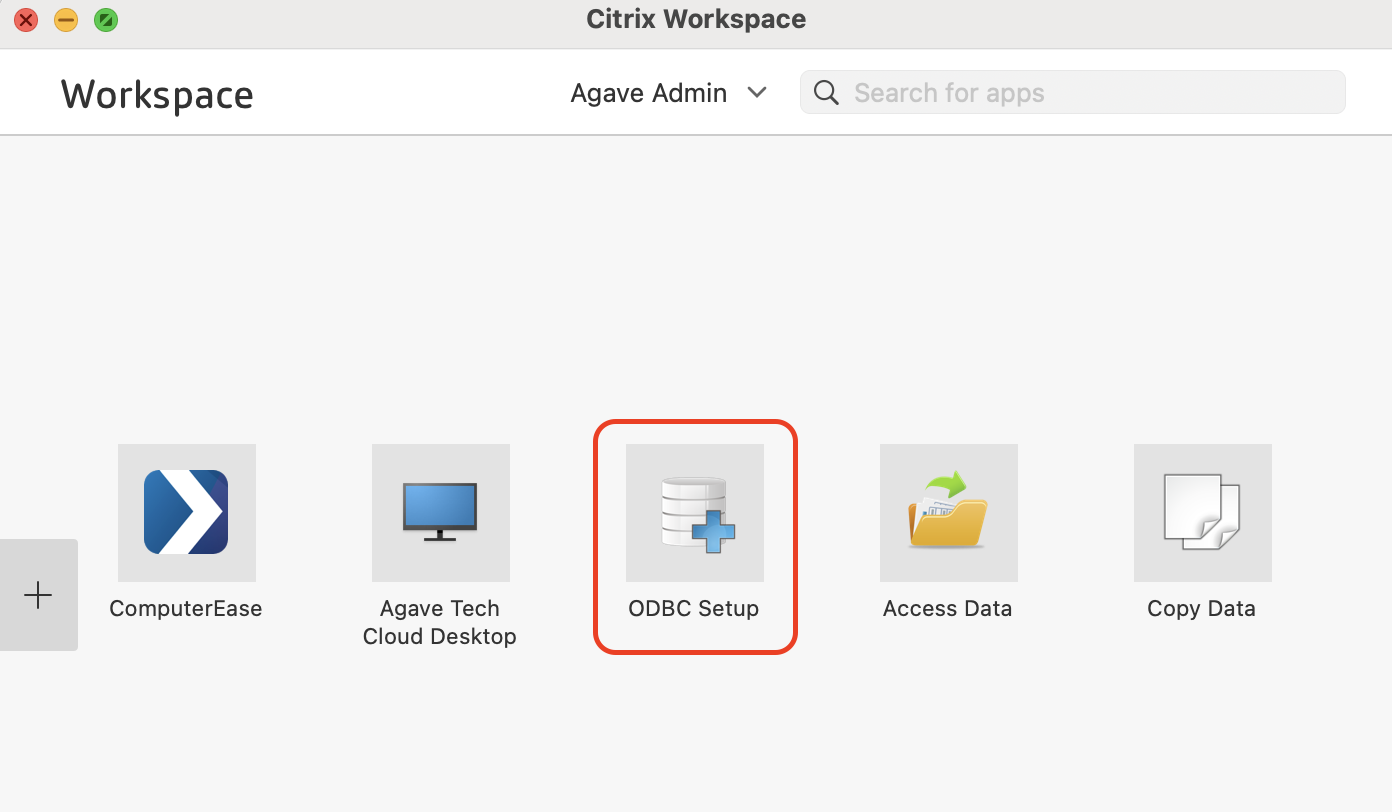
- From the Citrix Workspace view, press ODBC Setup. This action executes a process that sets up ODBC Access for your ComputerEase instance.
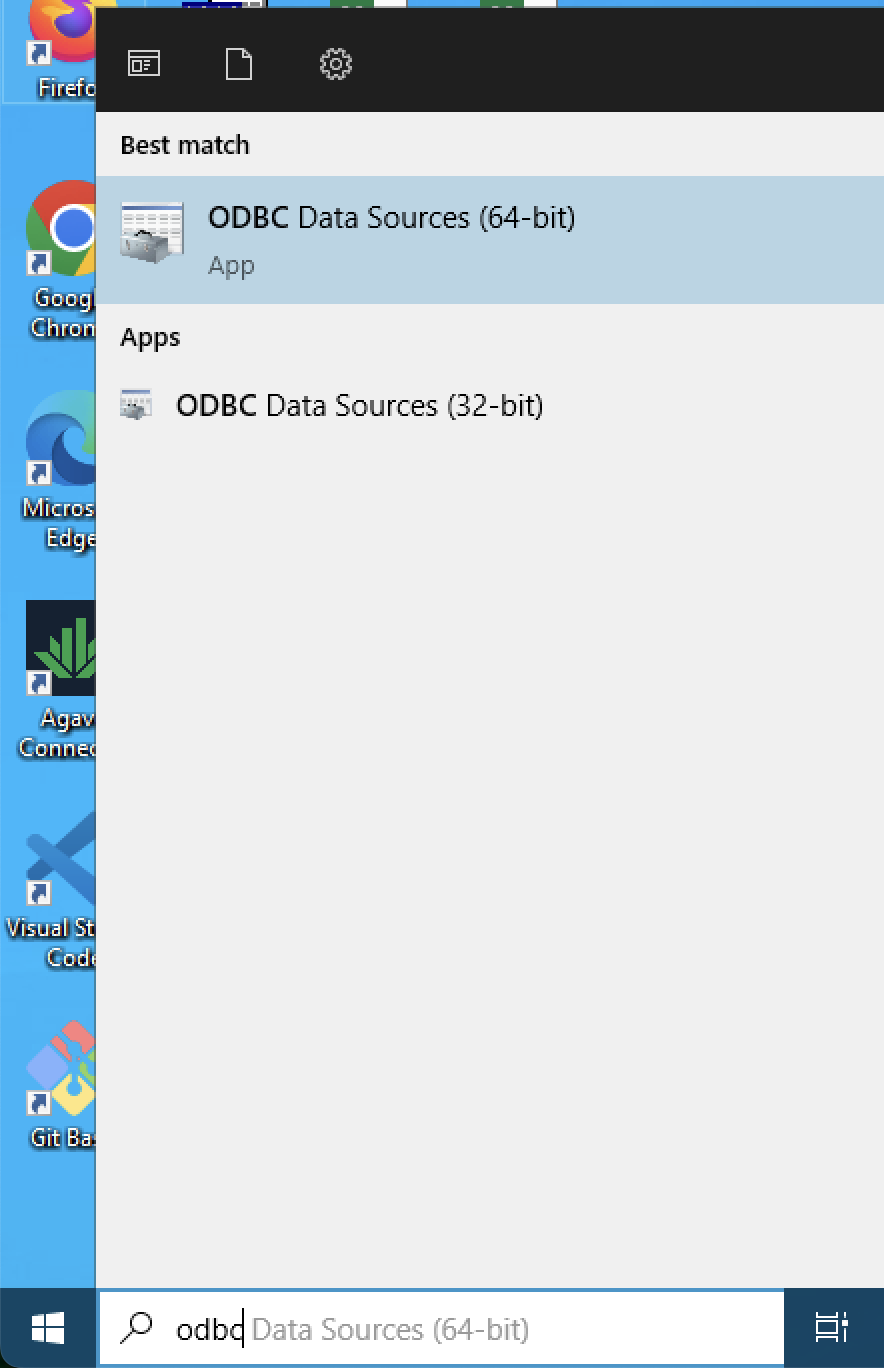
- To verify this action worked, log into the Desktop view. From the Windows Taskbar, open ODBC Data sources (64-bit):
- In the User DSN tab, you should see a list of Company Names:
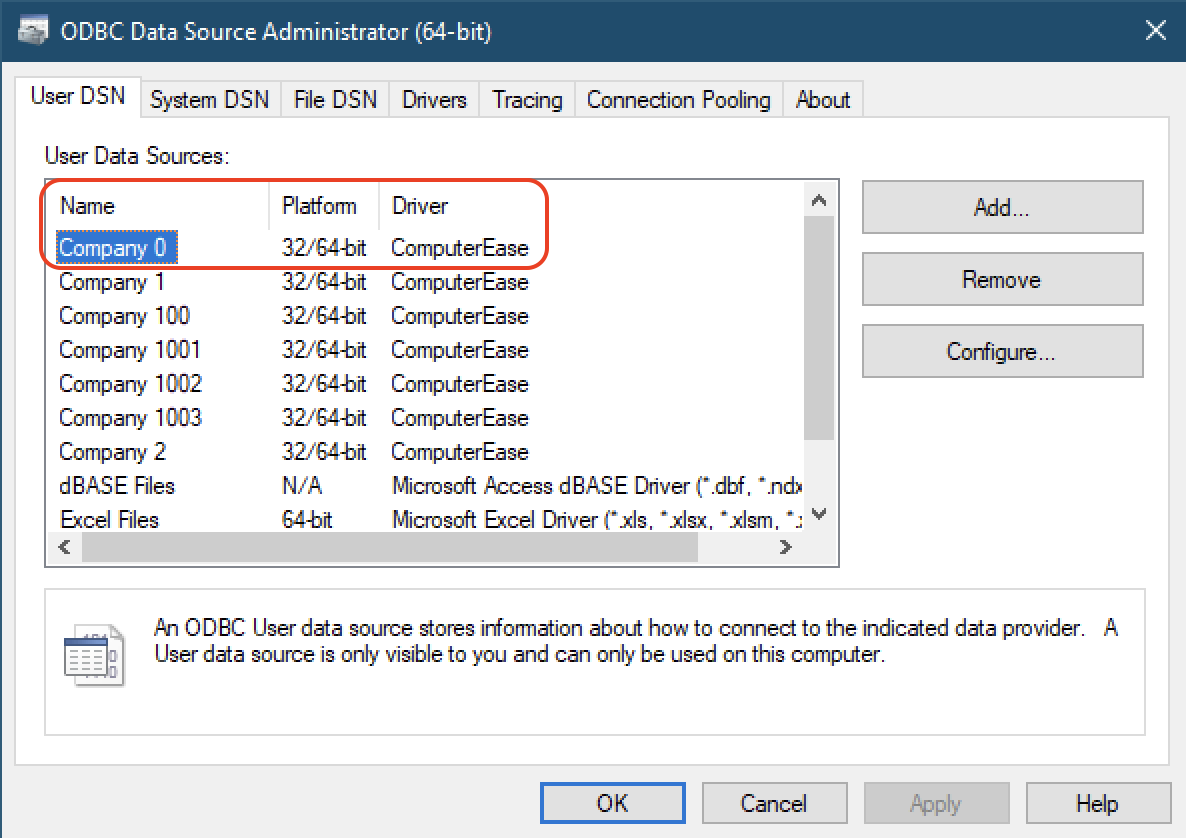
If you do not see the Company Name in this step, we recommend contacting Deltek Support and ask them to enable an ODBC access for your Desktop ComputerEase instance.
Step 2: Install and Enable Agave Connector Access
The second step in authenticating Agave to use Deltek ComputerEase is to enable ODBC access through the Agave Connector. This ODBC access allows Agave to read data from ComputerEase and sync it to your Project Management system.
Downloading the Agave Connector
-
Navigate to the Agave ERP Sync tool Settings screen and follow the prompt to connect ComputerEase.
-
Select No, disable API integration when prompted to Enable ComputerEase API Integration.
API Integration is not required for most customers and in most cases should be left disabled.
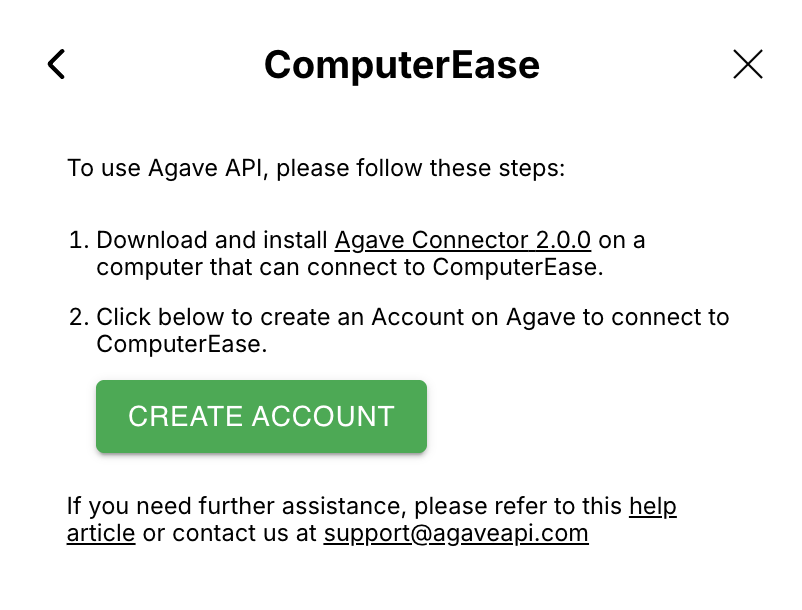
Continue in the Agave UI and click on the Agave Connector hyperlink to download and install the Agave Connector app before clicking Create Account.
For on-premise customers, we recommend installing the Agave Connector on the server used to host Deltek ComputerEase instead of a user's workstation.
Some customers also choose to run the Agave Connector on a separate account (rather than admin) on the host machine. Ensure you install the Agave Connector while signed in with the account that will run it.
- Open the Agave Connector and press Add Account. Then select ComputerEase as your Source System.
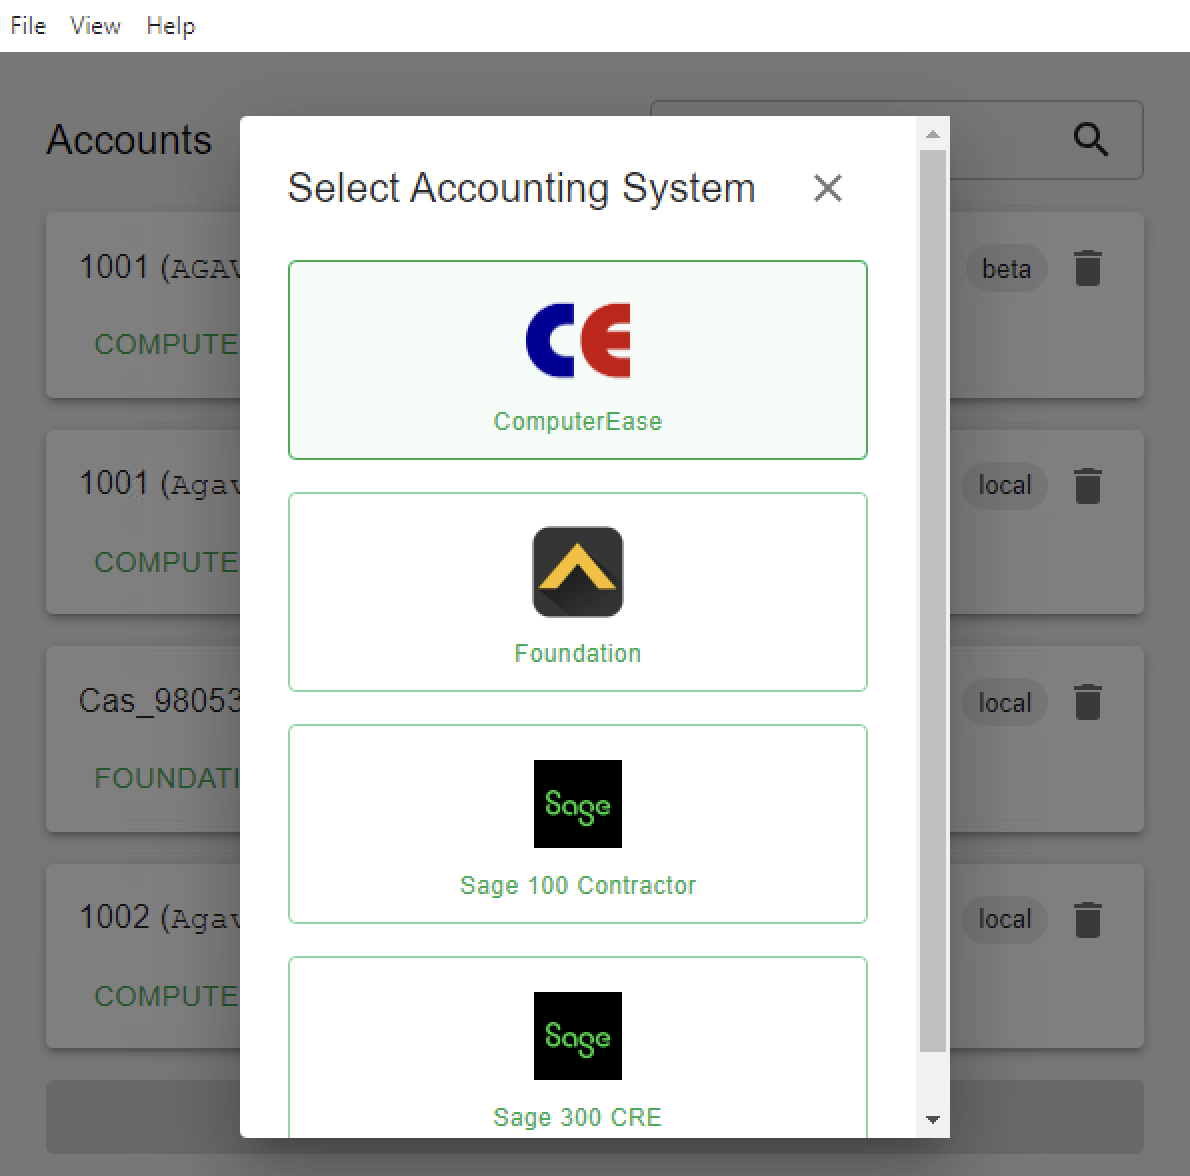
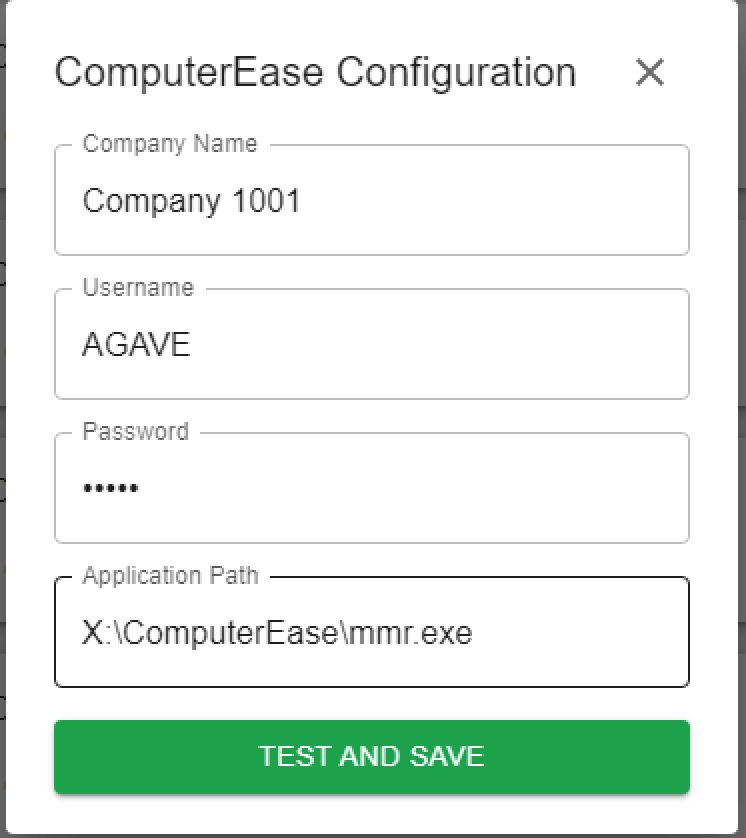
- Input the Company Number, Username, Password, and Application Path for your ComputerEase user you use in Agave Sync. Then press Test and Save.
The Username and Password can be the same login details you use in ComputerEase.
For ComputerEase single-tenant hosted instances, the Application Path will always be X:\ComputerEase\mmr.exe.
For ComputerEase on-premise instances, the Application Path will map to the root of the ComputerEase installation directory.
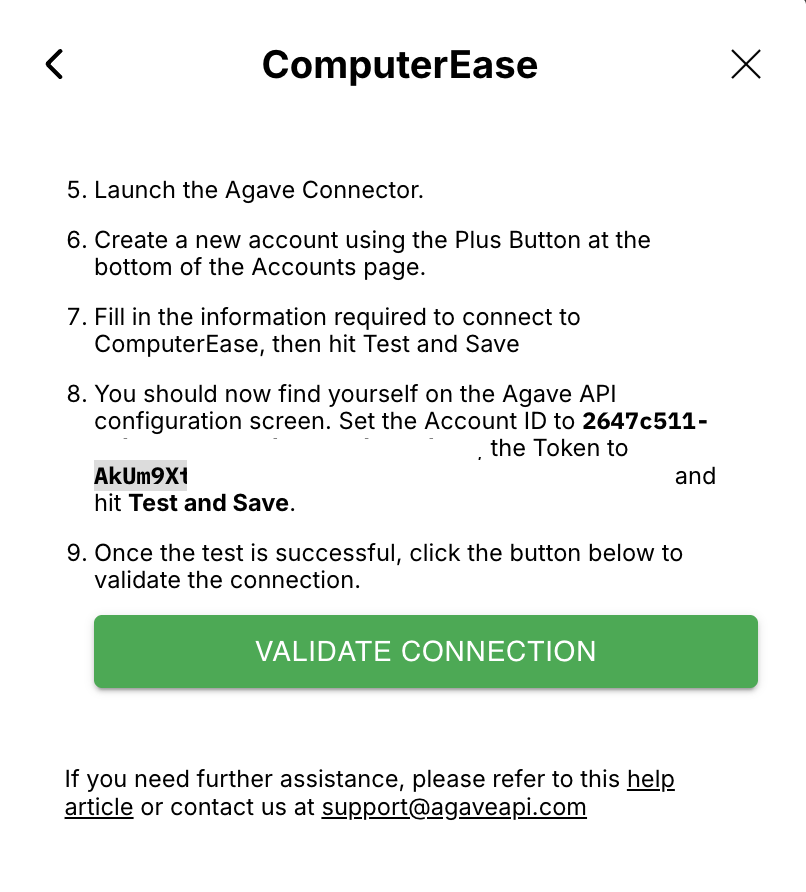
- In the Agave Sync view, add the Account ID and Account Token to the Agave Connector view. Input these details in the next screen of the Agave Connector and then press Test and Save:
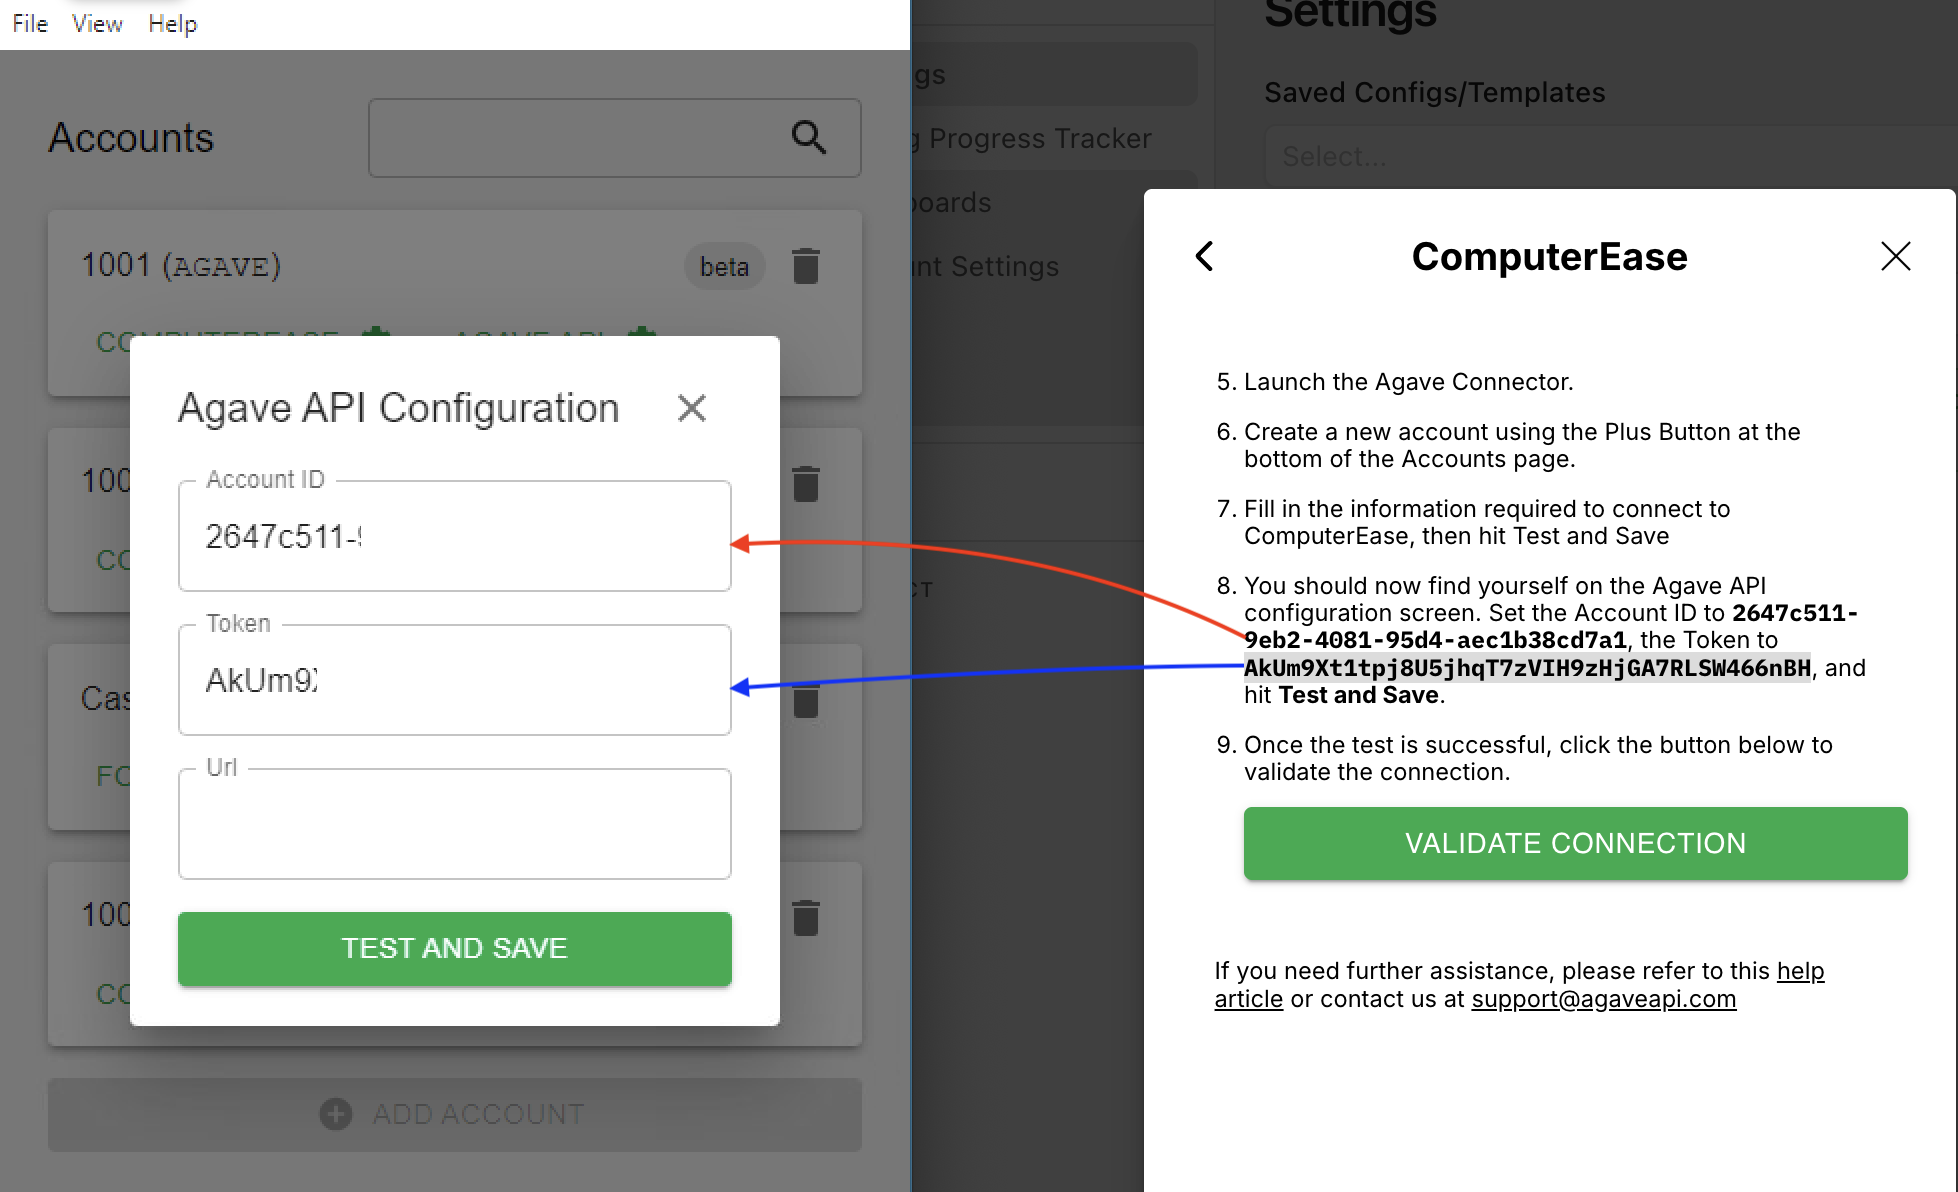
- In the Agave Sync view, press Validate Connection. Agave will now be connected to your ComputerEase account:

Step 3: Keep the Agave Connector Online (Single-Tenant Hosted Only)
For single-tenant hosted ComputerEase customers, the Citrix Desktop resets overnight. This shuts down the Agave Connector, which Agave needs in order to read data from your ComputerEase instance.
To prevent this, we recommend opening a support ticket with Deltek immediately after installing the Agave Connector to request that it stay online continuously.
- Go to Deltek Support.
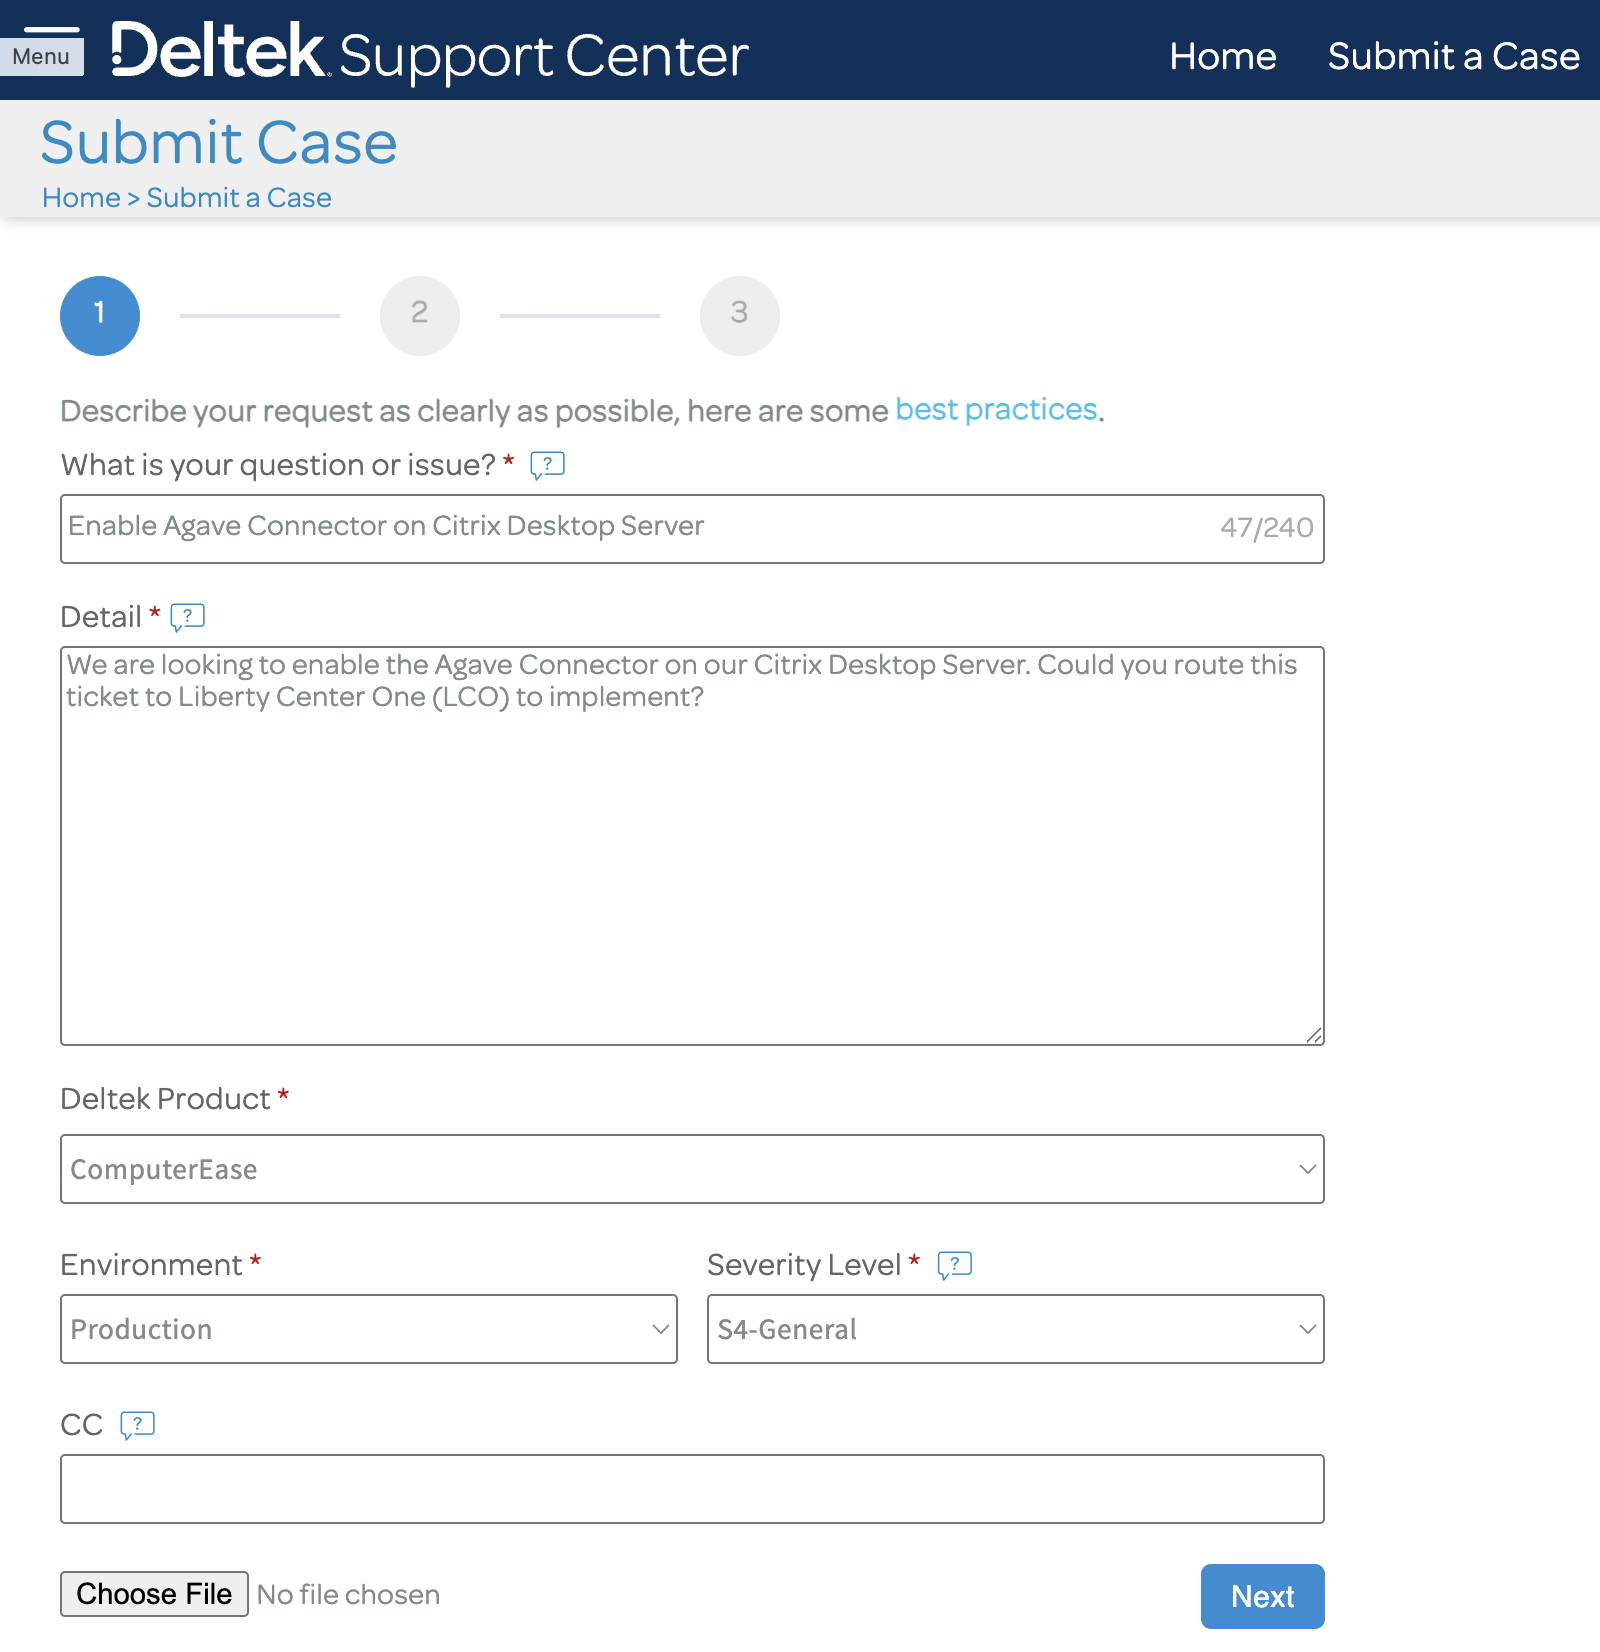
- Submit a case with the following details, then press Next:
- What is your question or issue:
Enable Agave Connector on Citrix Desktop Server - Detail:
We are looking to enable the Agave Connector on our Citrix Desktop Server. Could you route this ticket to Liberty Center One (LCO) to implement? - Deltek Product:
ComputerEase - Severity Level:
S4-General - CC: the email address of your Agave Account Manager
- What is your question or issue:
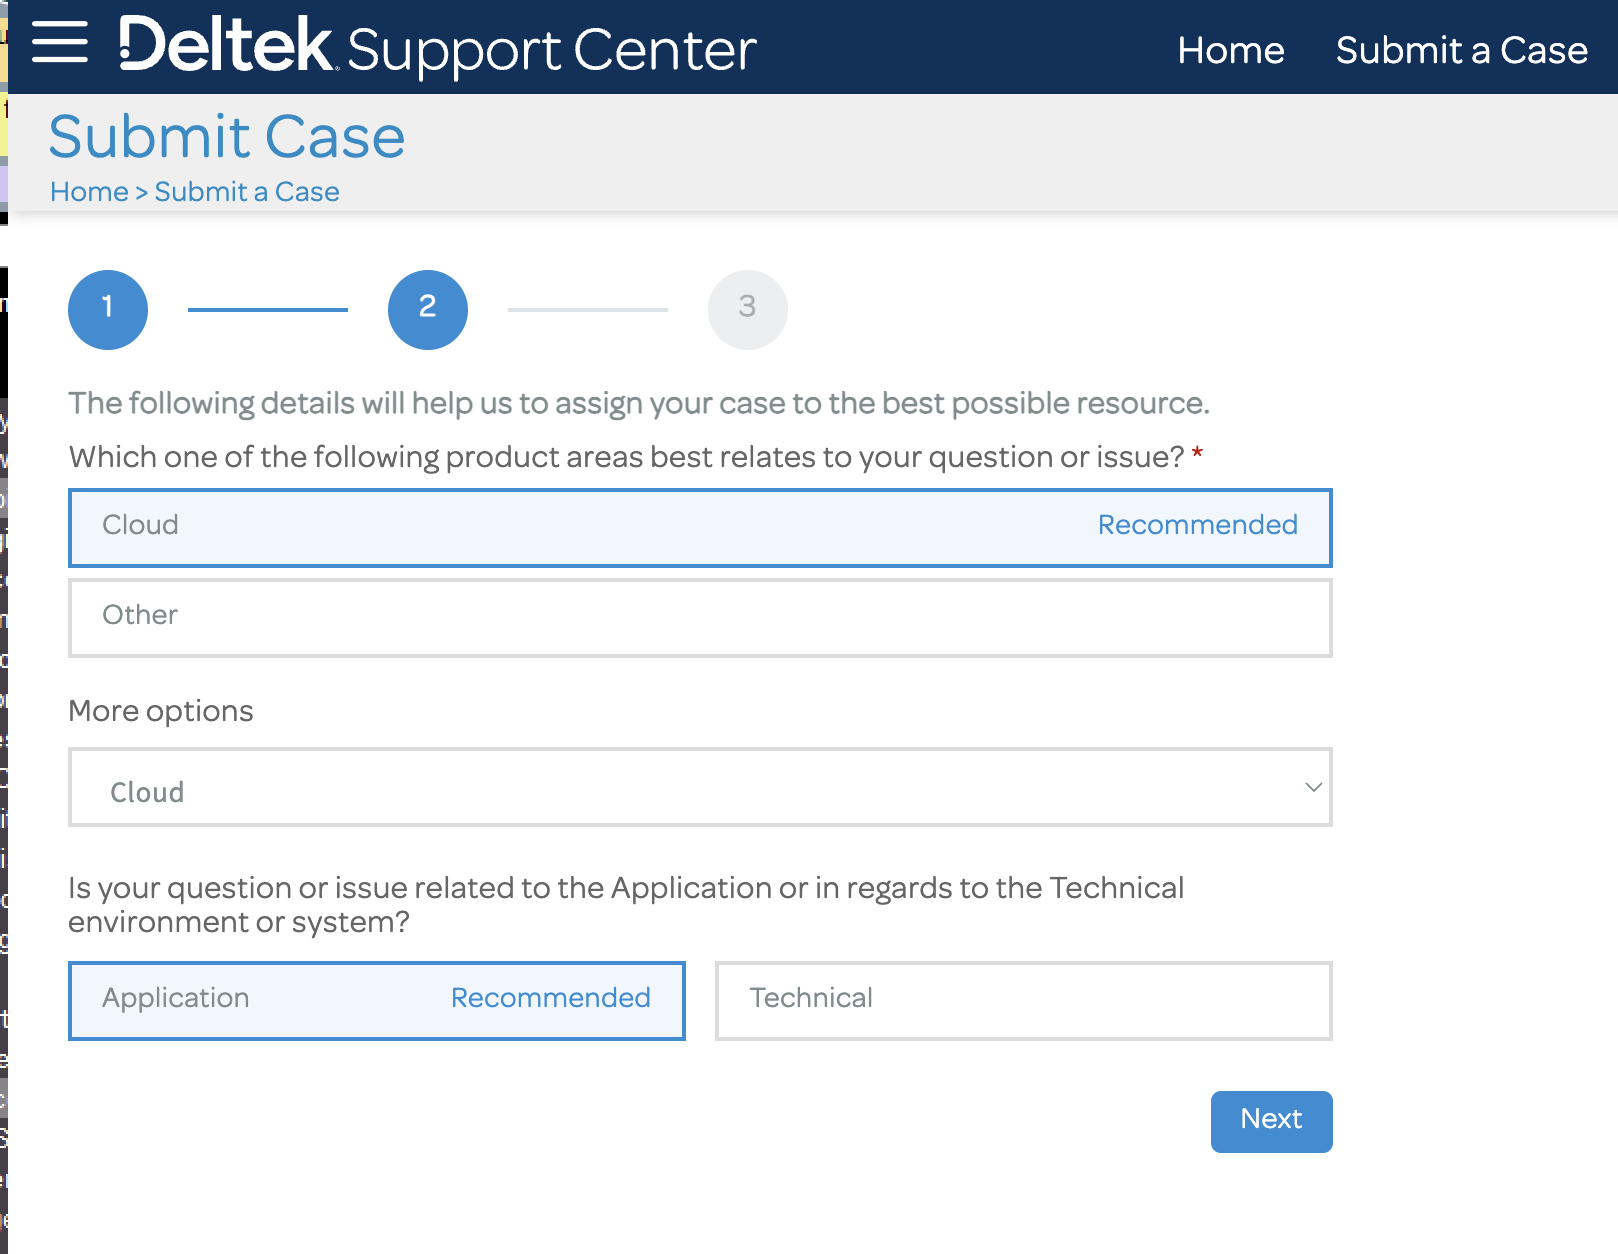
- On the next screen, select Cloud as the product area and Application as the question type, then press Next.
- On the final screen, scroll to the bottom and press Finish Submitting Case.
This step only applies to single-tenant hosted instances. On-premise customers can skip it, since the Agave Connector runs on a server you control.