Common Errors and FAQs
Common Errors
User is denied access to table
If you receive an error like the following User is denied access to table, it is because you are missing the required permissions for the ComputerEase user you are using for the integration.
To add permissions for this user:
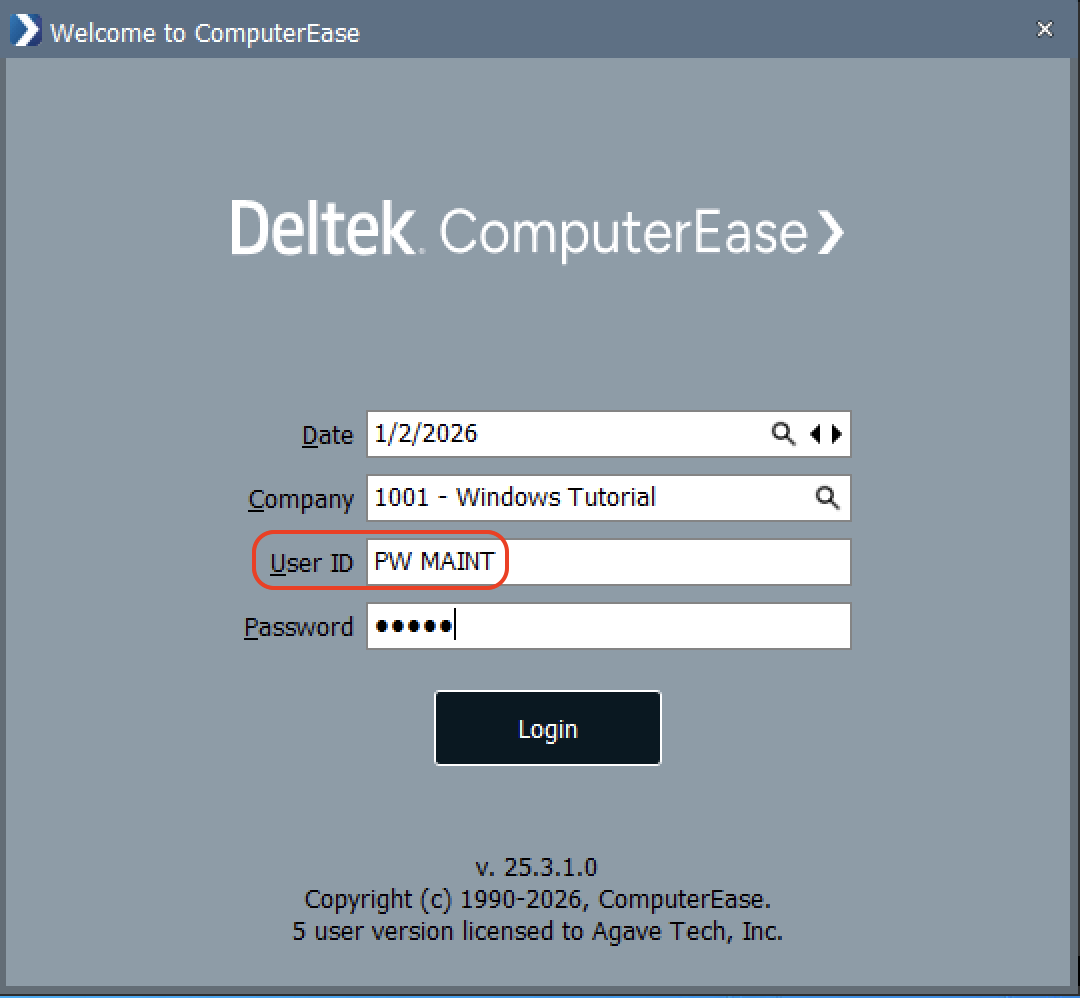
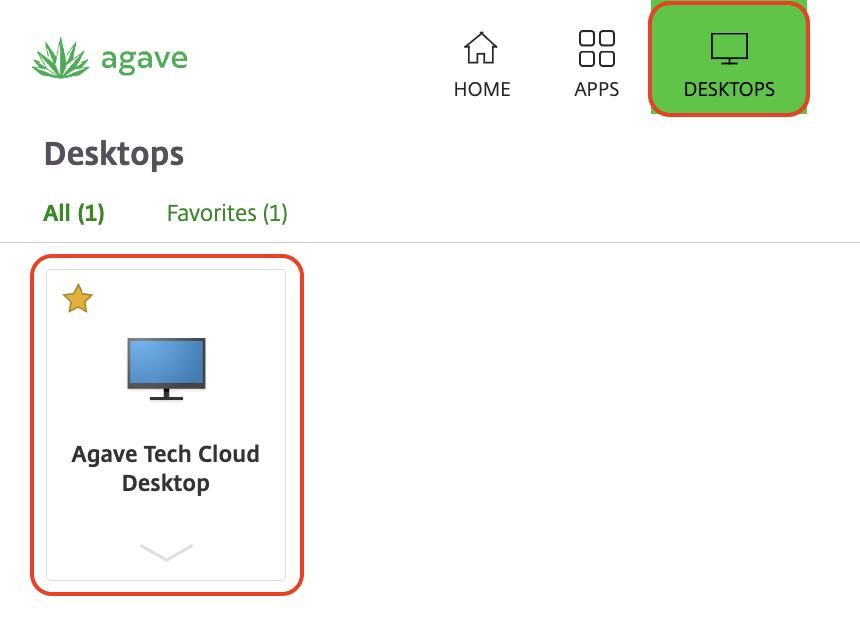
- Log in to ComputerEase with your
PW MAINTaccount:
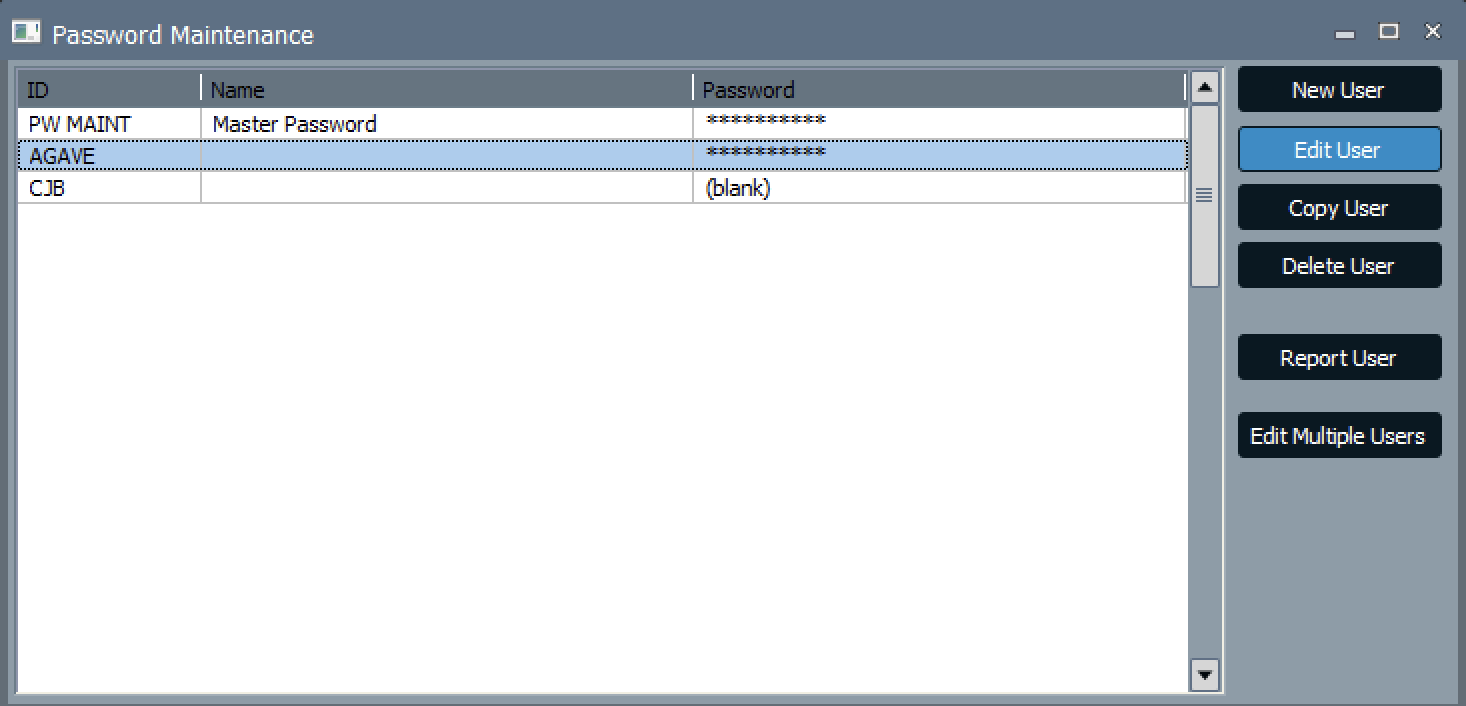
- Select the user (e.g. "Agave" below) and press Edit User:
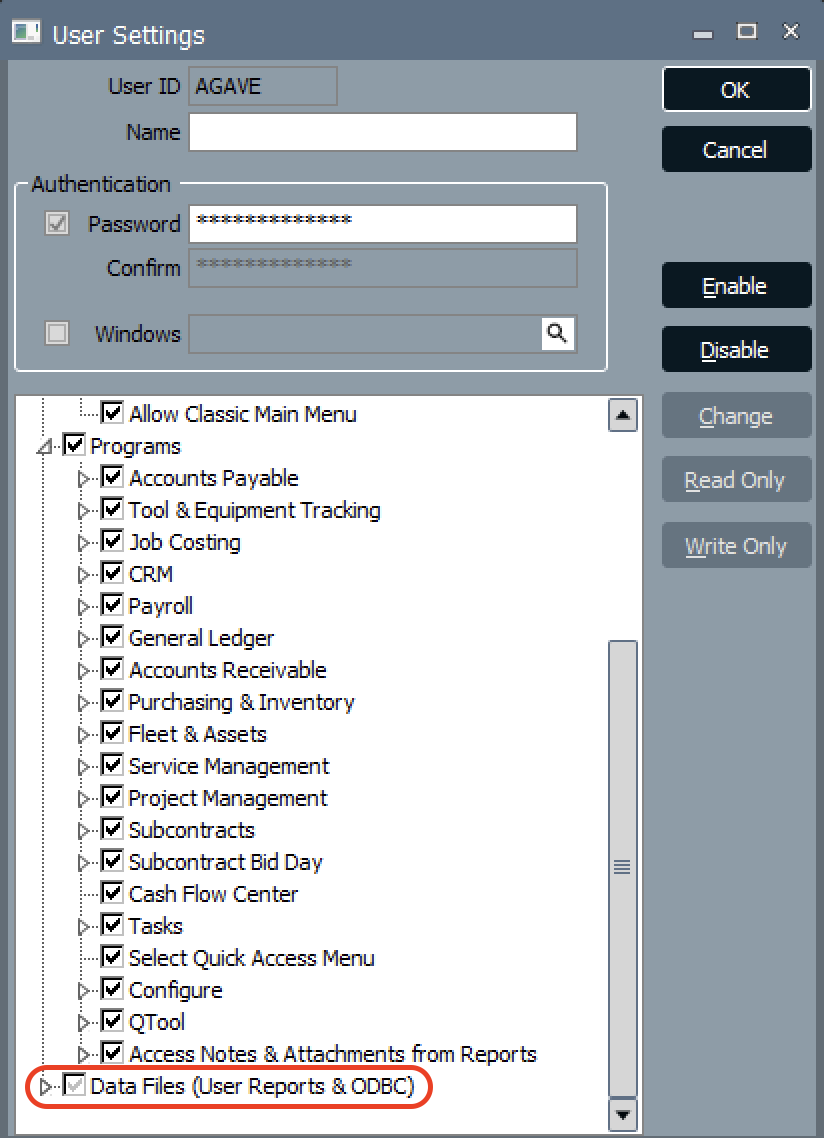
- Scroll down to Data Files (User Reports & ODBC) and expand it:
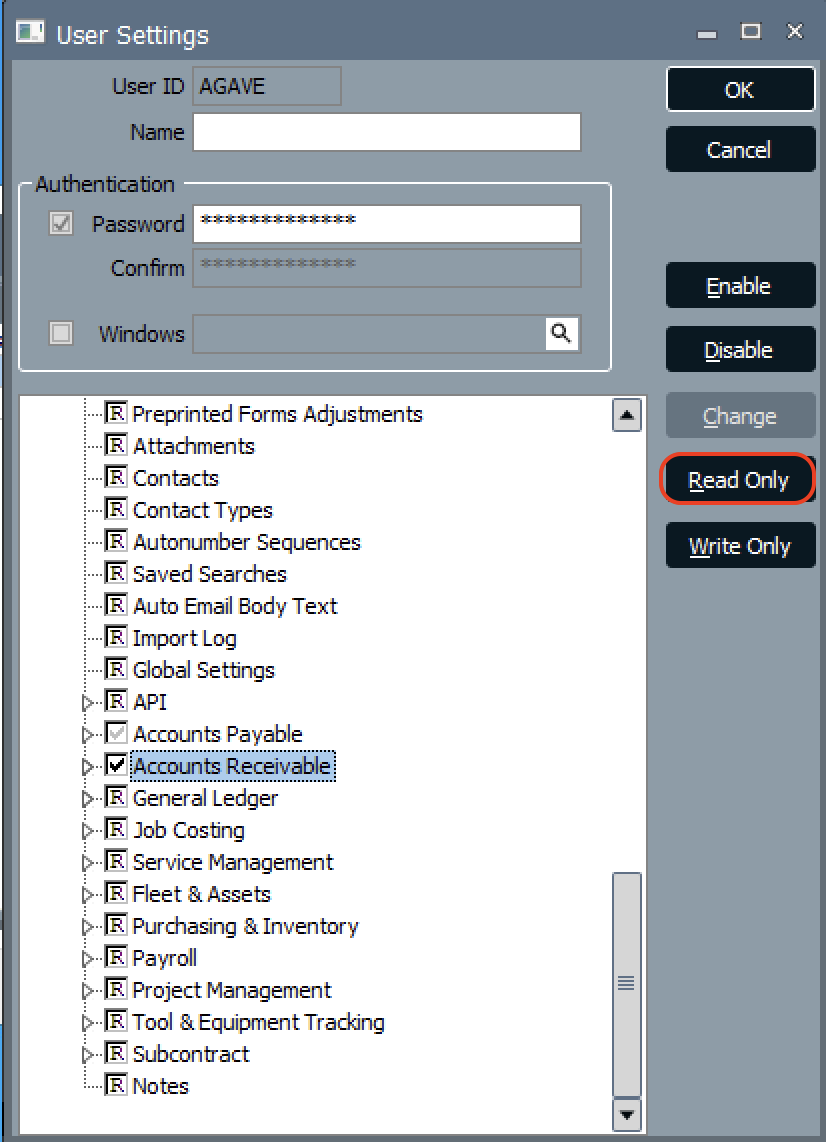
- Select the relevant data file for the record (E.g. "Accounts Receivable"). Press Read Only:
General FAQs
What are pre-requisites to using Deltek ComputerEase with Agave Sync?
- You must be on the on-premise or single-tenant, hosted models for Agave Sync (see below).
- You must have a login to Deltek ComputerEase that the integration can use (see below)
- If you are on the single-tenant, hosted model for ComputerEase, you must have access to:
- The Desktops view in the ComputerEase website (note, you typically need Admin-level permissions to access this view), and
- ODBC Setup under Apps
What instances of Deltek ComputerEase are supported by Agave Sync?
Agave Sync supports the following Deltek ComputerEase instances:
- On-premise: these are instances not hosted directly by Deltek. They run on a server managed locally by your company or by a third-party IT provider. You are likely using an on-premise instance if you log in with a URL that does not include https://your-company.computerease.cloud. Note, your Computerease instance must be installed on a supported version of Windows (see below).
- Single-tenant, hosted: these are instances hosted by Deltek but dedicated solely to your company (not shared). You’re on a single-tenant hosted instance if you log in with a URL that includes your company’s name plus computerease.cloud — for example, https://your-company.computerease.cloud.
What instances of Deltek ComputerEase are not supported by Agave Sync?
Agave Sync does not support the shared cloud model. These are instances hosted by Deltek and shared among multiple ComputerEase customers. If you log in at https://computerease.cloud, you’re on a shared cloud instance.
How can I upgrade from shared cloud to single-tenant hosted?
If you’re on the shared cloud and want to switch to a single-tenant hosted instance, please contact your Deltek Account Manager to discuss an upgrade.
What versions of Windows are supported for on-premise instances?
Agave Sync support the following versions of Windows:
- Windows 10
- Windows 11
- Windows Server 2016
- Windows Server 2019
- Windows Server 2022
Agave follows Microsoft's Product Lifecycle policy for Windows.
As of October 2023, Windows 8.1 and Windows Server 2012 have reached end of support and do not receive security updates. If you are using either version, we recommend upgrading immediately. Agave does not support these versions of Windows.
For more information, see related Microsoft announcement.
Do I need to whitelist any domains for my firewall?
If your team has an on-premise instance of ComputerEase and uses a firewall that restricts outbound traffic, you will need to whitelist the following domains to allow Agave Sync to communicate with your instance. This is only required for teams with firewalls that block outbound connections by default — most teams will not need to complete this step.
Whitelist the following domains on port 443 (HTTPS/WSS):
| Domain | Purpose |
|---|---|
rest.ably.io | REST API requests |
realtime.ably.io | Realtime WebSocket connections |
a.ably-realtime.com | Fallback host |
b.ably-realtime.com | Fallback host |
c.ably-realtime.com | Fallback host |
d.ably-realtime.com | Fallback host |
e.ably-realtime.com | Fallback host |
internet-up.ably-realtime.com | Connectivity check |
ws-up.ably-realtime.com | WebSocket connectivity check |
For forward compatibility, we also recommend whitelisting the following CNAME targets that Ably's domains resolve to:
main.realtime.ably.netmain.a.fallback.ably-realtime.commain.b.fallback.ably-realtime.commain.c.fallback.ably-realtime.commain.d.fallback.ably-realtime.commain.e.fallback.ably-realtime.com
Ably does not publish static IP addresses, as their service uses dynamically assigned IPs. Domain-based whitelisting is the recommended approach.