FAQs
Acumatica Authentication
This guide applies to both cloud and on-prem instances. To deploy a developer sandbox locally, follow Acumatica's guide here.
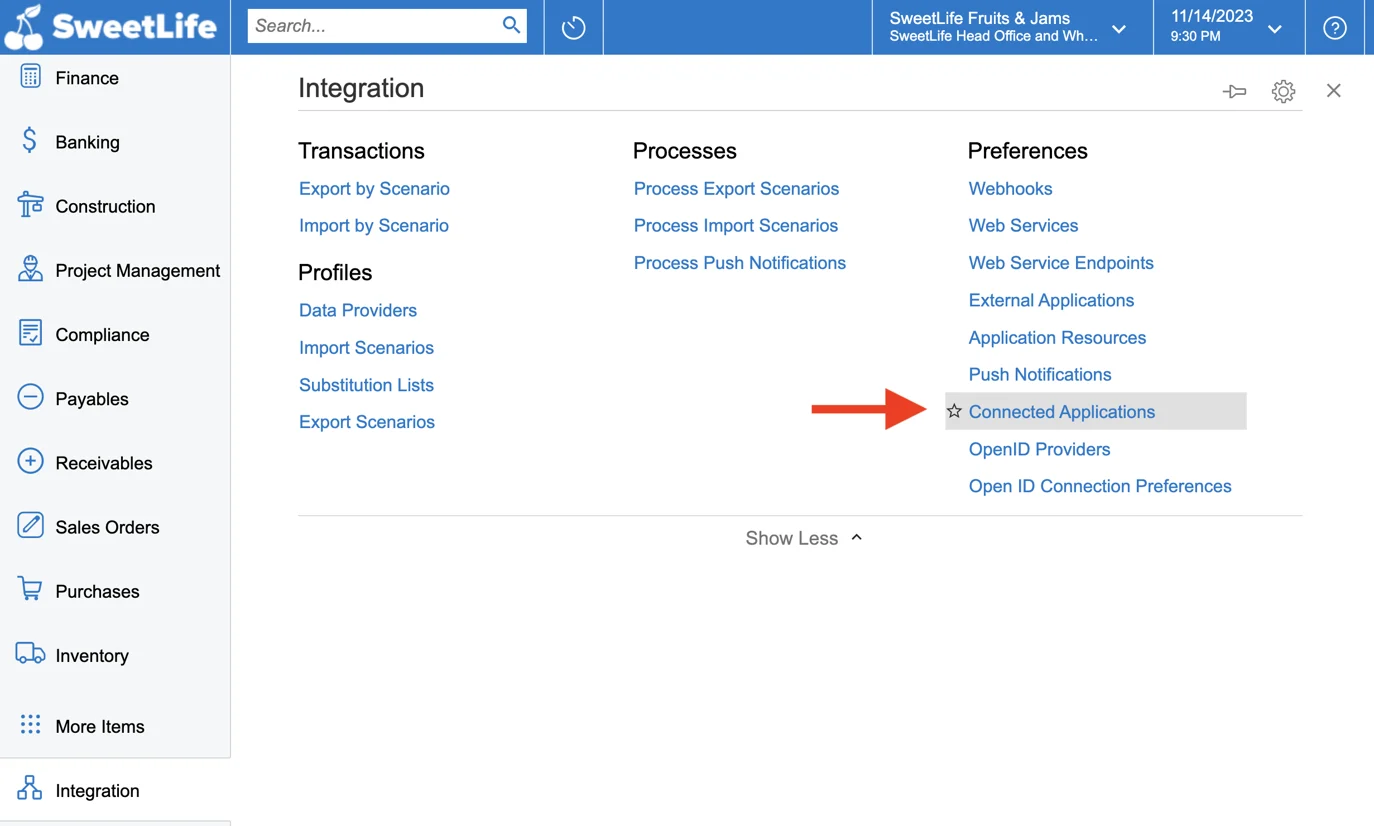
Step 1: Create a Connected Application in Acumatica
Agave will inherit the permissions of the user that follows this process, so ensure they have enough access for your use case.
-
Enter the Client Name and Select Authorization Code for the Authentication Flow. Click Save. After clicking the save button (top left), the Client ID box will autofill. Ensure the Active checkbox is selected.

-
Versions 2023 R2 and later only: Set the "Refresh Tokens" settings:

-
Set Mode to Sliding Expiration
-
Set Absolute Lifetime to Infinite or as long as you plan to use the integration. You will need to reconnect after this time period
-
Set the Sliding Lifetime. Generally 15 - 30 days works well
-
For more information on sliding expiration, see Acumatica's help article
-
-
Enter a Description and optionally an Expiration Date. Save the Client ID and Secret somewhere safe before closing this box. You will not be able to view the secret again after clicking "OK."
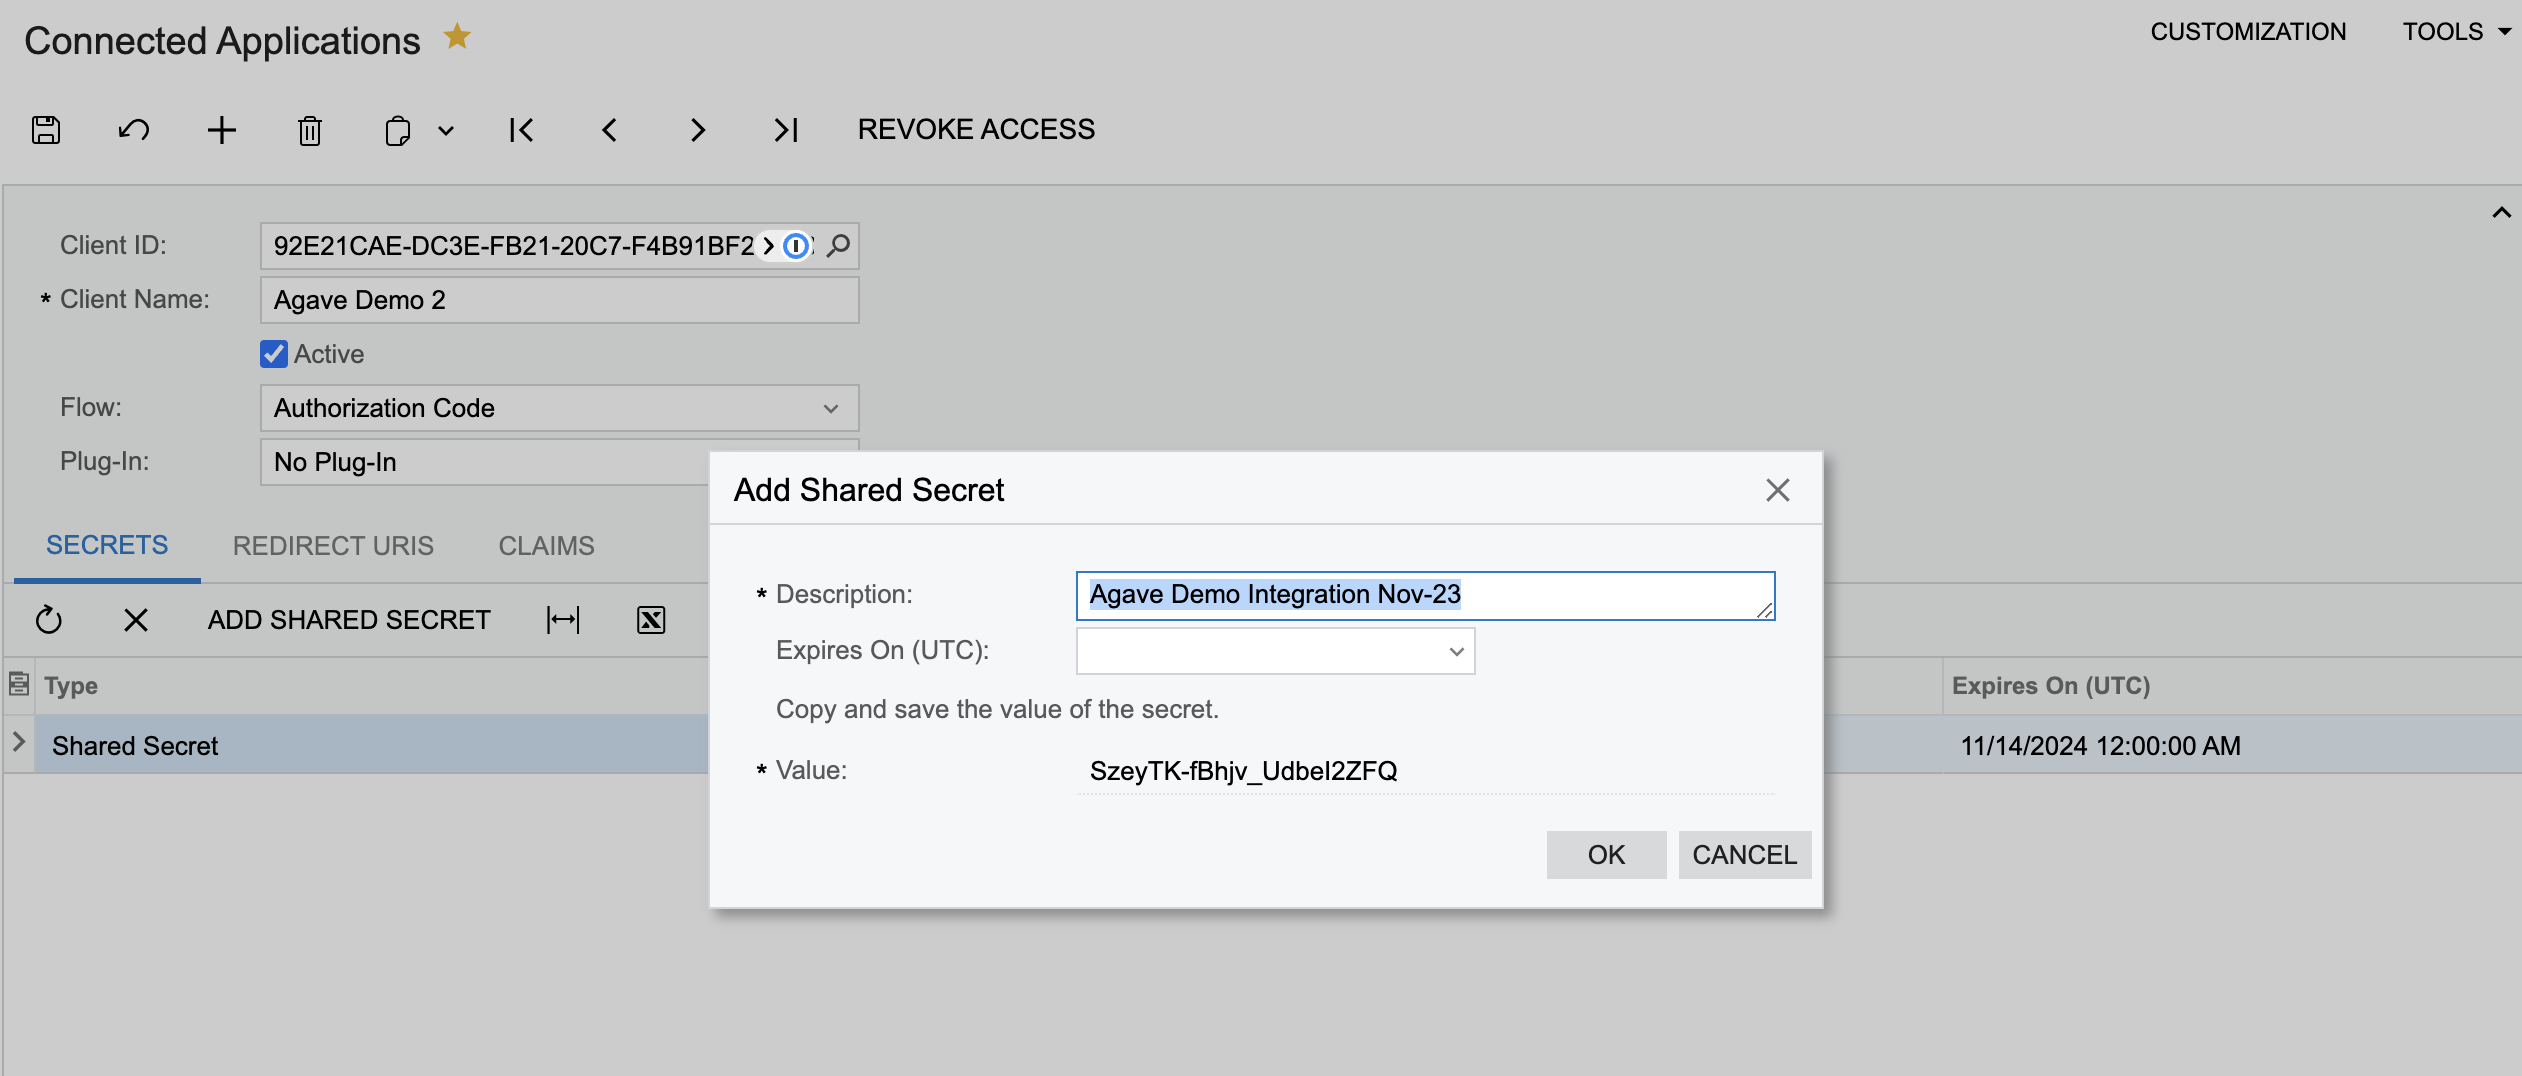
- The Expires On (UTC) field will determine how long the secret is valid. If it expires, you will have to create another account token.
-
Save (top left) on the Connected Application screen again to activate the Client ID and Secret.
Step 2: Add a Redirect URI to the Connected Application
Adding a Redirect URI enables the OAuth flow through Agave Link.
-
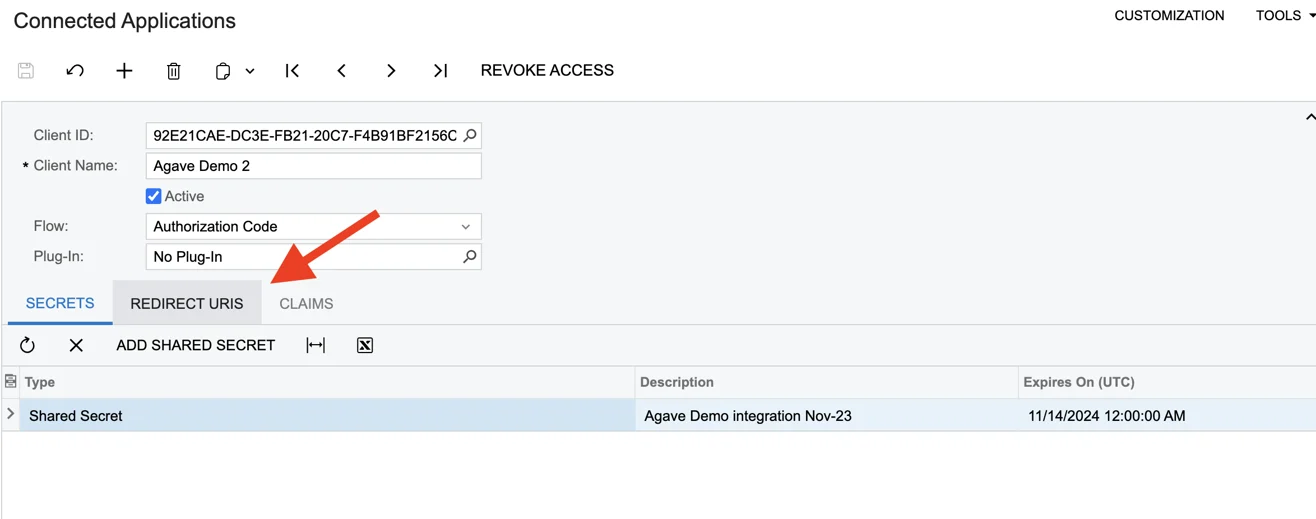
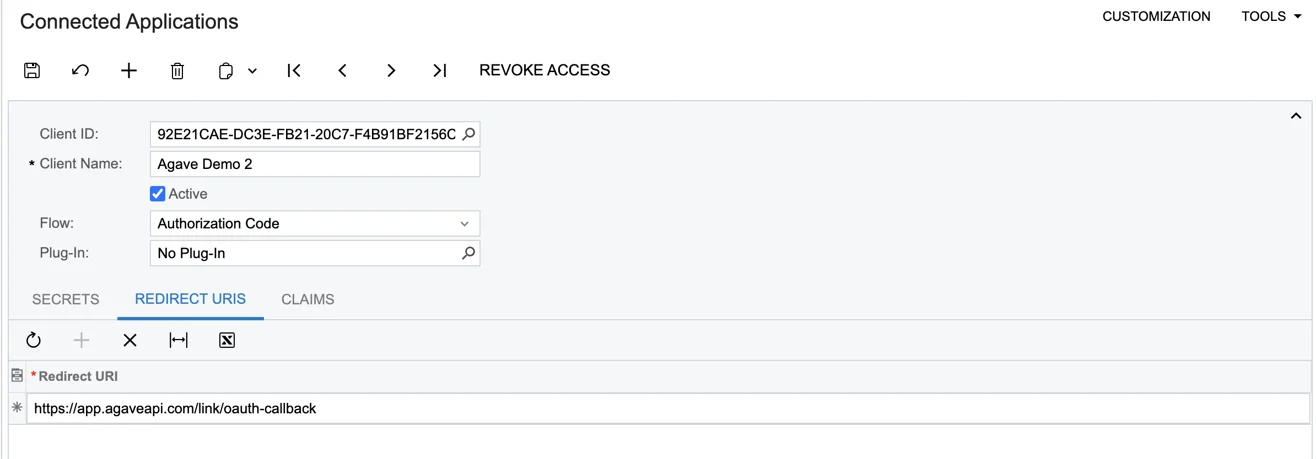
Click the Redirect URIs tab from the Connected Application Record at the end of Step 1.
-
Create an entry (click the Plus) and enter https://app.agaveapi.com/link/oauth-callback in the row.
-
Save (top left). The connected application is now fully set up.
Step 3: Authenticate with Agave Link
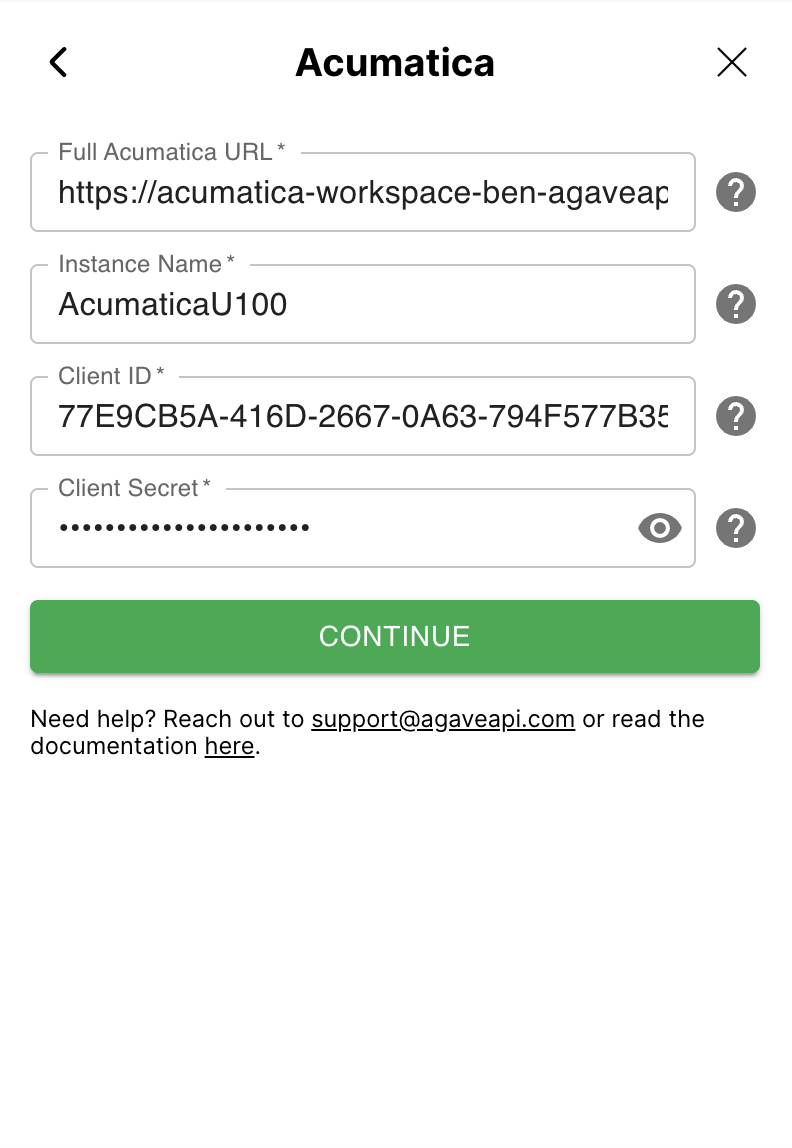
- Use the Agave Link Component to connect an Acumatica account.
- Enter the credentials generated in Step 1.
- Full Acumatica URL: URL used to access your instance. For accounts hosted by Acumatica, it will look like this: https://acme.myacumatica.com. Note: Ensure the URL does not contain any characters after the top-level domain (eg ".com").
- Instance Name: Name of your Acumatica instance. Typically the first element in the URL Path of your Acumatica instance (after the domain). Note The Instance Name may be omitted when installed at the root of the site (such as when hosted by Acumatica).
- Client ID: The Client ID created for the Connected Application in Step 1.
- Client Secret: The Client Secret created for the Connected Application in Step 1.
- Click Log in with Acumatica.
- Sign in with Acumatica and grant permissions to Agave.
Only click the "Yes, Allow" button once, otherwise Acumatica will overload with concurrent requests.
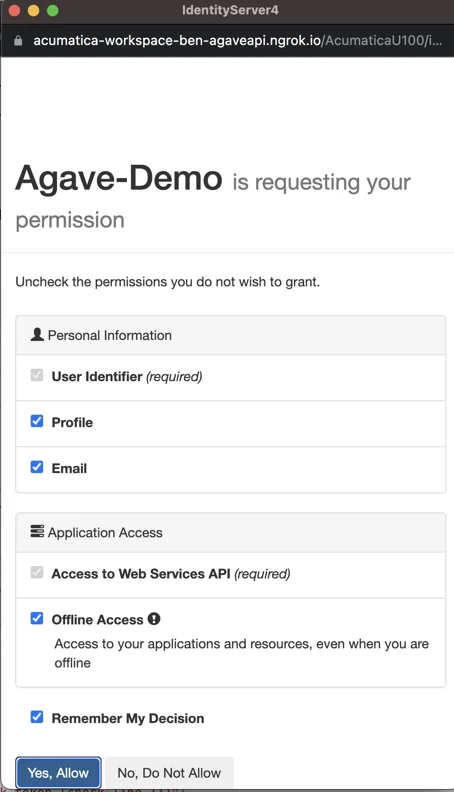
- Done! Agave Link will close if the connection is successful.
