Cost Codes
Visual Mapping

Configuration & FAQs
Cost Code Tiering
Autodesk allows adding hierarchy (or "tiering") for Budget Code Segments. Agave can automatically add tiering when syncing Cost Codes into Autodesk based on a defined number of characters.
In the above visual example, Agave inserts a tier after two characters to create the parent code "01" and the full code within it "01-000". Your Agave account representative can set this pattern for you.
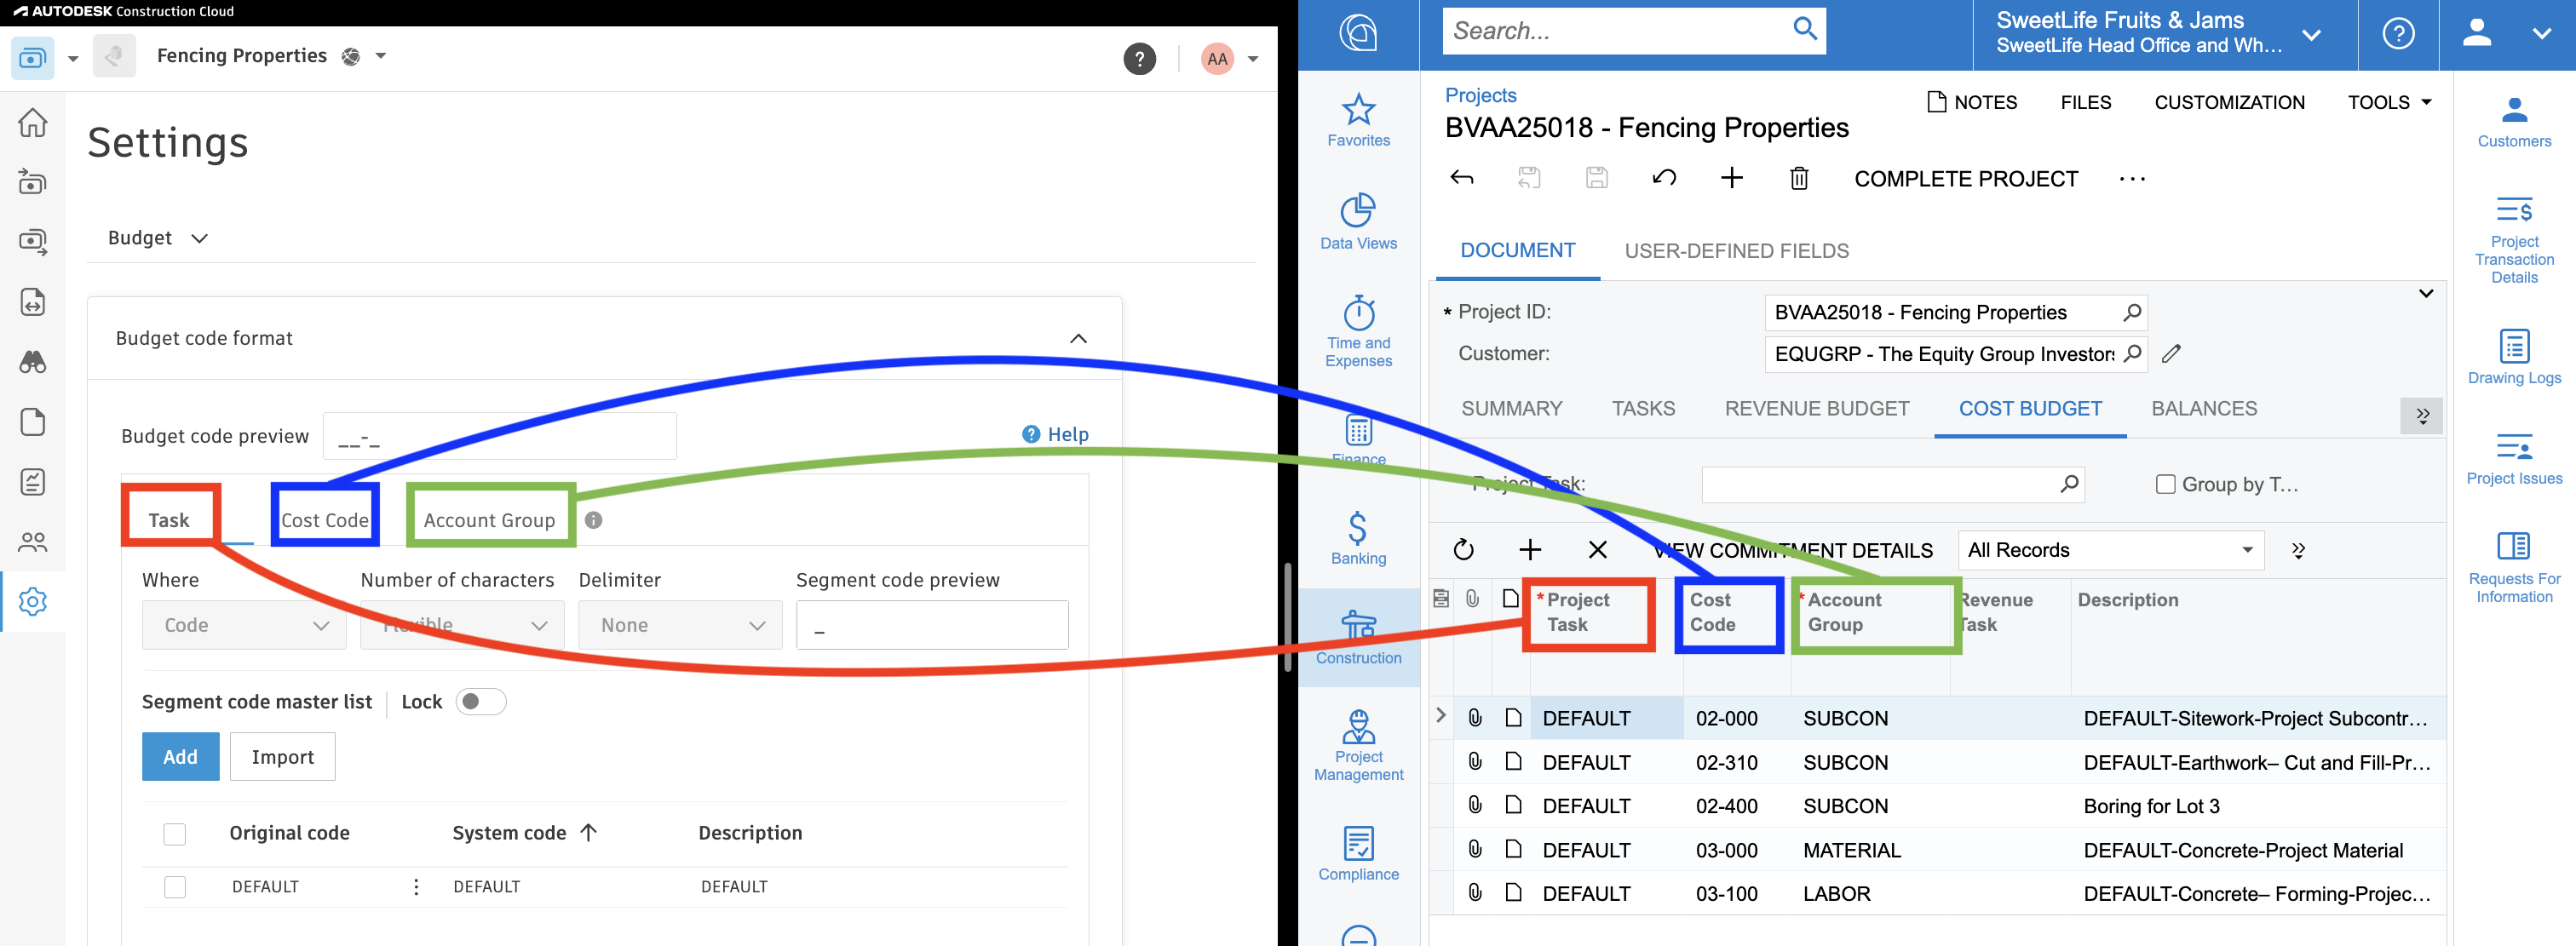
Autodesk Budget Code Setup
Acumatica uses three budget segments to break down costs:
- Task - Identifiable piece of work or phase of the project. Most commonly referred to as "Sub Jobs" or "Parent Jobs" in other systems.
- Cost Code - Typical construction Cost Code for categorizing what work is being done for cost/revenue transactions..
- Account Group - Most commonly referred to as a "Cost Type" or "Cost Class" in other systems. This refers to how the work is completed (e.g. "Material", "Labor", "Subcontract")
Autodesk has a more flexible segment structure in the form of its Budget Codes. To match the structure of financials in Acumatica, you will need to define three Budget Code Segments in Autodesk (one for each Acumatica segment):
Agave's Budget Code Setup guide has more information on this process, but the key points for Acumatica are:
- Create three segments in your Autodesk template (for Task, Cost Code, and Account Group)
- Set the number of characters to "Flexible"
Your Budget Code Segments do not have to be named "Task", "Cost Code", and "Account Group". If you would like to name them something different in Autodesk, let your Agave rep know.