Project Templates
FAQs
What are Project Templates?
Project Templates allow administrators to streamline the process of creating multiple projects with similar configurations. Administrators can configure project settings for various products and tools in templates including setting up members, standard files, and more.
Why do I need Project Templates?
Any time you import a project into ACC without a Project Template, they will need to manually do the following for each new Project:
- Re-enable tools (e.g. Cost Management)
- Re-enable settings for those tools
- Re-add users
A Project Template can also only be applied when creating the Project. To reverse this action, you would need to delete the project and re-create it.
How do I apply Templates to Autodesk Build Projects?
- On the Settings page of the Agave UI, in the Projects row, select a Project Template in the Default Template drop-down.
- Scroll to the bottom of the page and press Save Config. Going forward, all Projects that are added manually or automatically will have this Project Template applied.
- In Autodesk Build for a Project, add a Project Admin to the Project. Only after completing this step will the Project Template Members and Project Template settings apply to a Project that has been created with a Project Template.
How do I confirm that a Project template has been applied in Autodesk Build?
There are two locations in Autodesk Build you can confirm a Project Template has been applied:
- Project Settings: on the Project Settings page, you can see the Project Template applied under Project Template at the bottom of the page.
- Account Admin Projects: on the Projects list page under Account Admin, the the Project Template will be listed under the column Template Used.
Note: it might take 5-10 minutes for a Project Template to apply.
Can we have more than one Project Template?
Yes, customers can create multiple Project Templates. However, ensure that every setting highlighted below is applied consistently across all templates.
If you want to apply Project Templates in Autodesk Build as a default, see our guide on setting up Project Templates.
Configuring Autodesk Budget Codes to Match your Accounting System
You will want to make sure your Autodesk Build Budget Codes is set up to match the structure of your Sub Jobs, Cost Codes, and Cost Types in your Accounting System. We recommend properly configuring this in your Project Template(s) to ensure all Autodesk Projects use the same Budget Code structure.
The following includes a video walk through and guide to properly configure your Project Template's Budget Code.
To ensure they match:
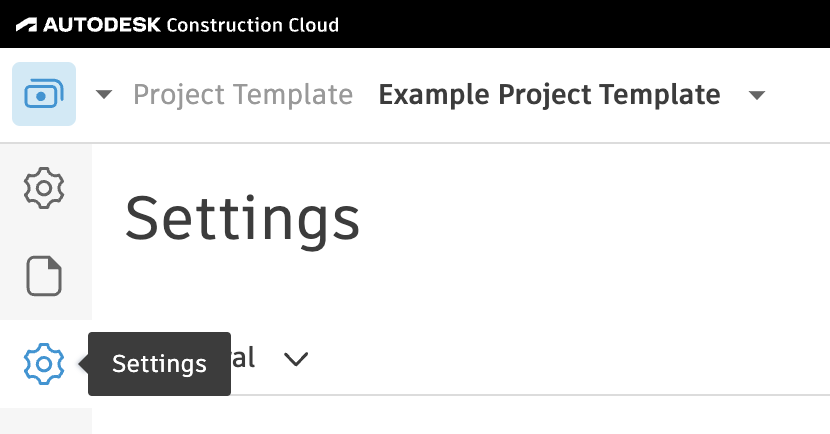
- In your Project Template, go to the Cost Management module.
- Select the gear icon or Settings on the left navigation.
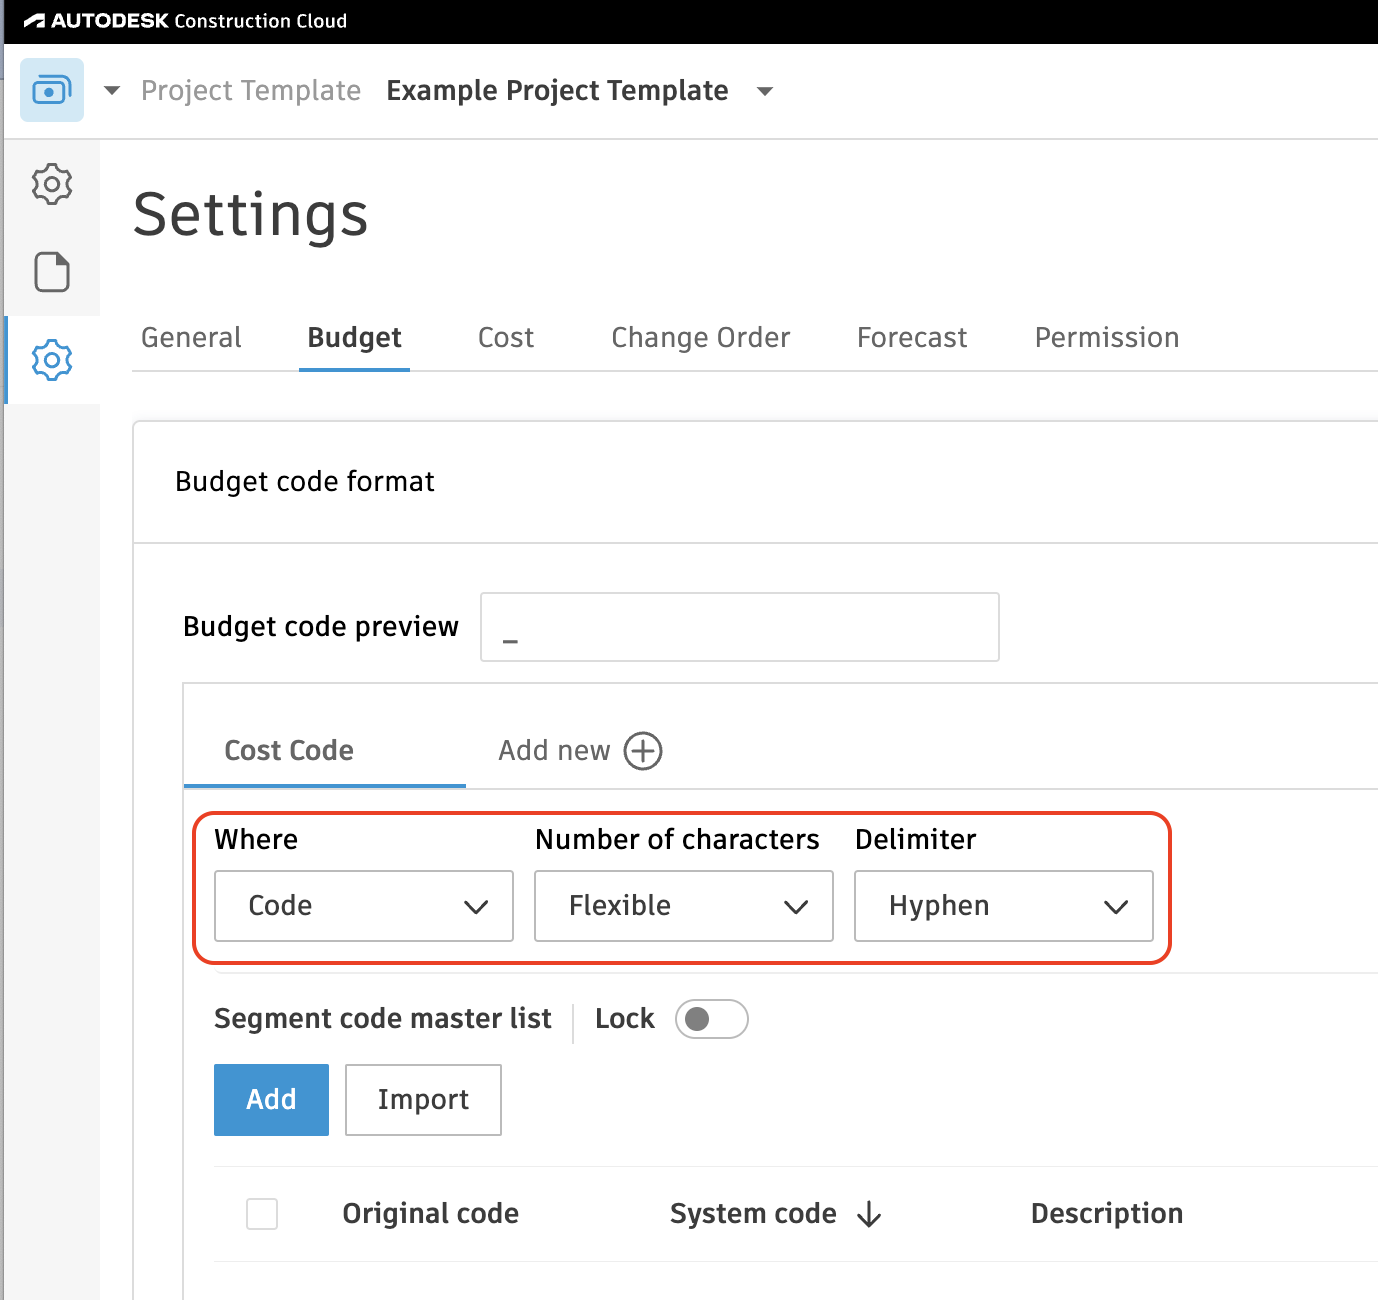
- Select the Budget tab, select Add New.

Configuring Sub Jobs
If you plan to use Sub Jobs, complete the following steps. If you do not, feel free to skip this step.
Note, the following Accounting Systems have the concept of Sub Jobs:
- Acumatica ("Tasks")
- CMiC
- Deltek ComputerEase ("Phases")
- Foundation ("Phases")
- Sage 100 Contractor ("Phases")
- Sage 300 CRE ("Extras")
- Sage Intacct
- Vista
To configure your Sub Job setup:
- Press the pencil icon next to Segment 1, and type in Sub Job.

- Below Sub Job:
- For Where, select "Code"
- For Number of Characters, select "Flexible"
- For Delimiter, select "Hyphen"

Configuring Cost Codes
To configure your Cost Code setup:
- Press the pencil icon next to Segment 1, and type in Cost Code.

- Below Cost Code:
- For Where, select "Code"
- For Number of Characters, select "Flexible"
- For Delimiter, select "Hyphen"
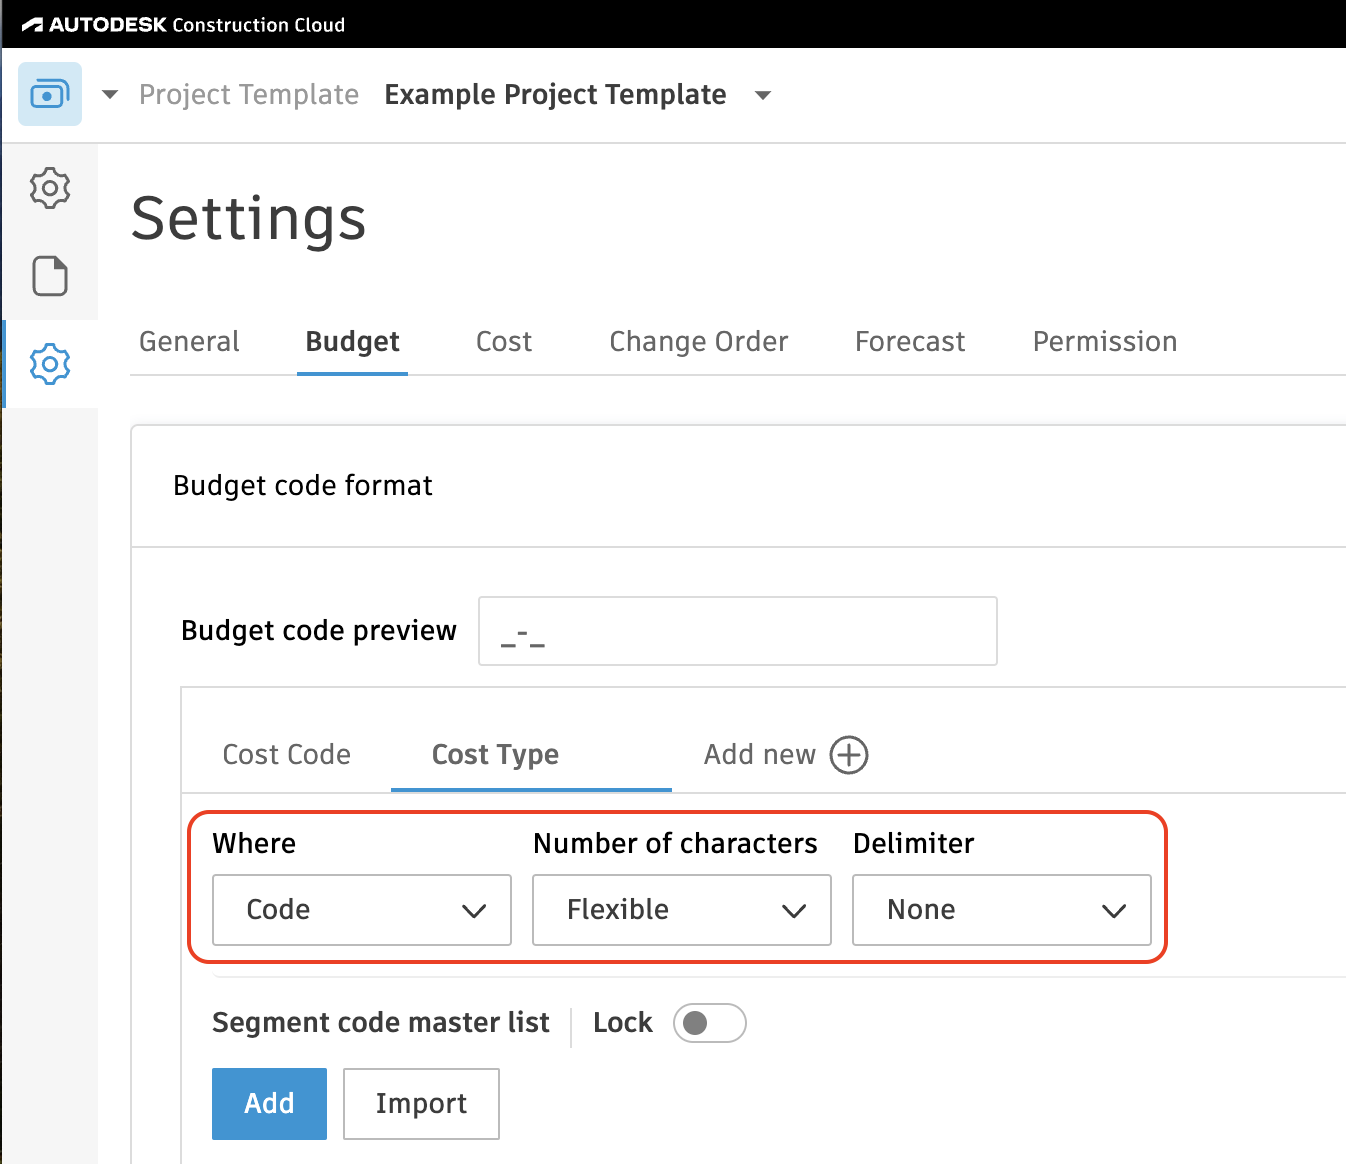
Configuring Cost Types
To configure your Cost Type setup:
-
Press the pencil icon next to Segment 2, and type in Cost Type.
-
Below Cost Type:
- For Where, select "Code"
- For Number of Characters, select "Flexible"
- For Delimiter, select "None"
Can we change the naming convention of these segments?
Yes, you can change the naming convention based on your team's preference. However, this should be consistent across every other Project Template created.
Can we have more than three budget segments?
No, Agave only supports syncing up to three budget segments.
Can we modify each segment detail?
If you want the segment to appear as part of your Budget Code, then "Where" should always be set to "Code".
"Number of characters" can be changed to match your accounting system. For example, if your Cost Type is always set to 3 characters like "LAB" or "MAT", then this can be set to "3" instead of "Flexible".
"Delimiter" can be set to any option on the drop down list based on preference.
Should we add budget codes to the Project Template?
We recomemnd leaving these segments empty in the Project Template. The goal is for the accounting system to be the single source of truth so that only one set of budget codes need to be maintained, and Agave can sync them directly from your accounting system to each Autodesk project as needed.
If you must have budget codes in the Project Template, ensure they are an exact match with what is in your accounting system to prevent sync errors due to discrepancy.
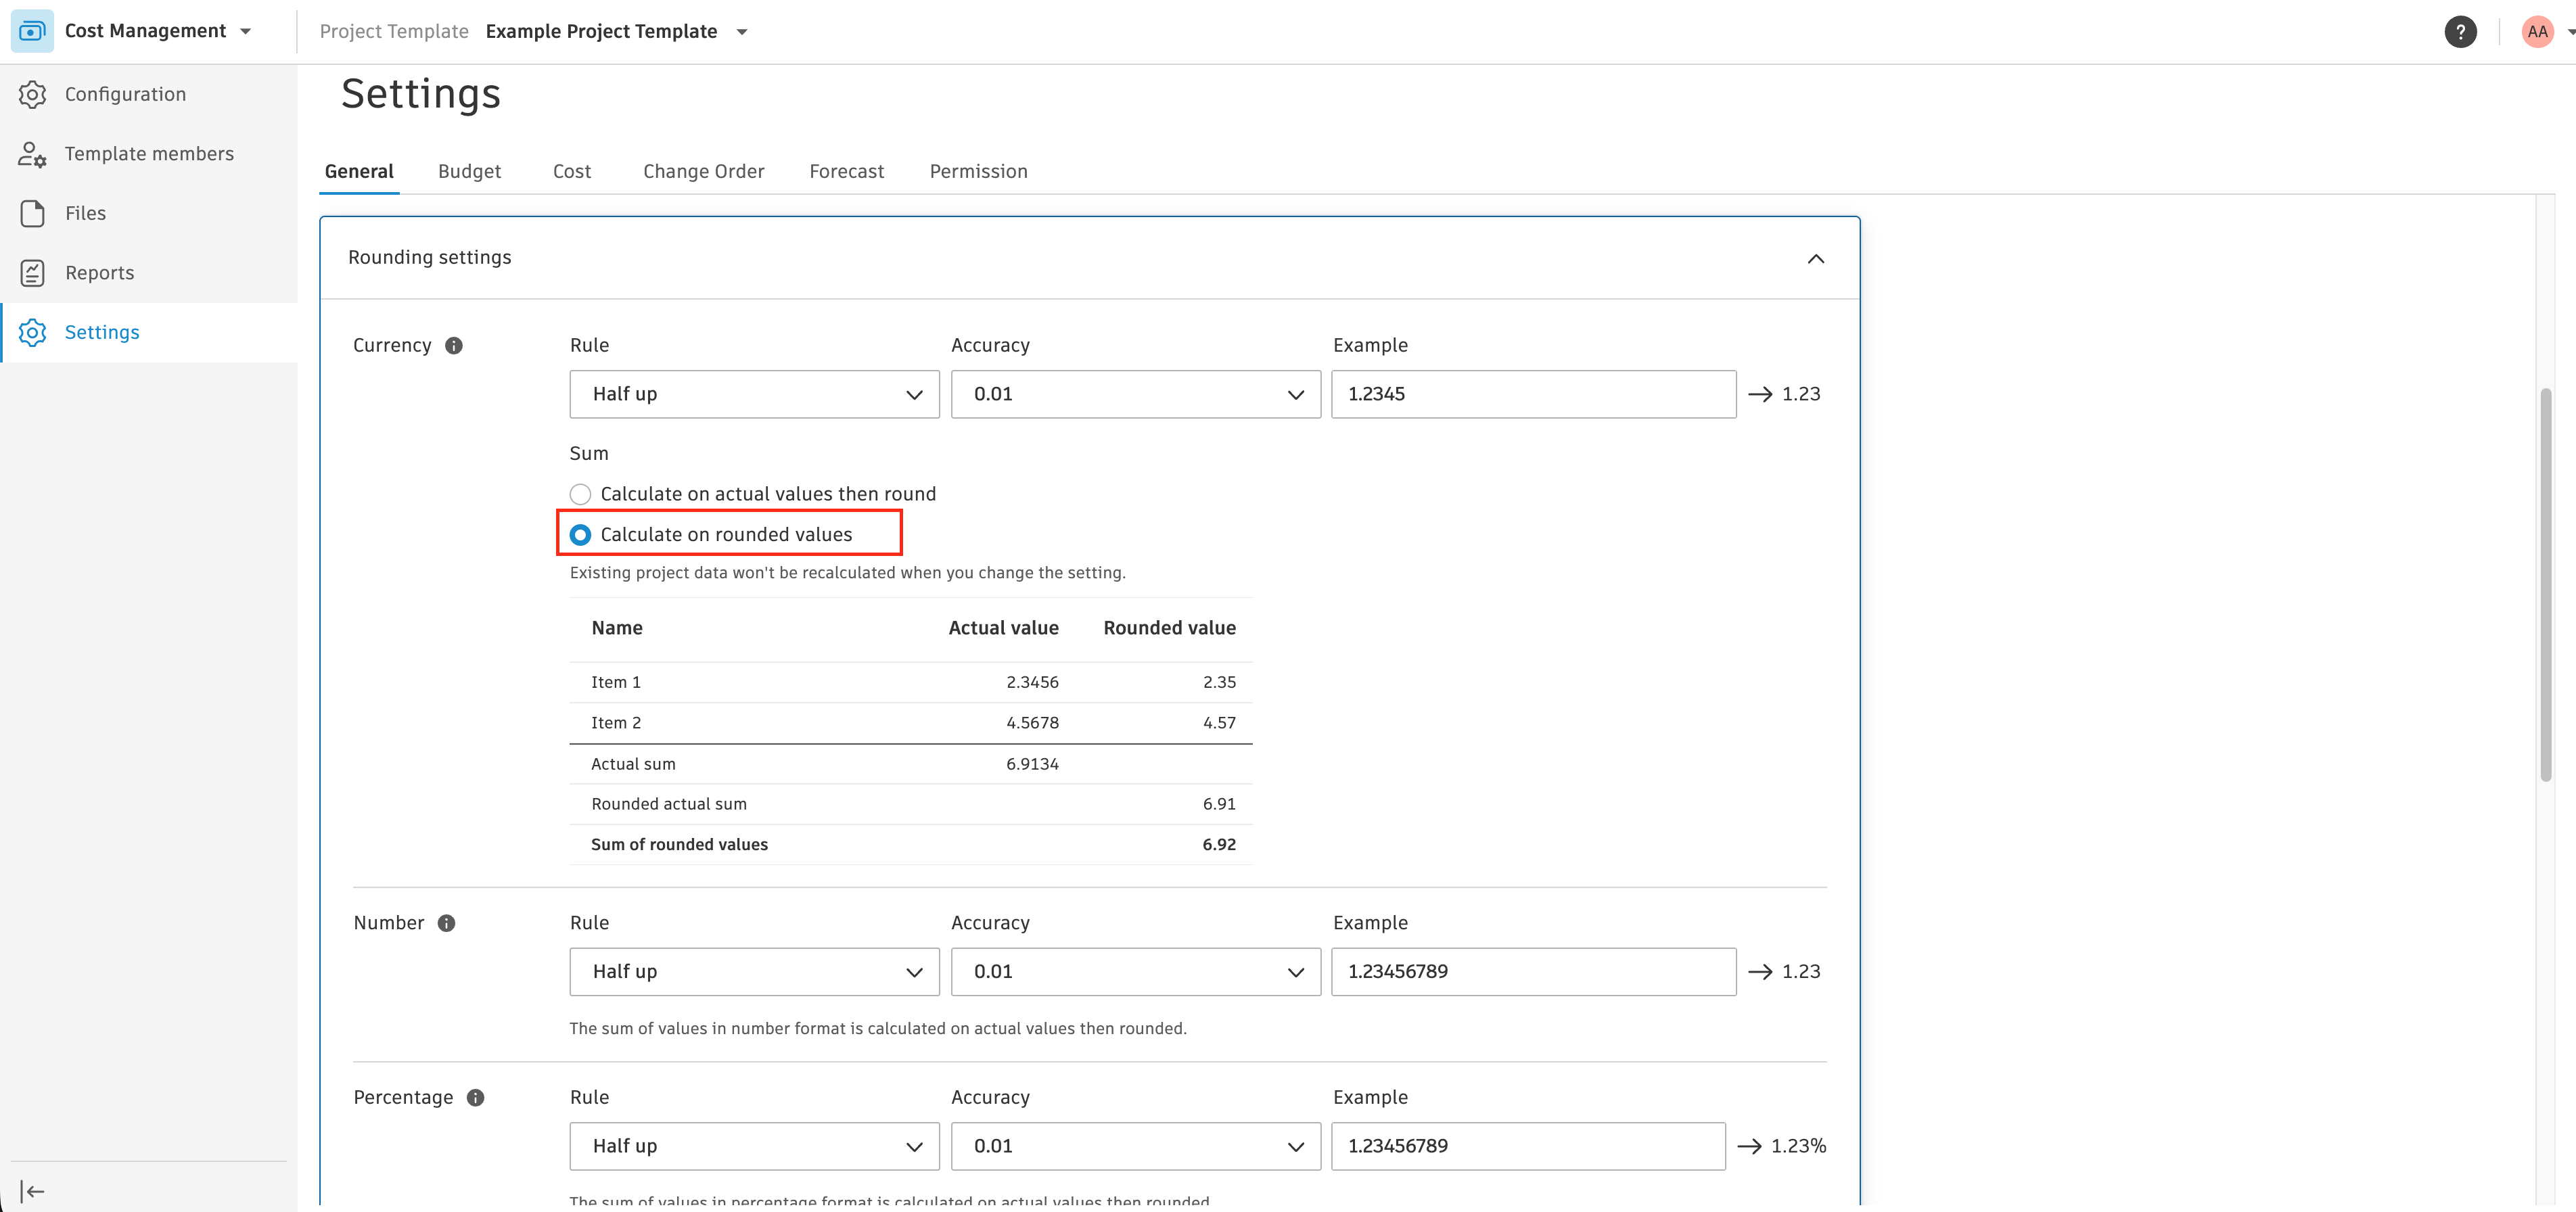
Configure Rounding Settings
Autodesk defaults to accumulating values at 4-decimal precision before rounding the total. Most accounting systems (e.g. Vista) round each line item first, then sum. This mismatch produces small discrepancies that cause reconciliation failures on audited jobs. Ensure that the Currency is set to “Calculate on rounded values”.