Authentication
Connecting to Sage Intacct
A Sage Intacct connection to Agave uses both Sage Intacct's XML gateway and JSON API. The JSON API currently covers a subset of data models; the remainder use the XML gateway. As a result, you need to complete the prerequisites for both protocols — the steps below walk through each in order.
Prerequisites
To allow Agave to connect to Sage Intacct, you will need the following:
- Sage Intacct Web Services Subscription
- This "Web Services" license comes with a "Sender ID" and "Sender Password"
- These will be sent to you by Sage when activating your subscription
- It is important that you store these credentials in a secure place, as they will be used to establish your connection with Agave Sync
- This "Web Services" license comes with a "Sender ID" and "Sender Password"
- Sage Intacct Construction Financials Module
- The Sage Intacct Construction Project Management module is not required
Step 1: Enable Web Services Subscription
To enable the Web Services subscription, you or your company's Sage Intacct Administrator will need to:
1a. Contact your Sage Intacct account manager to enable a Web Services License.
1b. Enable the Web Services subscription under Company --> Admin --> Subscriptions.
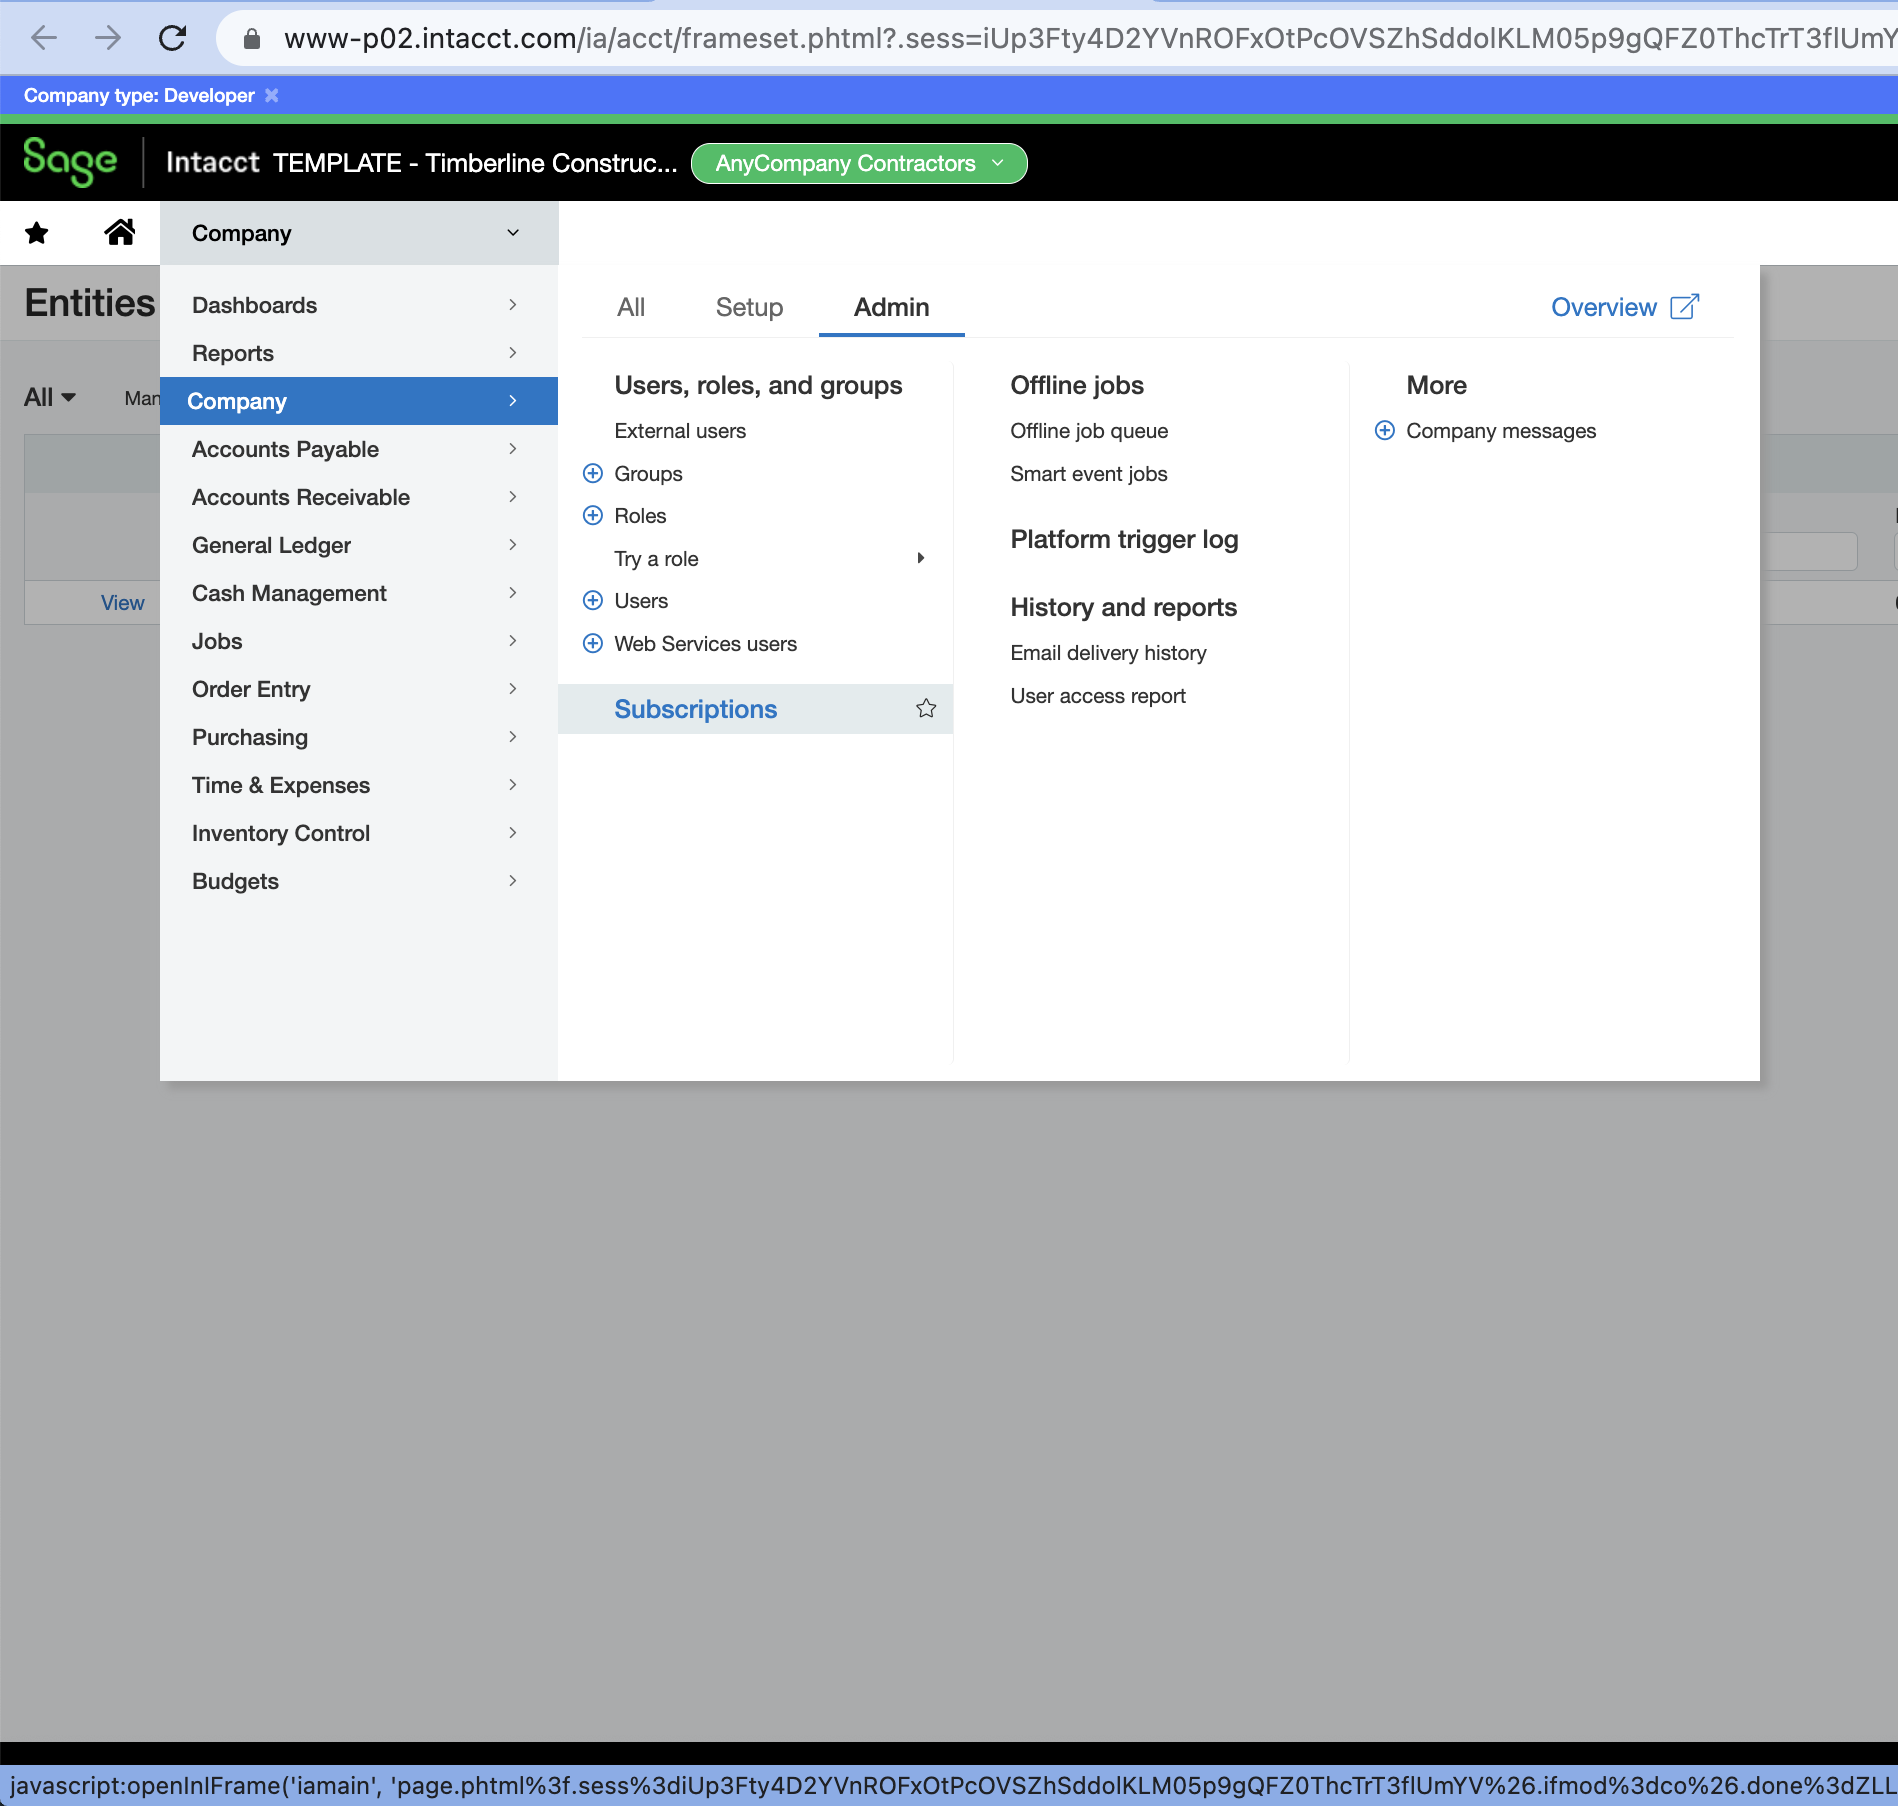
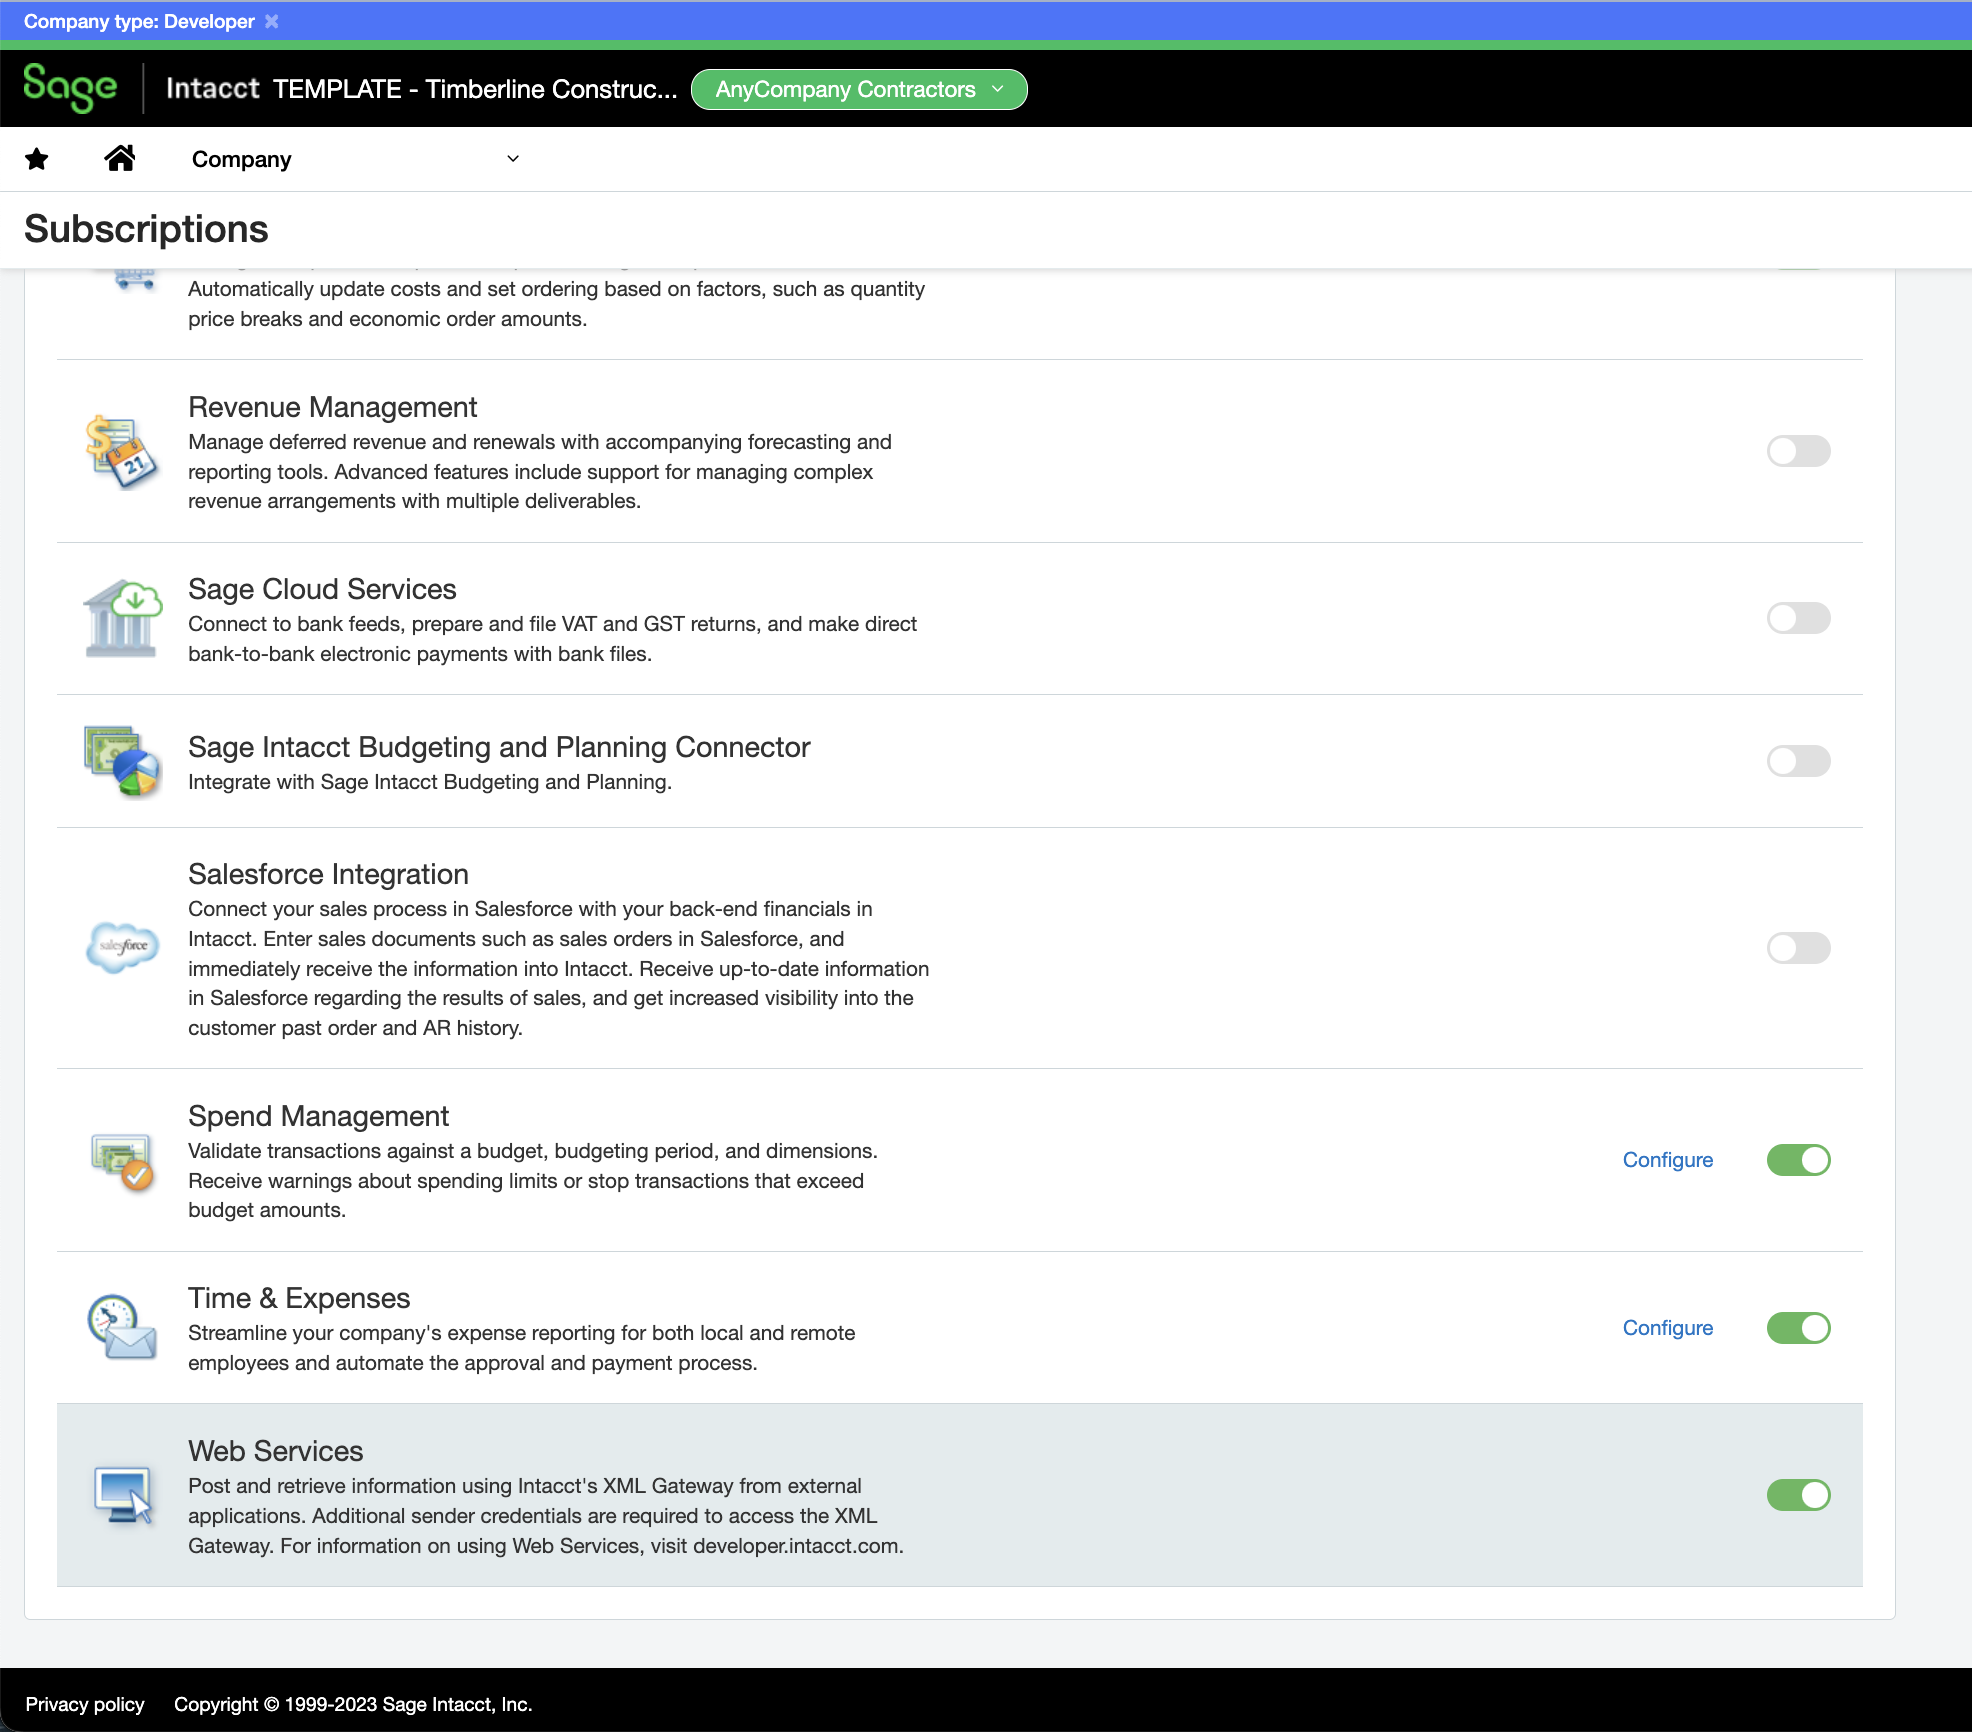
1c. Scroll to the bottom of the page and enable the Web Services subscription.
Step 2: Authorize Web Service Sender ID
To authorize your Web Service Sender ID:
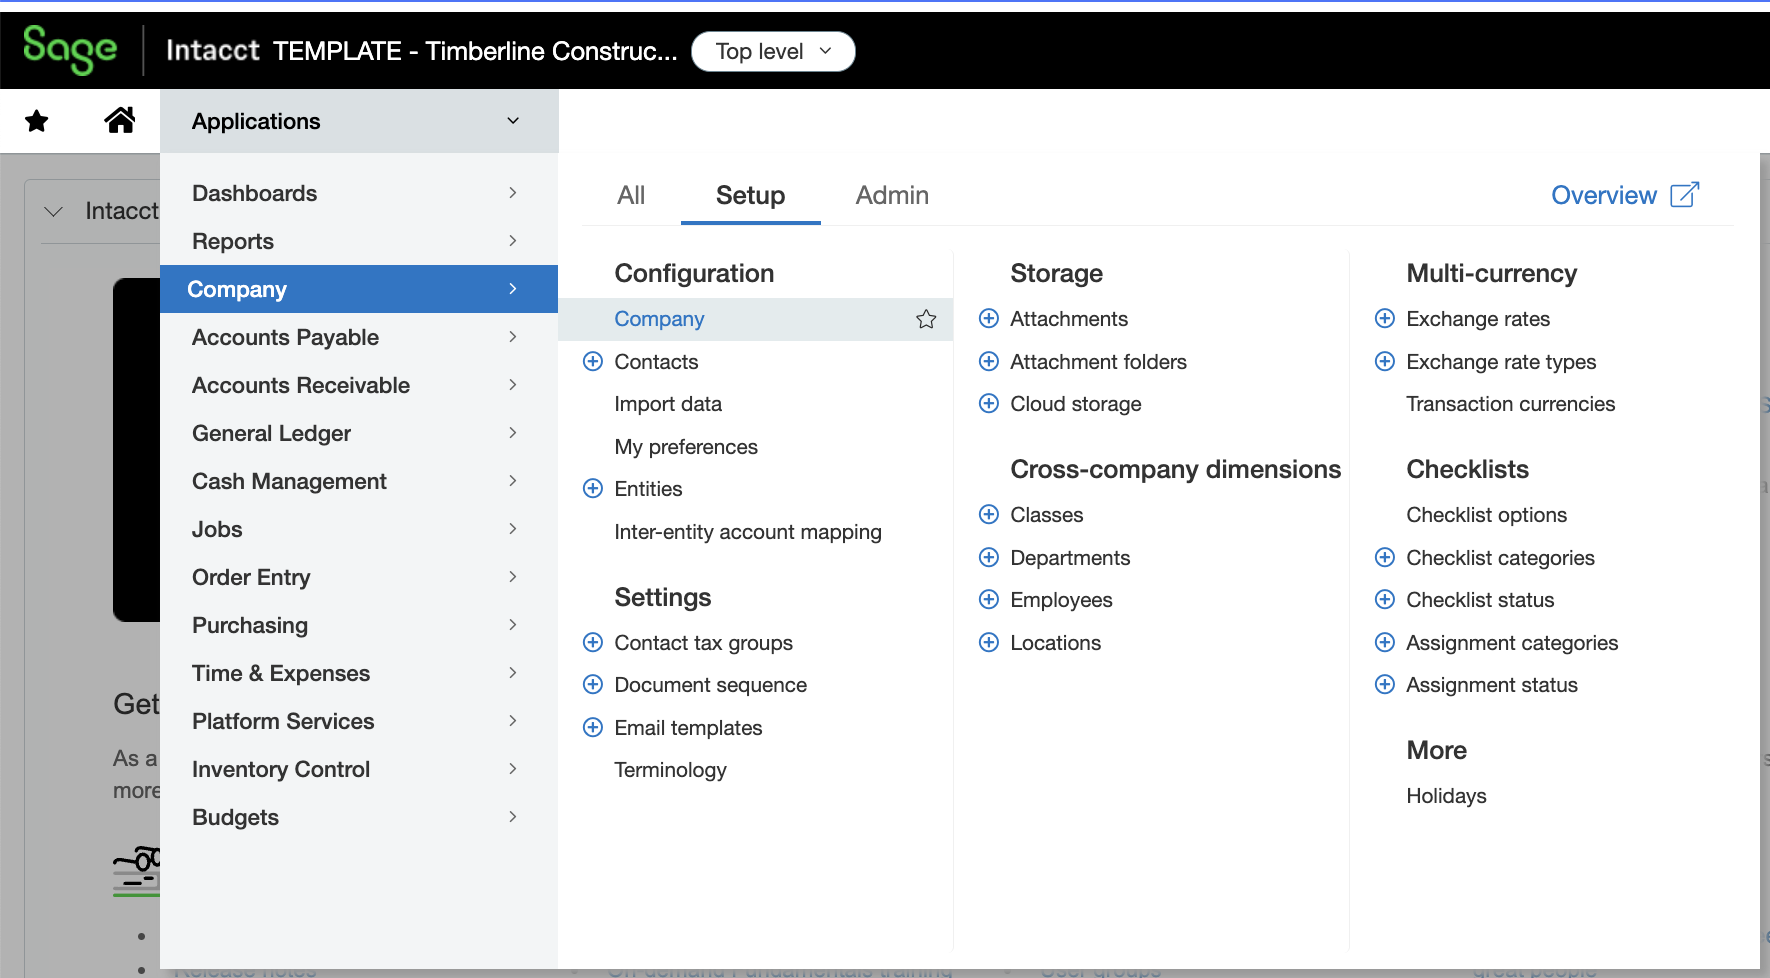
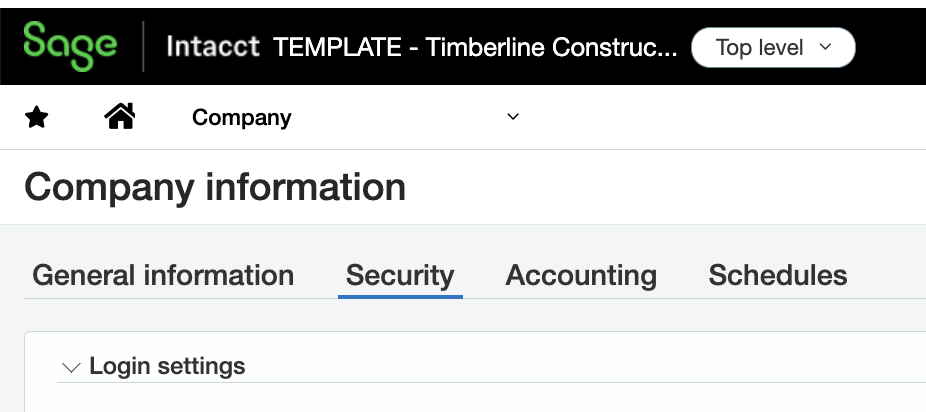
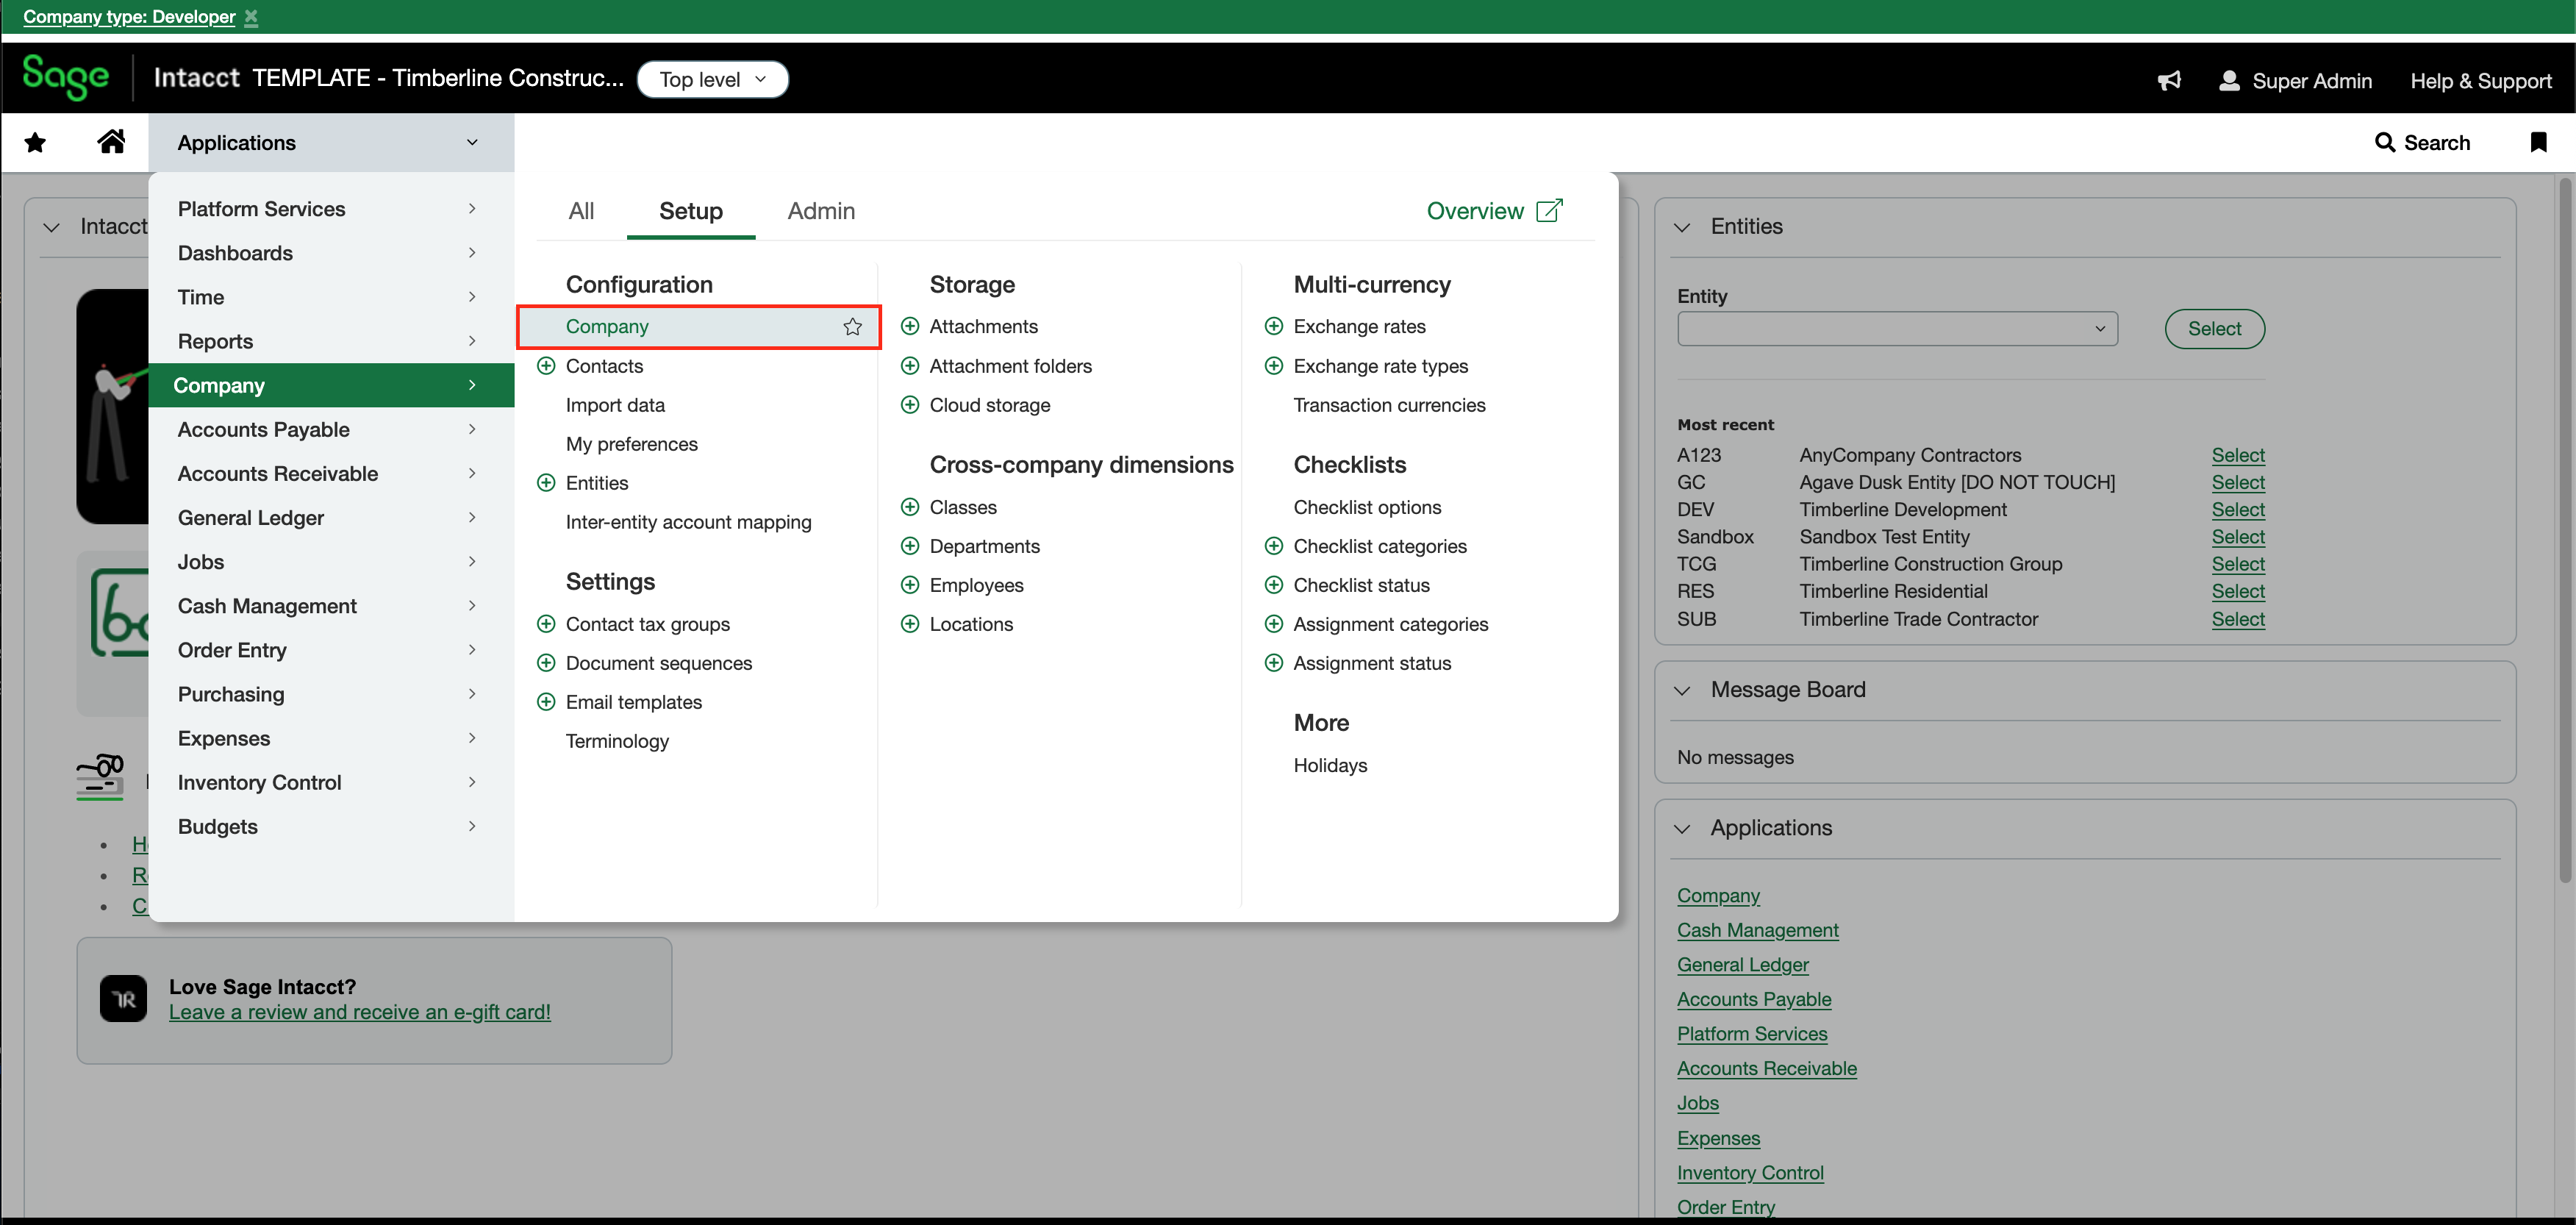
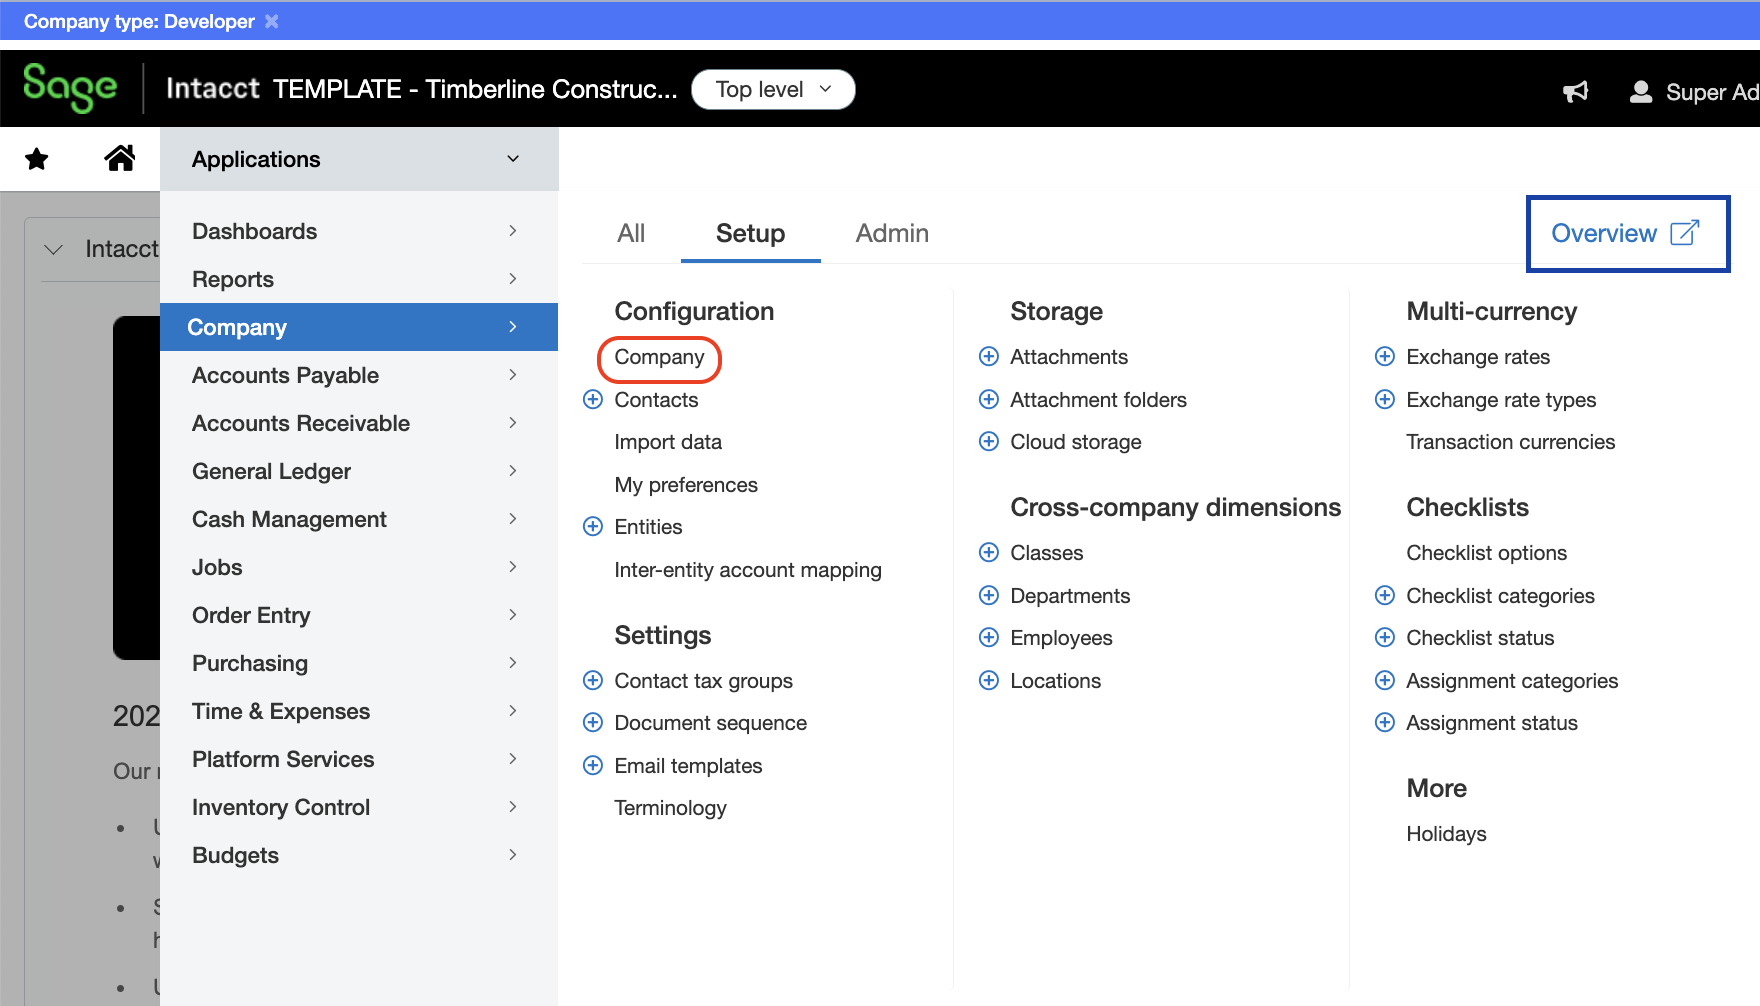
2a. Select Company --> Setup --> Company (under Configuration).
2b. Select Security.
2c. Scroll down to Web Services Authorizations, and press Add.
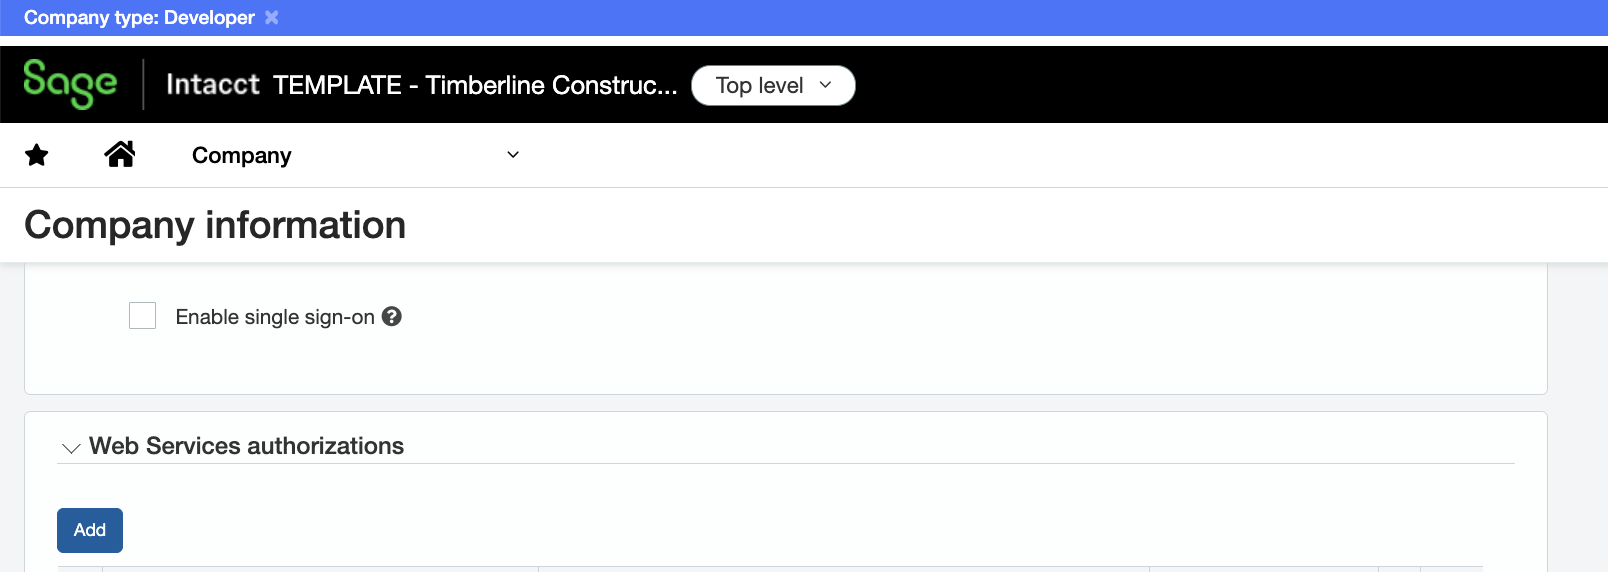
2d. Input details for your Sender ID (acquired in Step 1) and press Save.
Step 3: Create Web Services User
A Web Service User lets Agave exchange data with Sage Intacct via the XML gateway.
To create a Web Service User:
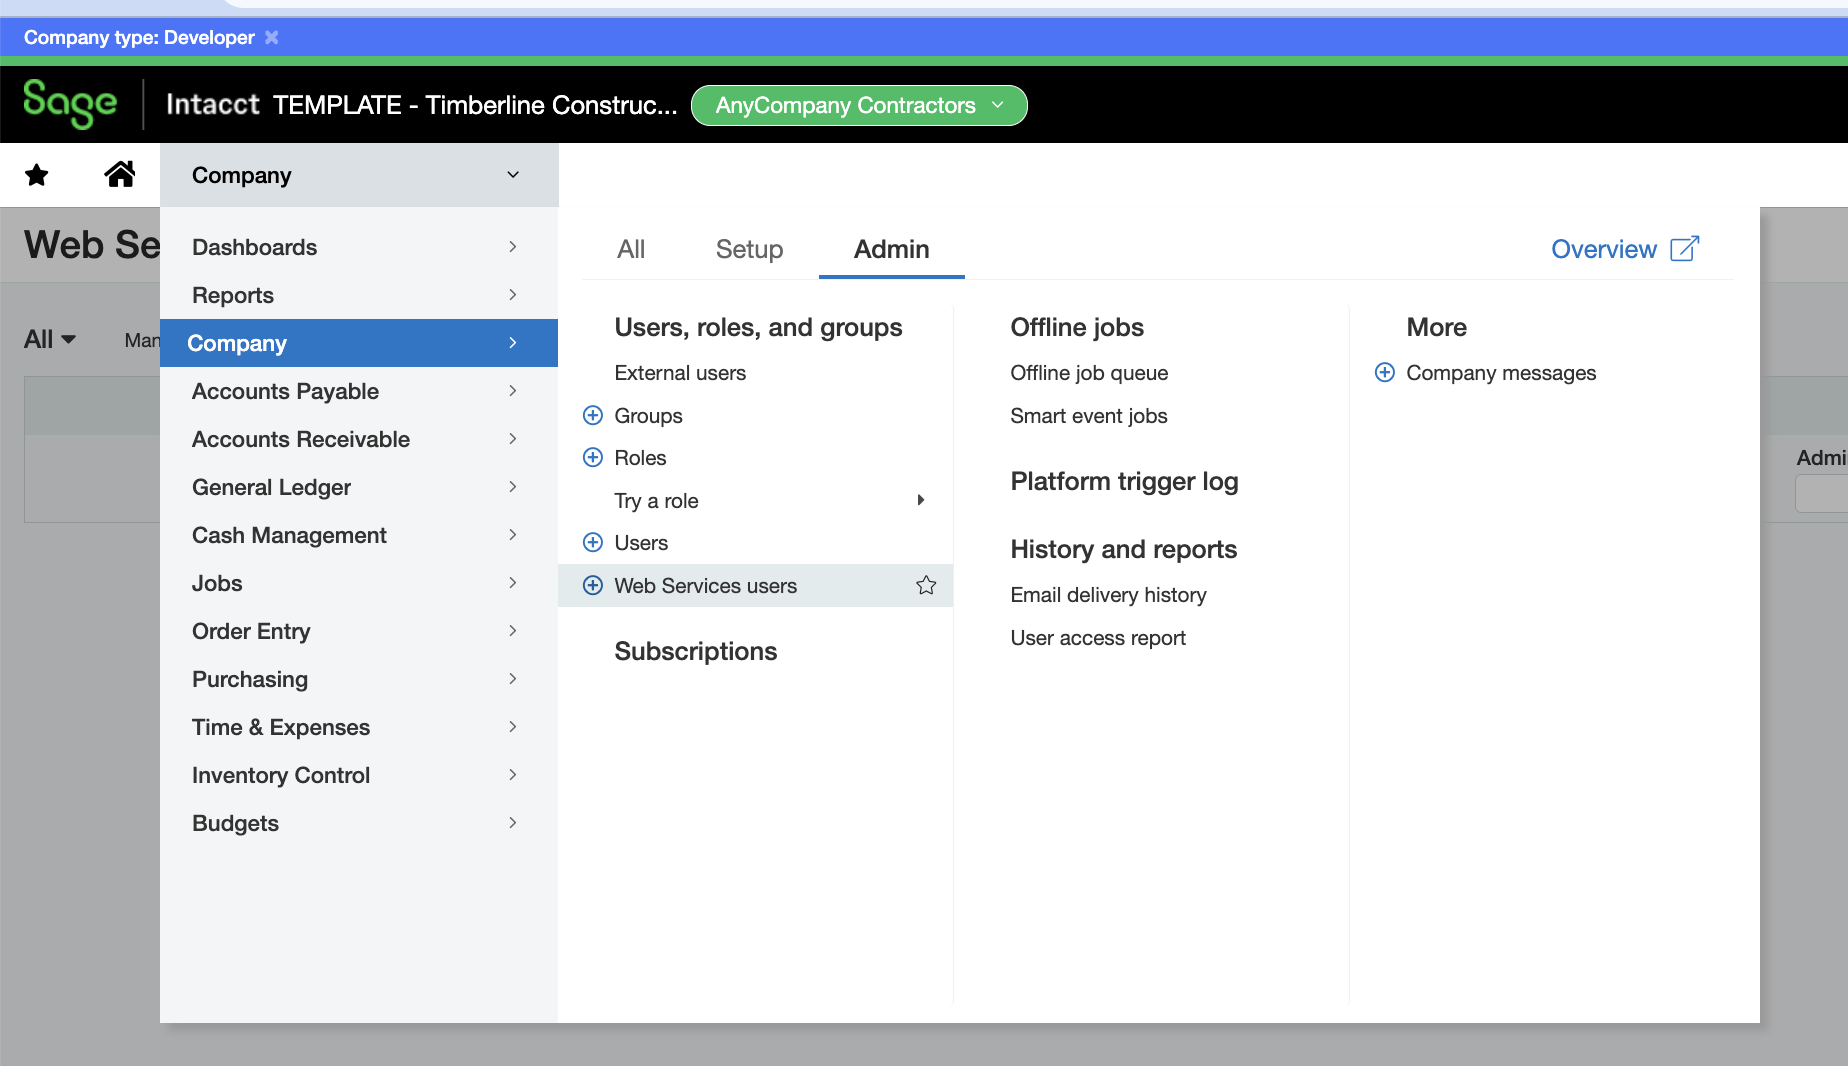
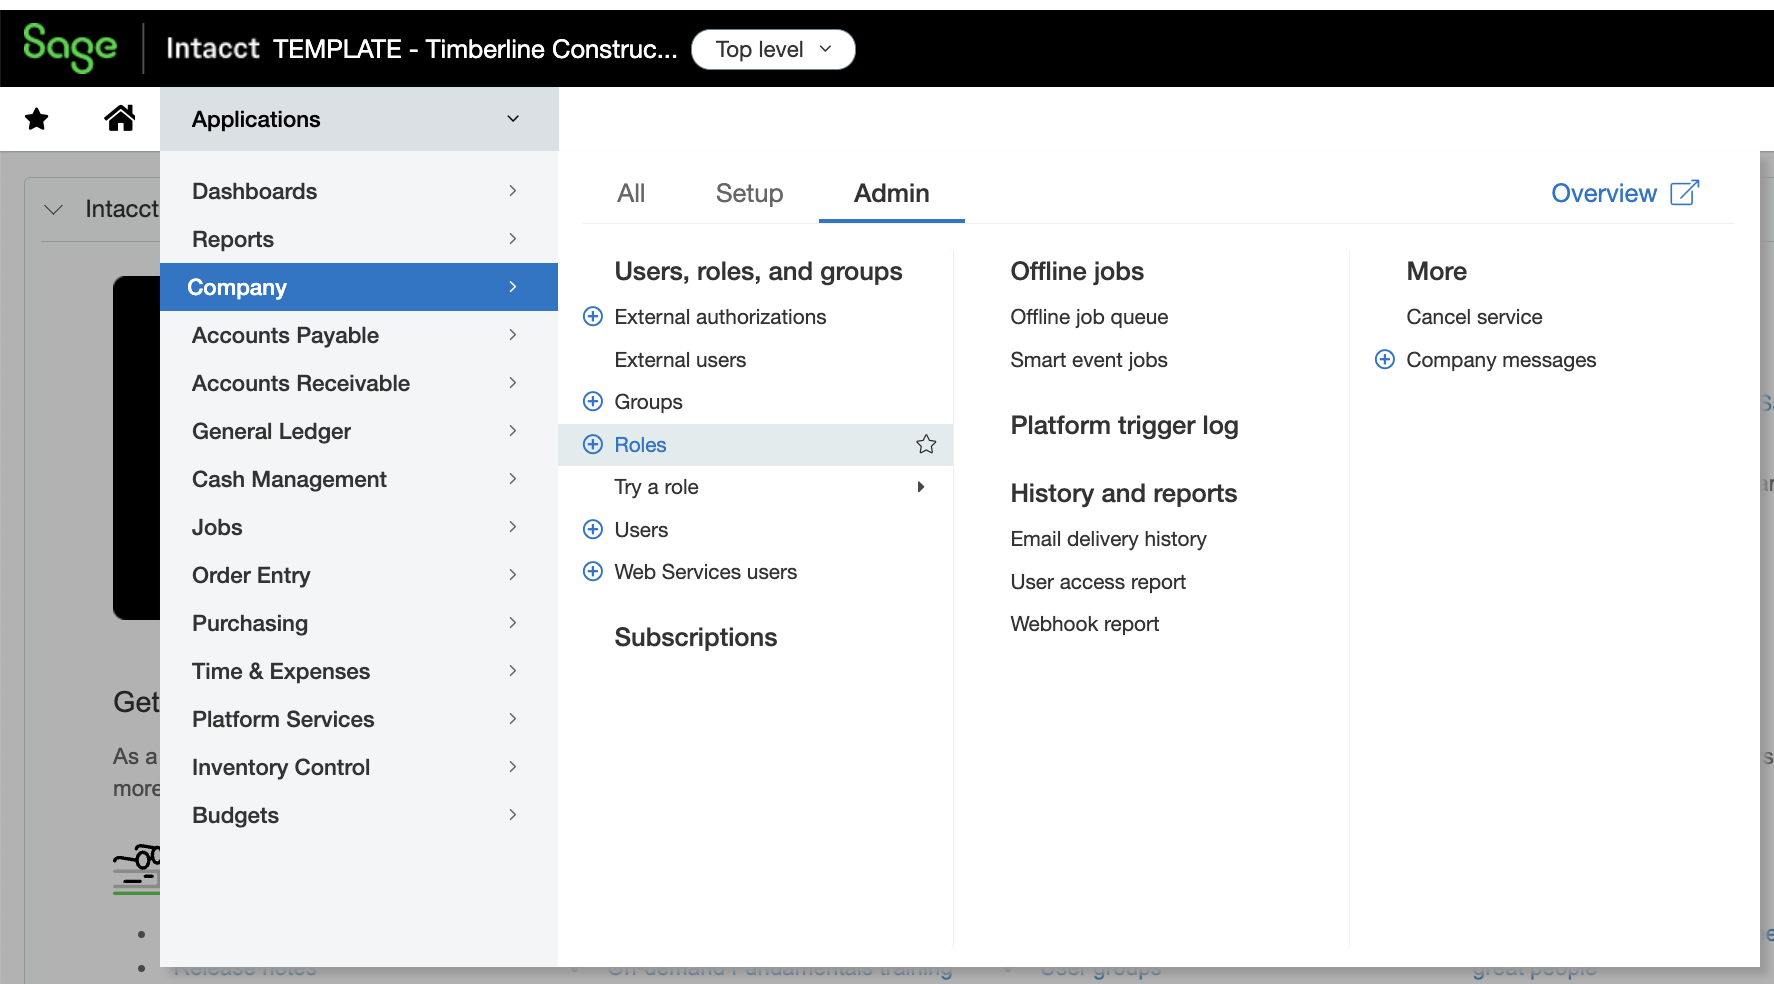
3a. Select Company --> Admin --> Web Service Users:
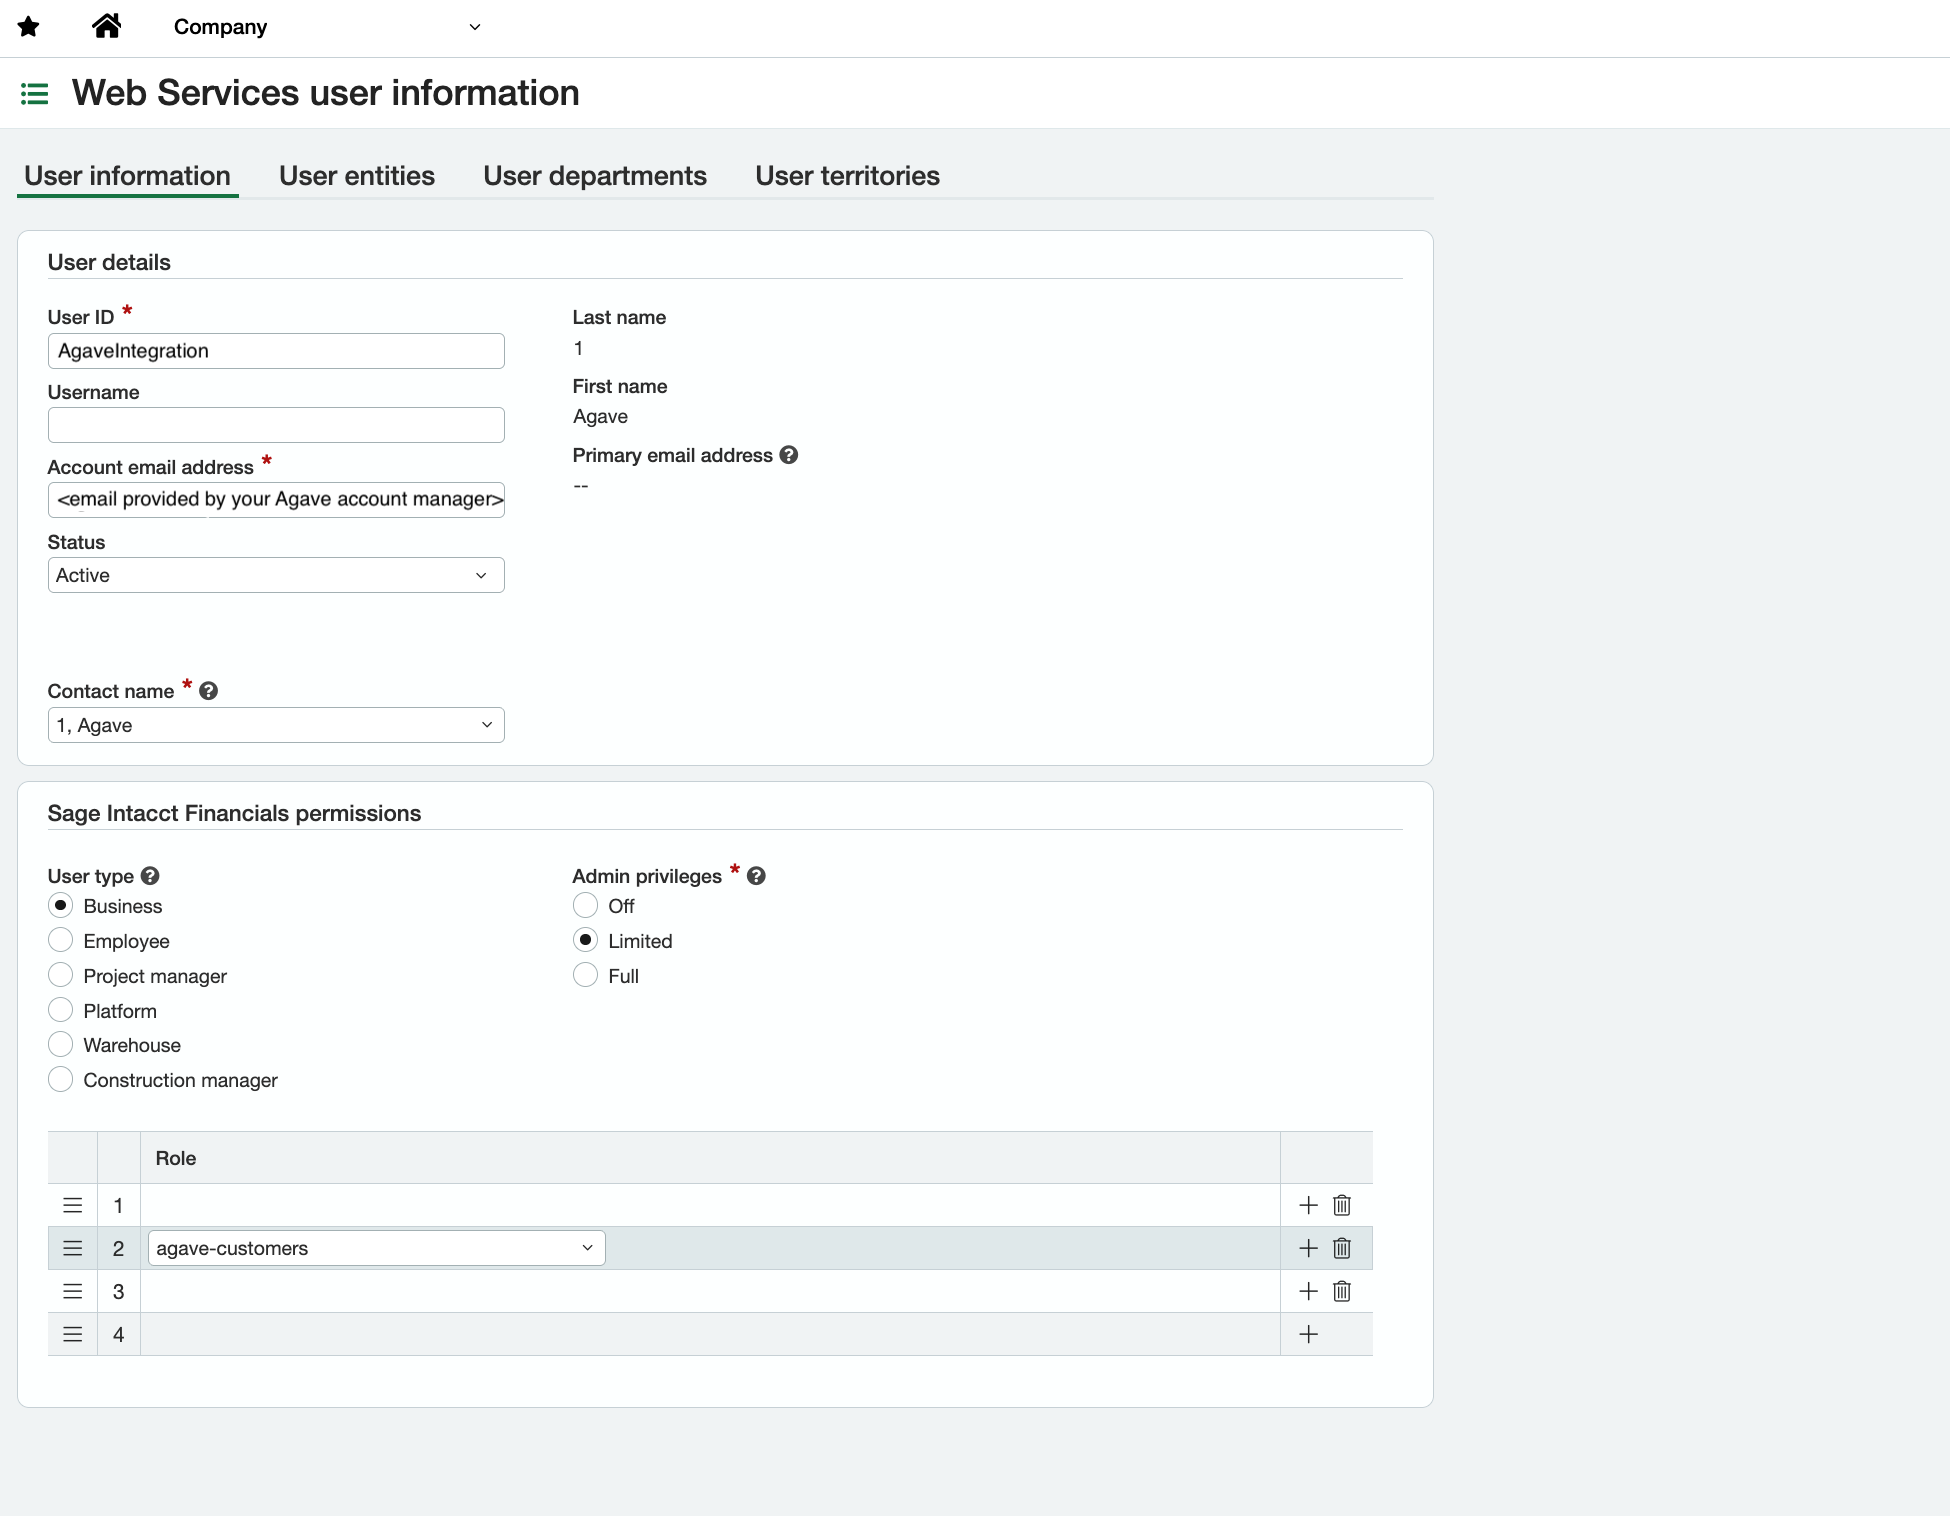
3b. Enter the user information for the Web Service User as shown below. Ensure you add the user's role in the table at the bottom of the page.
Note: Steps 3d–3g detail how to create the role and ensure it has proper permissions.
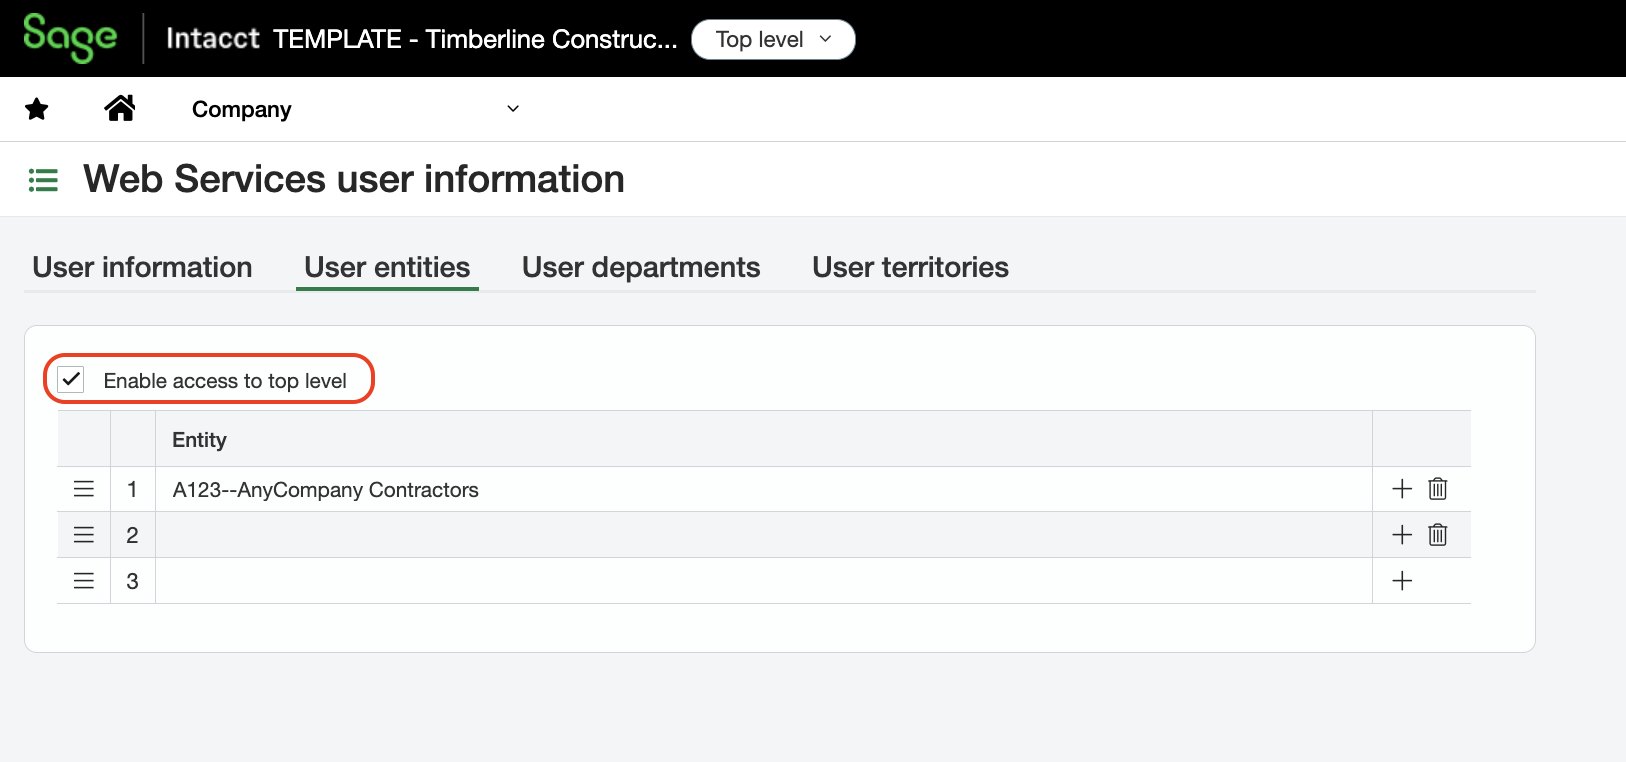
3c. Go to User Entities tab. Select Enable access to top level and any Entities you would like to enable for this Web Services User:
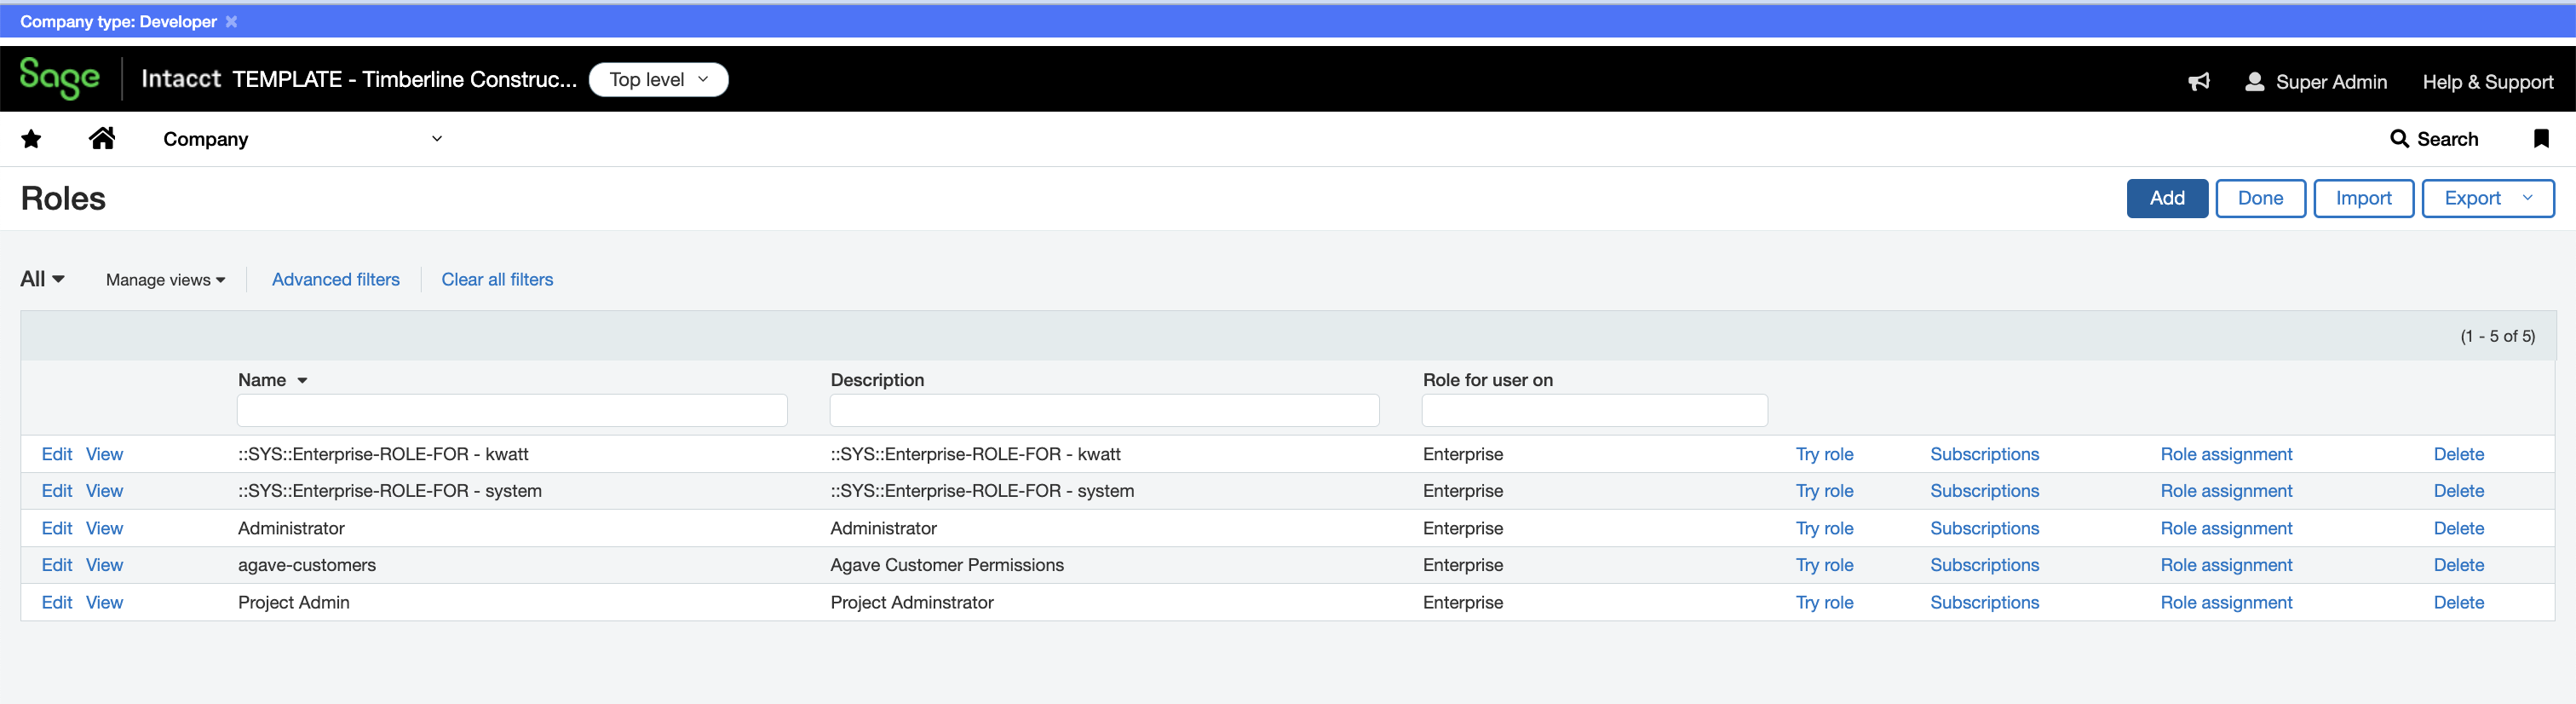
3d. To ensure the Web Service User has the proper permissions, go to Company --> Admin --> Roles:
3e. Select Add:
3f. Add a name and description for the Role, then click Save.

3g. For each module, click Permissions next to the module name, then click All --> Save. Repeat until every required module has permissions enabled.
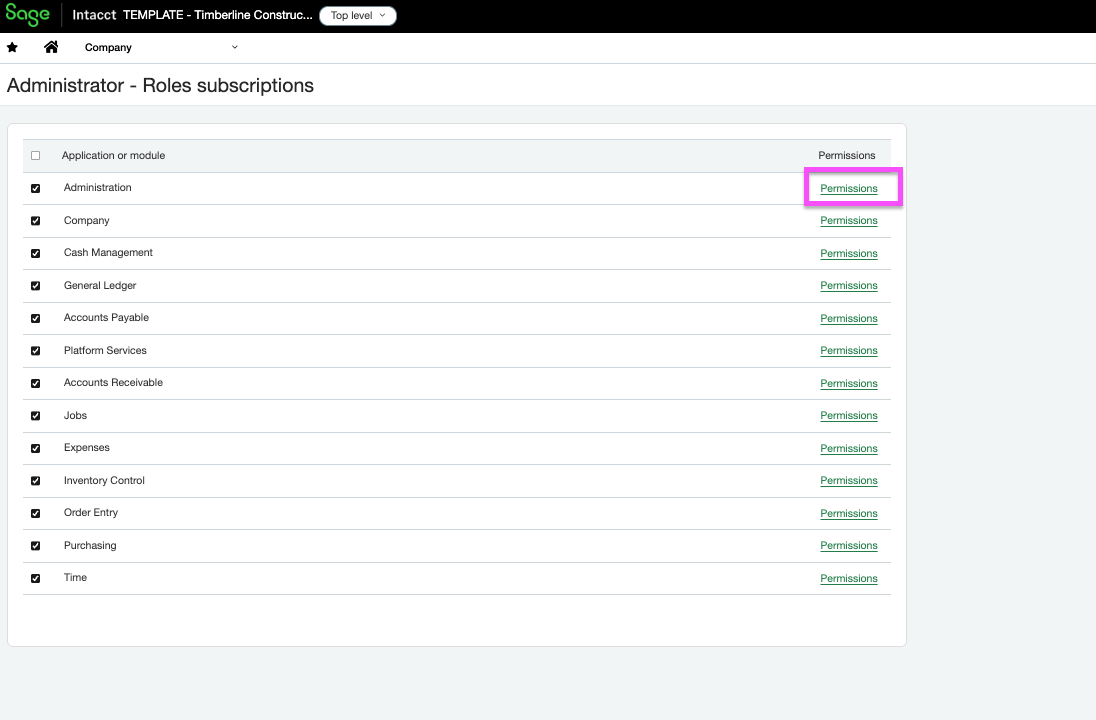
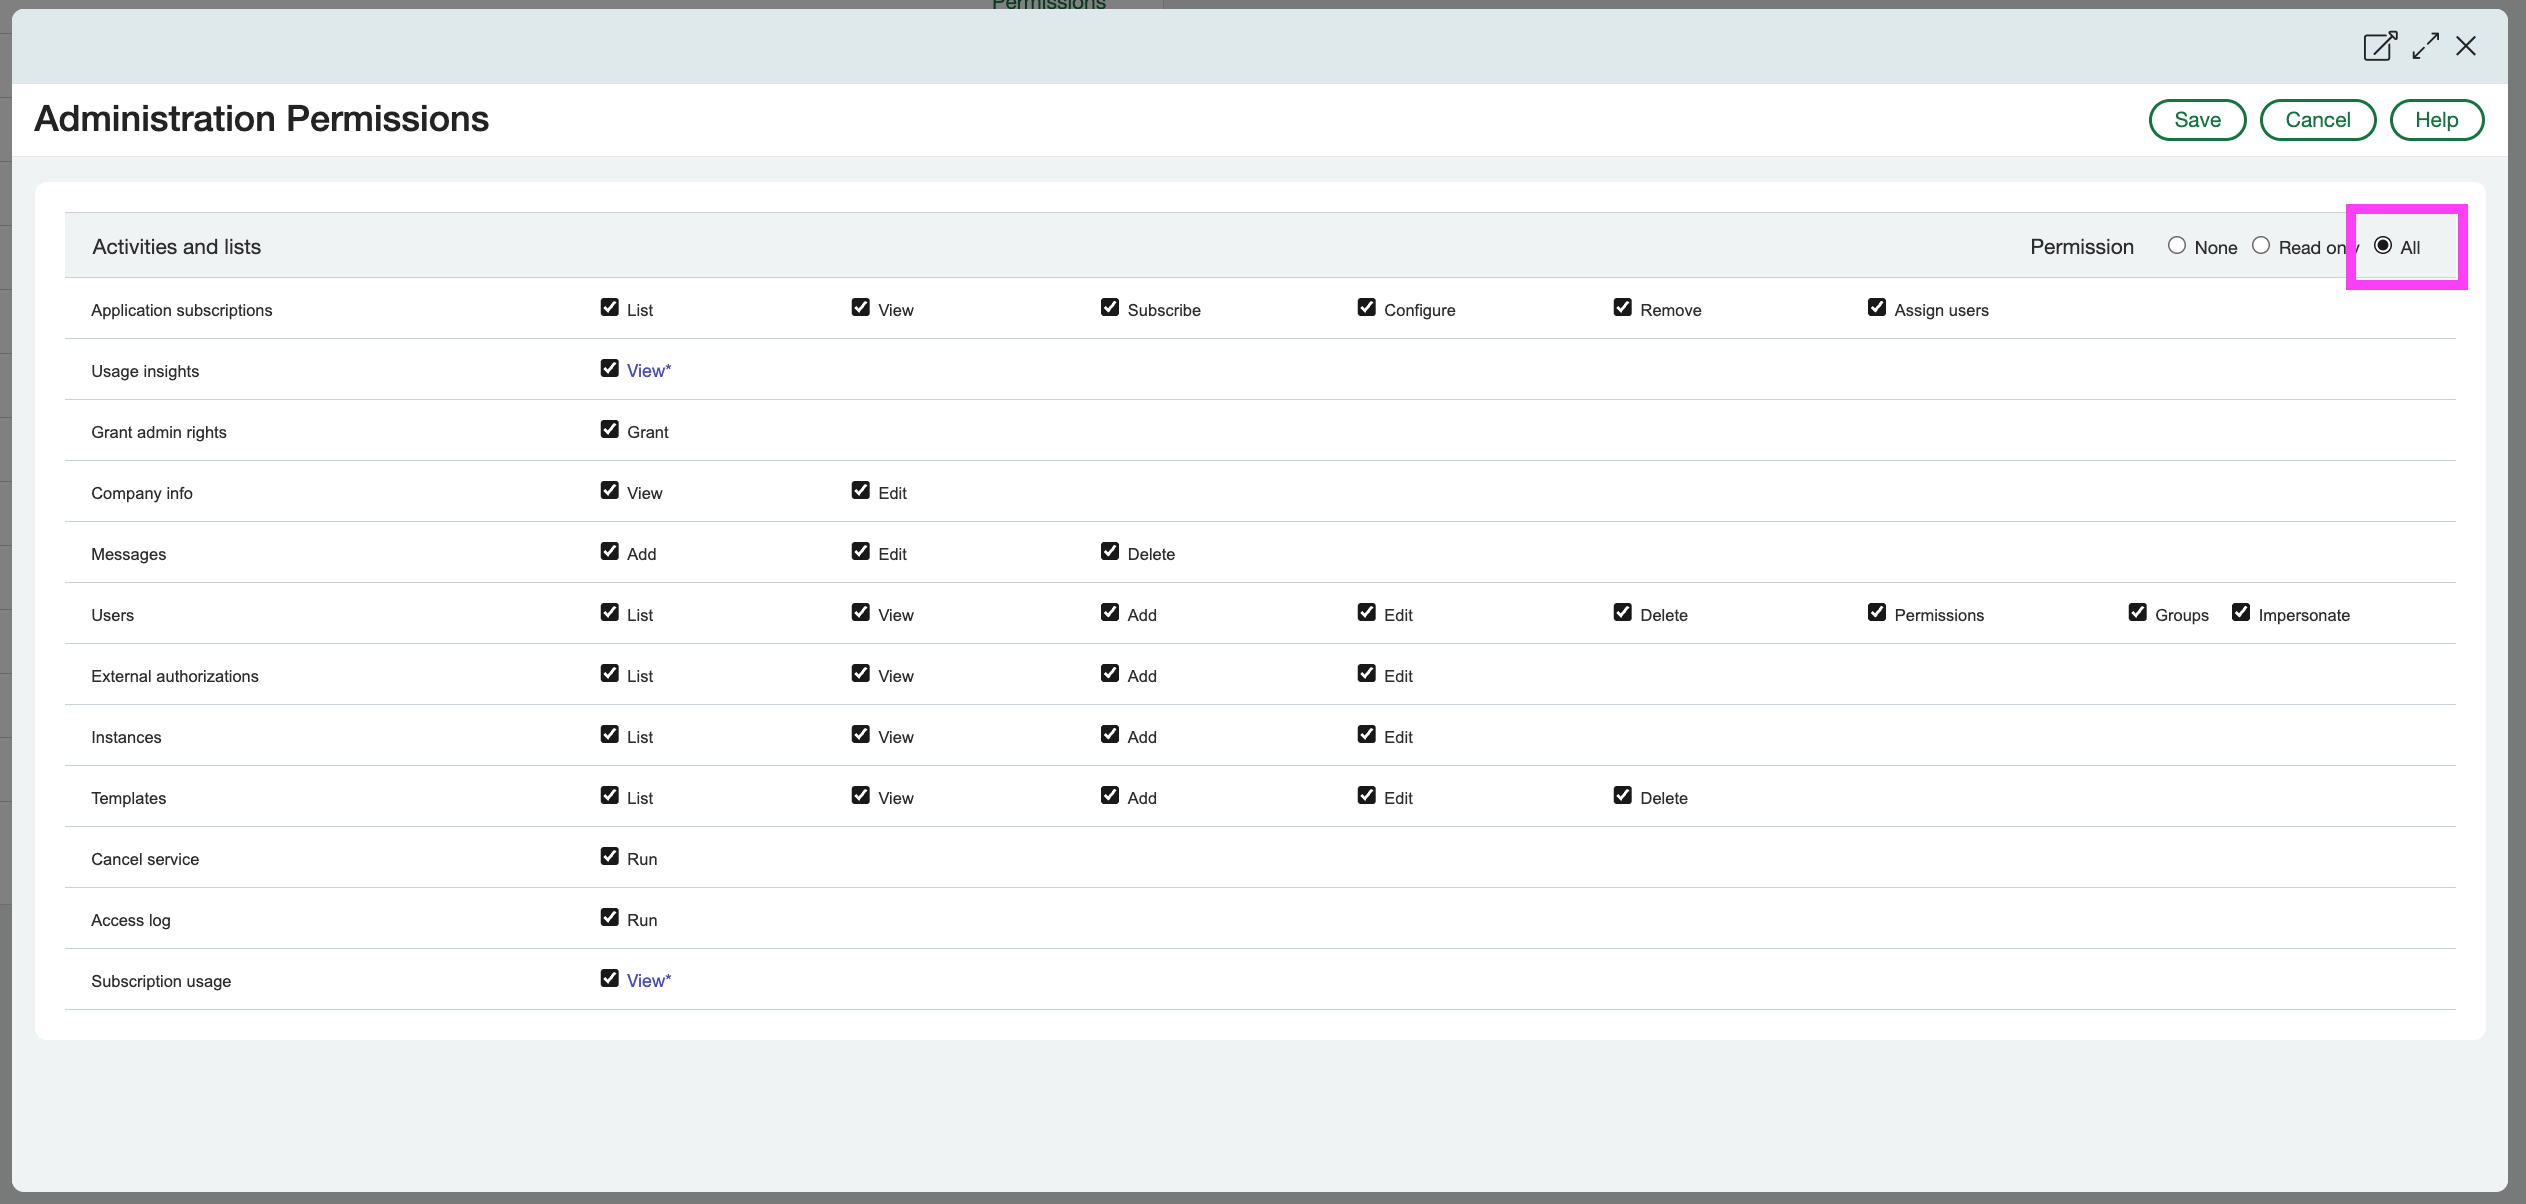
Ensure that you at least enable permissions for the Company, General Ledger, Accounts Payable, Accounts Receivable, Jobs, Order Entry, and Purchasing modules. After saving the role, return to the Web Service User page (Step 3b) and add the new role under the Role table at the bottom.
Step 4: Create API Application in Sage Developer Portal
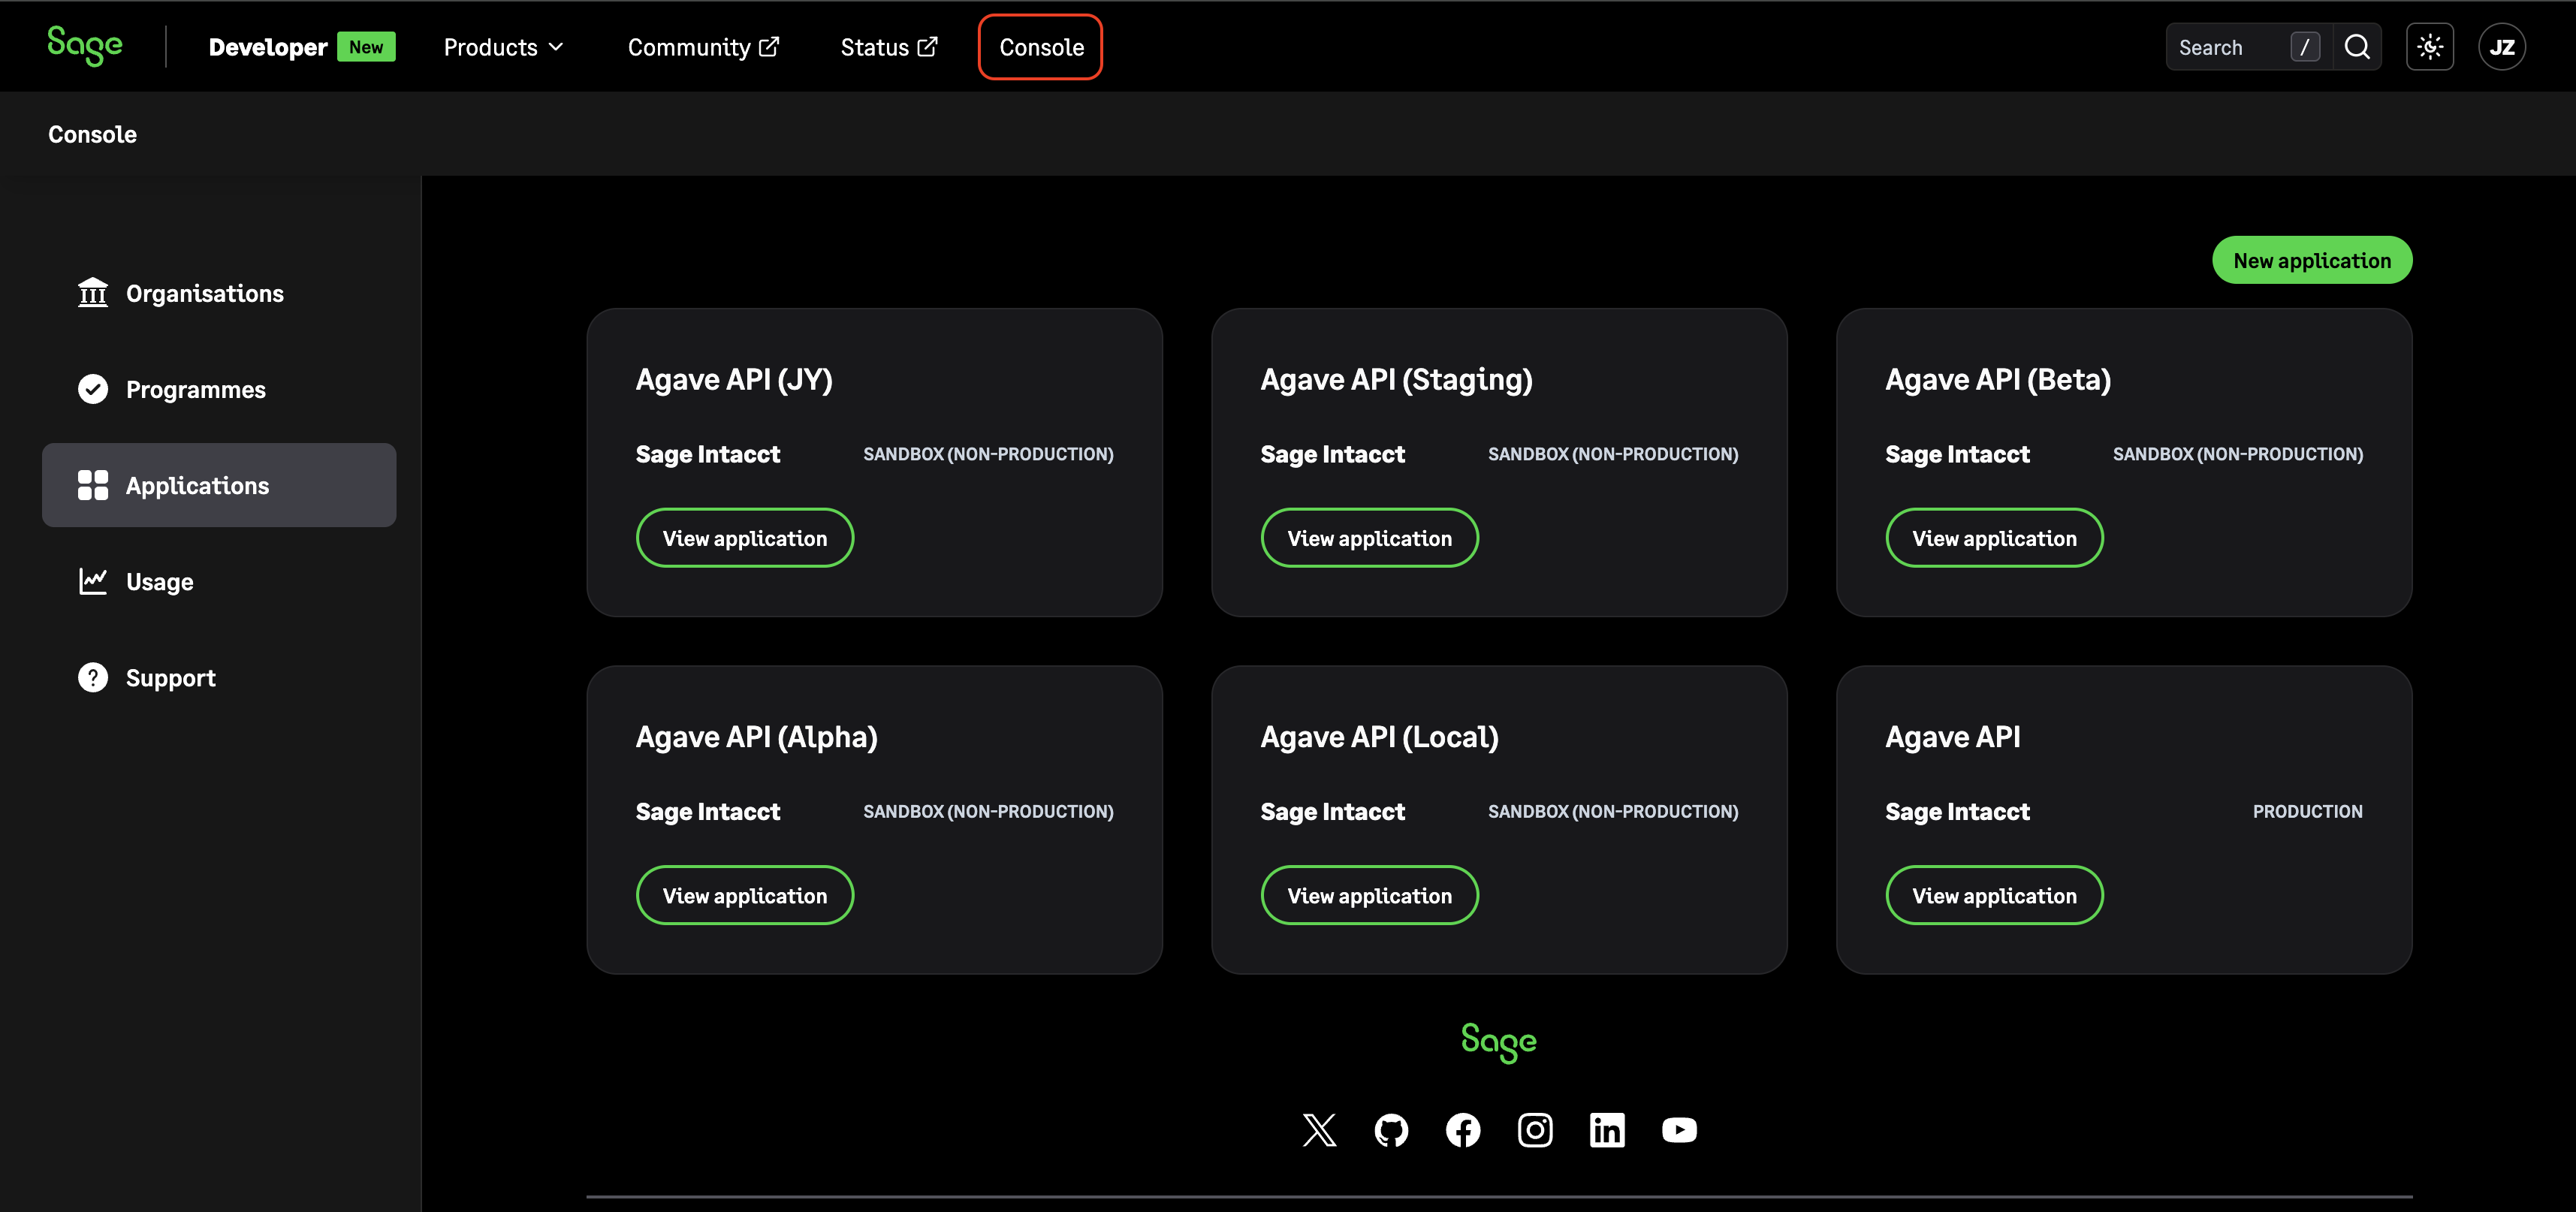
4a. Navigate to https://developer.sage.com/intacct/, log in with your Sage Intacct Developer Workspace credentials, and select the Console tab:
First time using the Sage developer portal? If this is your or your IT team's first time using the Sage developer portal, follow the two sub-steps below before continuing. If you already have a login and are enrolled in the Sage Intacct Developer Programme, proceed to step 4b.
Create a Sage ID. On the login page, click Sign up. You can use any work email — we recommend a shared or role-based address (e.g. it-admin@yourcompany.com) rather than a personal one, so the account doesn't get orphaned if someone leaves. When prompted, create a workspace and name it after your company.
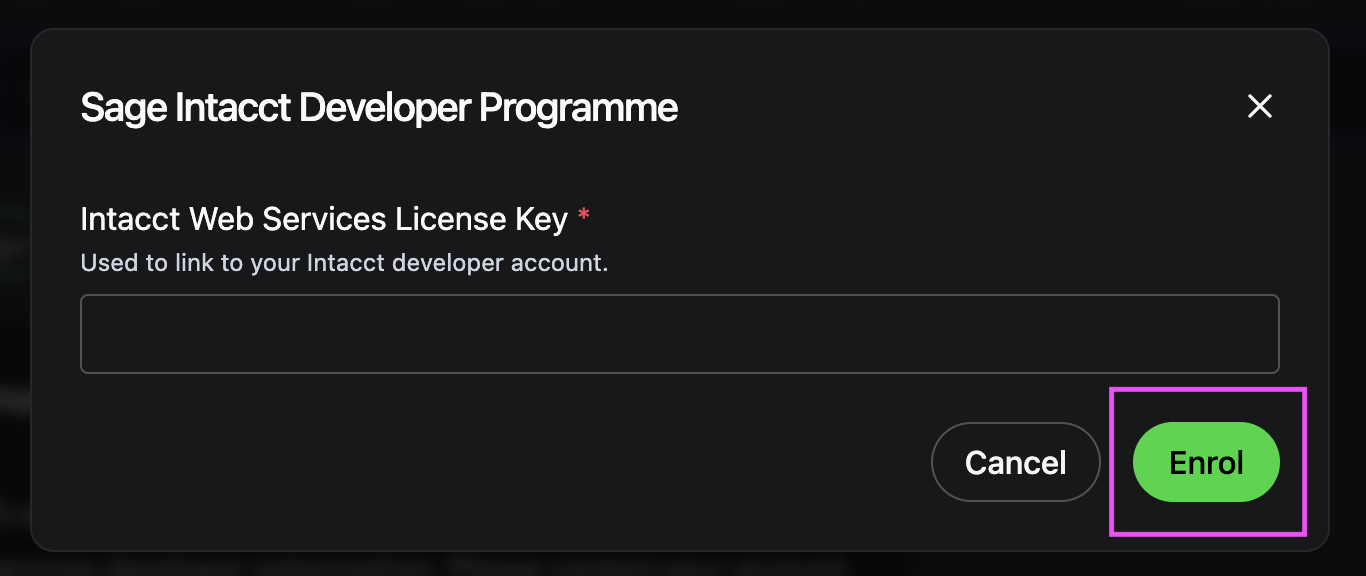
Enroll in the Sage Intacct Developer Programme. From the Console, go to Applications and click to create a new application. If you see an Enroll to unlock button, click it, then click Enroll on the page that opens.
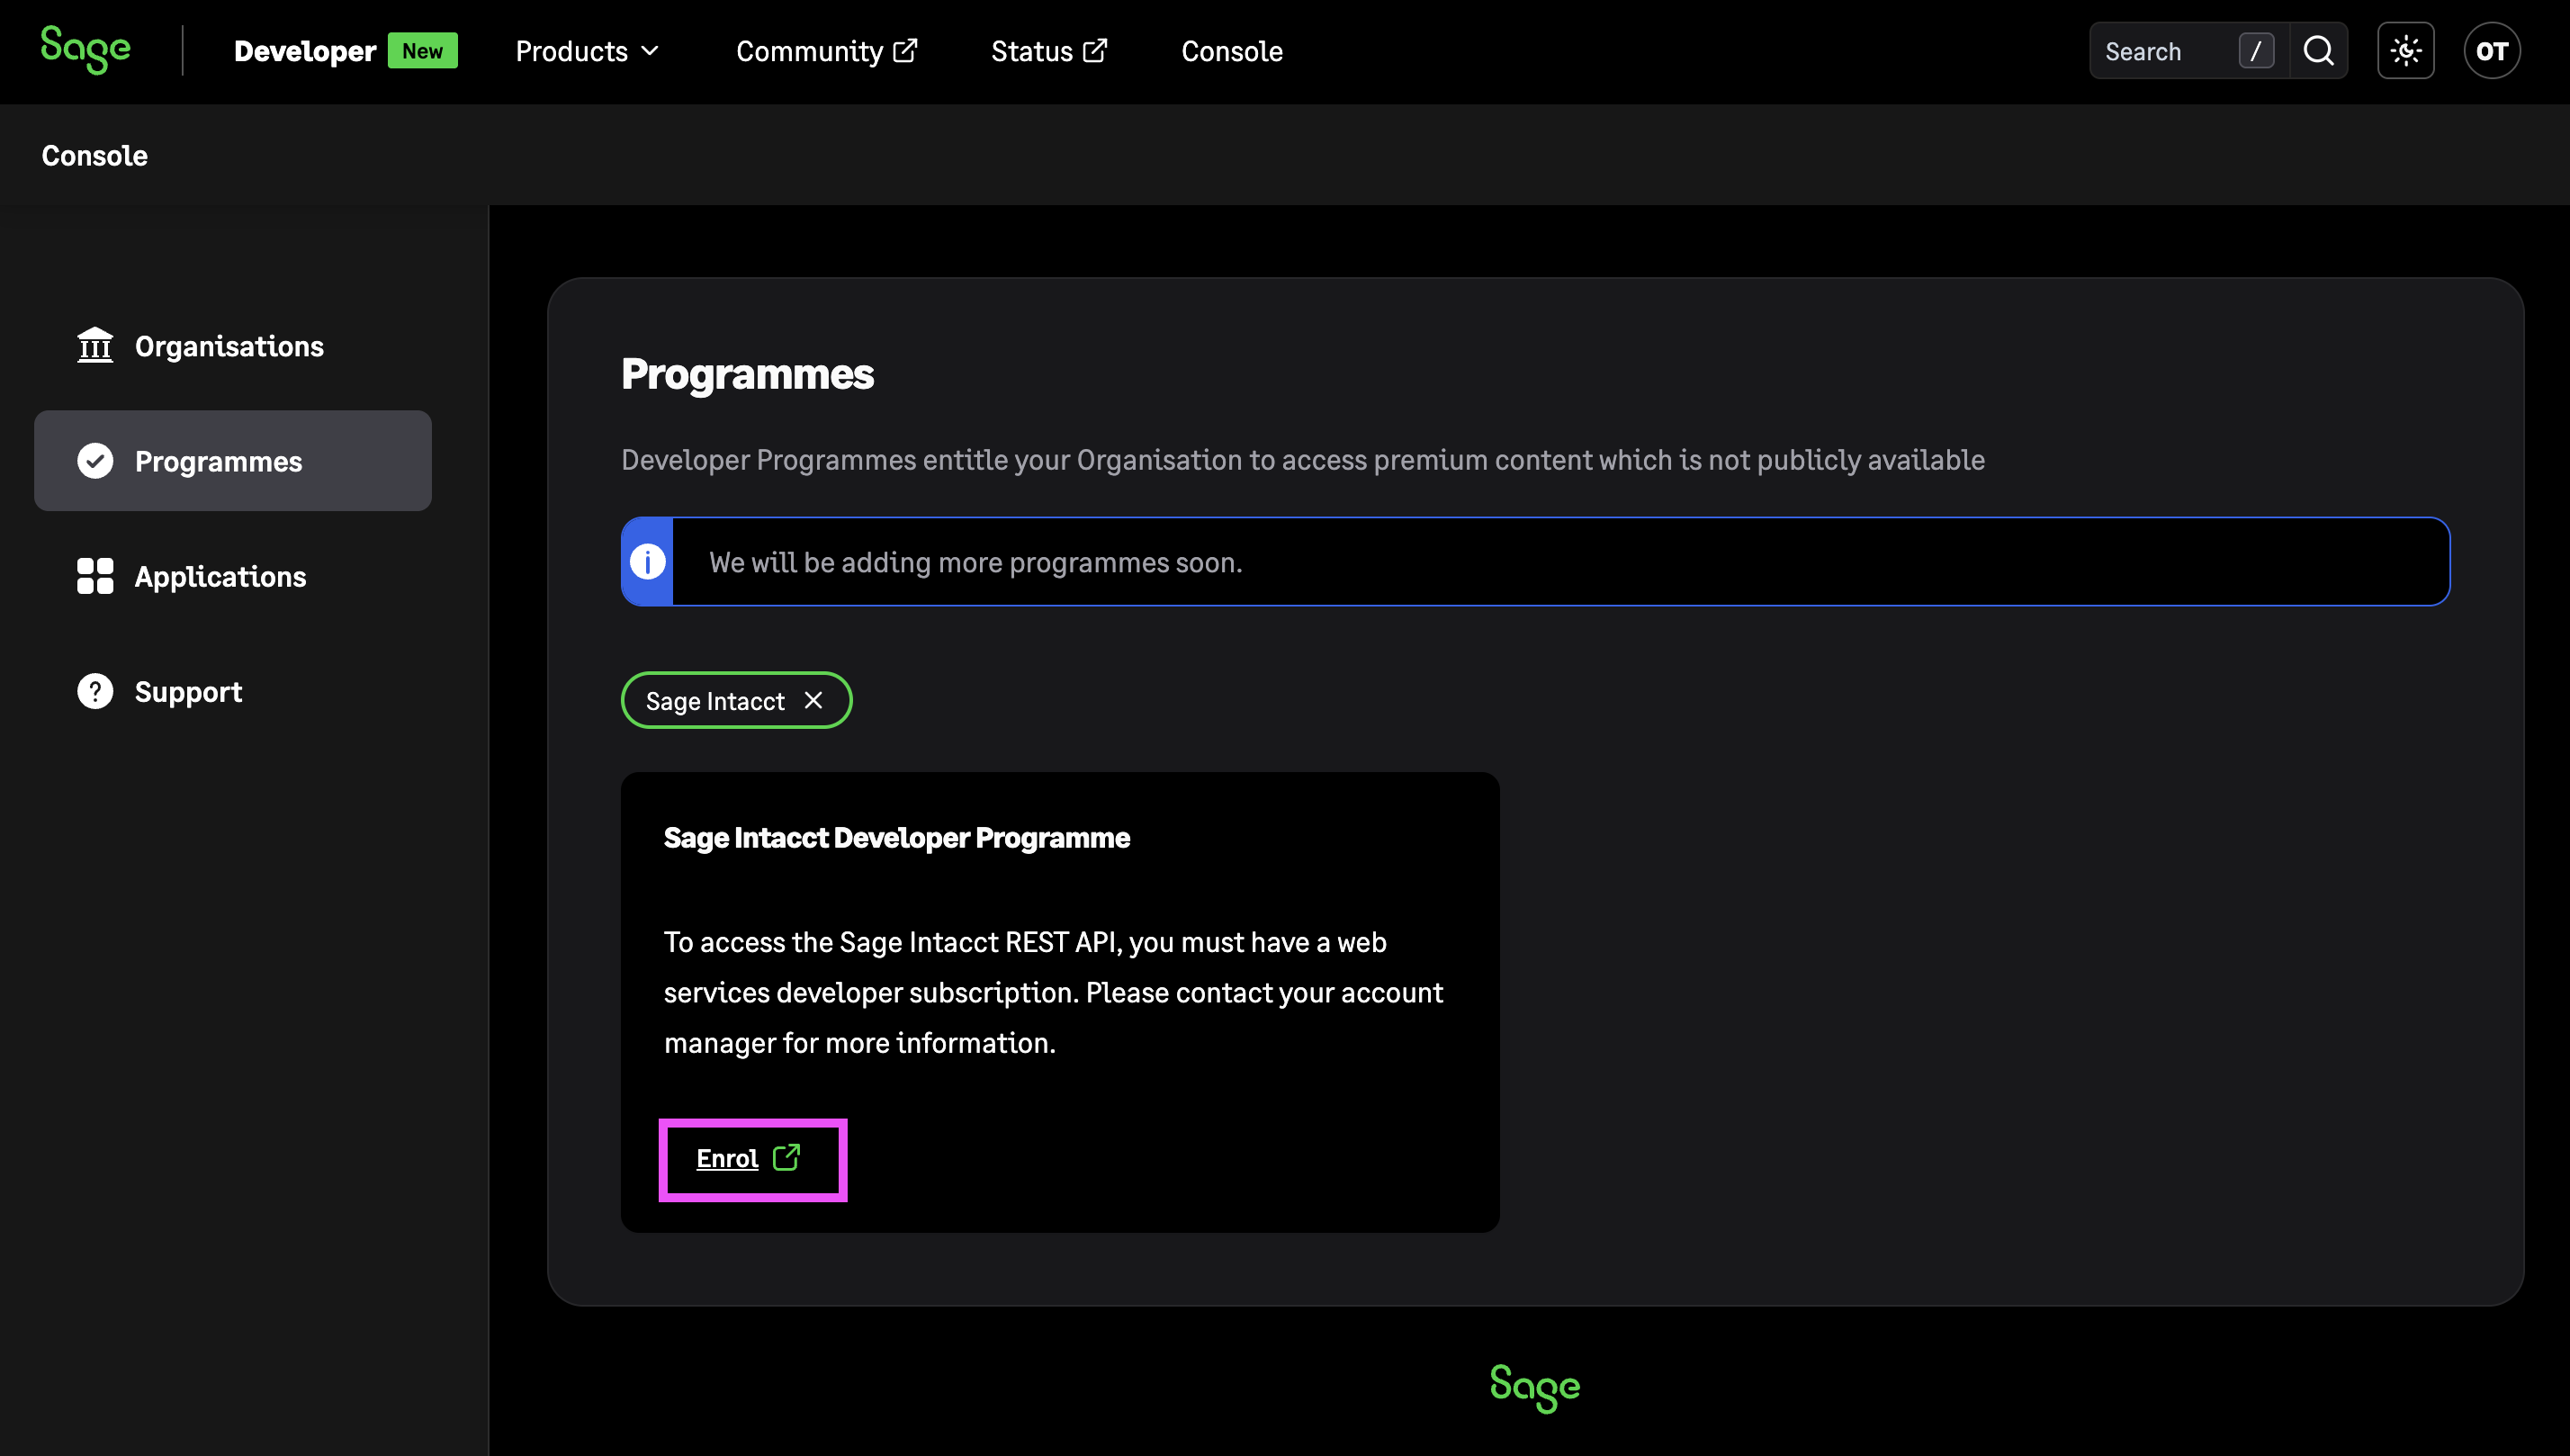
A dialog will appear asking for your Intacct Web Services License Key — this is your Sender ID referenced in Step 1. Paste it in and click Enroll.
Once enrollment is confirmed, continue with step 4b below.
4b. Select Applications on the sidebar and create a new application.

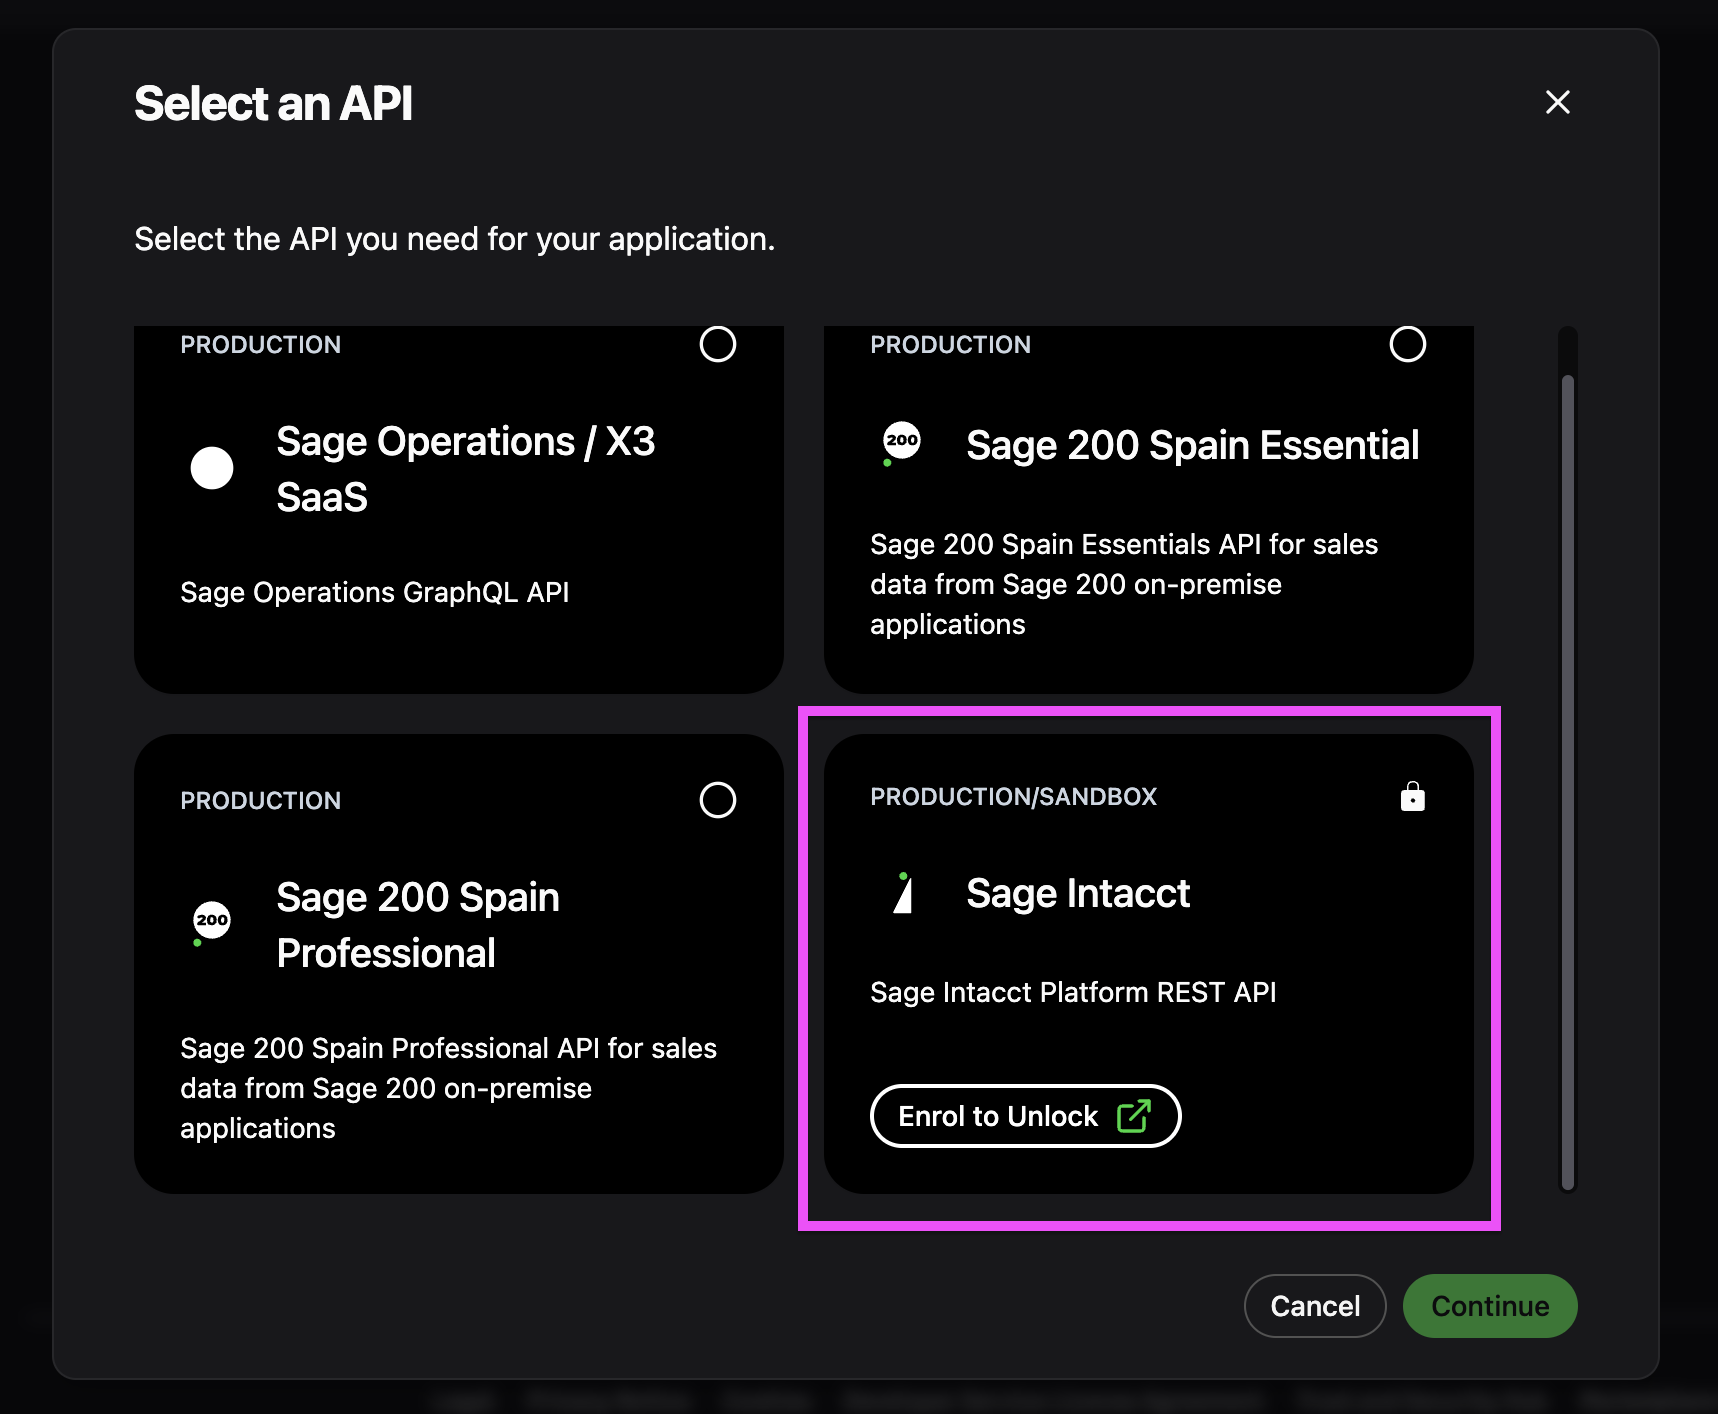
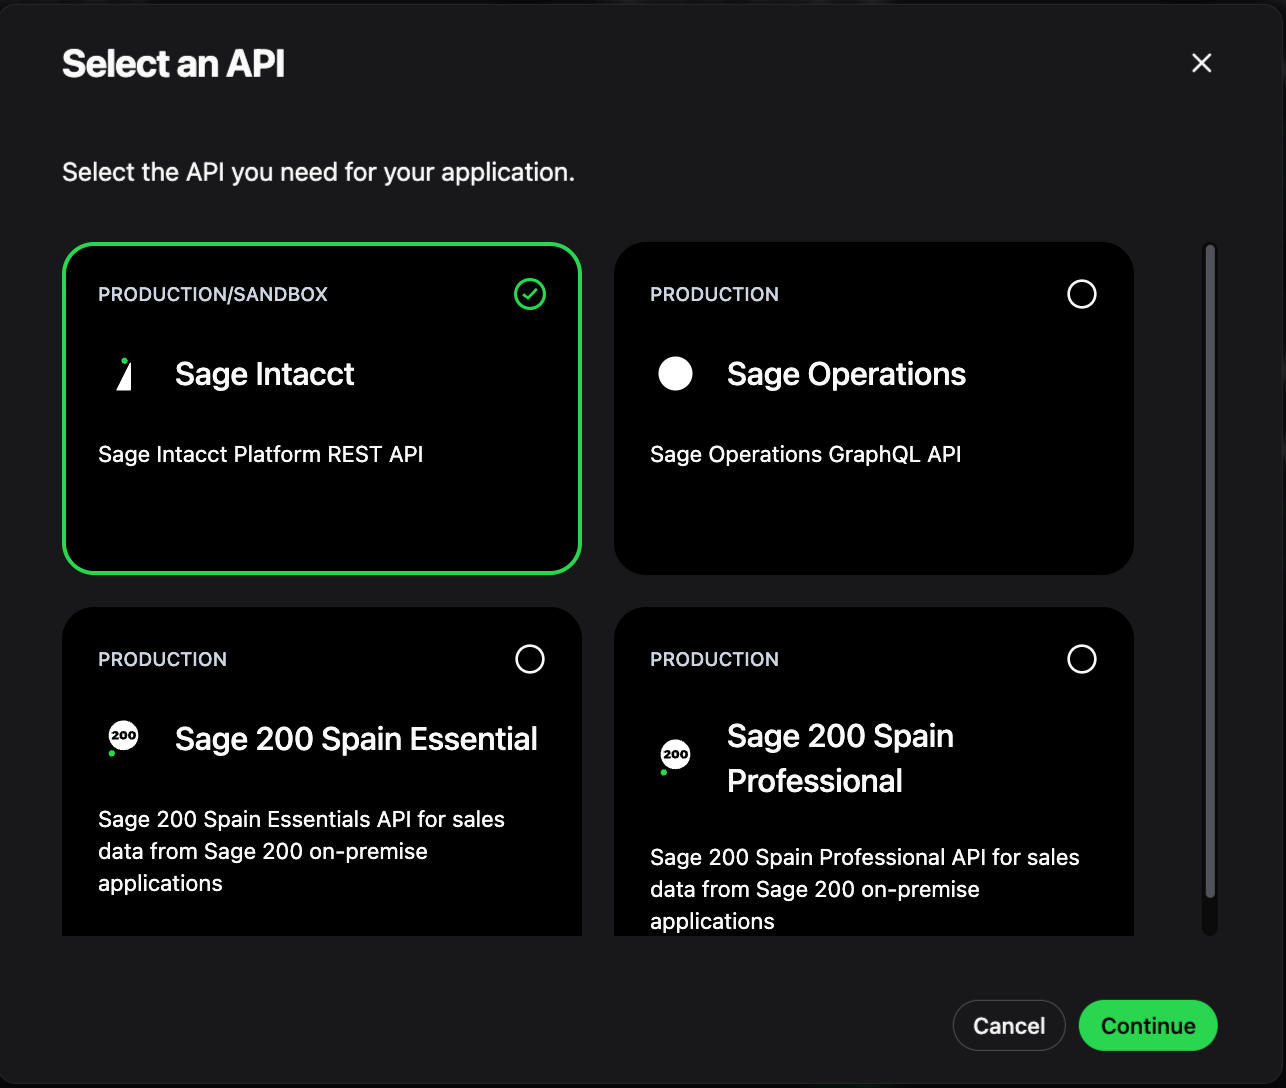
4c. Select the Sage Intacct API.
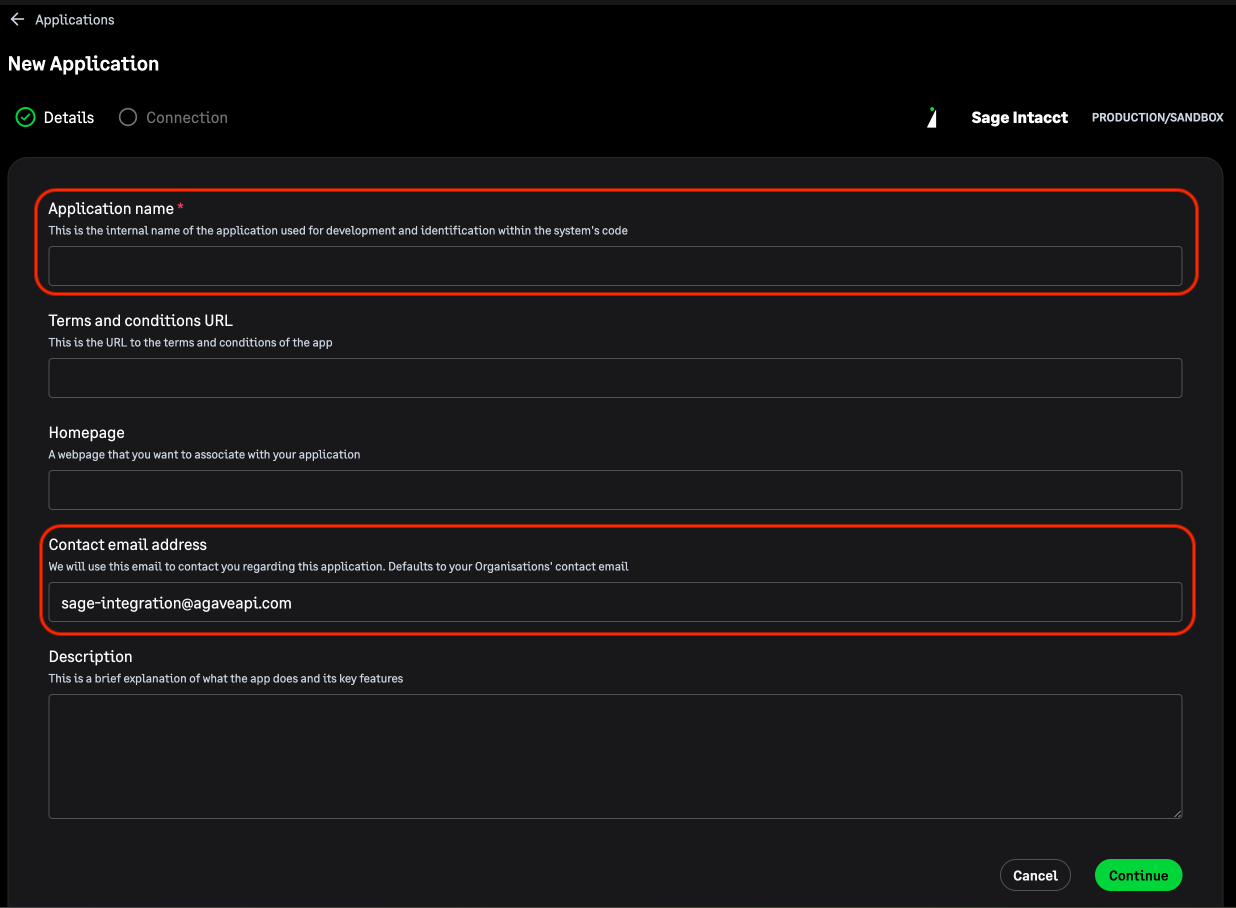
4d. Enter "Agave Customer" as the Application Name and your email address as the Contact Email Address.
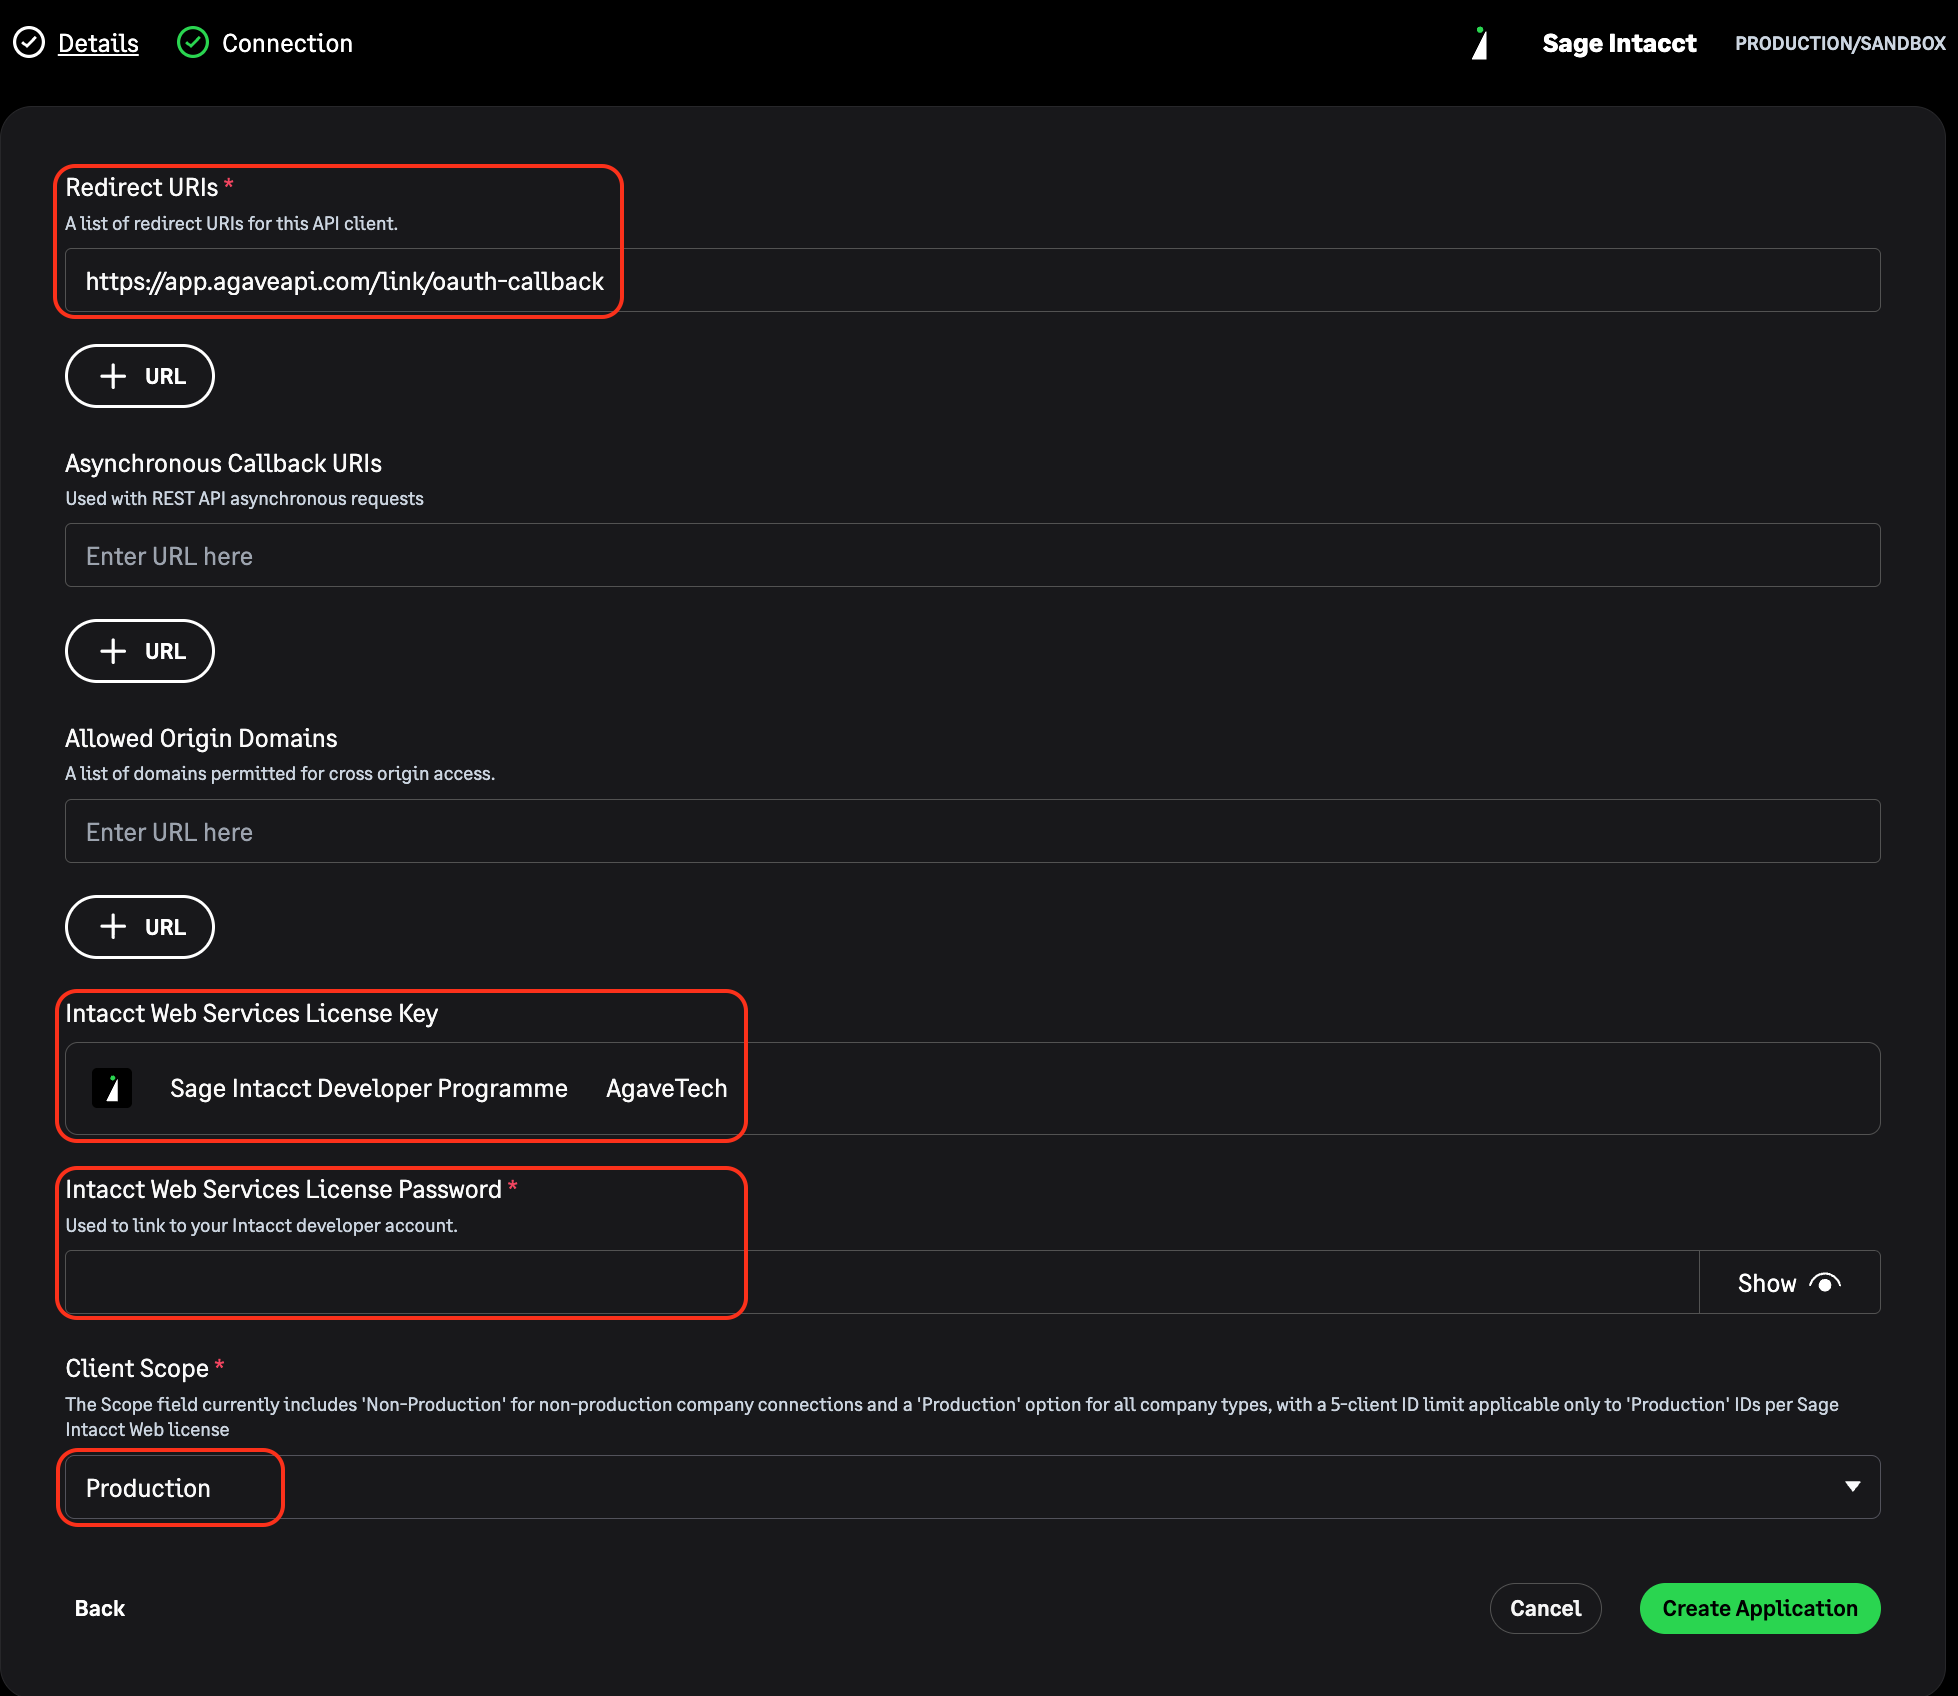
4e. Enter https://app.agaveapi.com/link/oauth-callback as the redirect URI, set Client Scope to production, and your Sage Intacct Web Services Sender Password for the password. You can leave the Async Callback URI and Allowed Origin Domains blank.
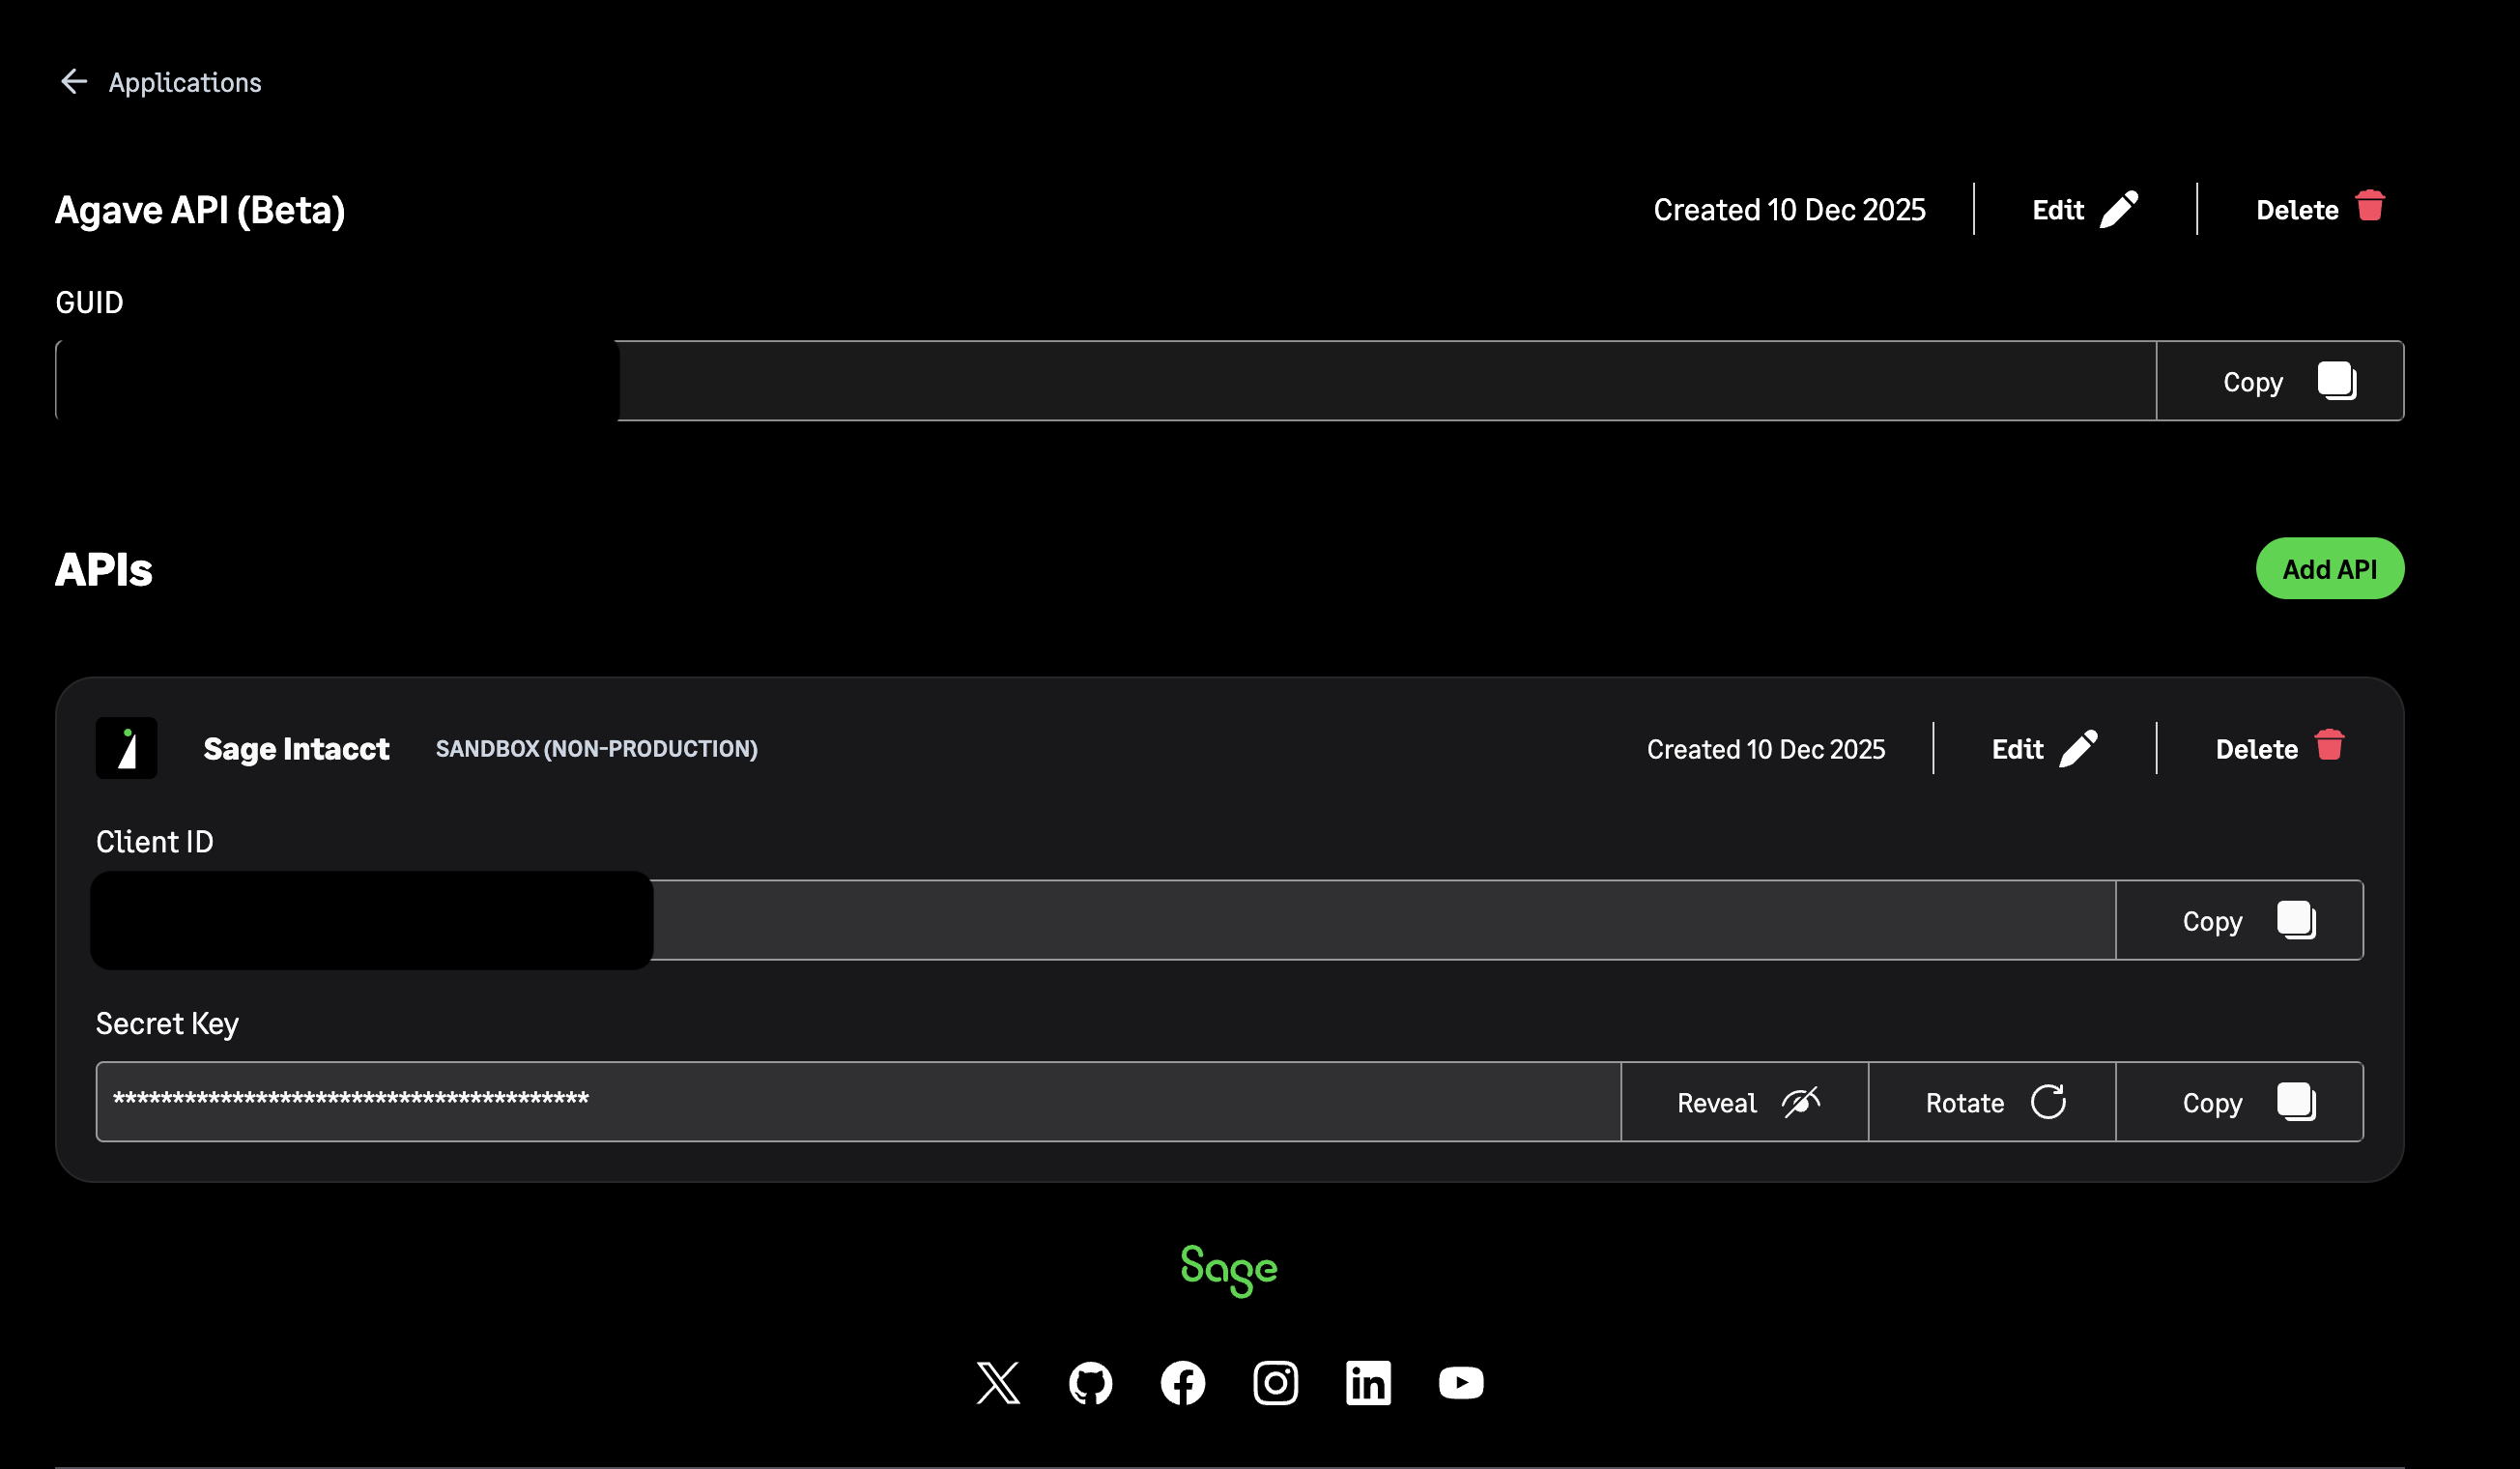
4f. Upon completion, you should receive a GUID, Client ID, and Secret Key.
Step 5: Authorize Client Application in Sage Intacct
5a. Open Sage Intacct at the top-level entity and navigate to Company --> Setup --> Company --> Security.
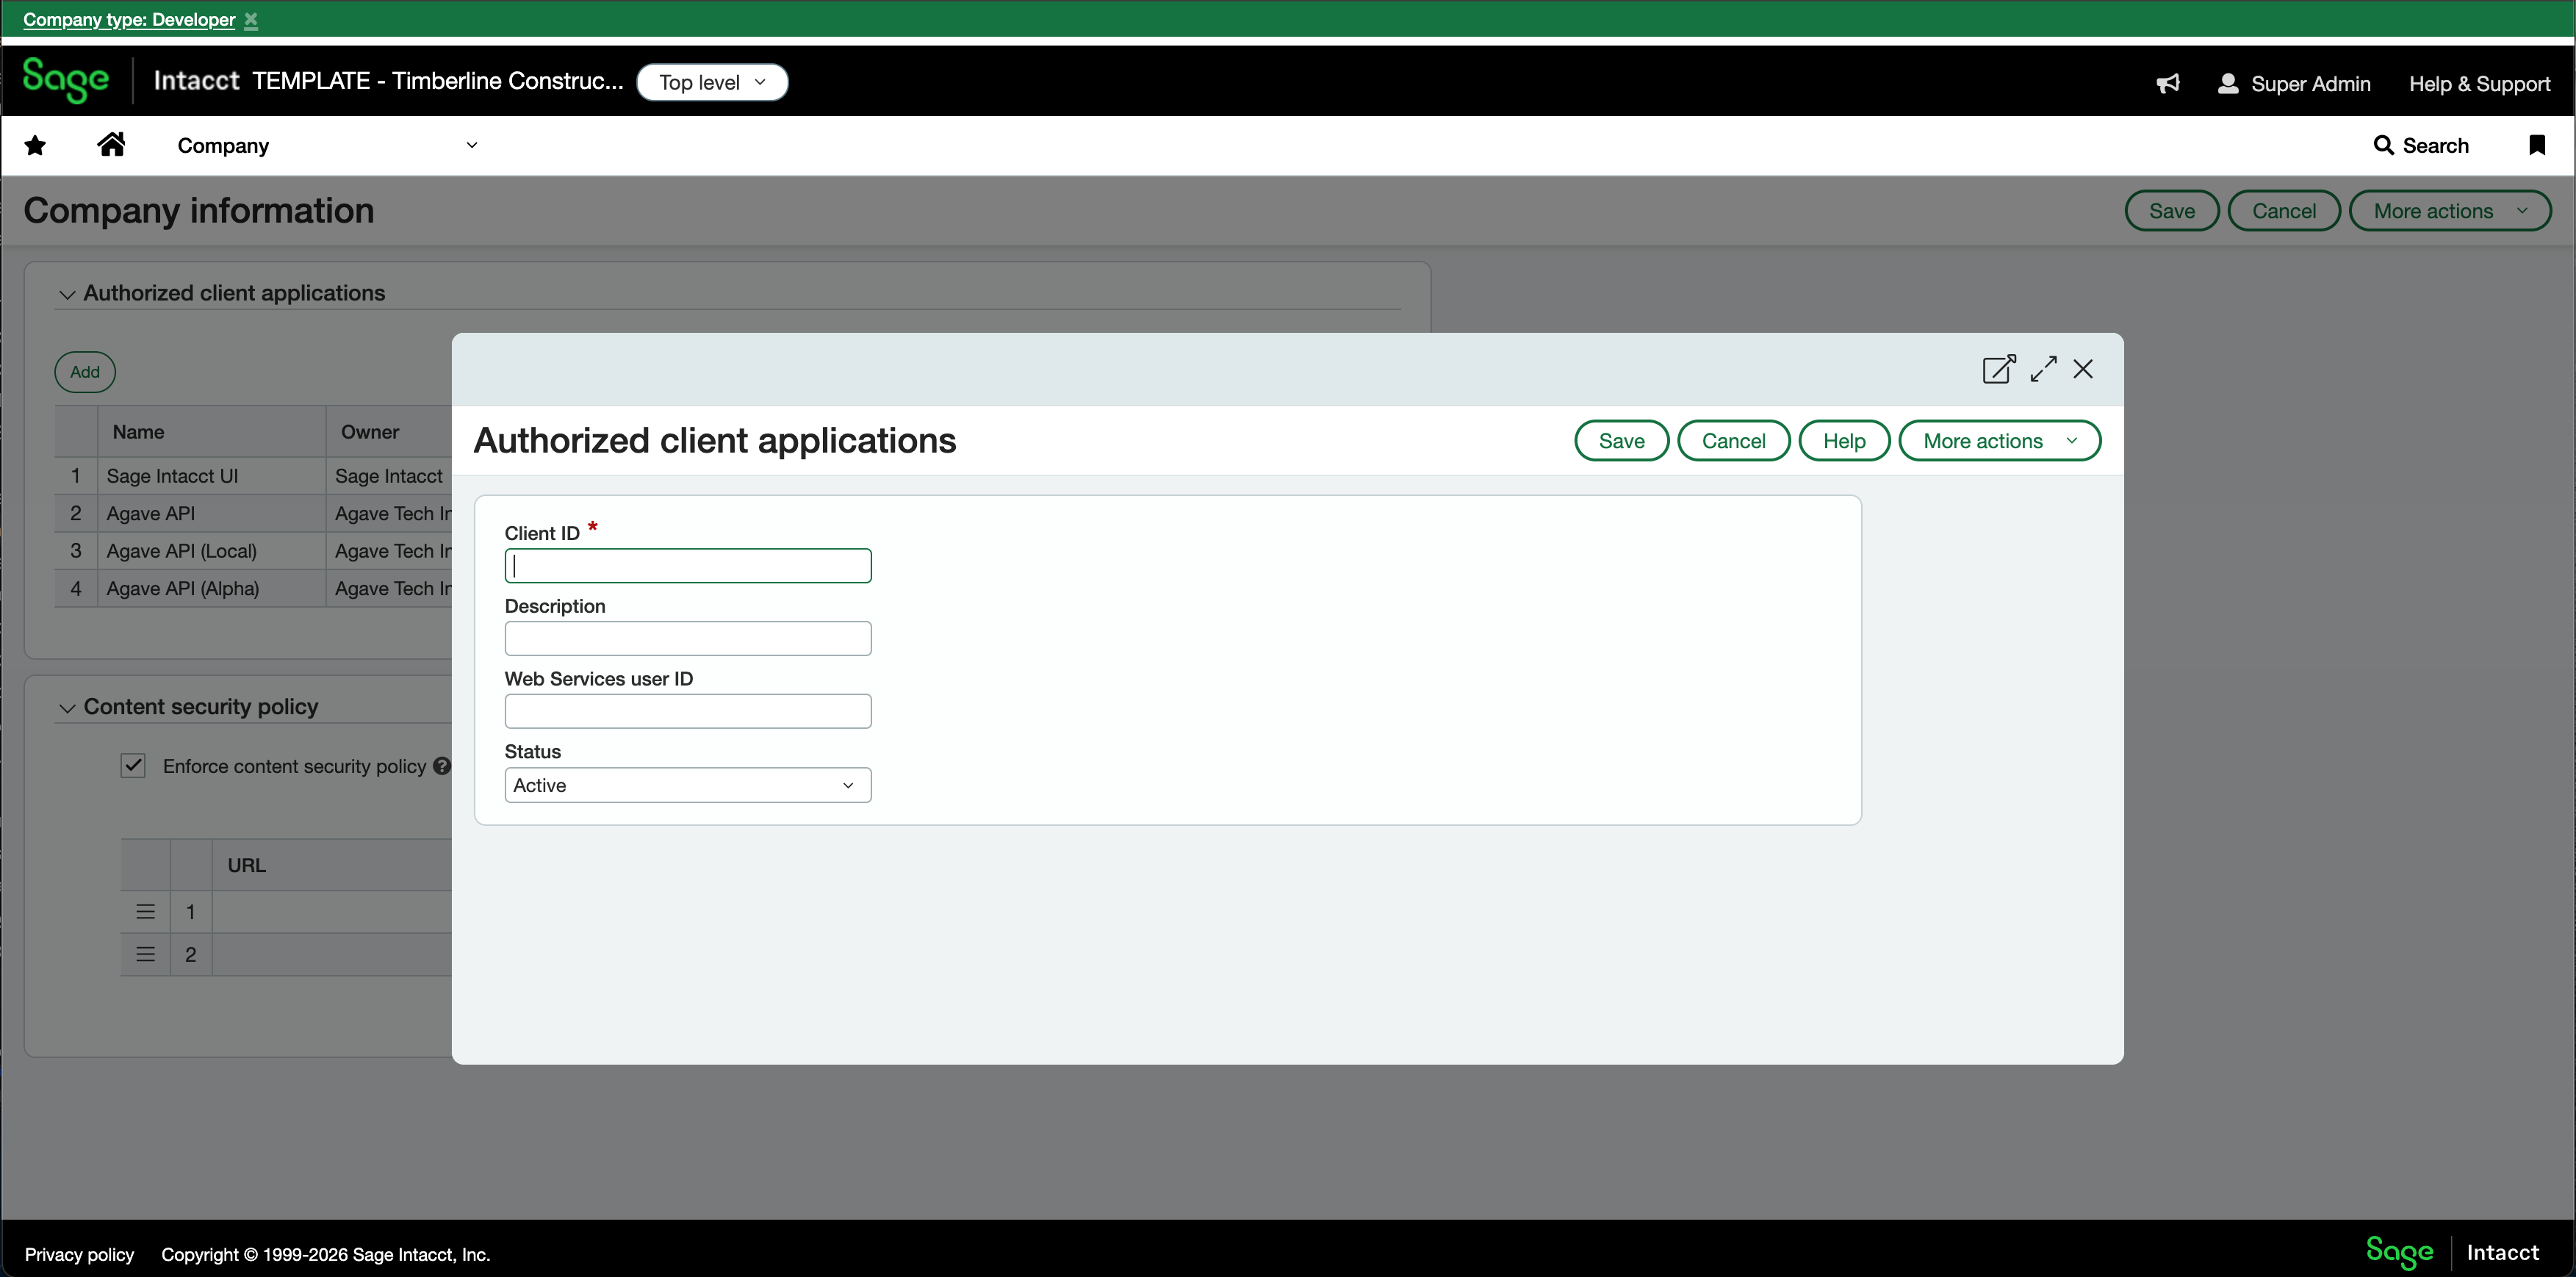
5b. Under Authorized client applications, click Add, then populate the Client ID from Step 4 along with a description, leaving the Web Services user ID field blank, then hit Save.
Step 6: Authenticate with Sage Intacct in Agave
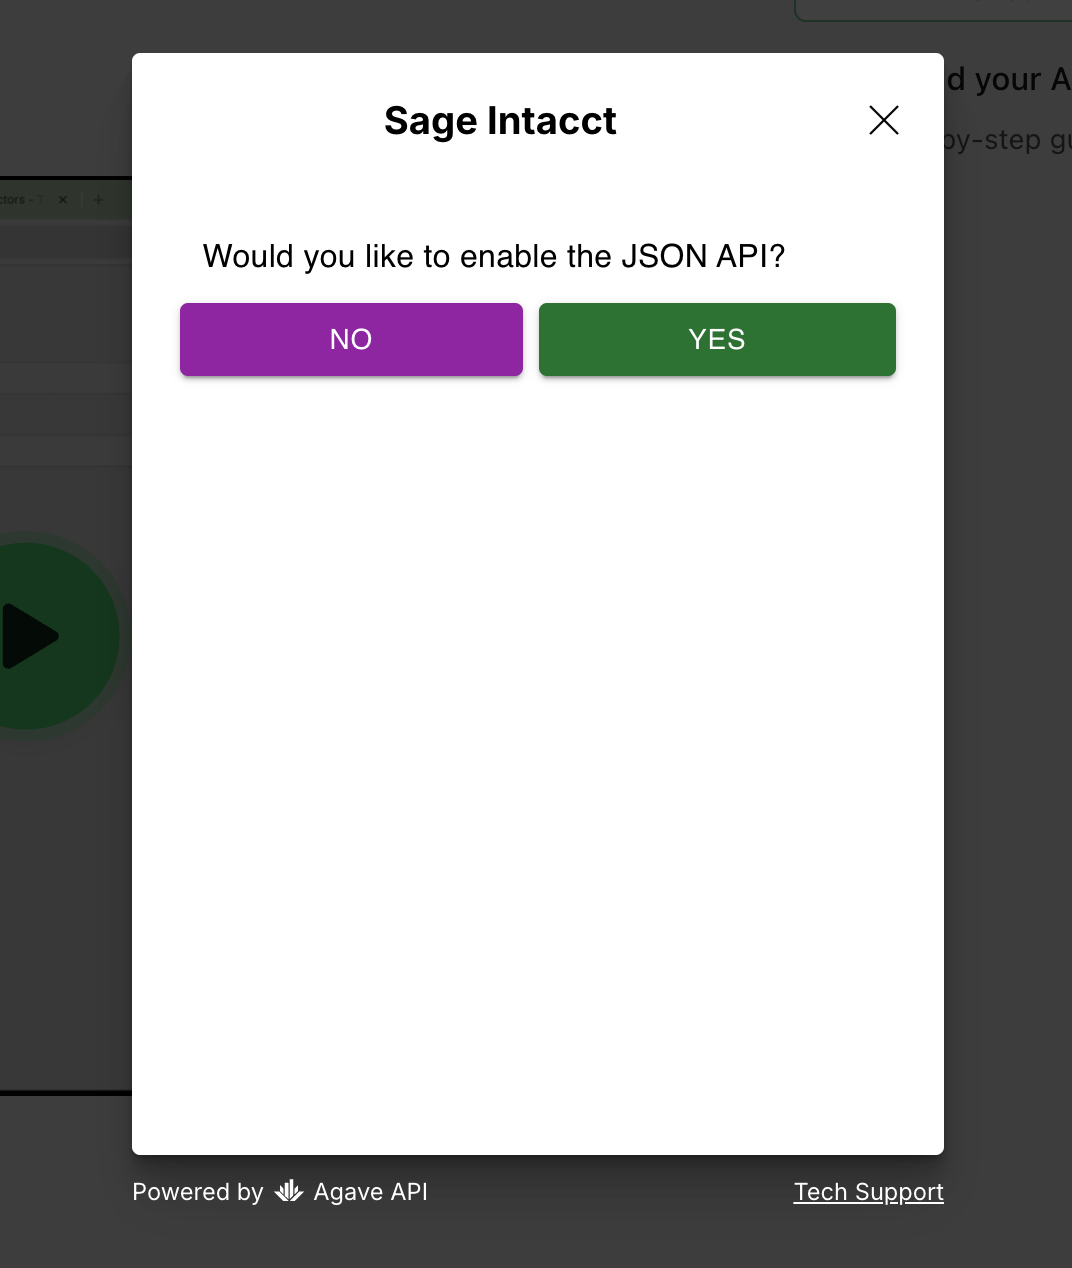
6a. Open Agave Link for Sage Intacct. You will first see a prompt asking "Would you like to enable the JSON API?" Click YES.
6b. Enter the Client ID and Client Secret from the API Application you created in Step 4, then click SUBMIT.

6c. You will be redirected to a Sage Intacct login page ("Authorize - Agave Customer wants to access Sage Intacct on my behalf"). Enter the following and click Log in:
- Company ID — your Sage Intacct Company ID (see the note below if you need help retrieving it).
- User ID — your Web Service User ID from Step 3 (this field is typically pre-filled as "Agave").
- Password — your Web Service User Password from Step 3.
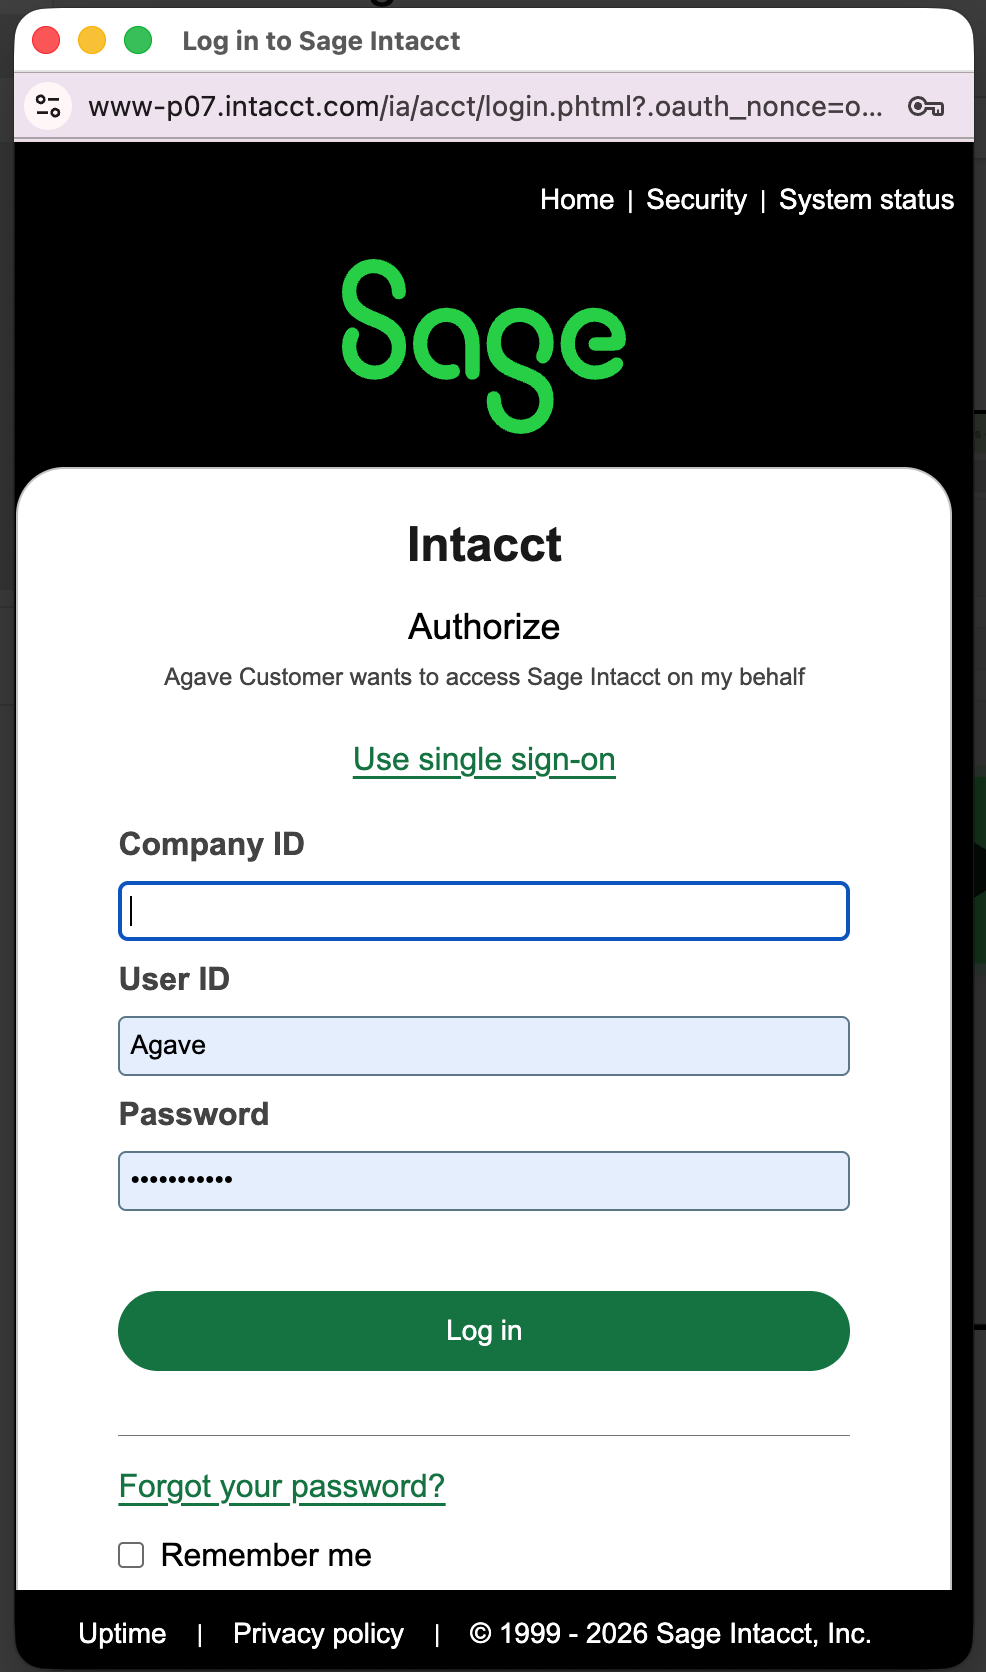
To determine your Company ID, select Applications → Company → Company in Sage Intacct. Your Company ID will appear at the top of the page.
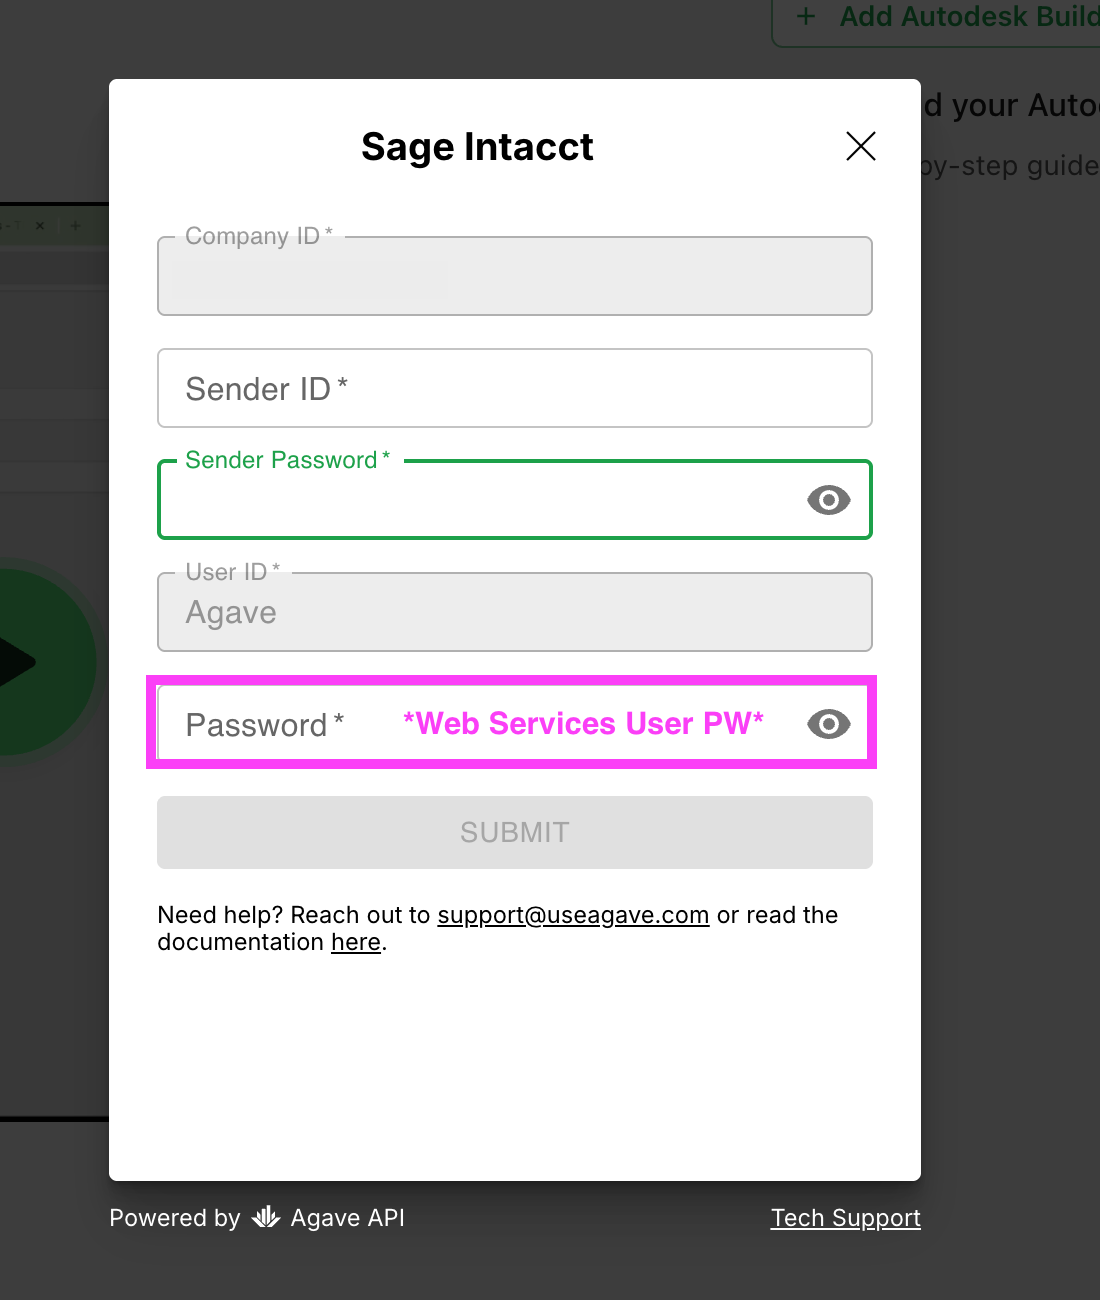
6d. You'll be returned to the Agave Link modal. Company ID and User ID will be pre-populated. Complete the remaining fields:
- Sender ID — the Web Service Sender ID provided by Sage when you activated your subscription.
- Sender Password — the Web Service Sender Password.
- Password — your Web Service User Password again (same value entered in 6c).
Click SUBMIT.
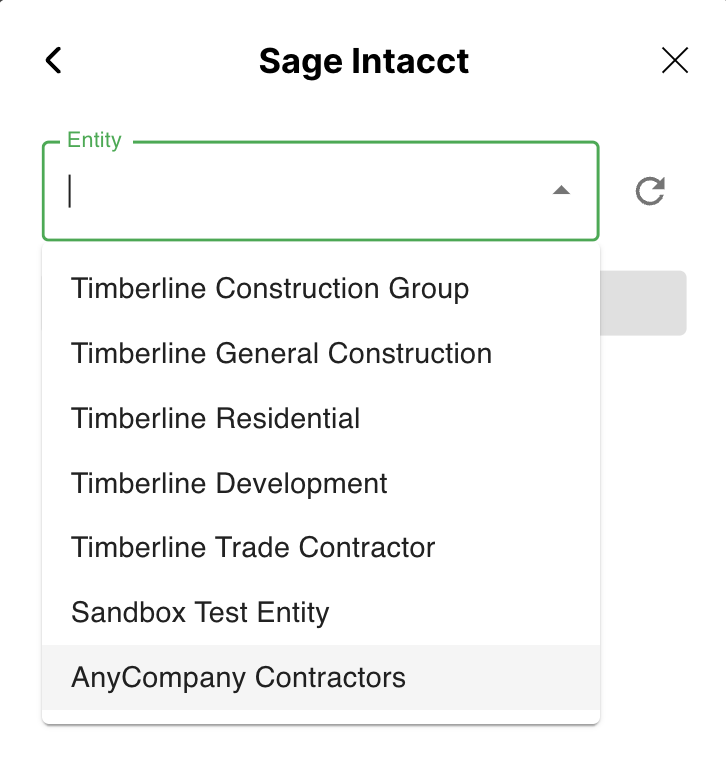
6e. On the next screen, select an Entity and press Confirm.