QuickBooks Desktop Authentication
To read and write data from and to QuickBooks Desktop through Agave, you need to have the QuickBooks Web Connector running on your PC at all times.
It will occupy one of your QuickBooks Desktop licenses.
Step 1: Install QuickBooks Web Connector
Download the latest version of the QuickBooks Web Connector from this link and follow the prompts in the download to complete the installation.
It is an Intuit application that enables web services to securely exchange data with QuickBooks Desktop.
Step 2: Open Company File
Ensure you are opening the company file with an Admin user.
Open the QuickBooks Desktop application and select "Open" for your company file.
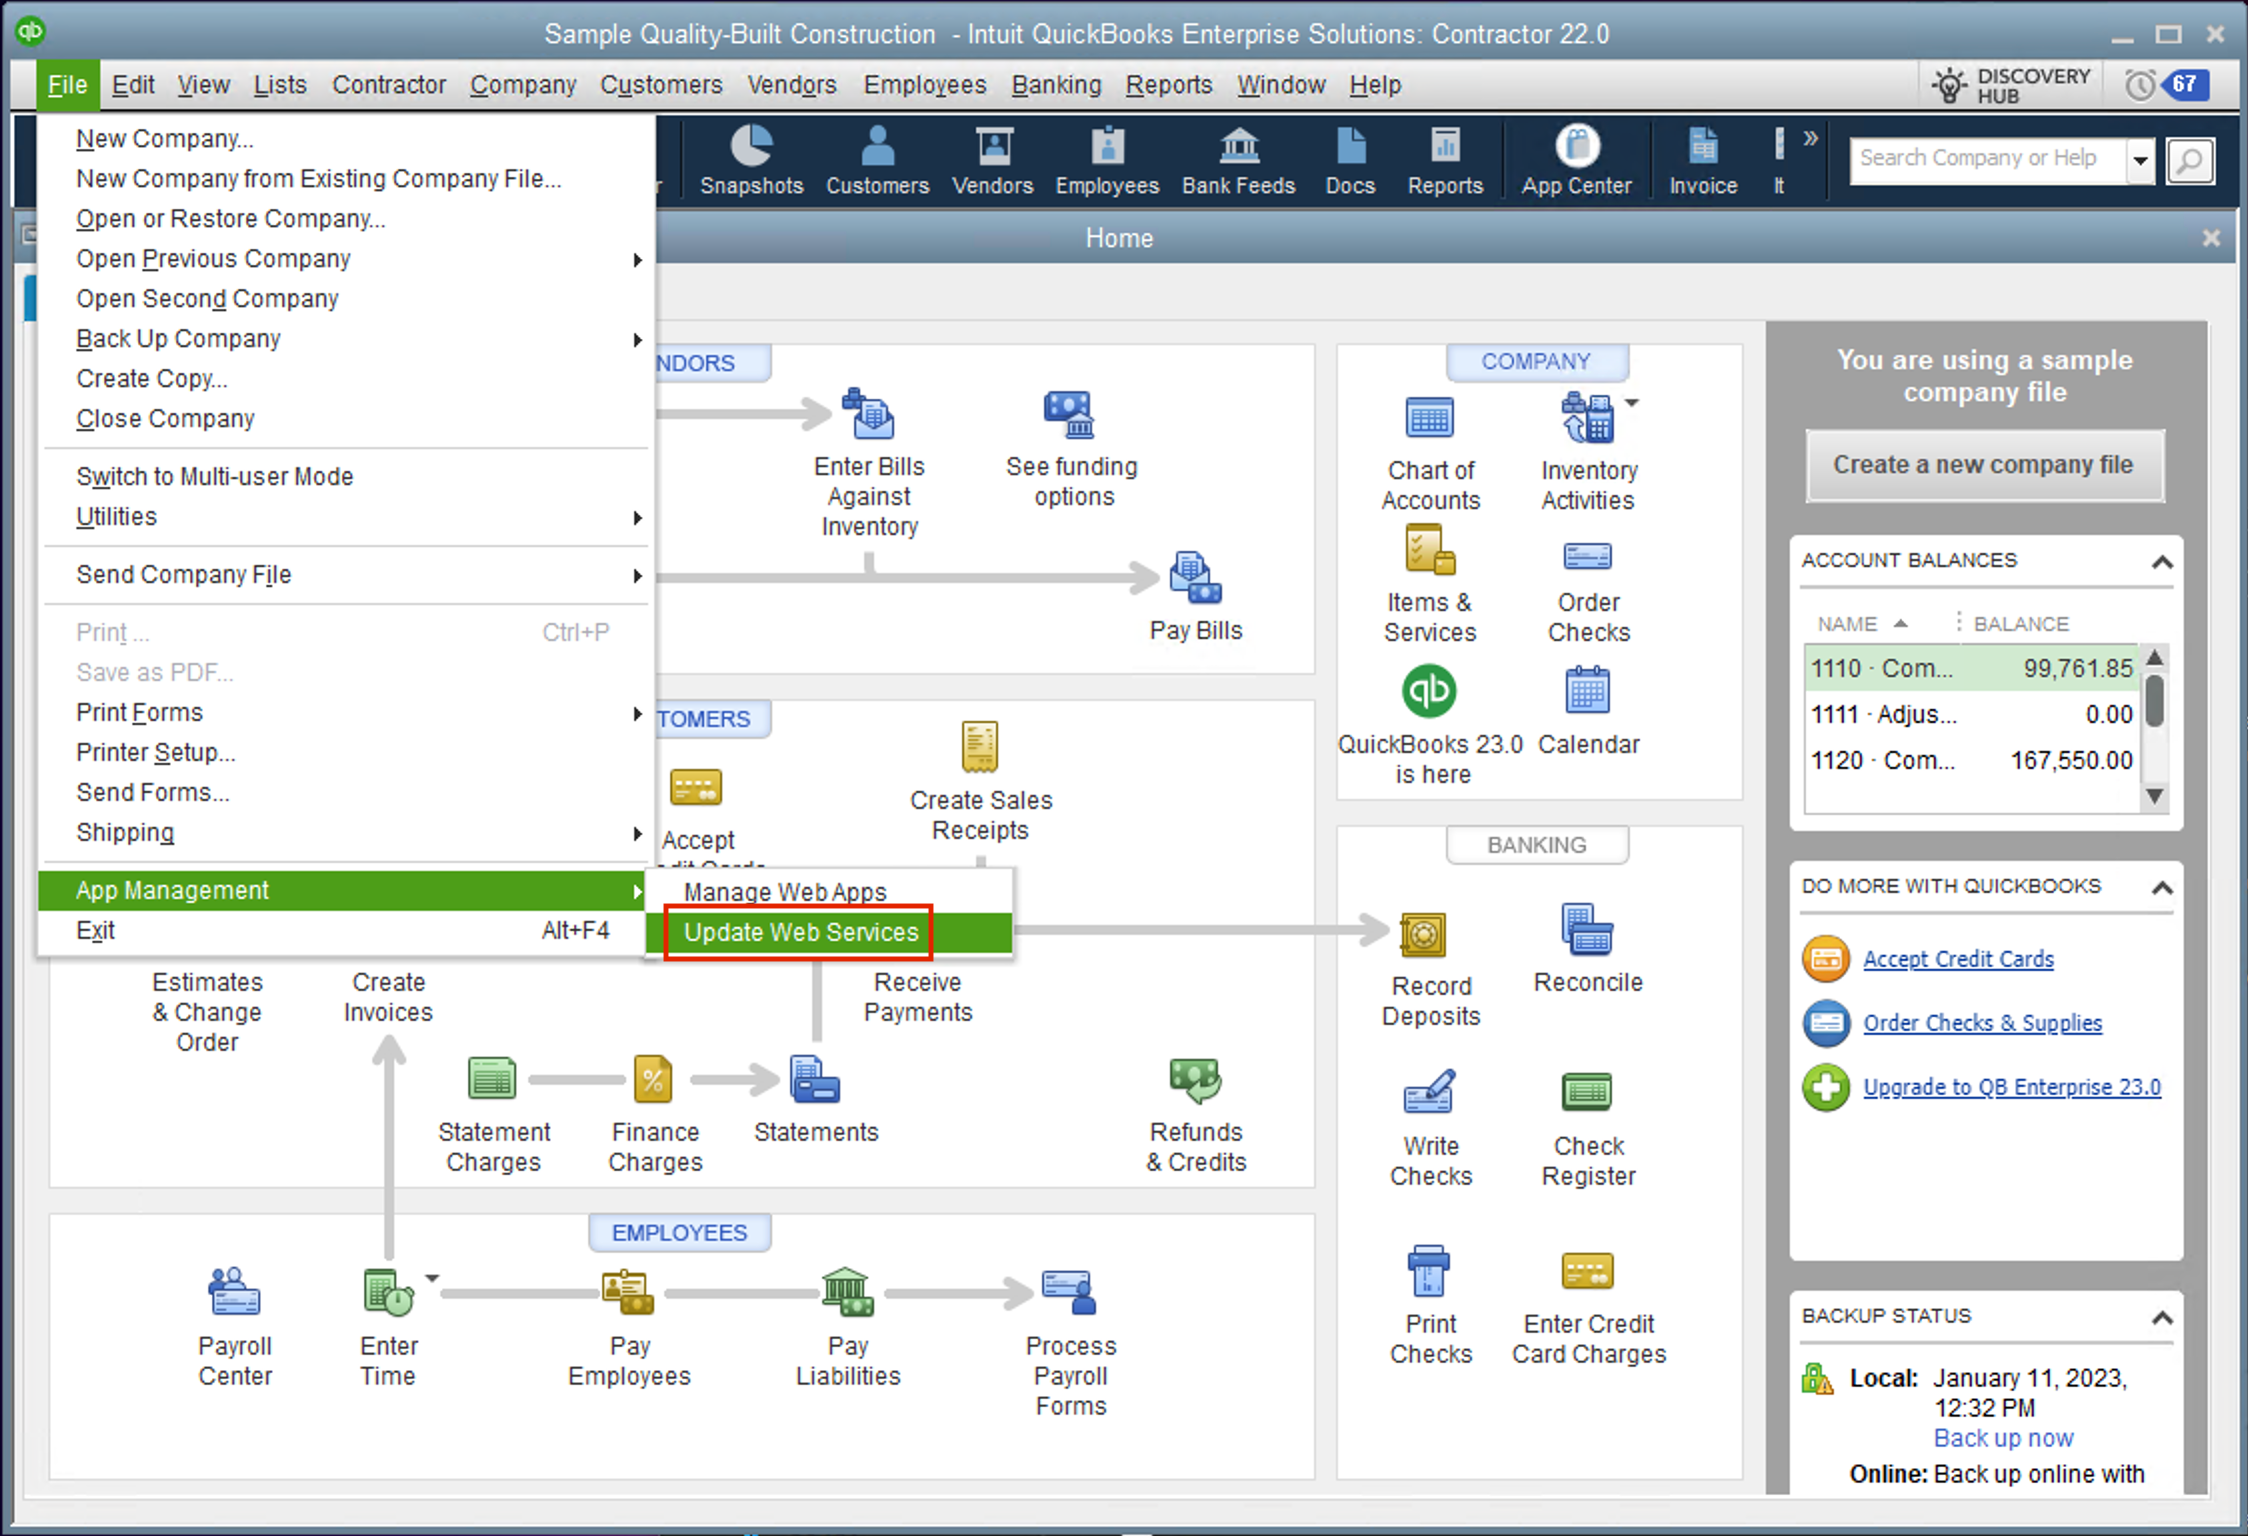
Step 3: Open QuickBooks Web Connector
Open QuickBooks Web Connector. You can open it by searching for it in the Windows Start menu, or by selecting "File → App Management → Update Web Services" in QuickBooks Desktop.
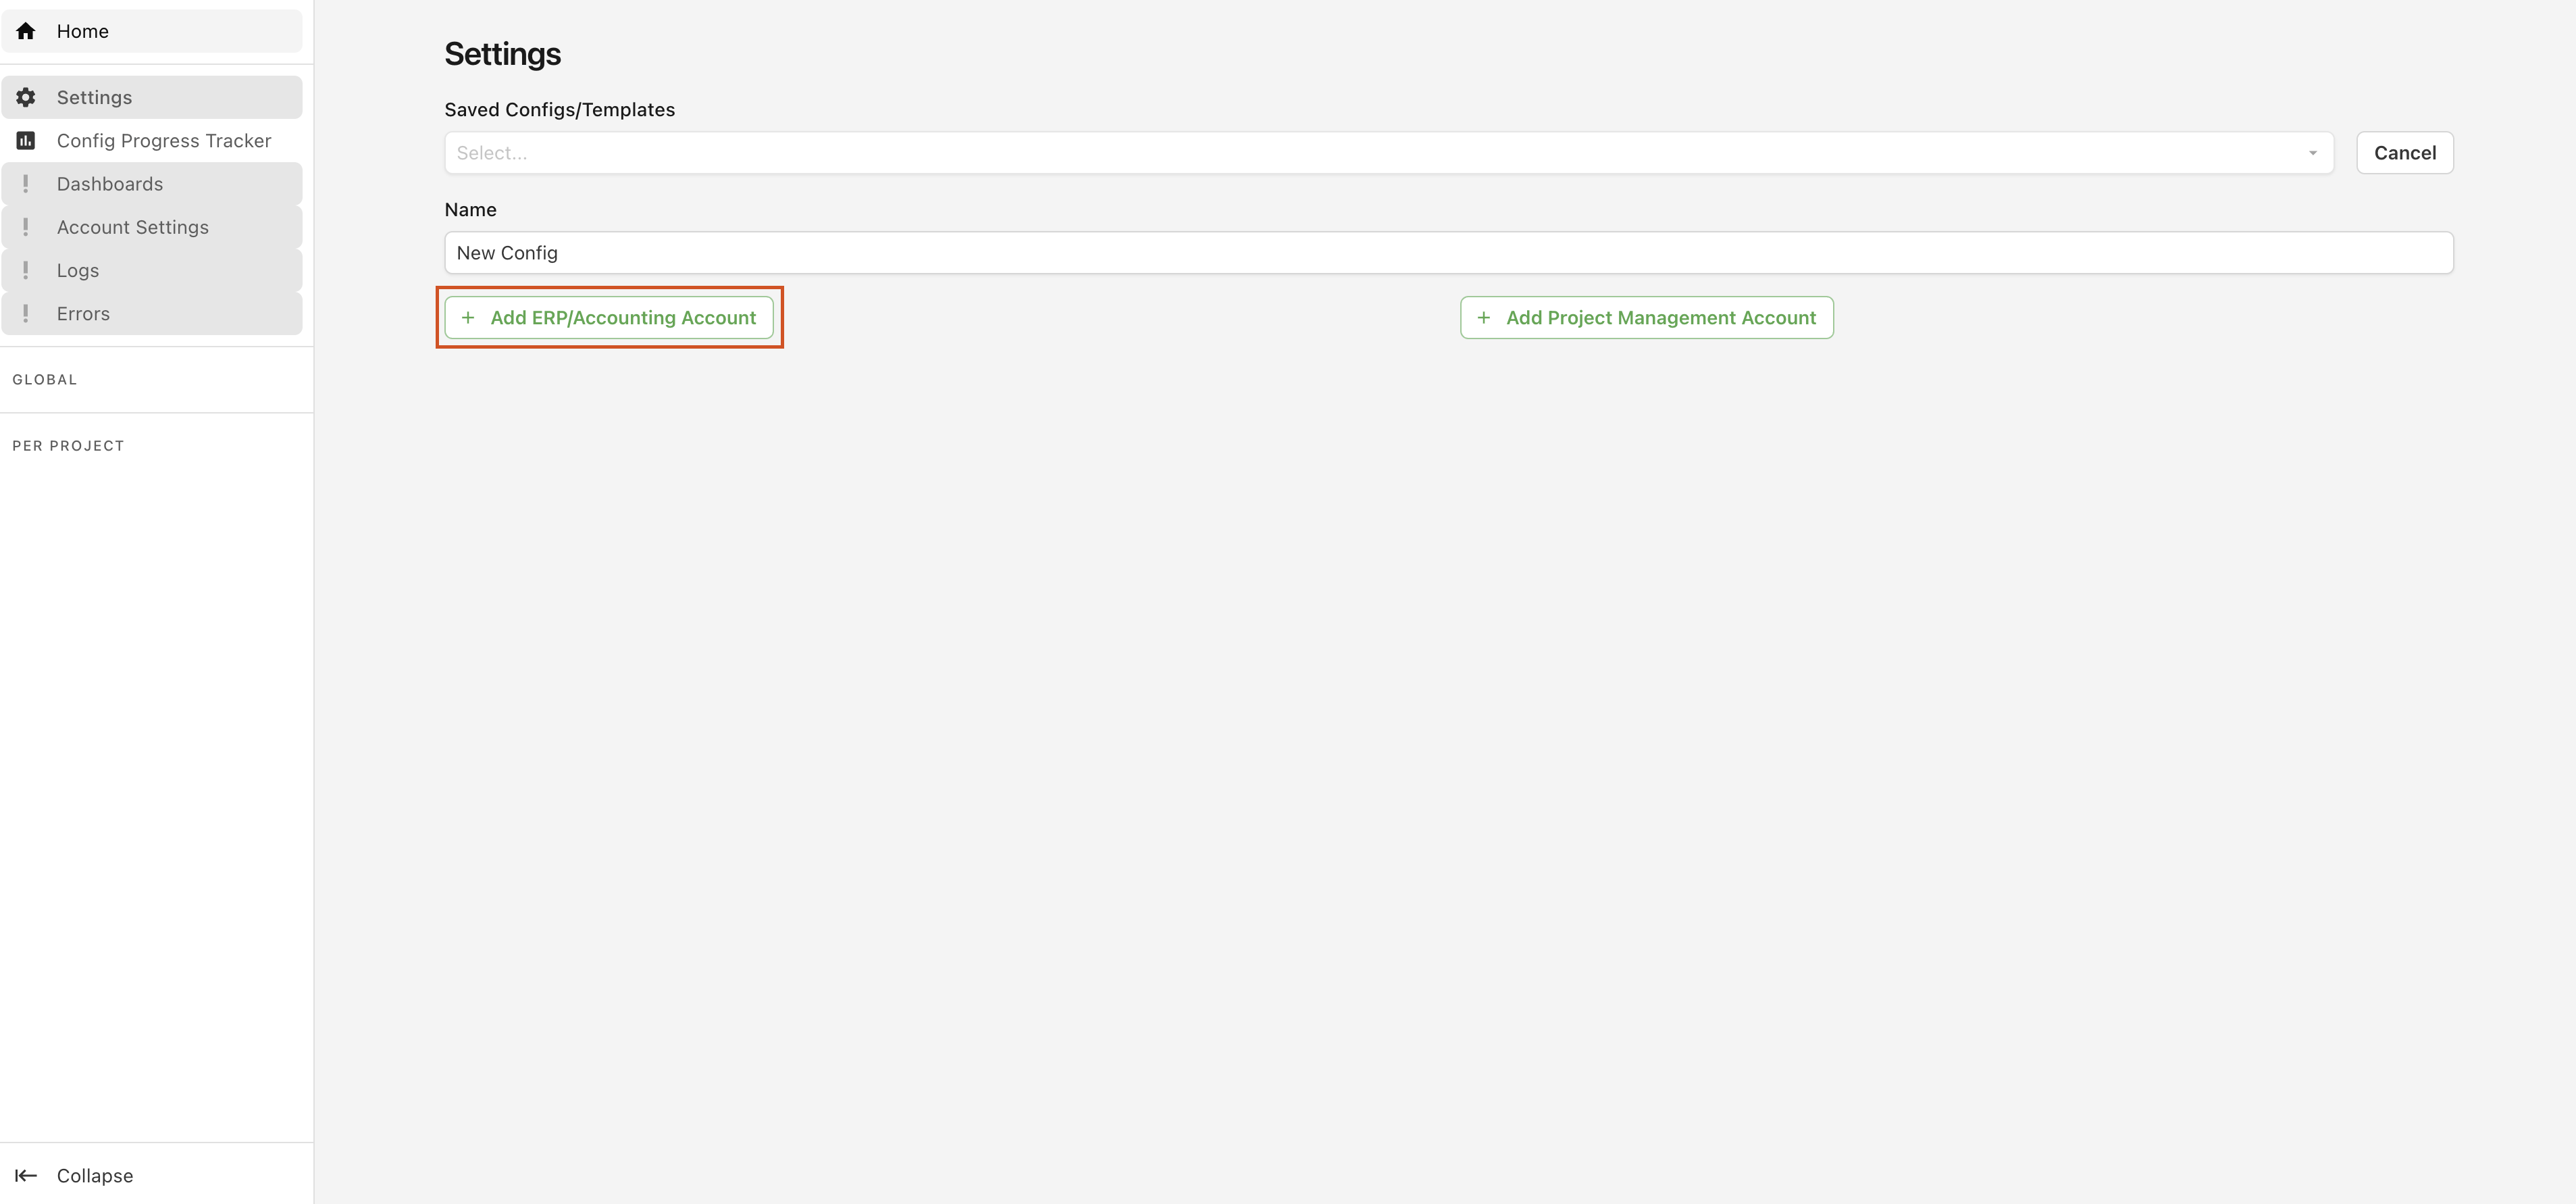
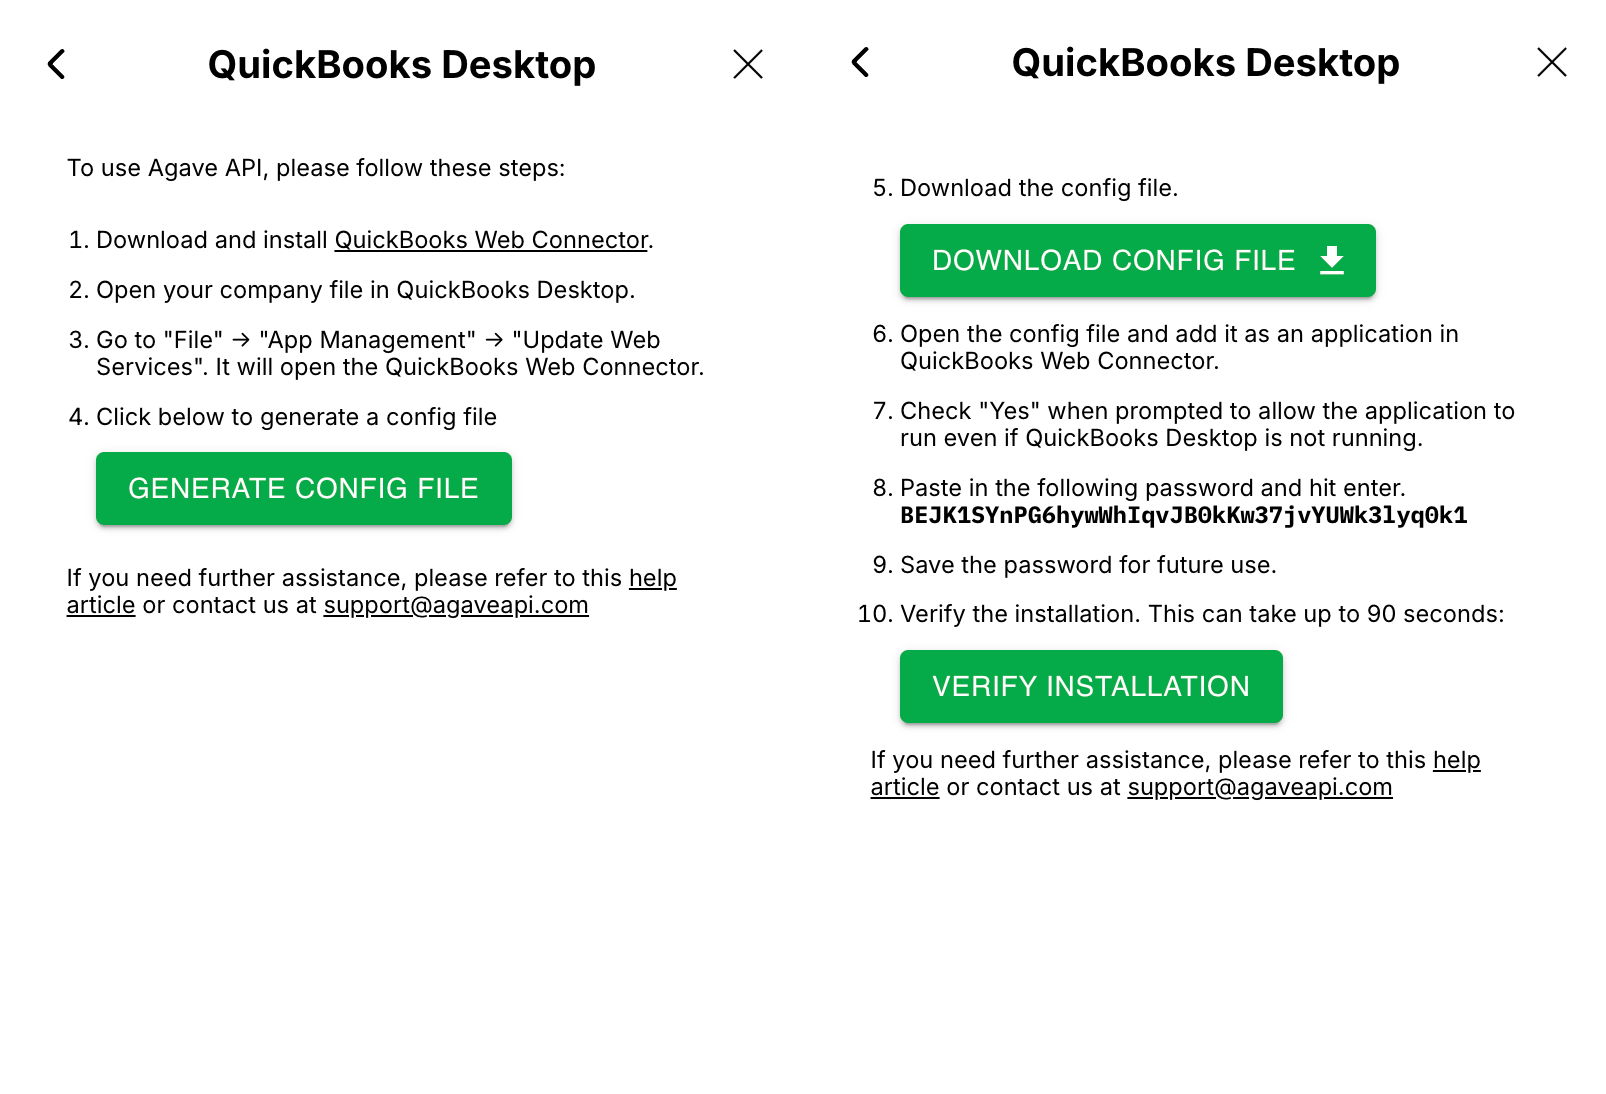
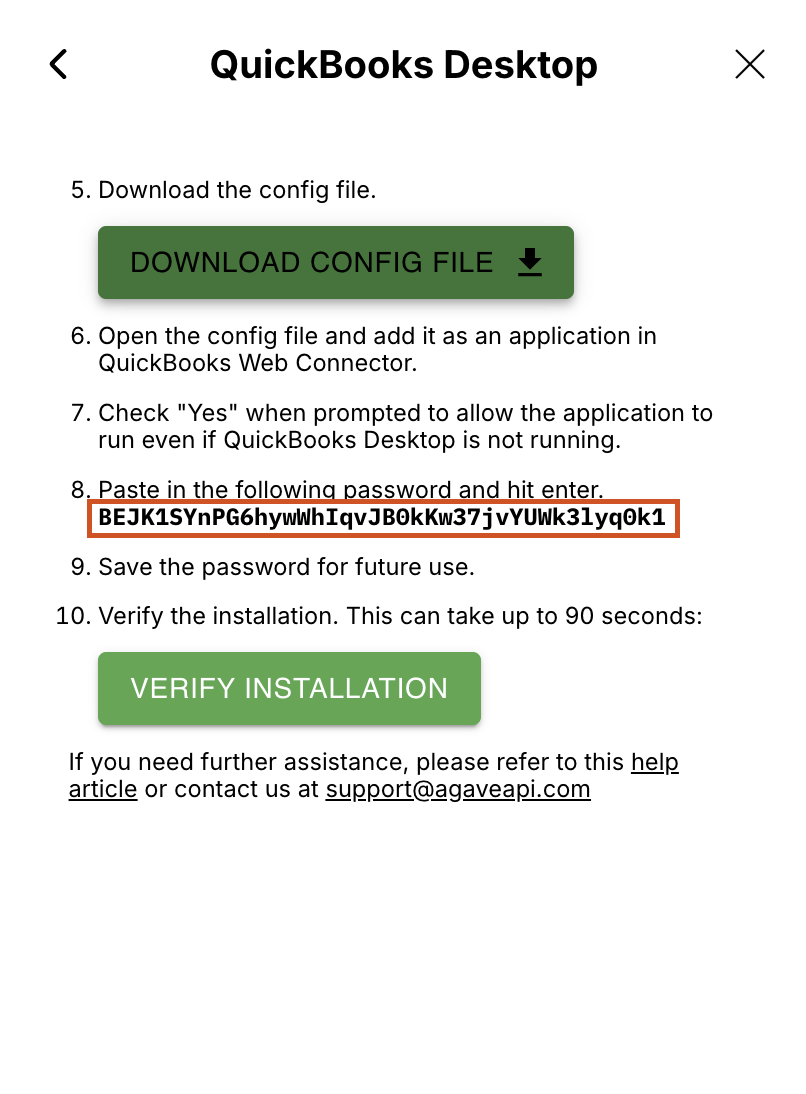
Step 4: Download the Config File
In Agave Sync, add a new ERP/Accounting Account and select QuickBooks Desktop as the source system. Click continue then select "Generate Config File" and download the config file (e.g. agave-3b84ff2e-f35d-4787-8840-e391ff8a1e4e.qwc).
Step 5: Authorize the App
Before opening the config file, make sure you have the correct company file open in QuickBooks Desktop, otherwise you will authorize access to the incorrect company file.
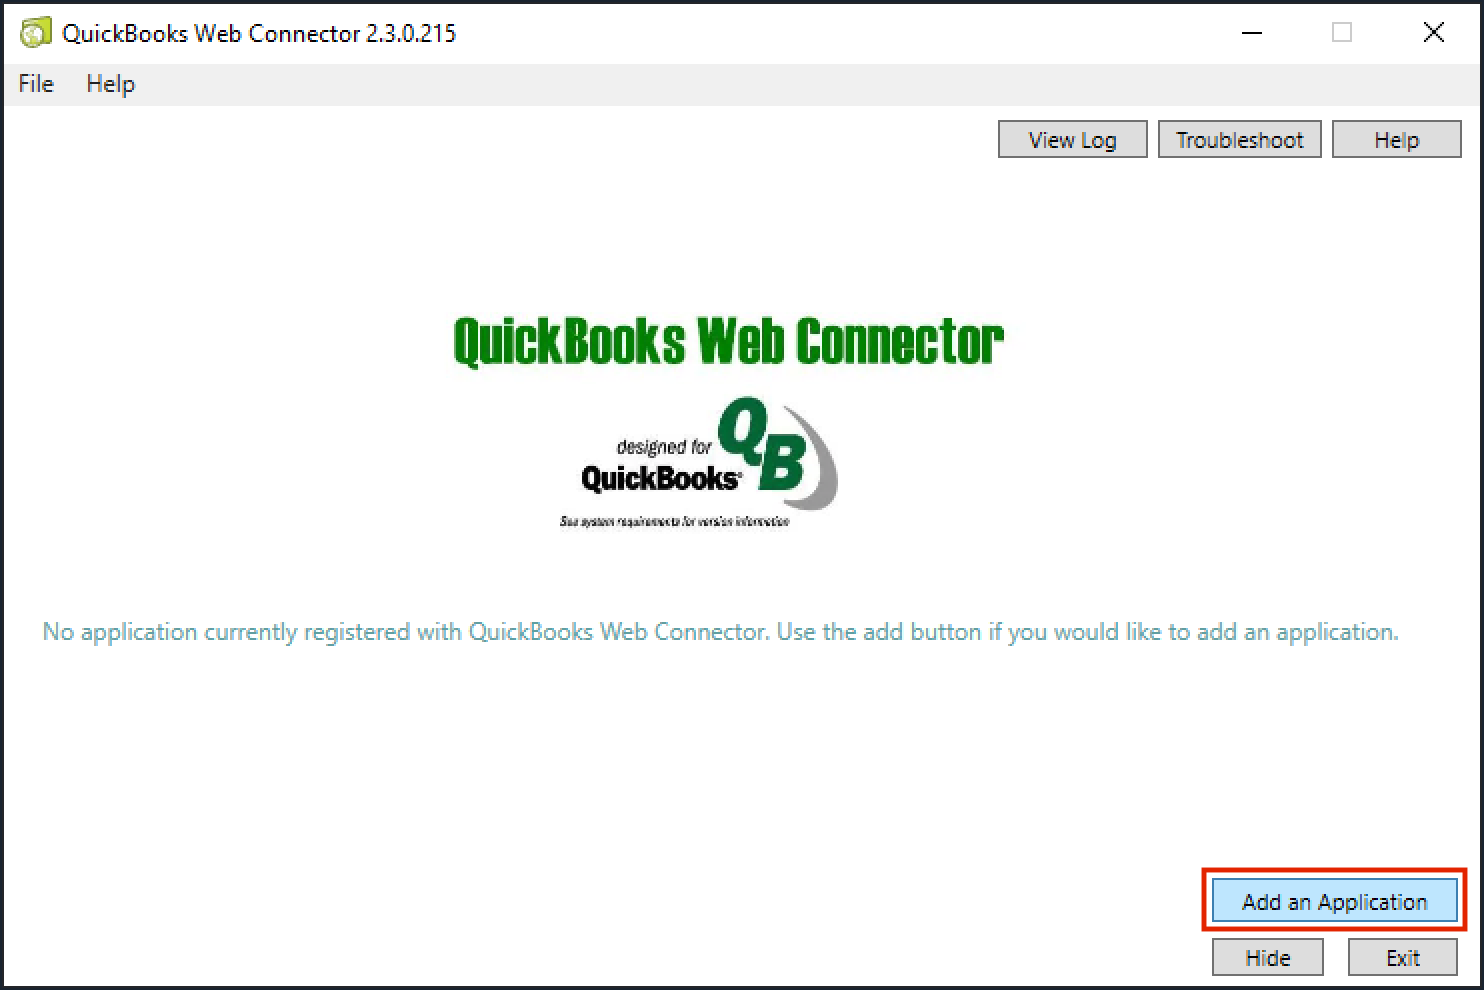
To open the file in QuickBooks Web connector, double-click it or select "Add an Application":
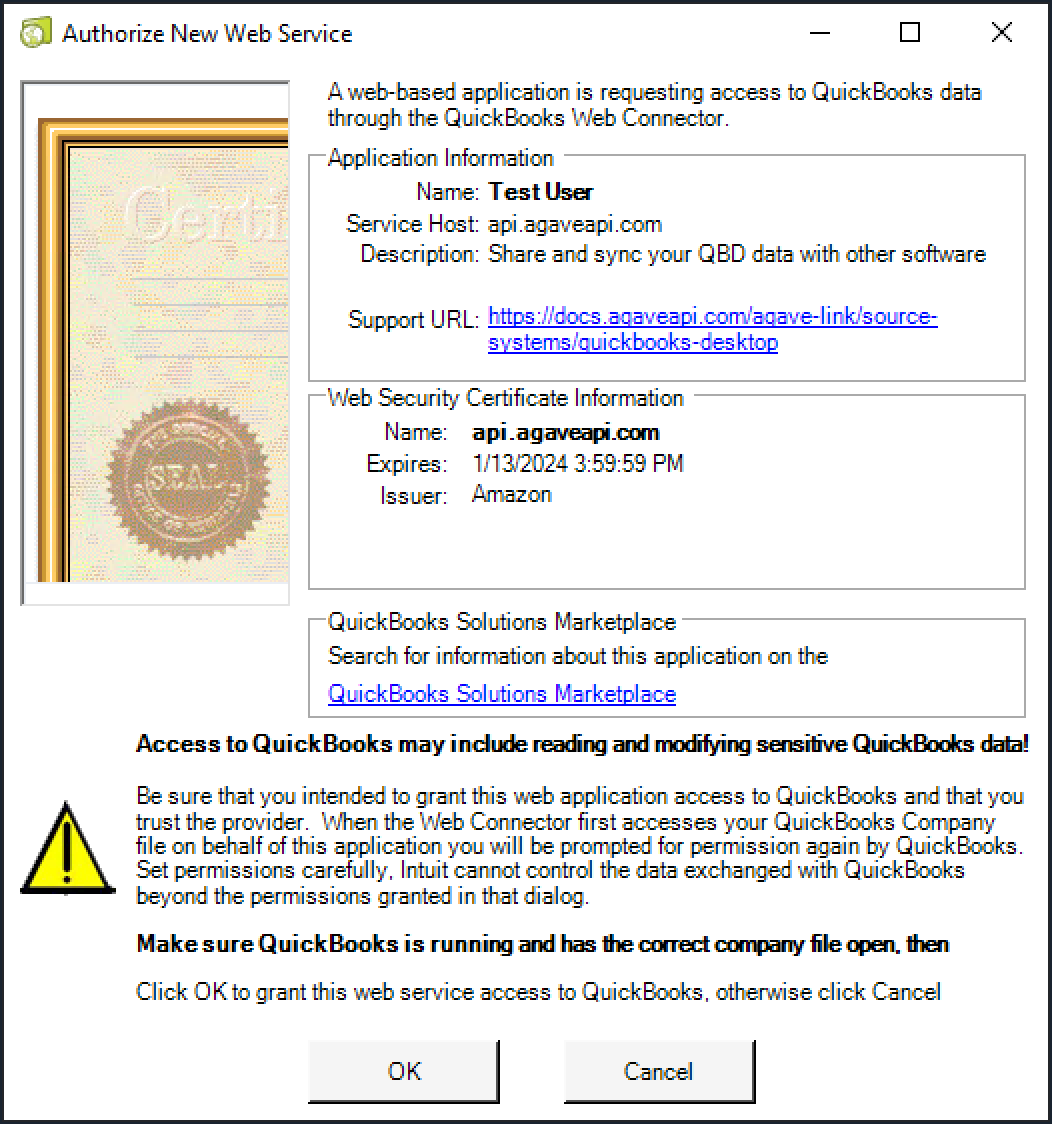
QuickBooks Desktop will now show you an authorization screen. Press OK to continue.
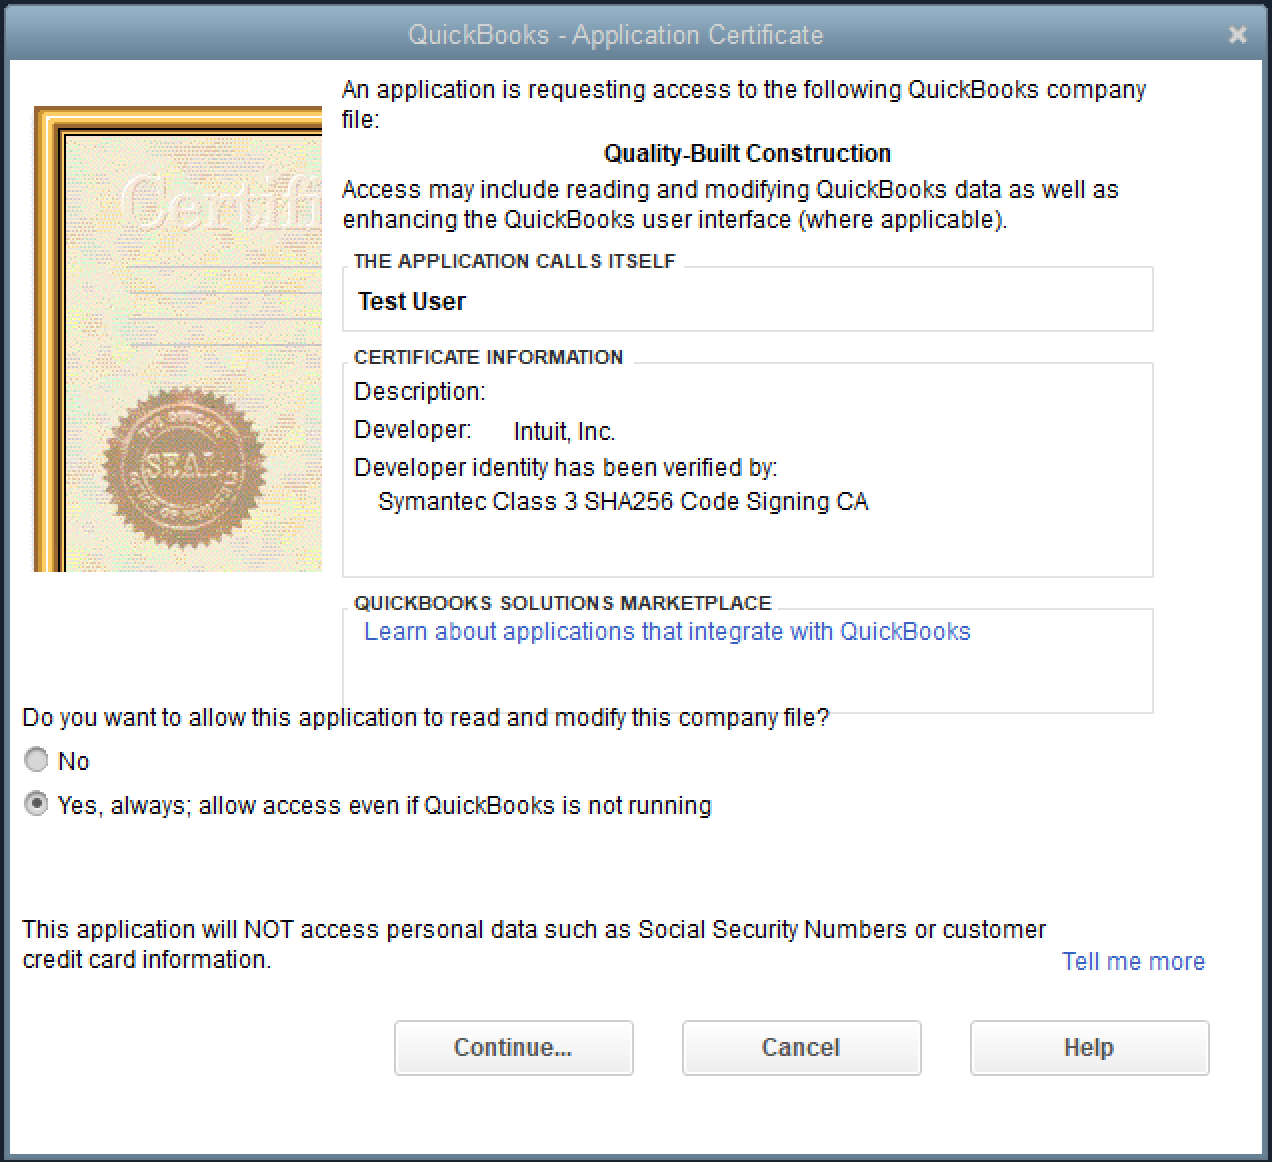
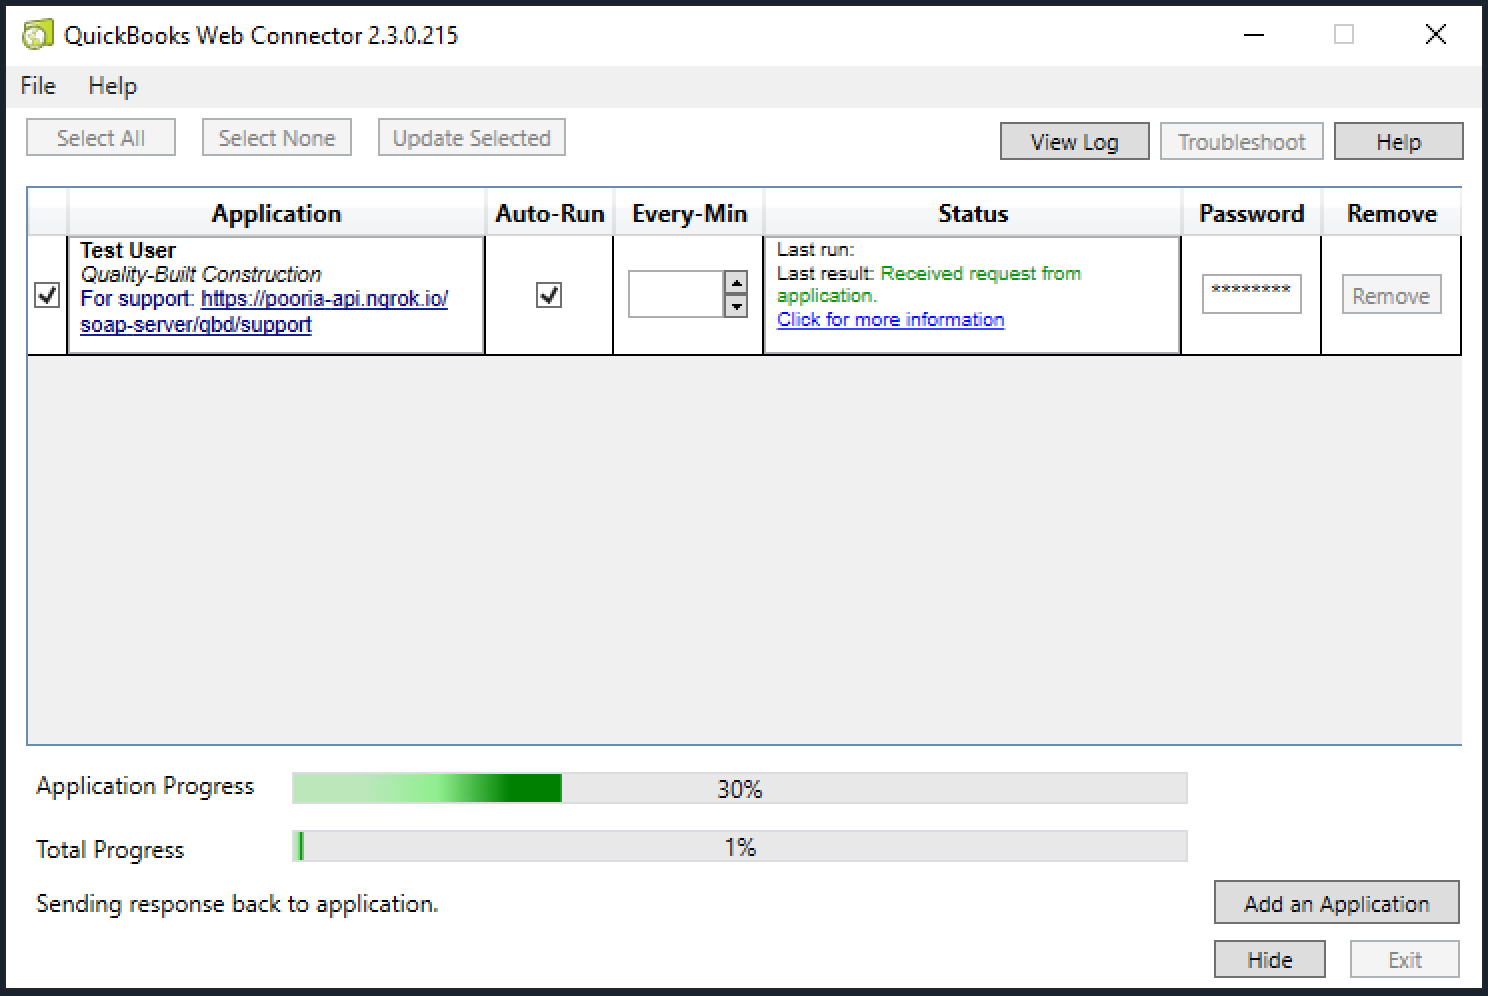
In the next screen, choose "Yes, always." If you choose "No", you will need to manually sync your QuickBooks Desktop data every time you want to update your data. If you choose "Yes", Agave will sync your data every 15 seconds.
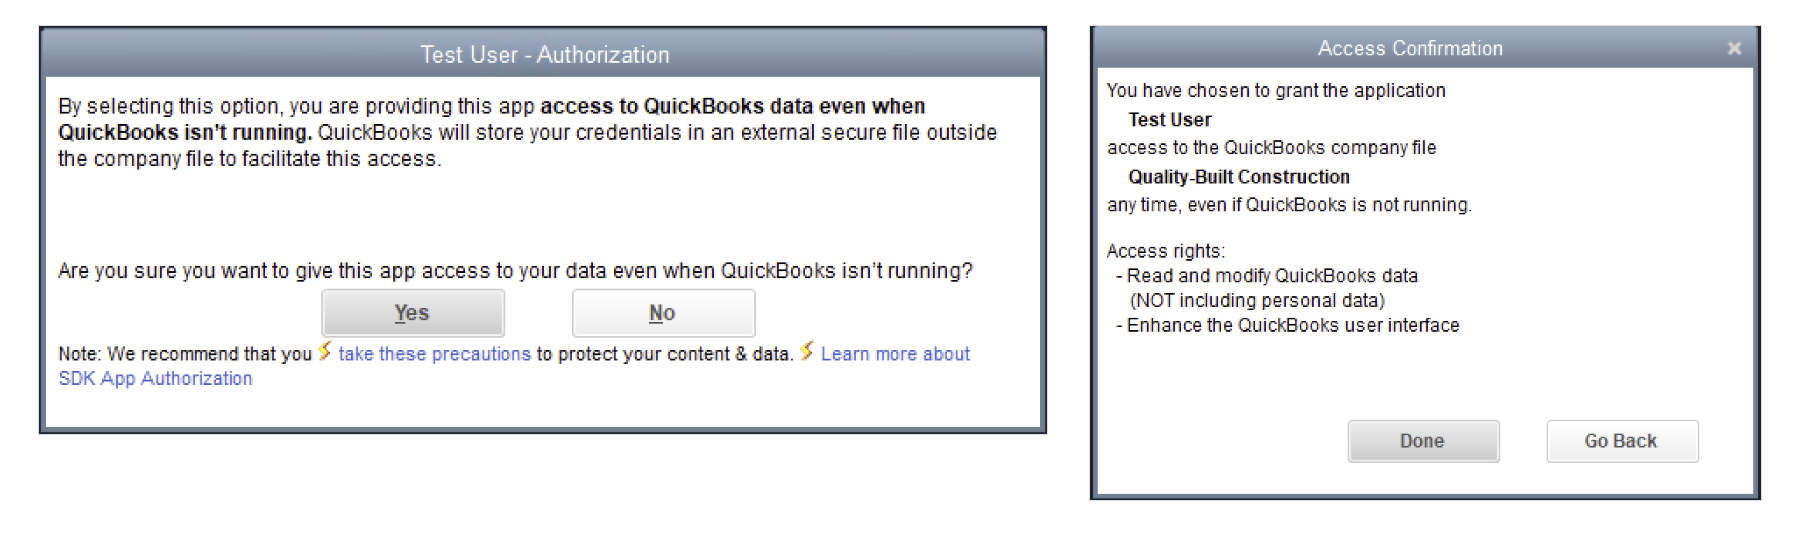
Select "Yes" and "Done" in the next two screens.
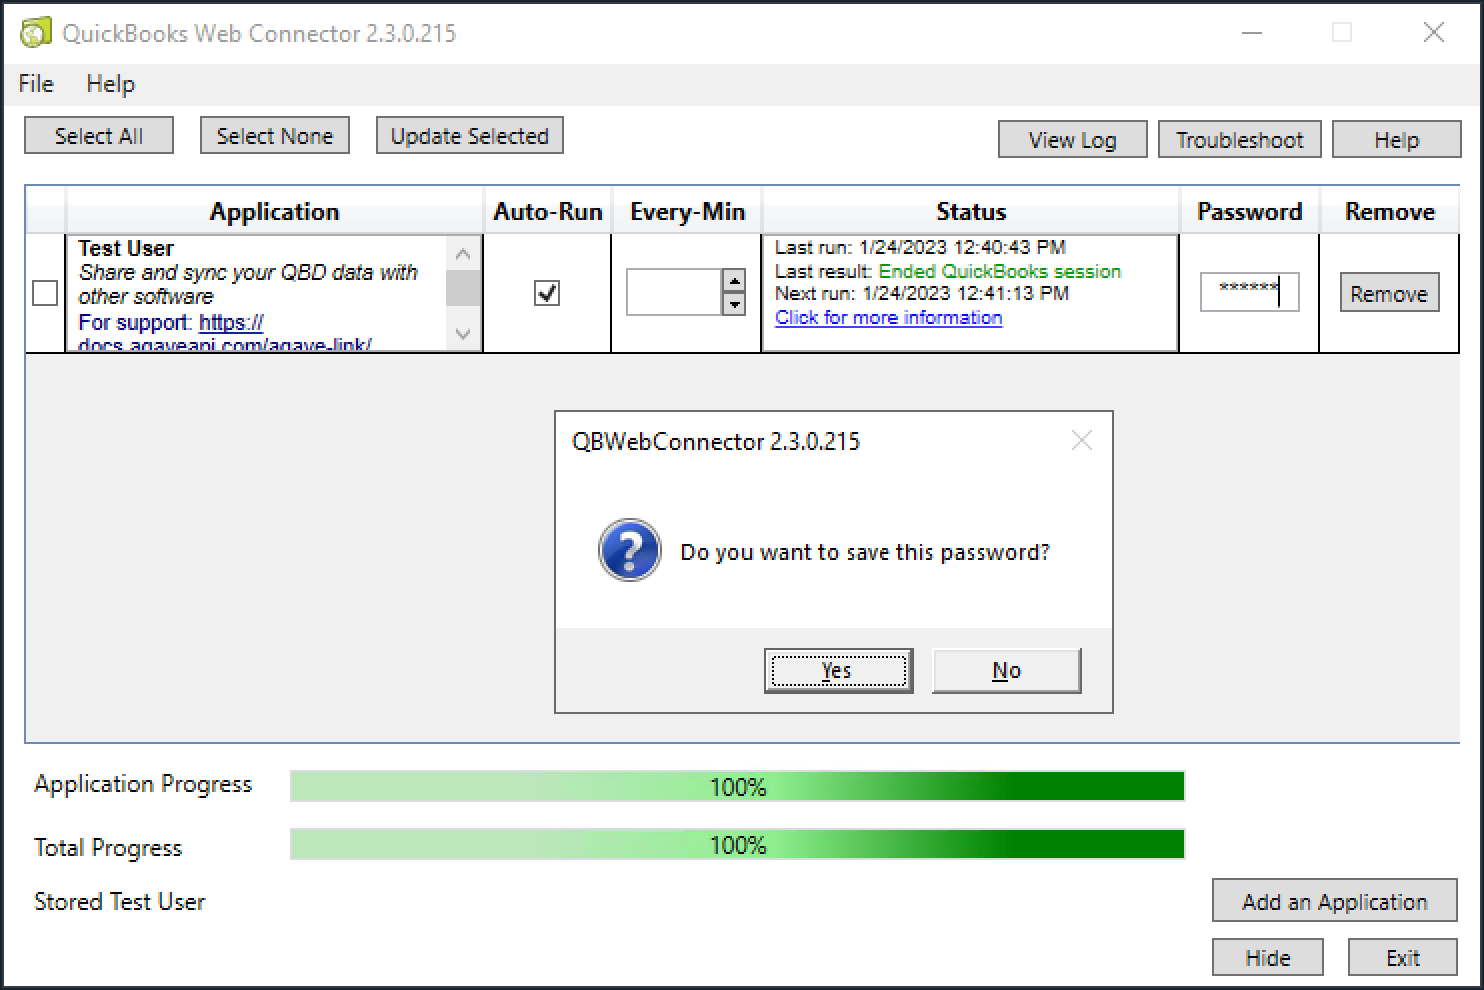
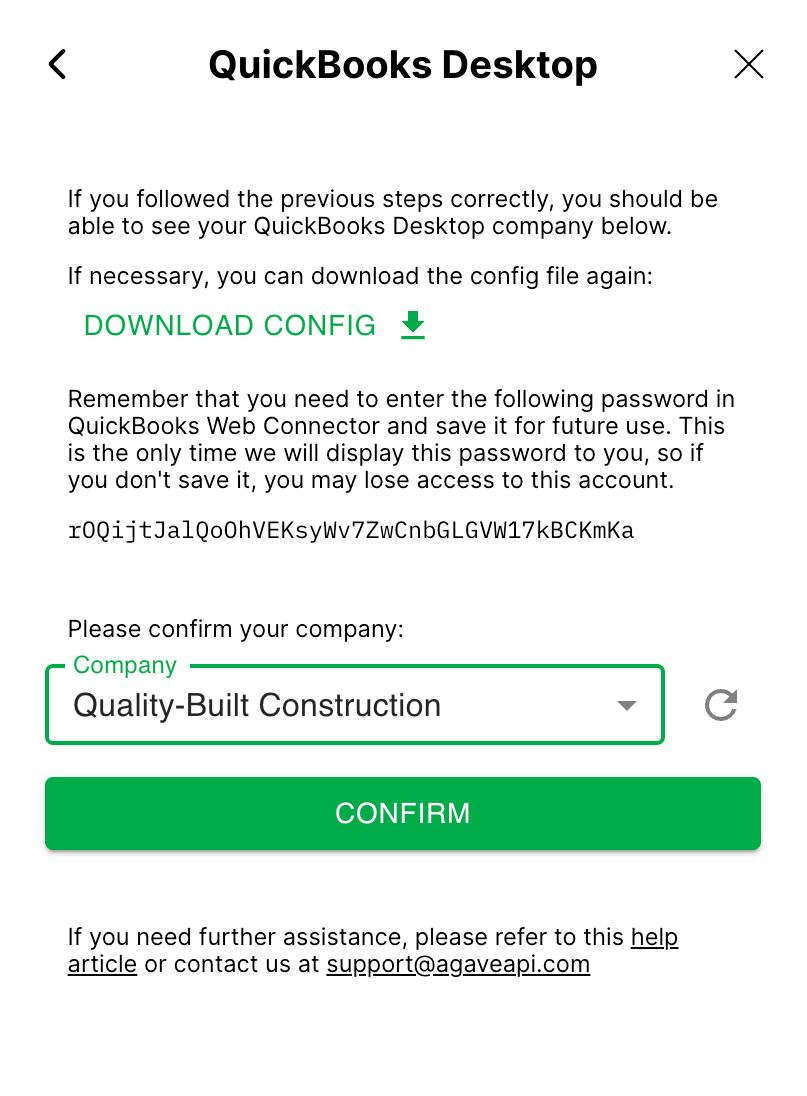
Step 6: Enter the Password
This password is only displayed to you once. We recommend you store it in a secure place.
Enter the password from step 4 in QuickBooks Web Connector, then hit TAB. Make sure that you save the password when prompted.
Step 7: Verify the Connection
Click "Verify Connection". After a few seconds (up to 90 seconds), you should see your QuickBooks Desktop company in the dropdown. If not, refresh the list until you do. If everything is set up correctly, you should see QuickBooks Web Connector sending requests to Agave.
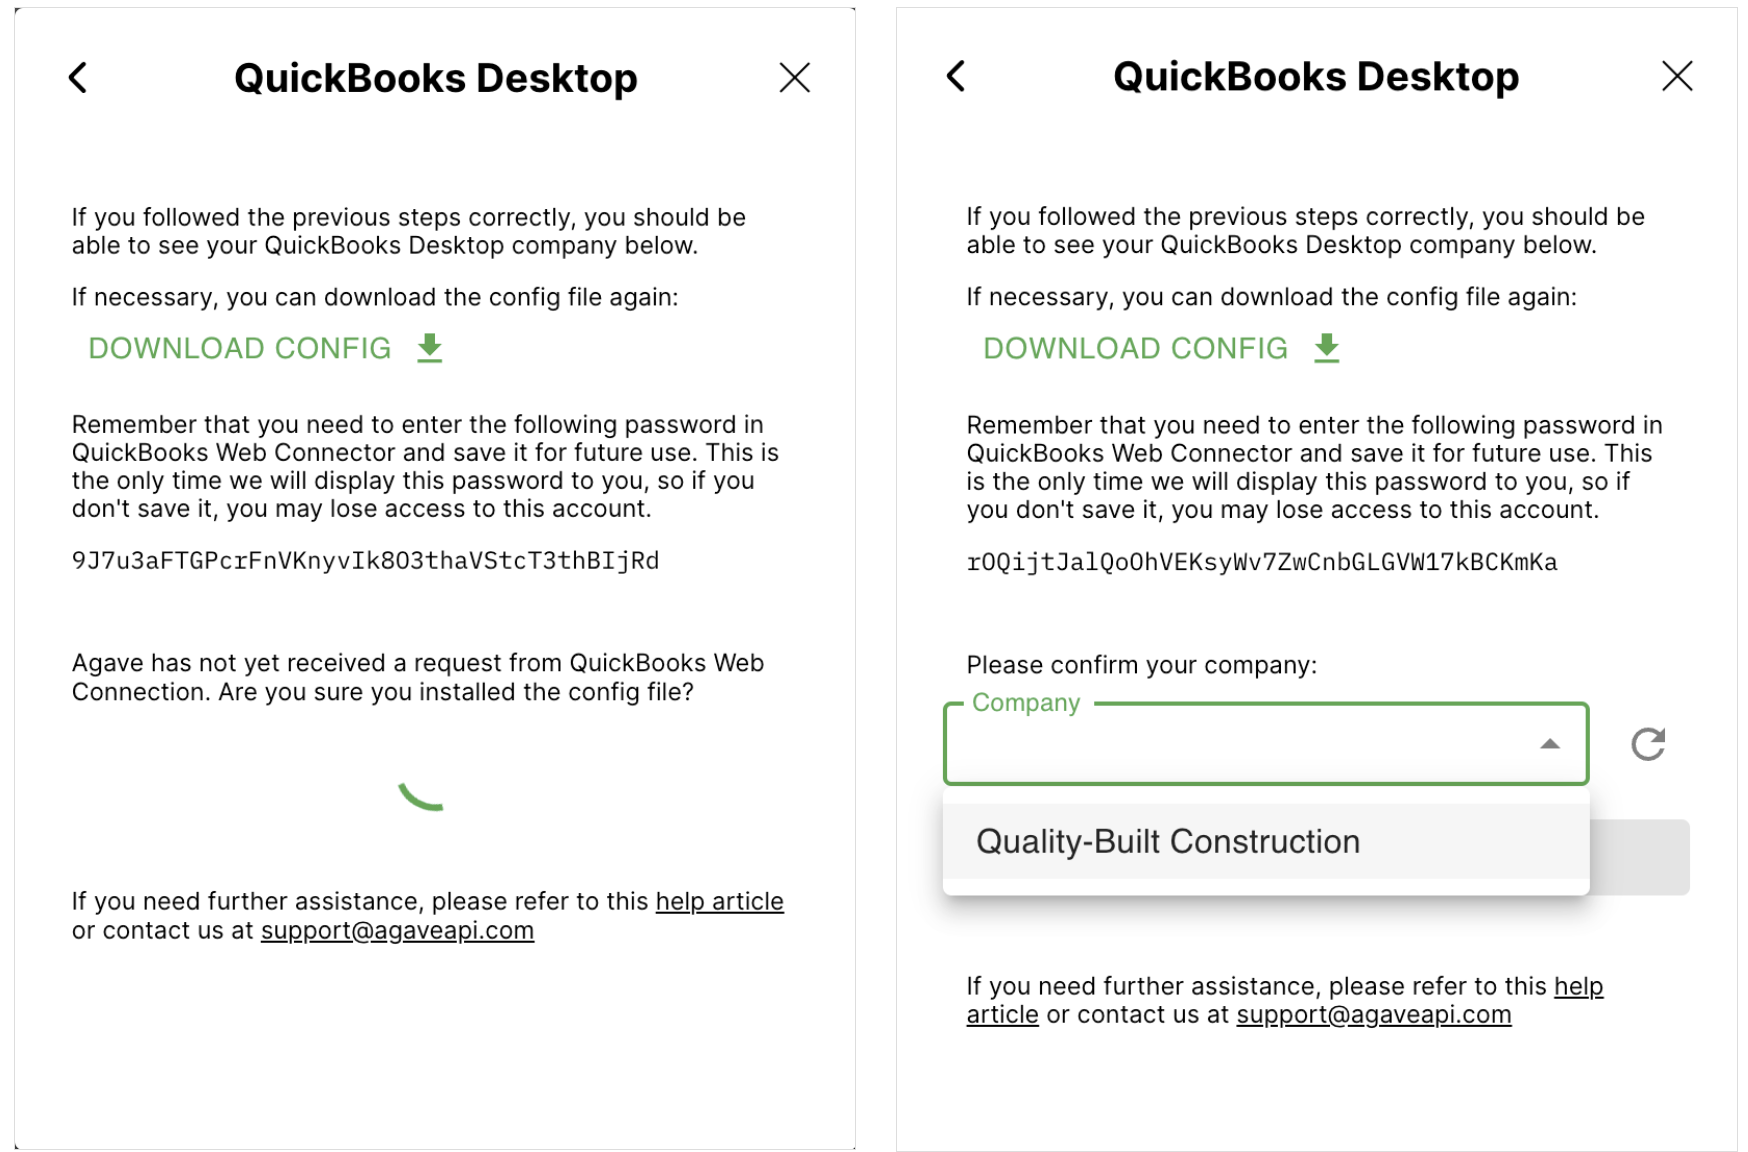
Step 8: Select your Company
Select your company and press "Confirm".
Note: If you see the following error message while trying to validate connection, you need to add your company's tax ID in QuickBooks Desktop.
Please set your Company EIN in Quickbooks Desktop and try again.
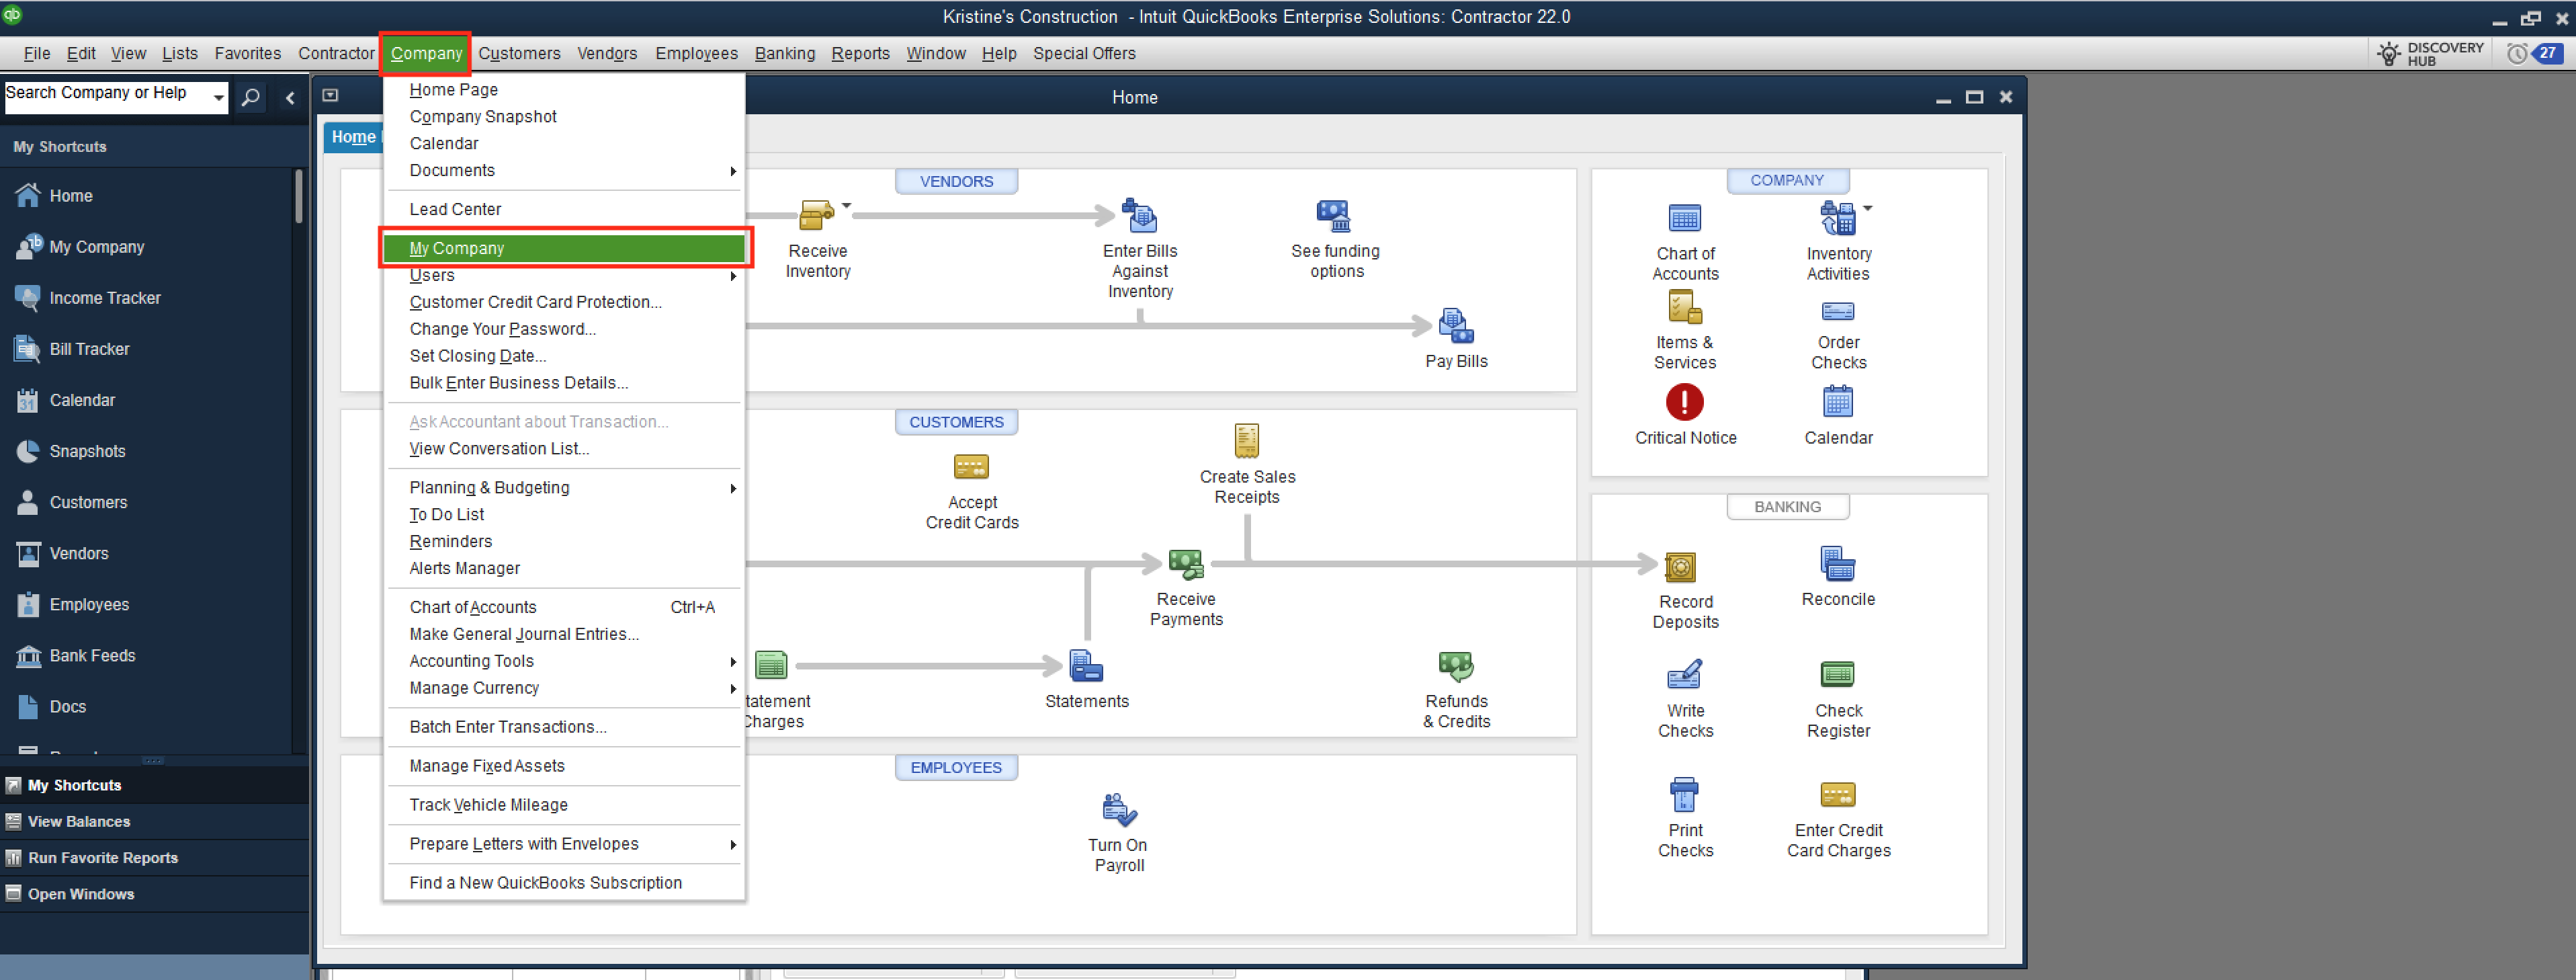
To add your company's Tax ID (EIN or SSN):
- Go to "Company" and select "My Company".
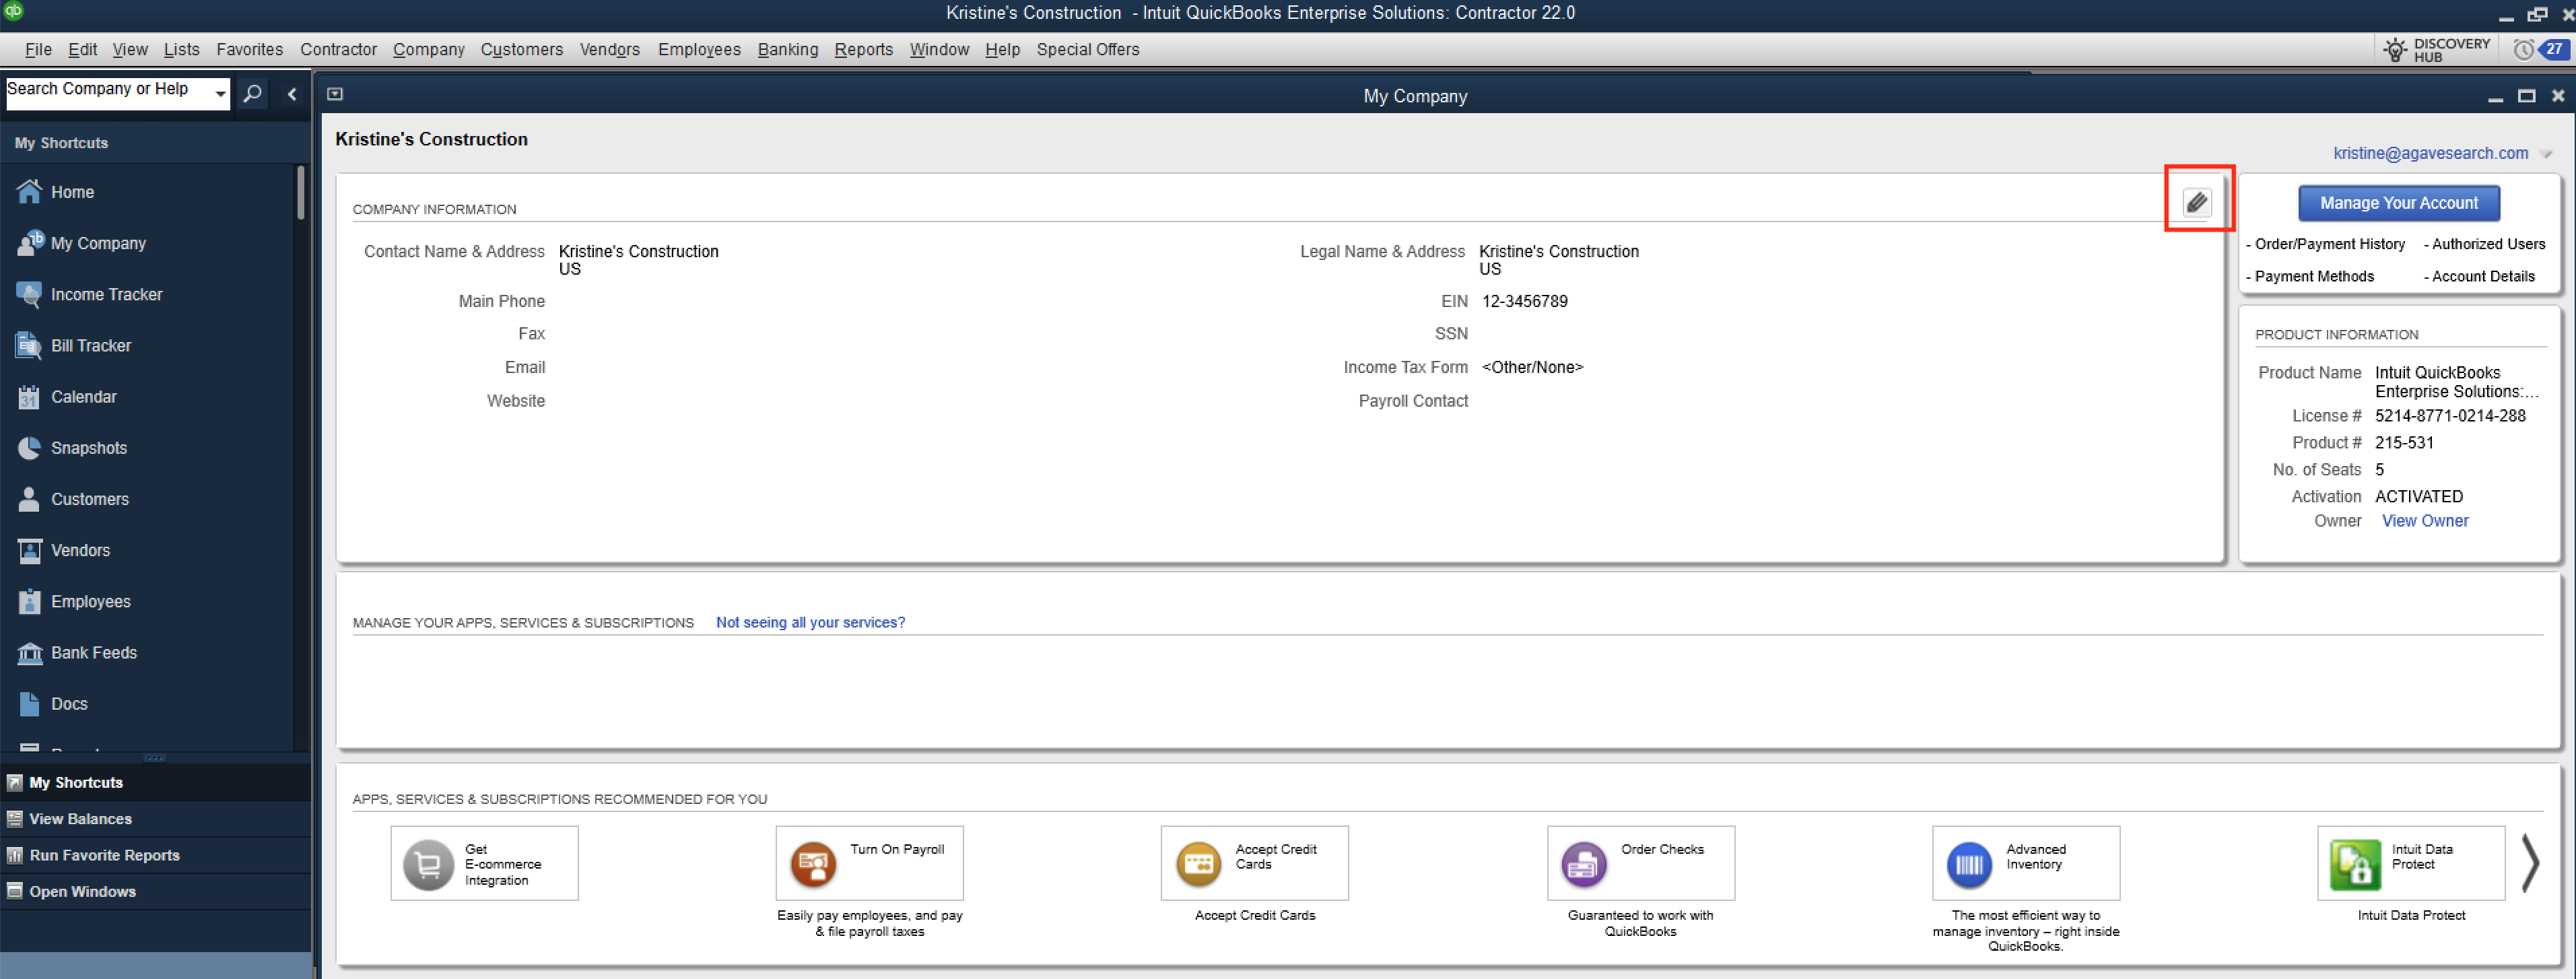
- Click the pencil/edit icon in the Company Information box.
- Select Company Identification on the left and enter your Federal Employer Identification (EIN) No. or SSN, and your State Employer ID if applicable.
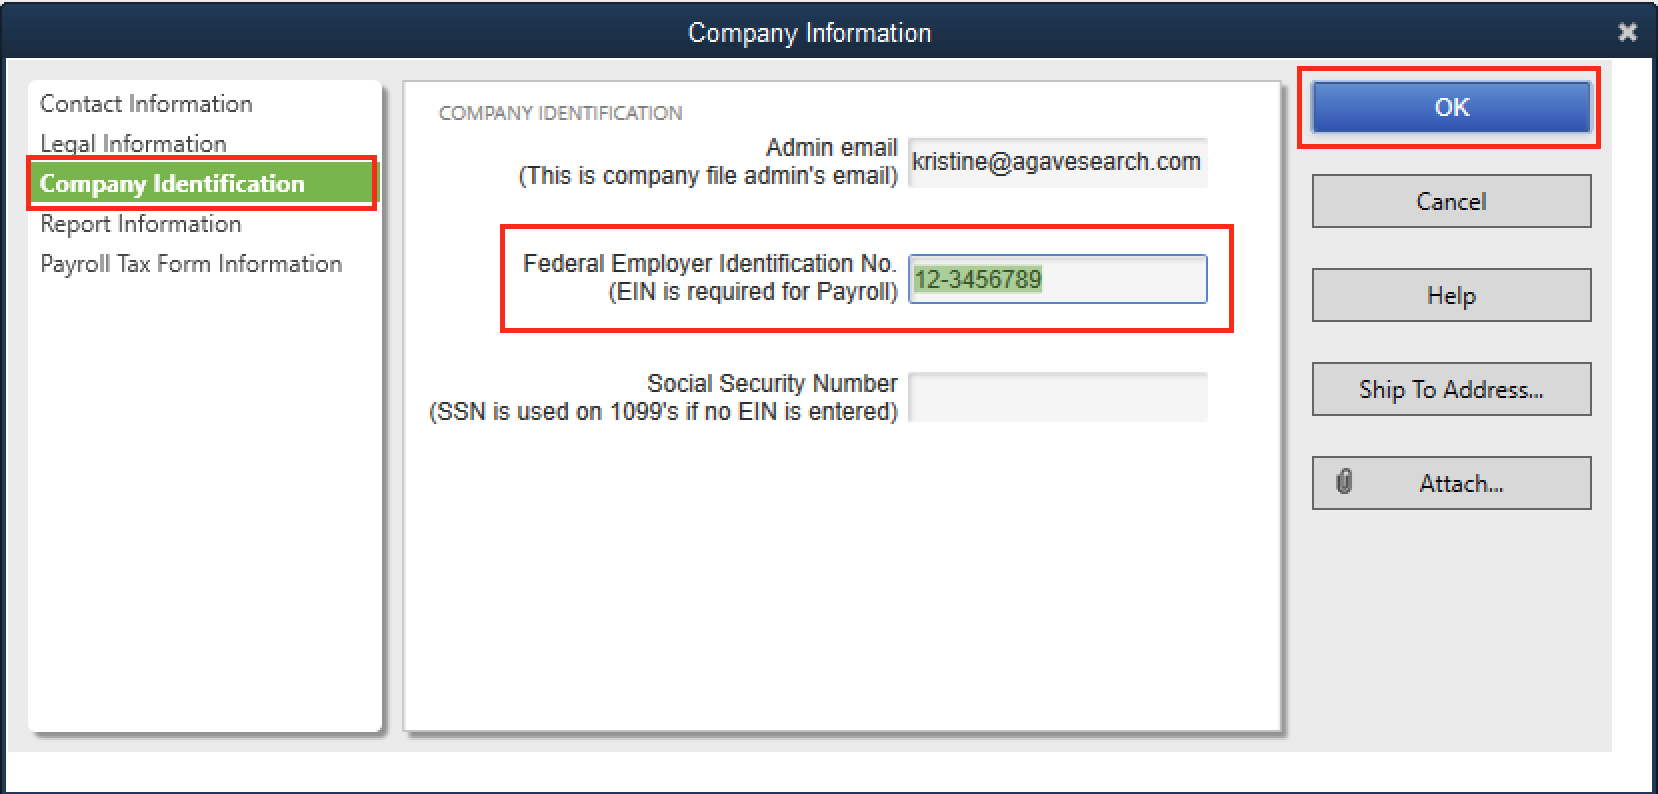
- Click OK to save.