Common Errors and FAQs
General FAQs
What requirements must be met before connecting Agave Sync to Sage Intacct?
- You need to purchase the Sage Intacct Construction Accounting module.
- You need to enable the Web Services Subscription (see below.
Are there any particular considerations or best practices we should be aware of when integrating at the top level versus the entity level with Intacct?
Each Agave sync configuration links one Autodesk Hub with one Sage Intacct Entity.
Both integration approaches—(1) at the top-level entity or (2) at an individual child entity—are viable. However, we would generally recommend integrate at the child-entity level for the following reasons:
- If additional entities are added over time (e.g., through acquisitions), they wouldn’t all need to be connected to Autodesk individually.
- While filters can be applied at the top level to achieve similar results, managing syncs at the child level provides more control.
- Most core objects (e.g., Vendors, Customers) can still be set up at the top-level entity and shared with child entities as needed.
- Inter-company transactions are only possible at the top-level entity.
There are two considerations with the child-entity integration approach though:
- More Overhead Work: permissions, modules, and settings would need to be managed separately for each entity instead of just at the top level.
- Additional Costs: each new sync configuration (i.e., integrating another entity with Autodesk) would incur additional costs from Agave.
Are there any known issues or limitations that could affect the integration's performance or functionality at either level?
Typically, no major issues arise at either level. However, a top-level entity may contain significantly more data, potentially leading to:
- Higher request volume to Intacct.
- The need for more filtering, which could slow down requests.
What are costs from Sage Intacct for using Agave Sync?
You will need to must purchase a separate "Web Services" license, which costs $2,500/yr for 100k total requests per month.
For more details on enabling the Web Services license, see link.
Connecting to Sage Intacct
Prerequisites
To allow Agave to connect to Sage Intacct, you will need the following:
- Sage Intacct Web Services Subscription
- This "Web Services" license comes with a "Sender ID" and "Sender Password"
- These will be sent to you by Sage when activating your subscription
- It is important that you store these credentials in a secure place, as they will be used to establish your connection with Agave Sync
- This "Web Services" license comes with a "Sender ID" and "Sender Password"
- Sage Intacct Construction Financials Module
- The Sage Intacct Construction Project Management module is not required
Step 1: Enable Web Services Subscription
To enable the Web Services subscription, you or your company's Sage Intacct Administrator will need to:
- Contact your Sage Intacct account manager to enable a Web Services License.
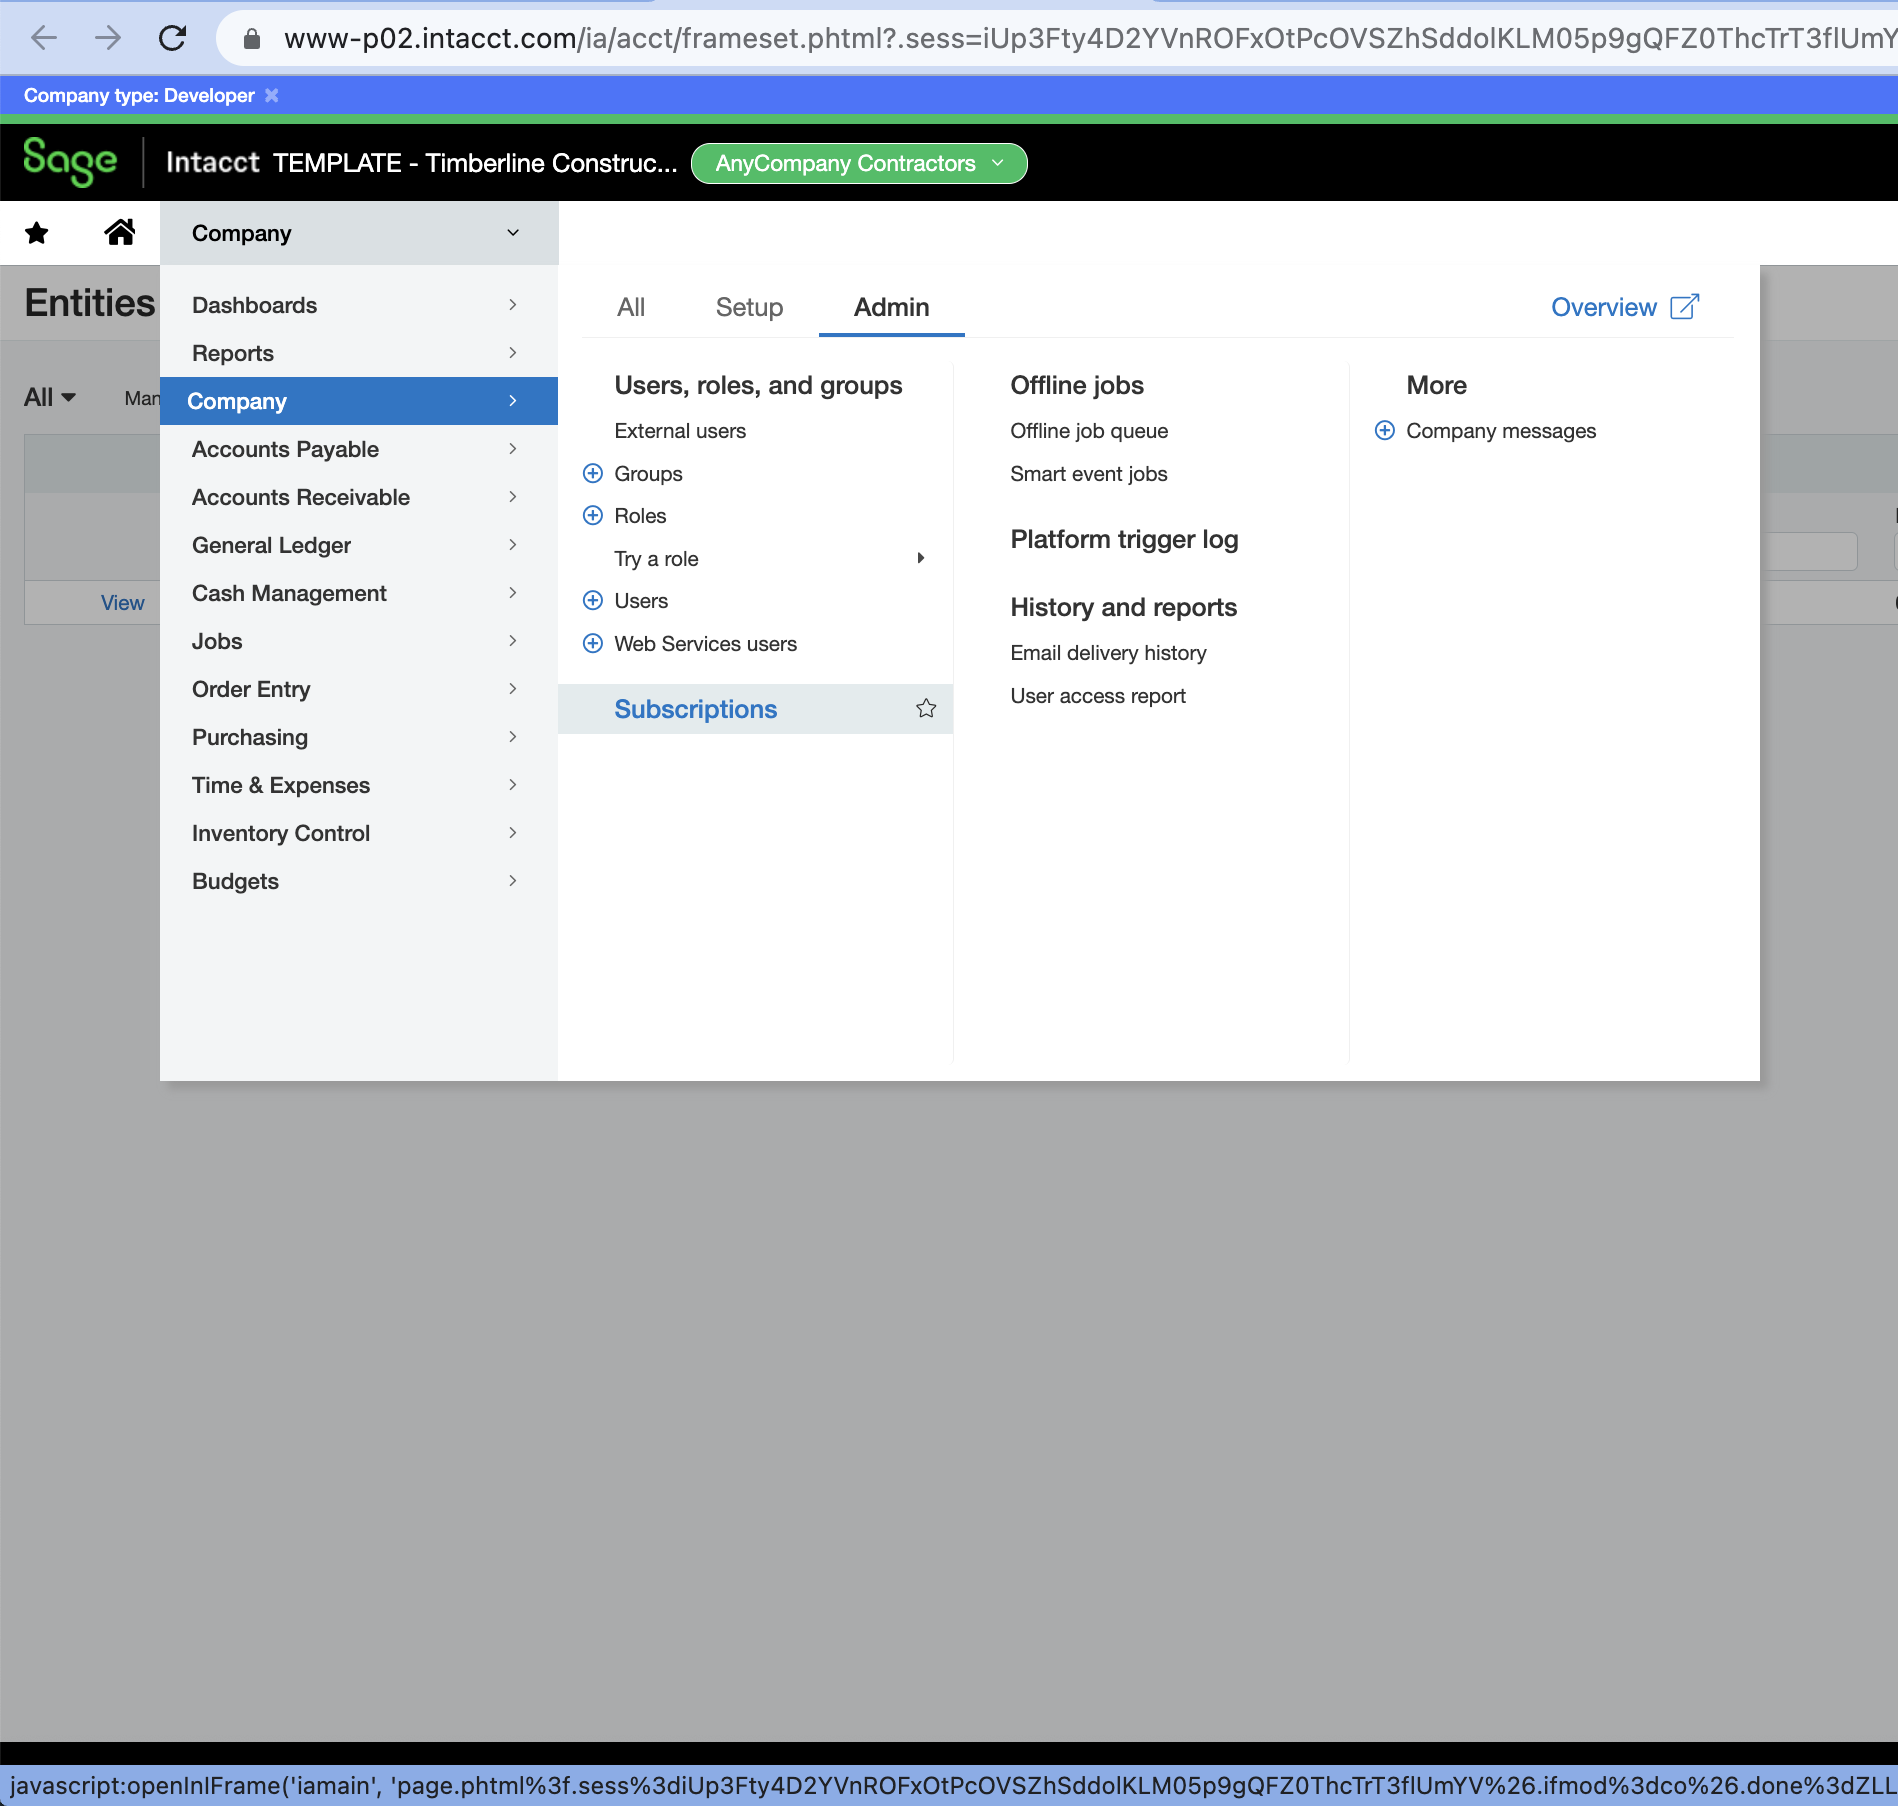
- Enable the Web Services subscription under Company --> Admin --> Subscriptions.
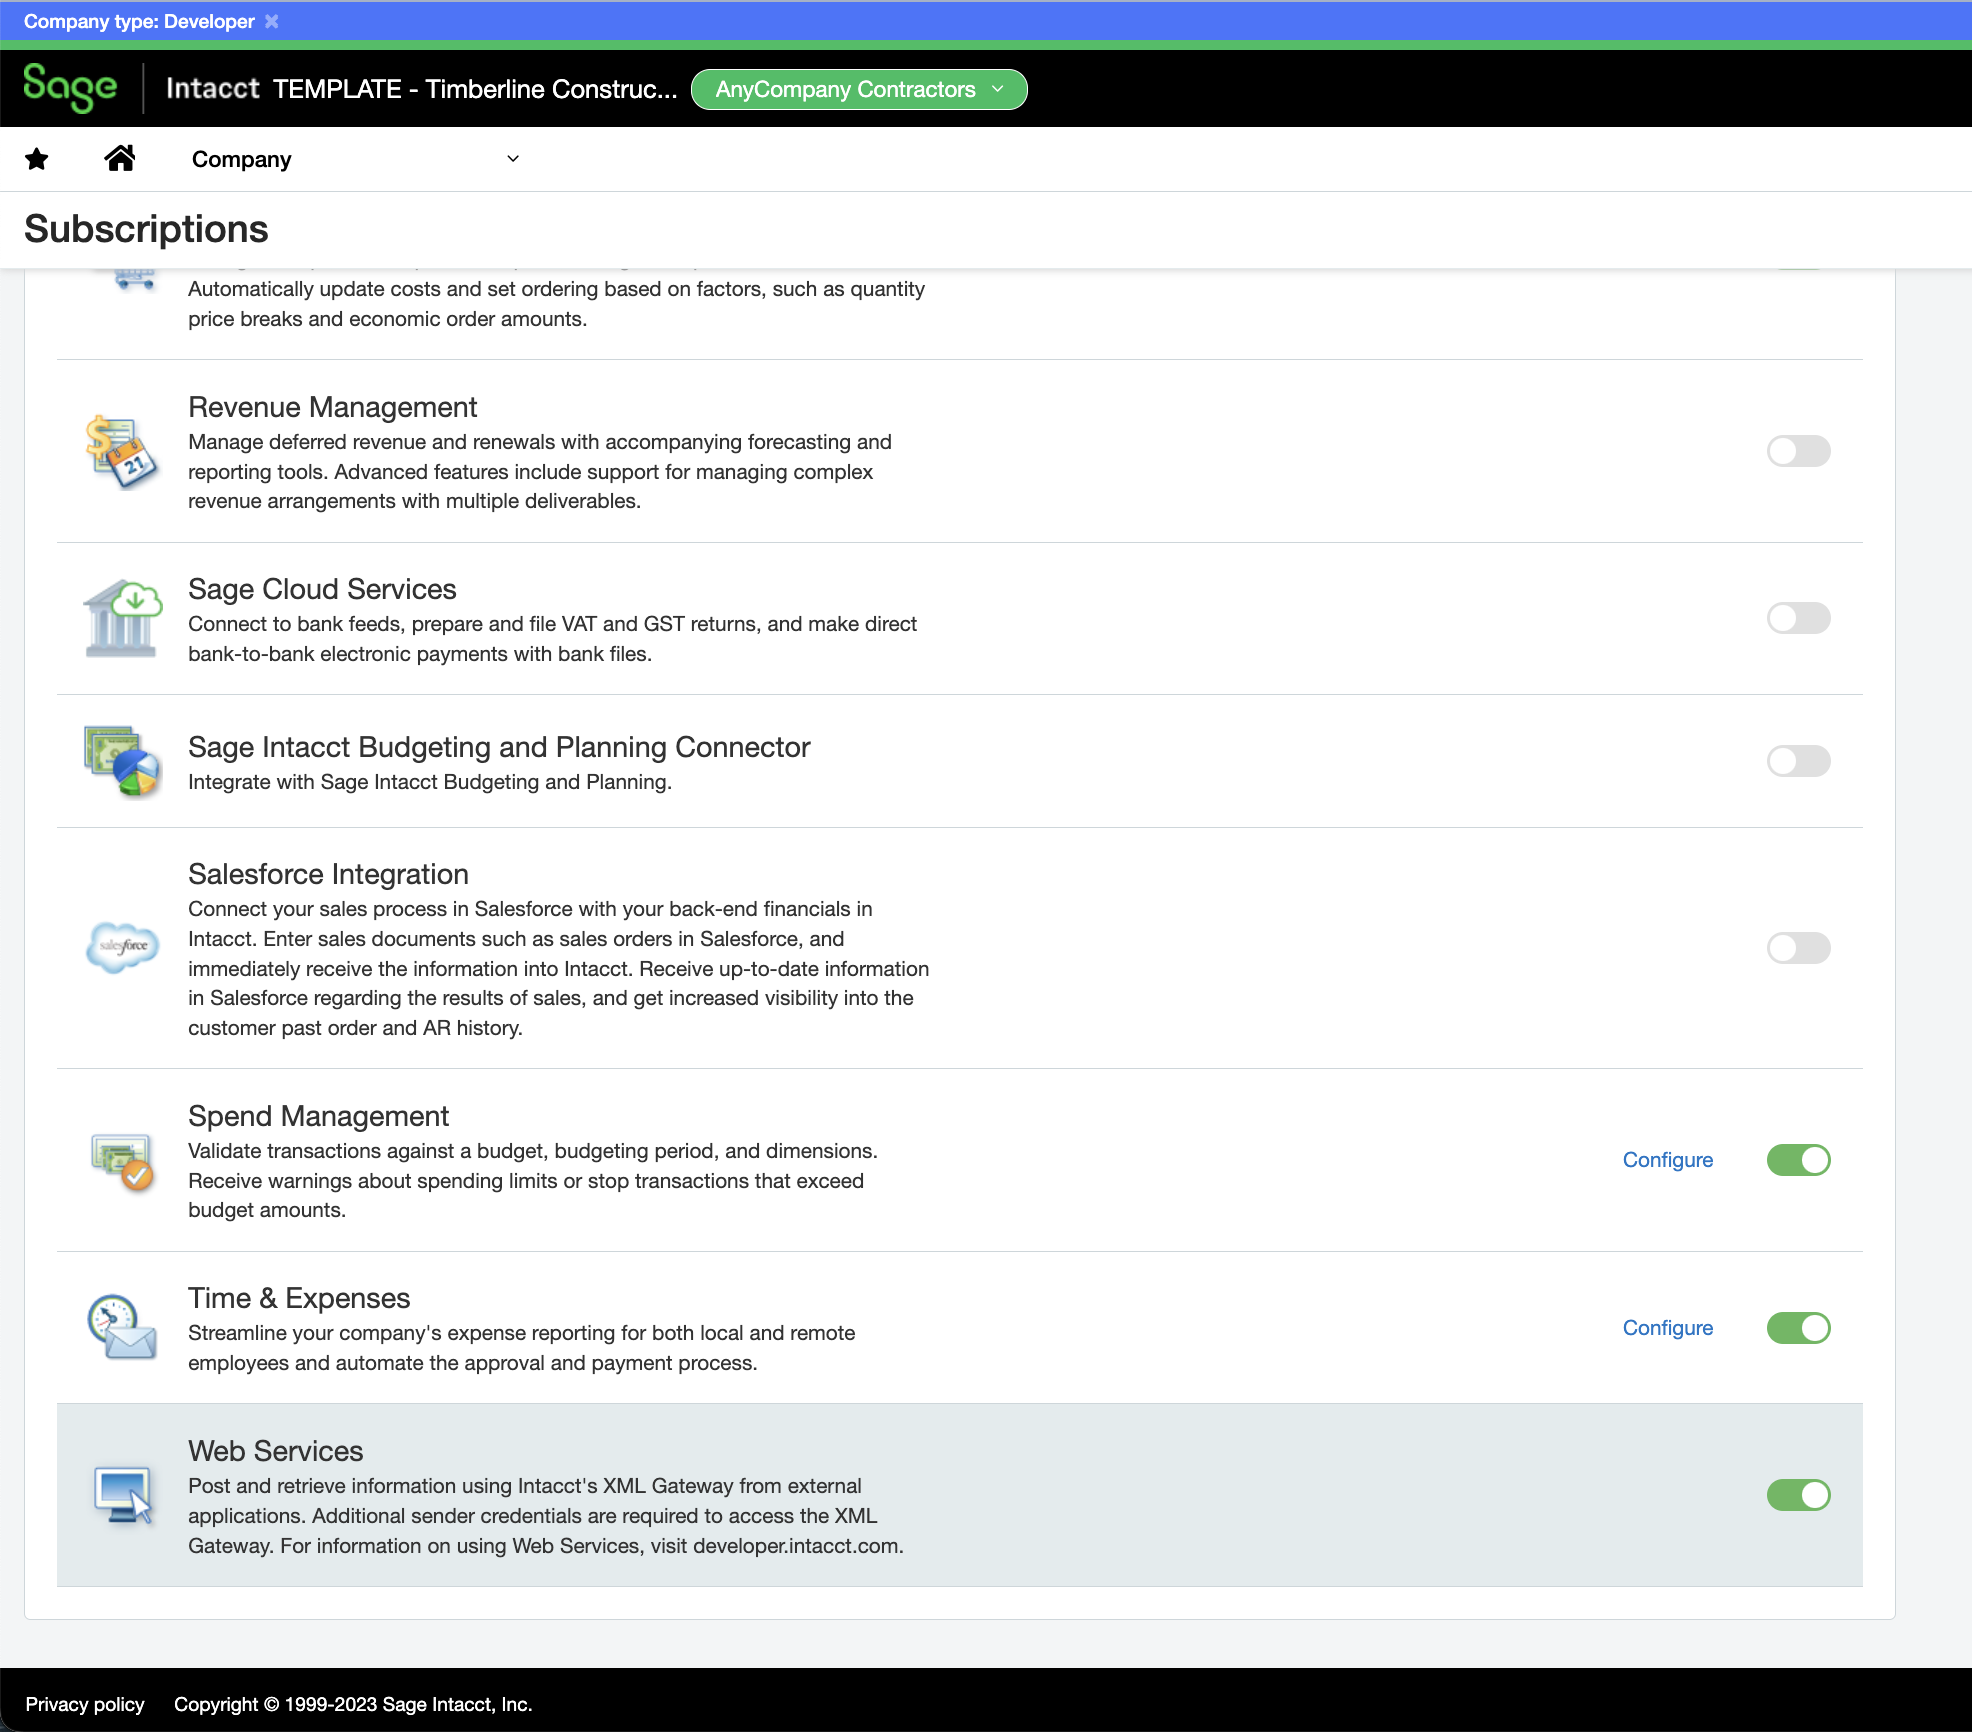
- Scroll to the bottom of the page and enable the Web Services subscription.
Step 2: Authorize Web Service Sender ID
To authorize your Web Service Sender ID:
- Select Company --> Setup --> Company (under Configuration).
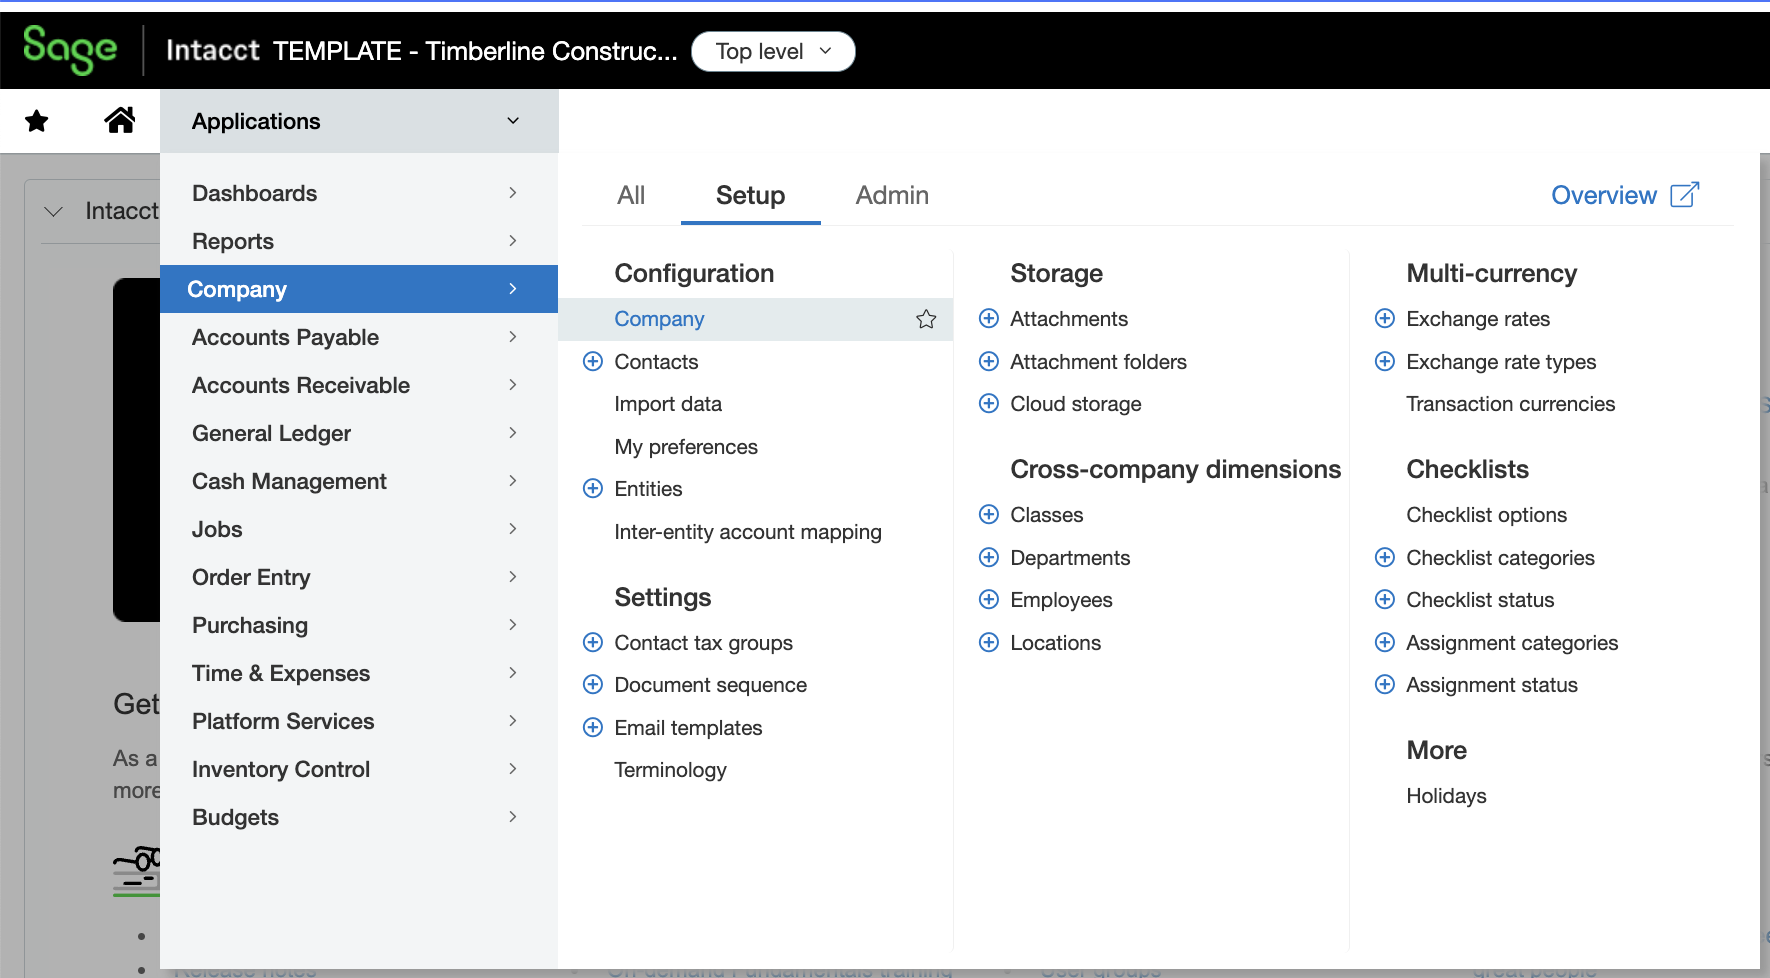
- Select Security.
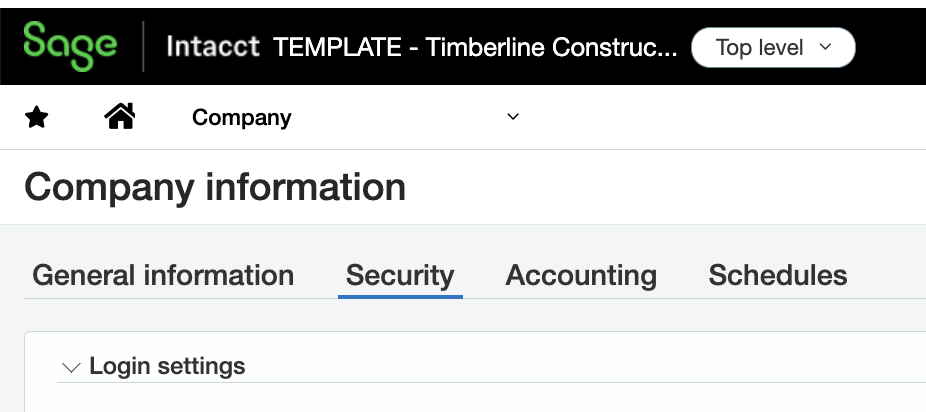
- Scroll down to Web Services Authorizations, and press Add.
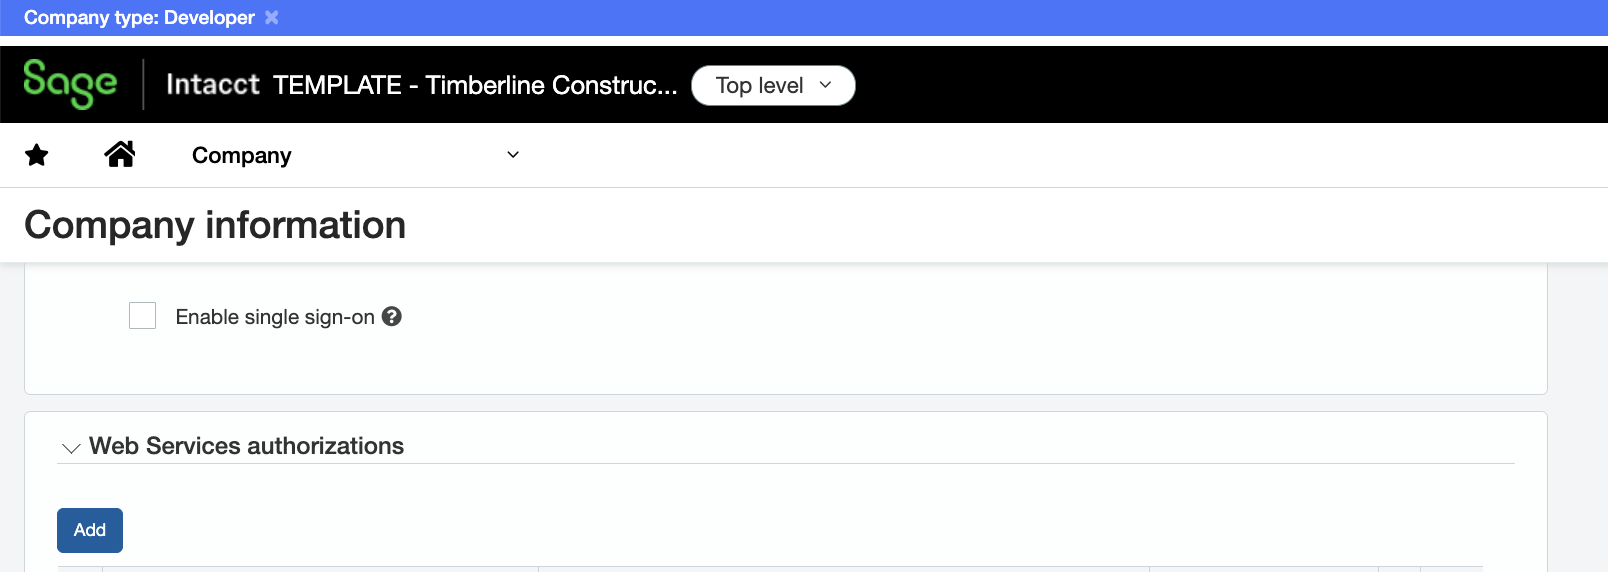
- Input details for your Sender ID (acquired in Step 1) and press Save.
Step 3: Create Web Services User
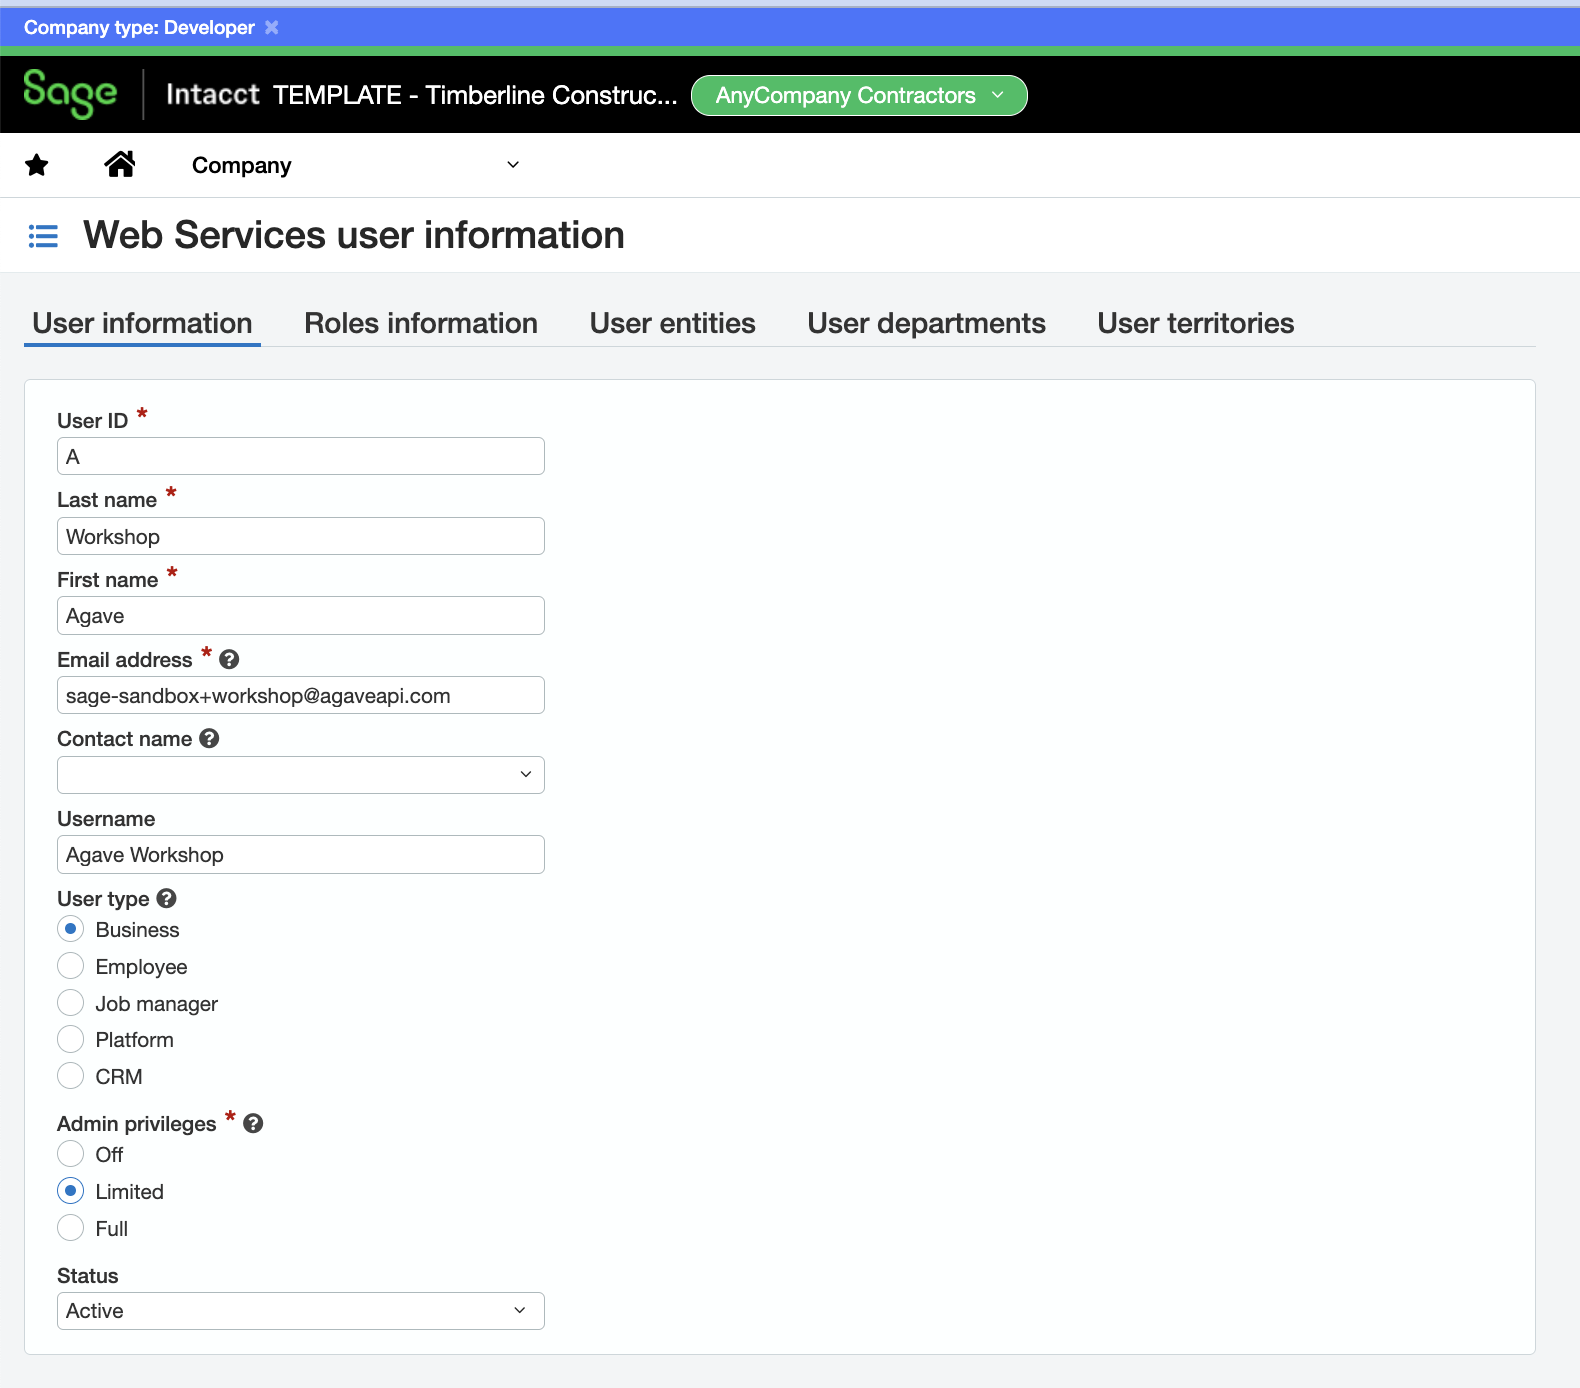
A Web Service User lets Agave exchange data with Sage Intacct without needing to log in manually.
To create a Web Service User:
- Select Company --> Company --> Web Service Users:
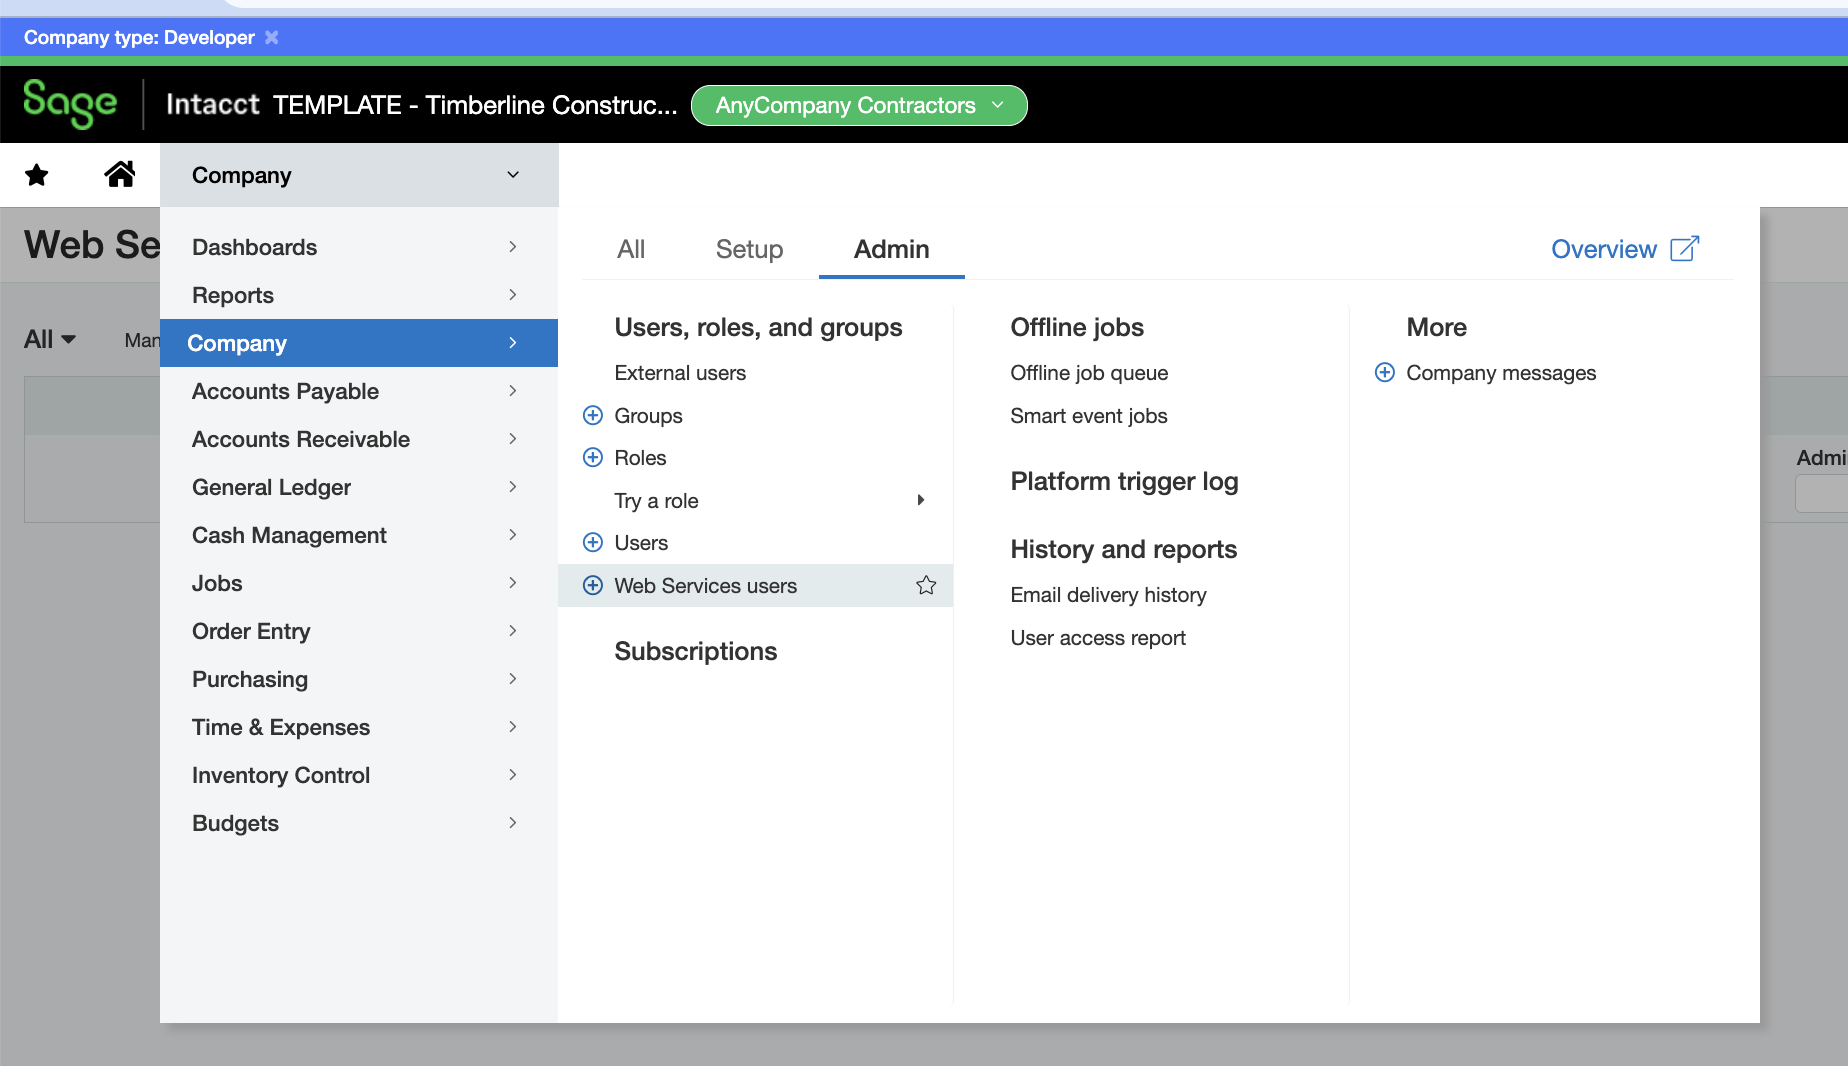
- Enter the user information for the Web Service User as shown below:
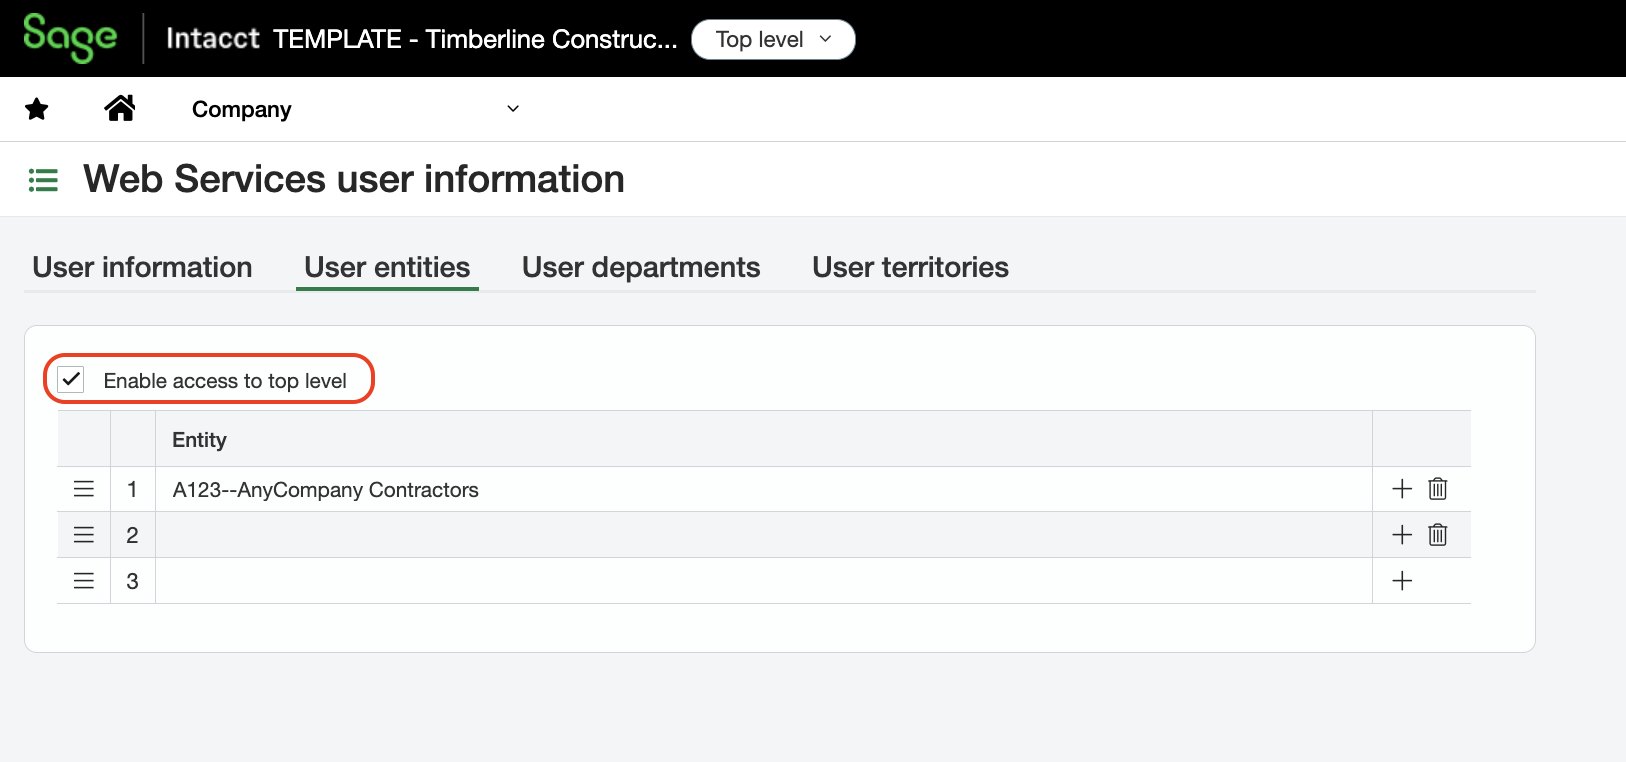
- Go to User Entities tab. Select Enable access to top level and any Entities you would like to enable for this Web Services User:
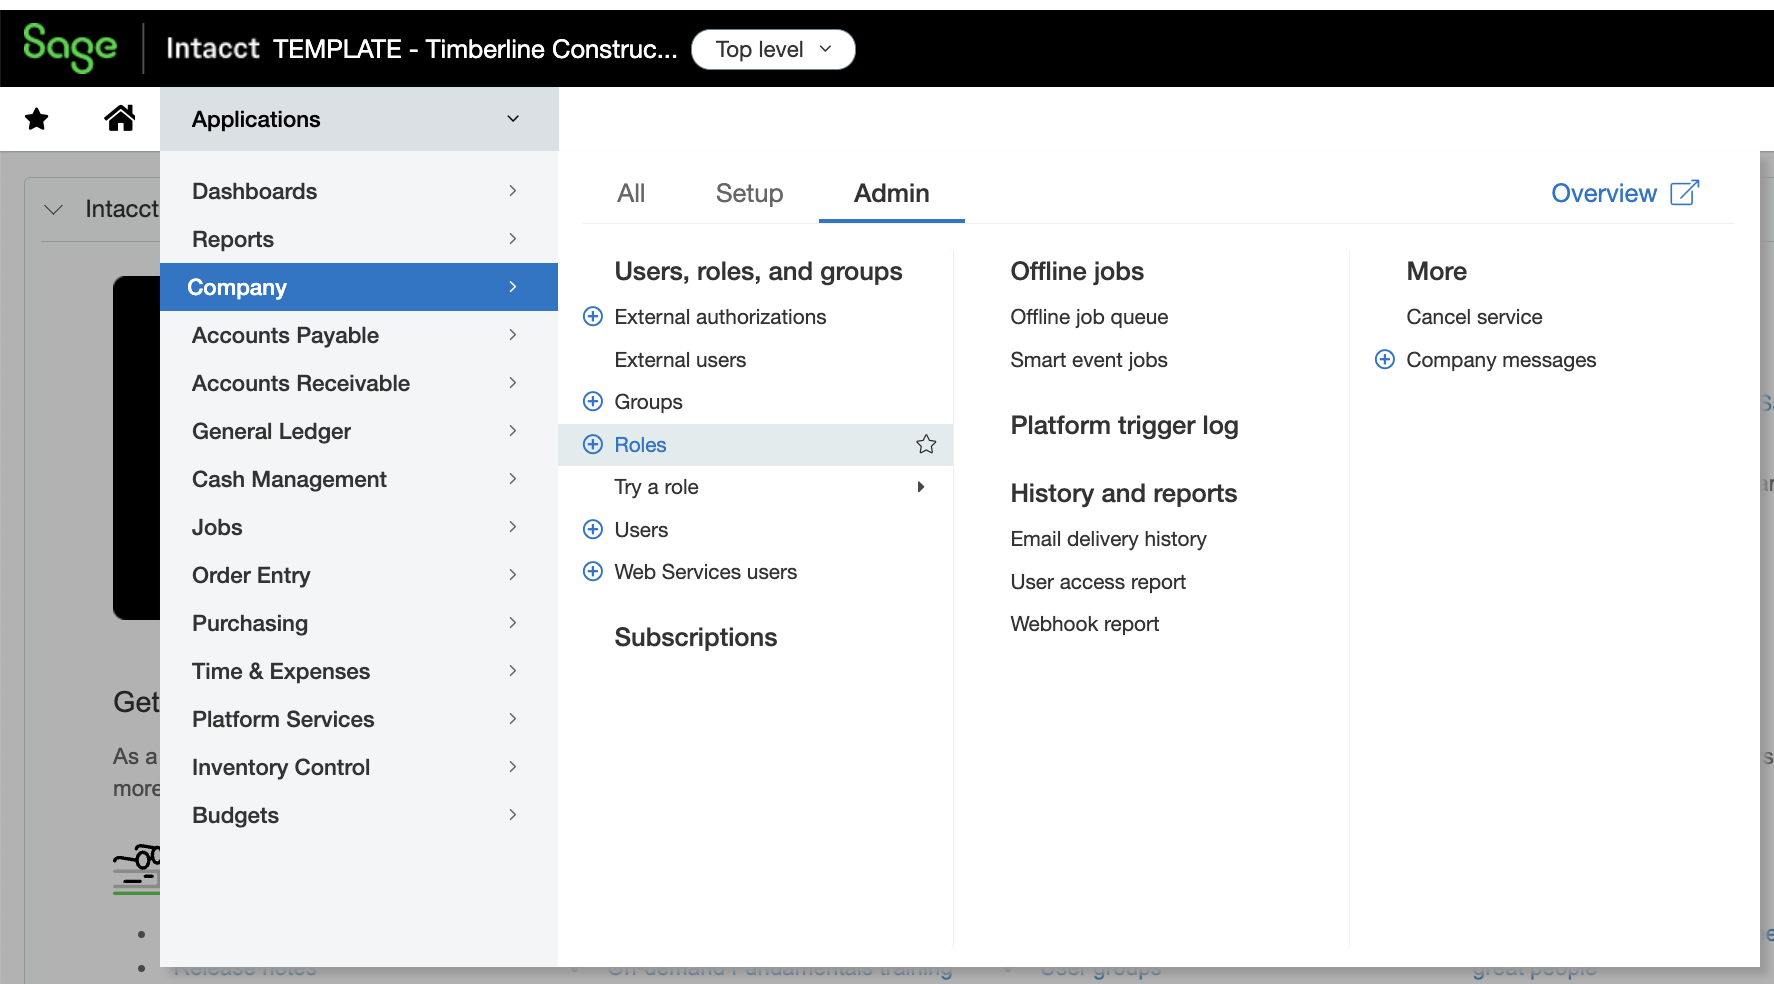
- To ensure the Web Service User has the proper permissions, go to Company --> Admin --> Roles:
- Select Add:

- Add a Description for the Role:
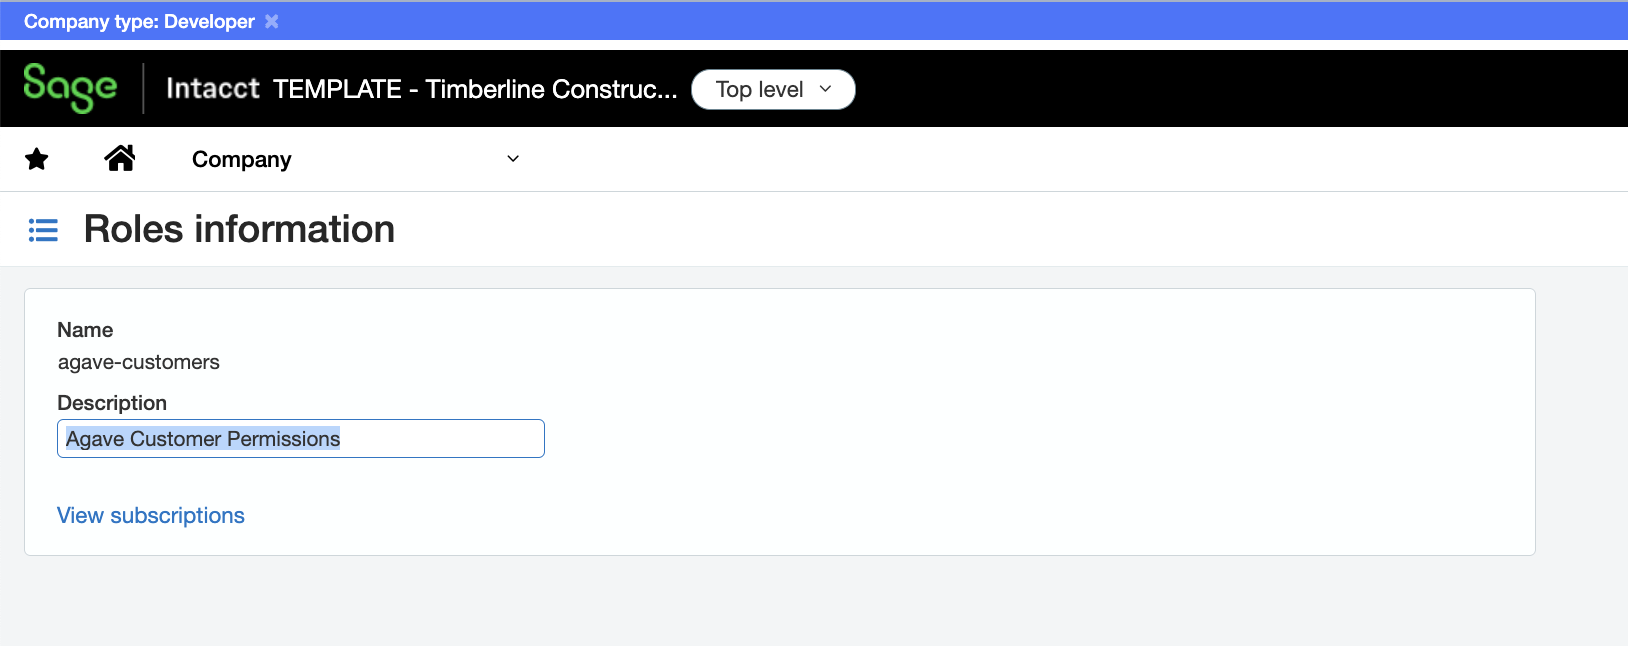
- Select View Subscriptions, and select the relevant Permissions and press Save:
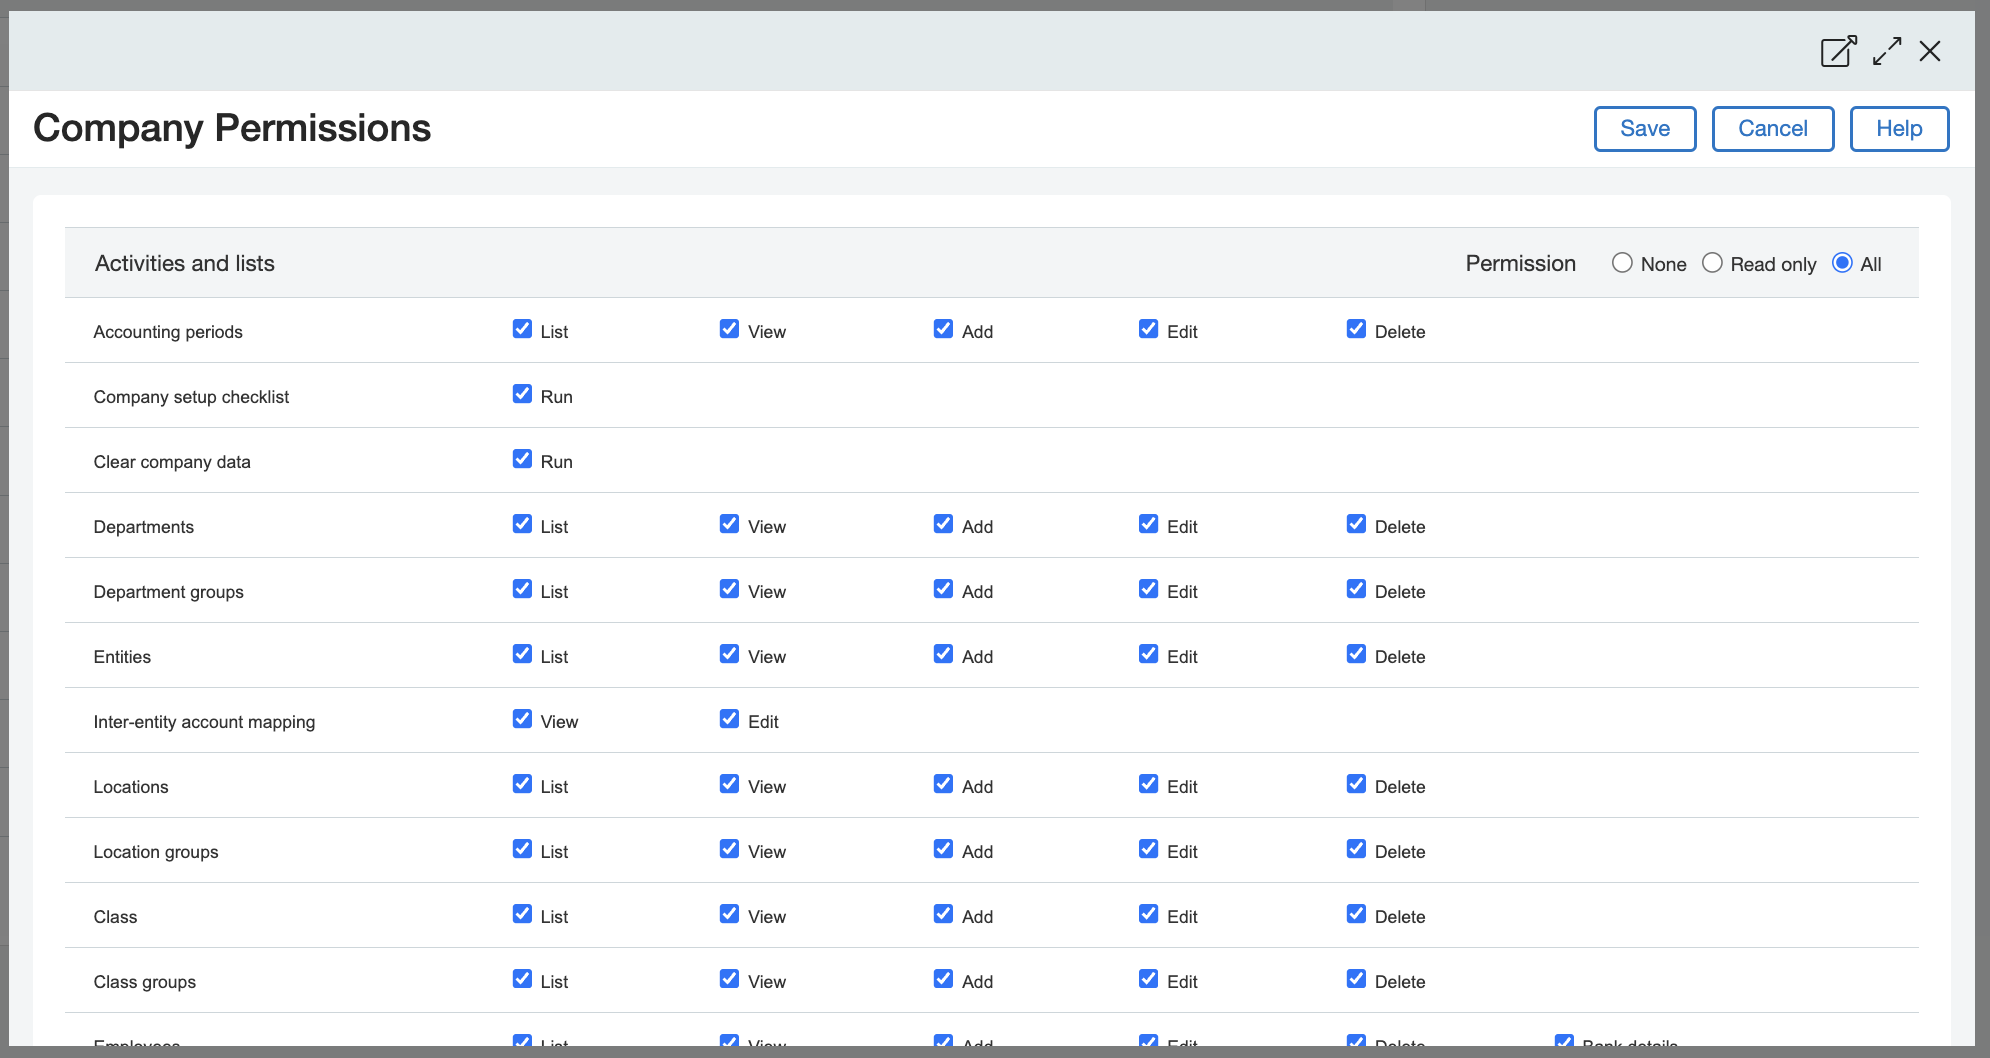
Ensure that you at least enable permissions for the Company, General Ledger, Accounts Payable, Accounts Receivable, Jobs, Order Entry, and Purchasing modules.
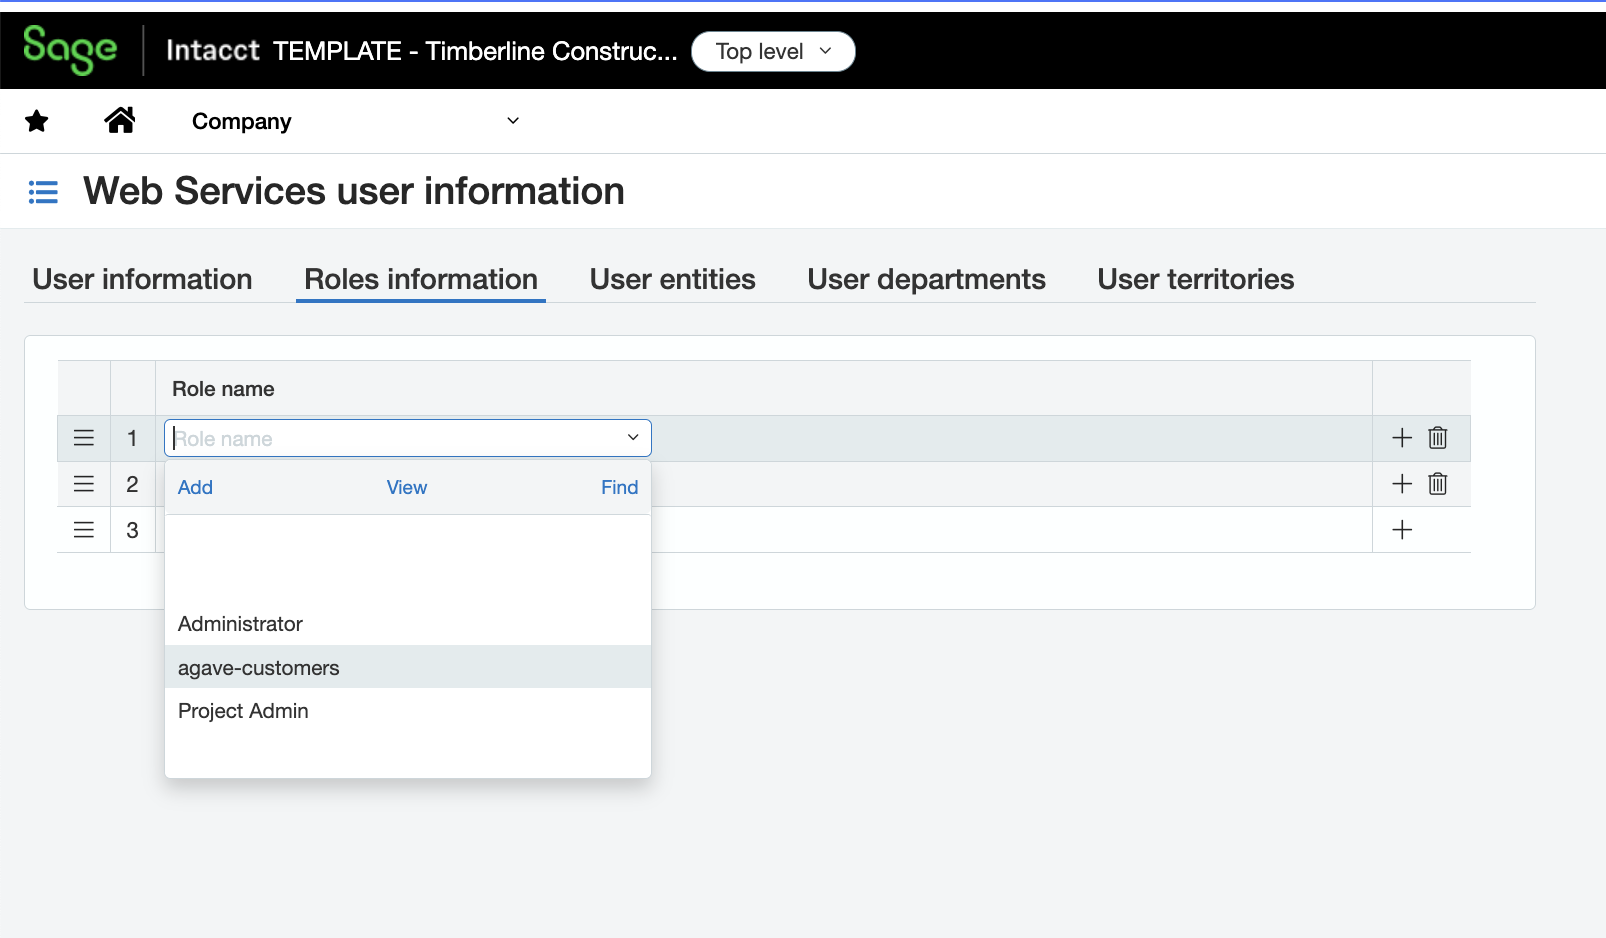
- Return to the Web Service User page. Under the Roles Information tab, add the above Role for the Web Service User:
Step 4: Authenticate with Sage Intacct in Agave
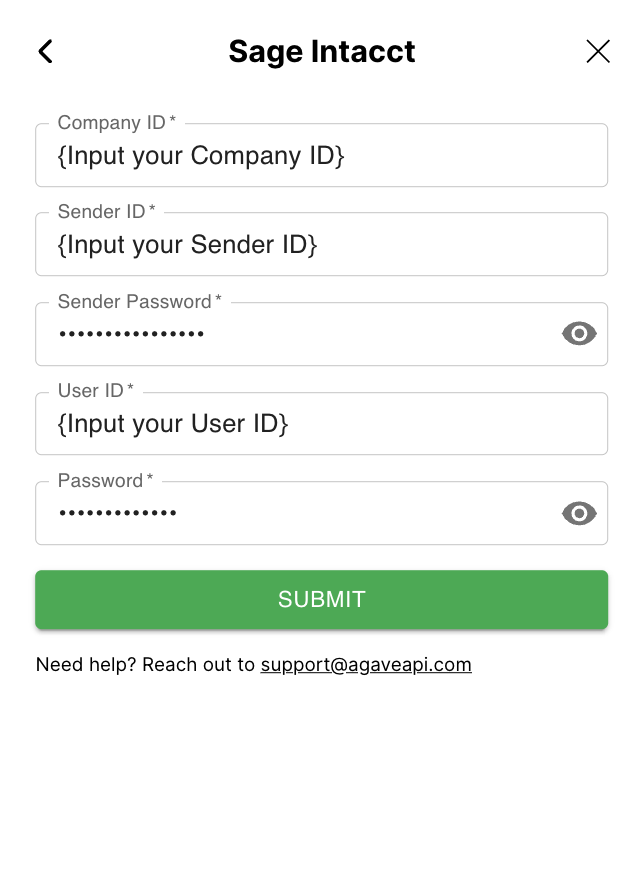
When logging into Sage Intacct in Agave, input details for connecting to your Sage Intacct account, including the:
- Company ID: see below for details on how to retrieve your Company ID.
- Sender ID: this is the Web Service Sender ID provided by Sage when you activated your subscription.
- Sender Password: this is the Web Service Sender Password provided by Sage when you activated your subscription.
- User ID: this is the Web Service User ID you created above.
- Password: this is the password for the Web Service User.
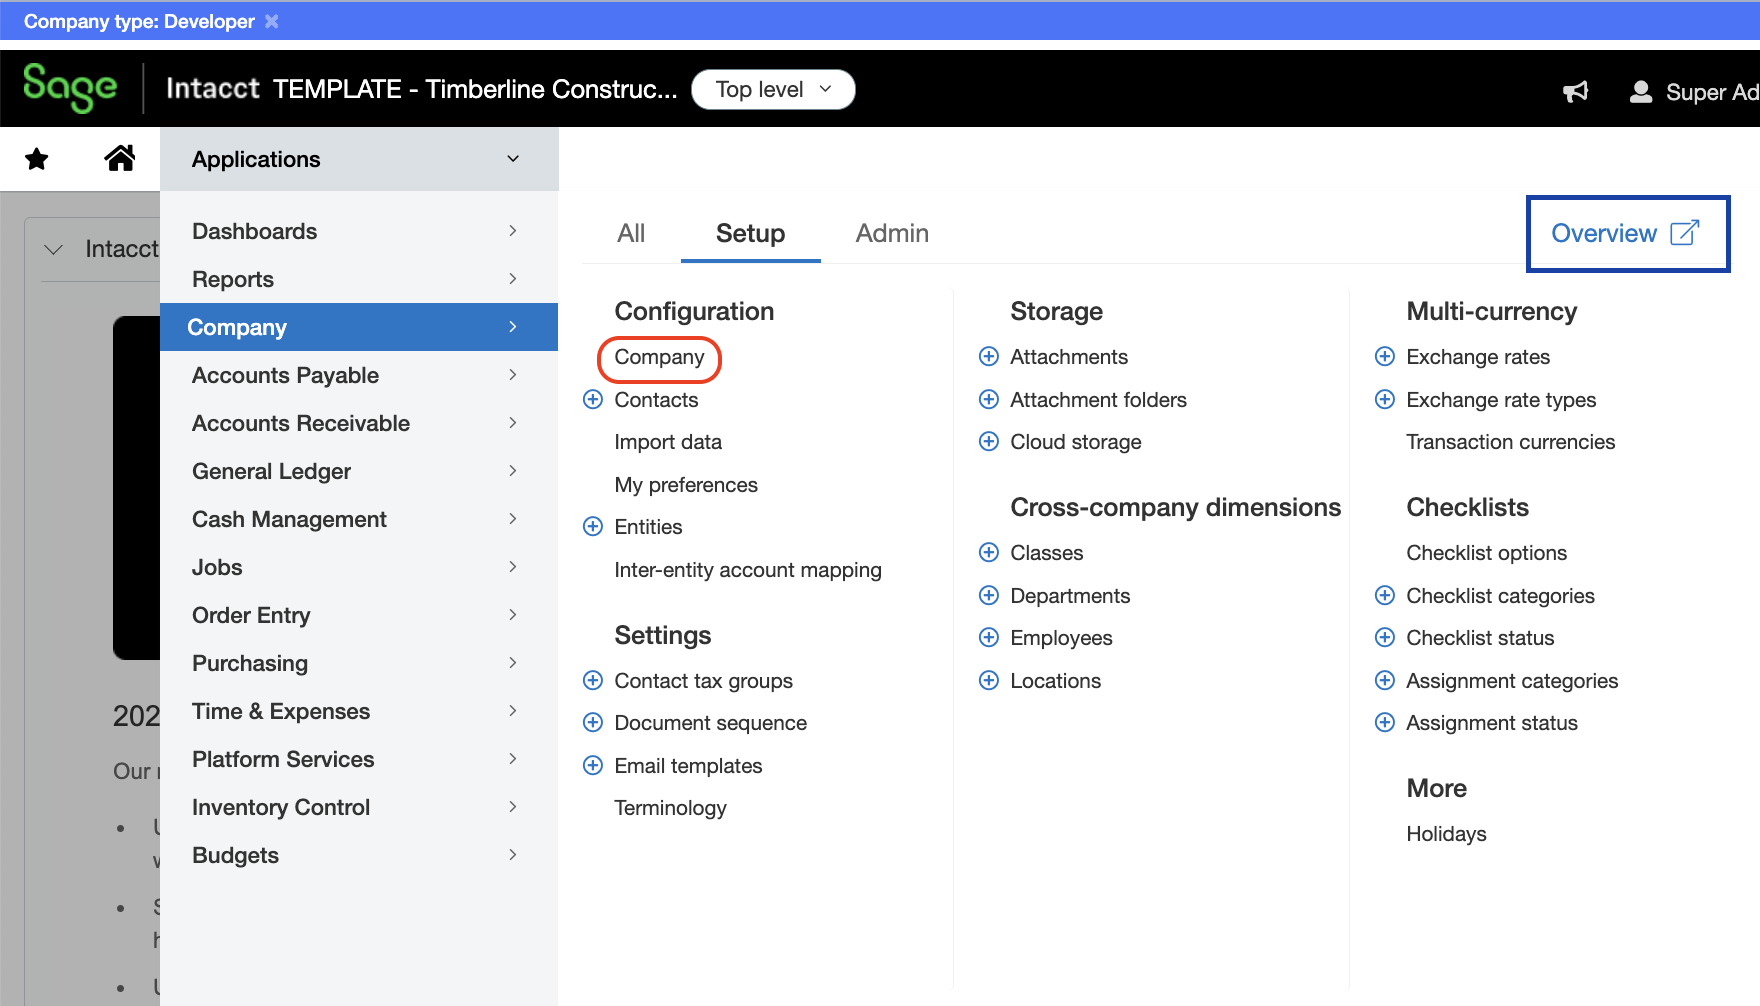
To determine your Company ID, select Applications-->Company-->Company. Your Company ID will appear at the top of the page.
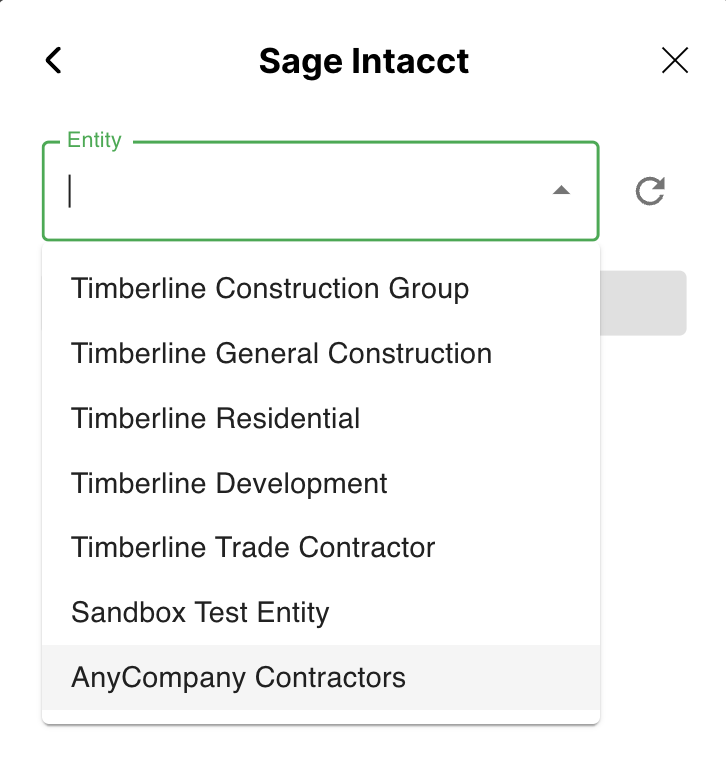
Finally, press Submit. On the next screen, select an Entity and press Confirm:
