Common Errors and FAQs
QuickBooks Web Connector
Web Connector application has stopped working
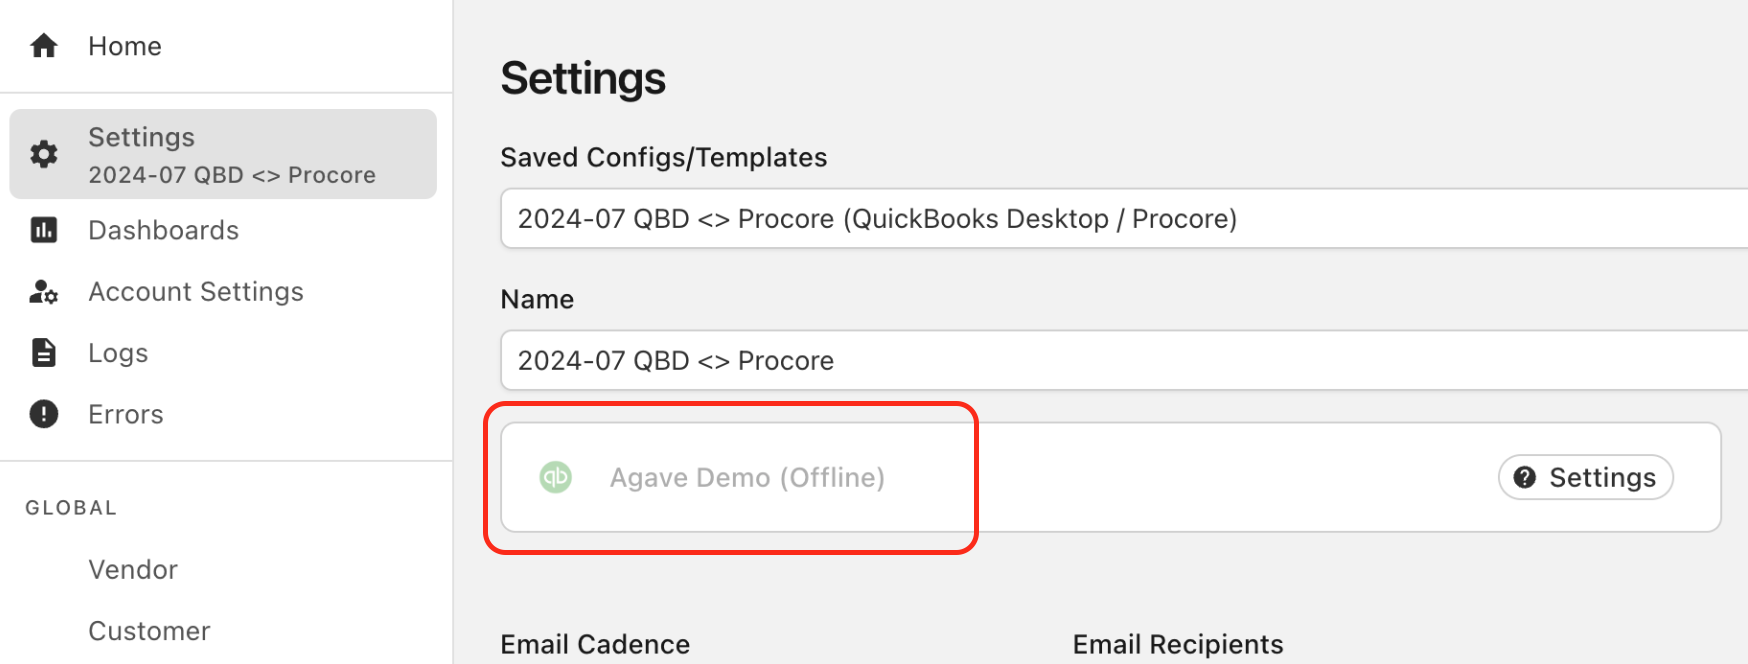
If your QuickBooks Desktop account appears offline or unresponsive in Agave Sync, you may need to restart the Web Connector application 2-3 times for it to reconnect and resume normal operation.
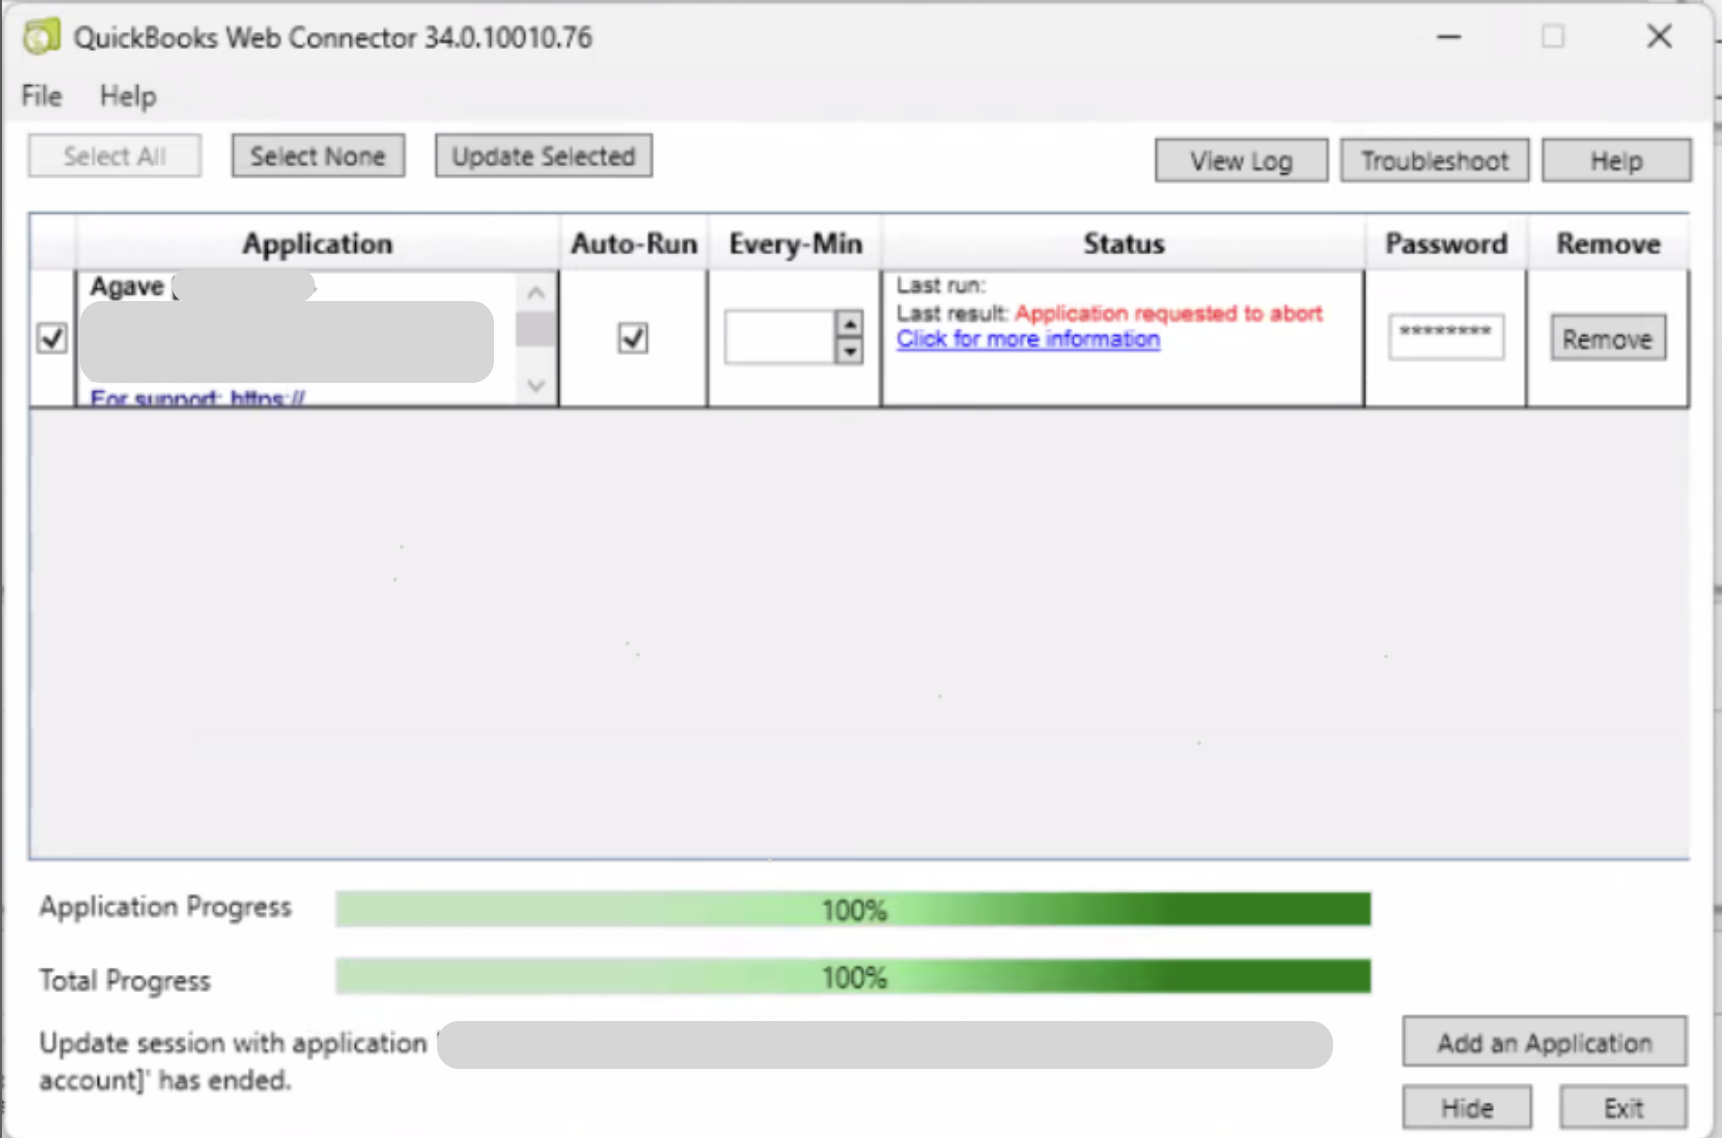
Web Connector last result "Application requested to abort"
You may encounter this error if you recently moved your QuickBooks Desktop company file and are unable to load data in Agave Sync after. To resolve, inform Agave Support and they will be able to reset the company file path.
Error: If the Company data file is not open, a call to the “BeginSession” method must include the name of the data file.
QuickBooks requires that you have the company file open during the initial Web Connector setup process.
Error: This application has not accessed the QuickBooks company data file before.
QuickBooks requires that you are signed in as an Admin user when adding a new connection to the Web Connector.
Error: Insufficient permission level to perform this action.
Step 1: Determine the User for the Integration Application
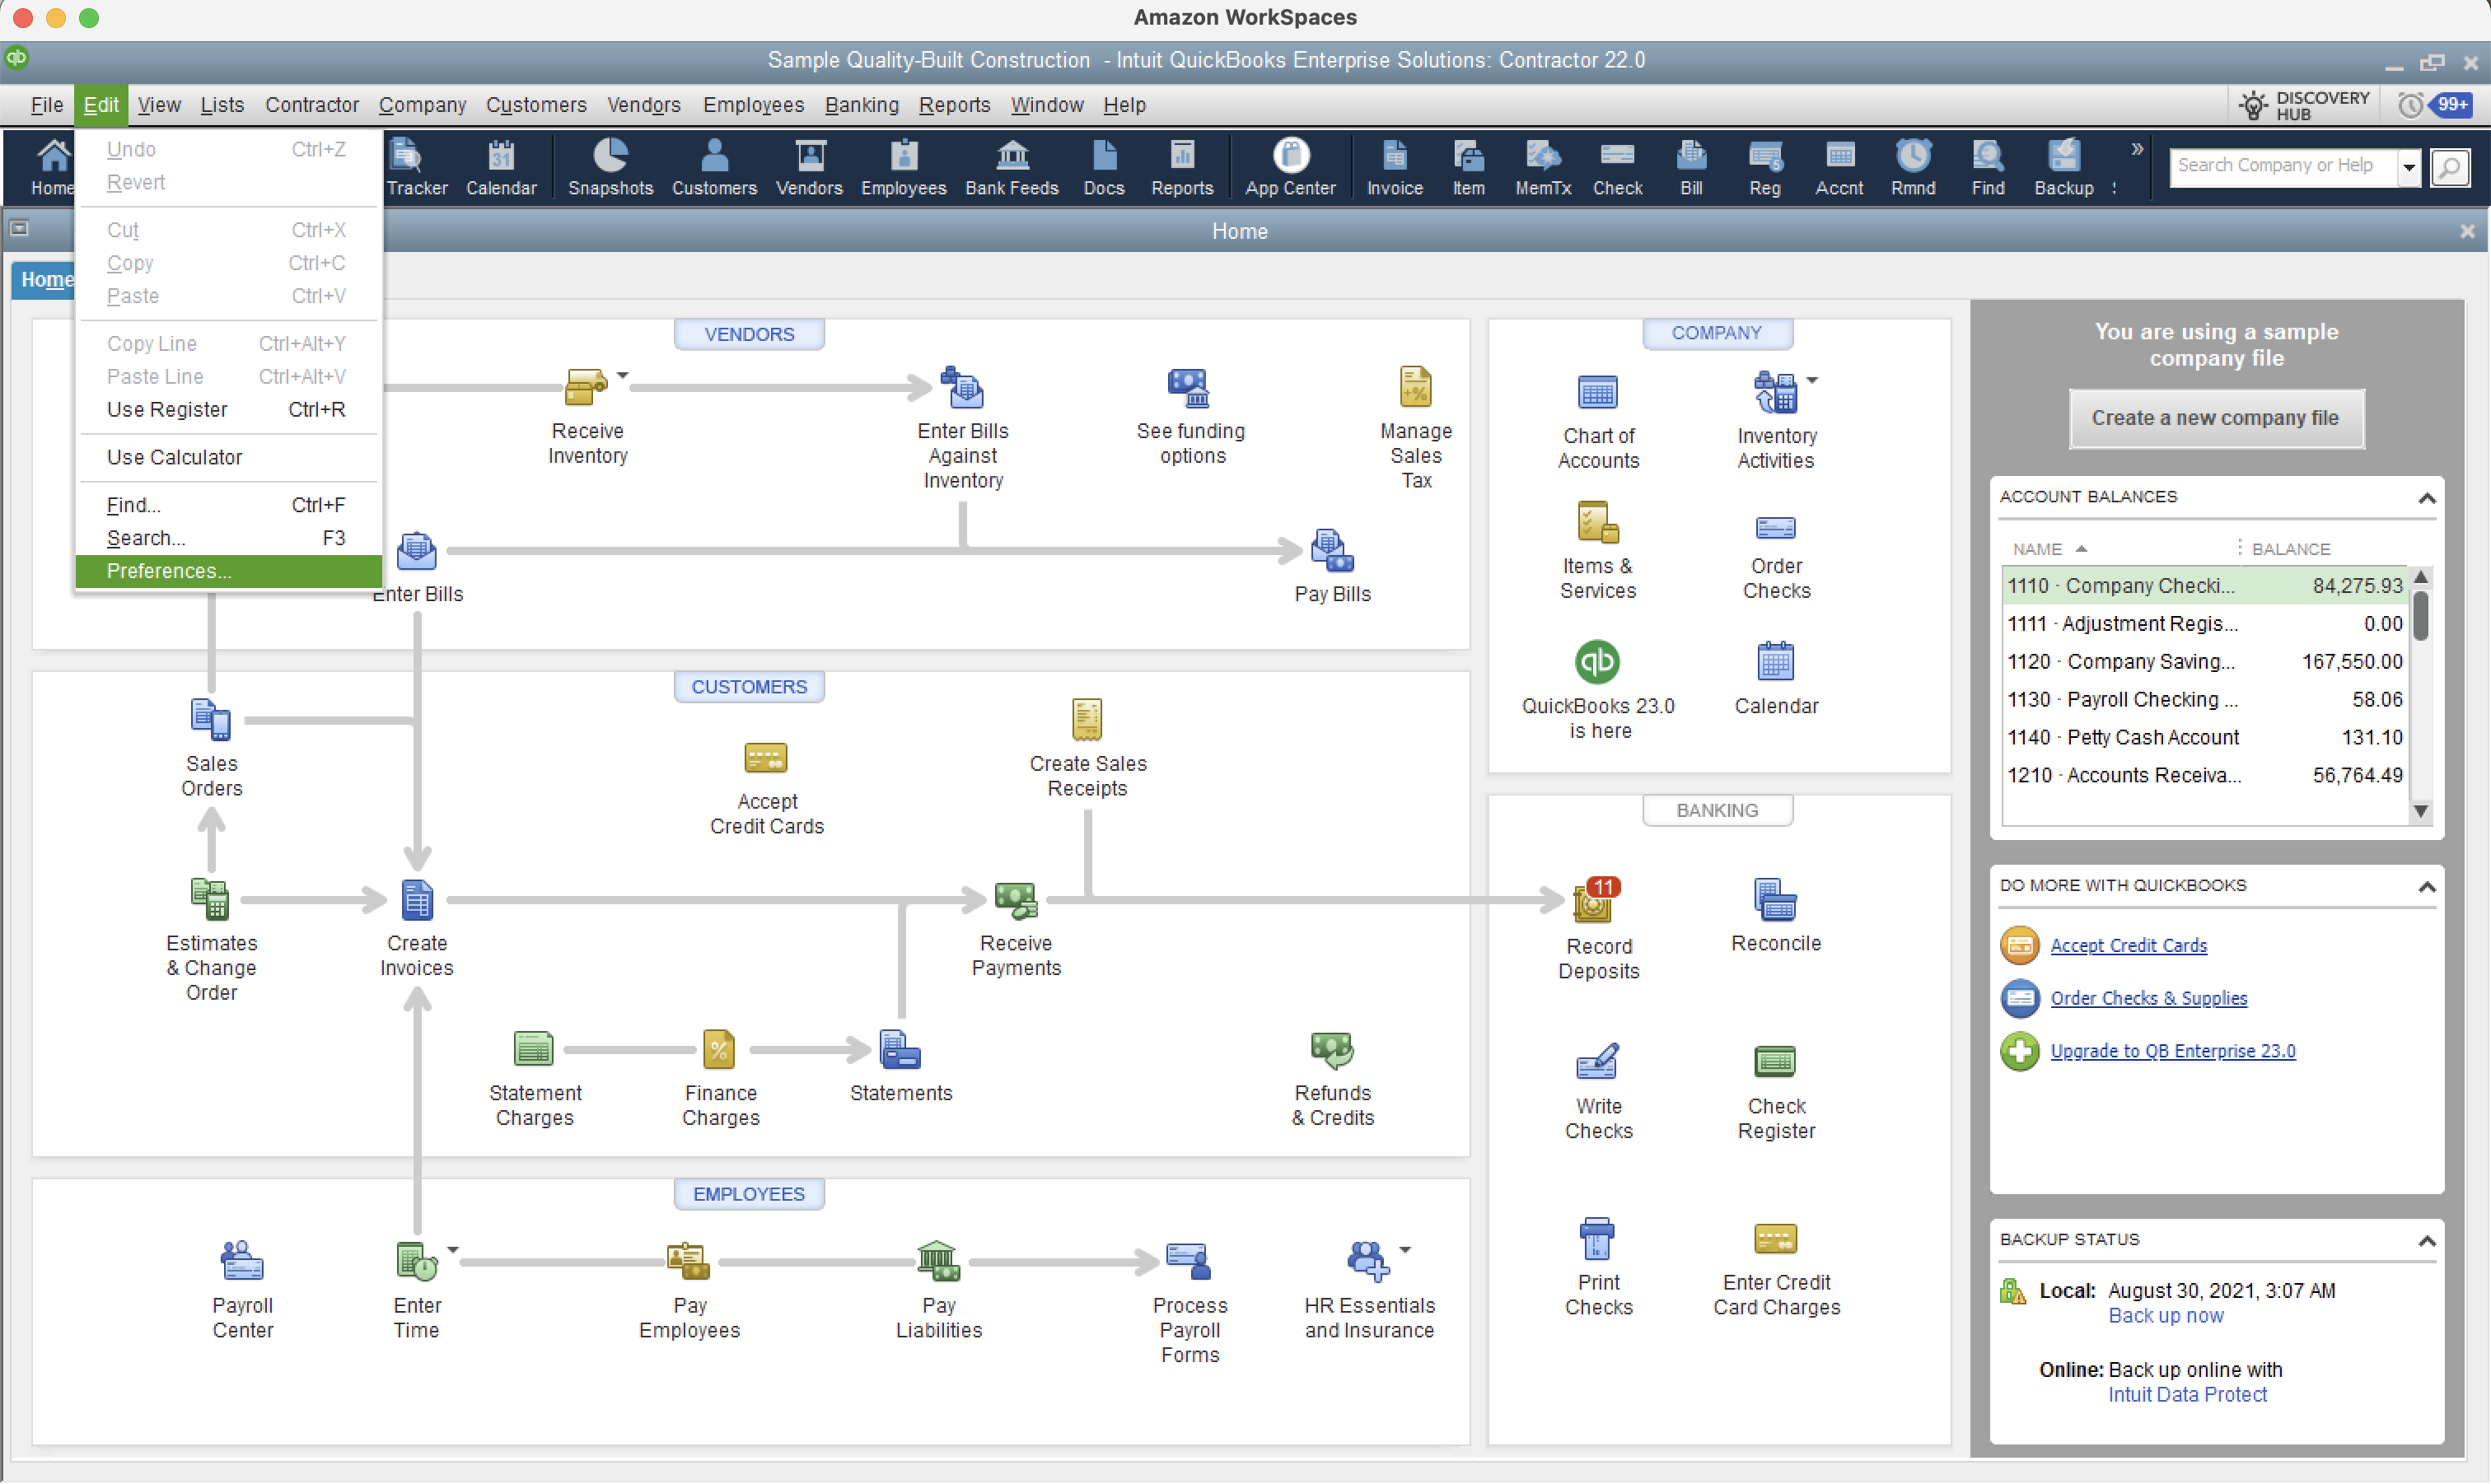
- From the homepage, select Edit → Preferences:
- Navigate to Integrated Applications → Company Preferences:
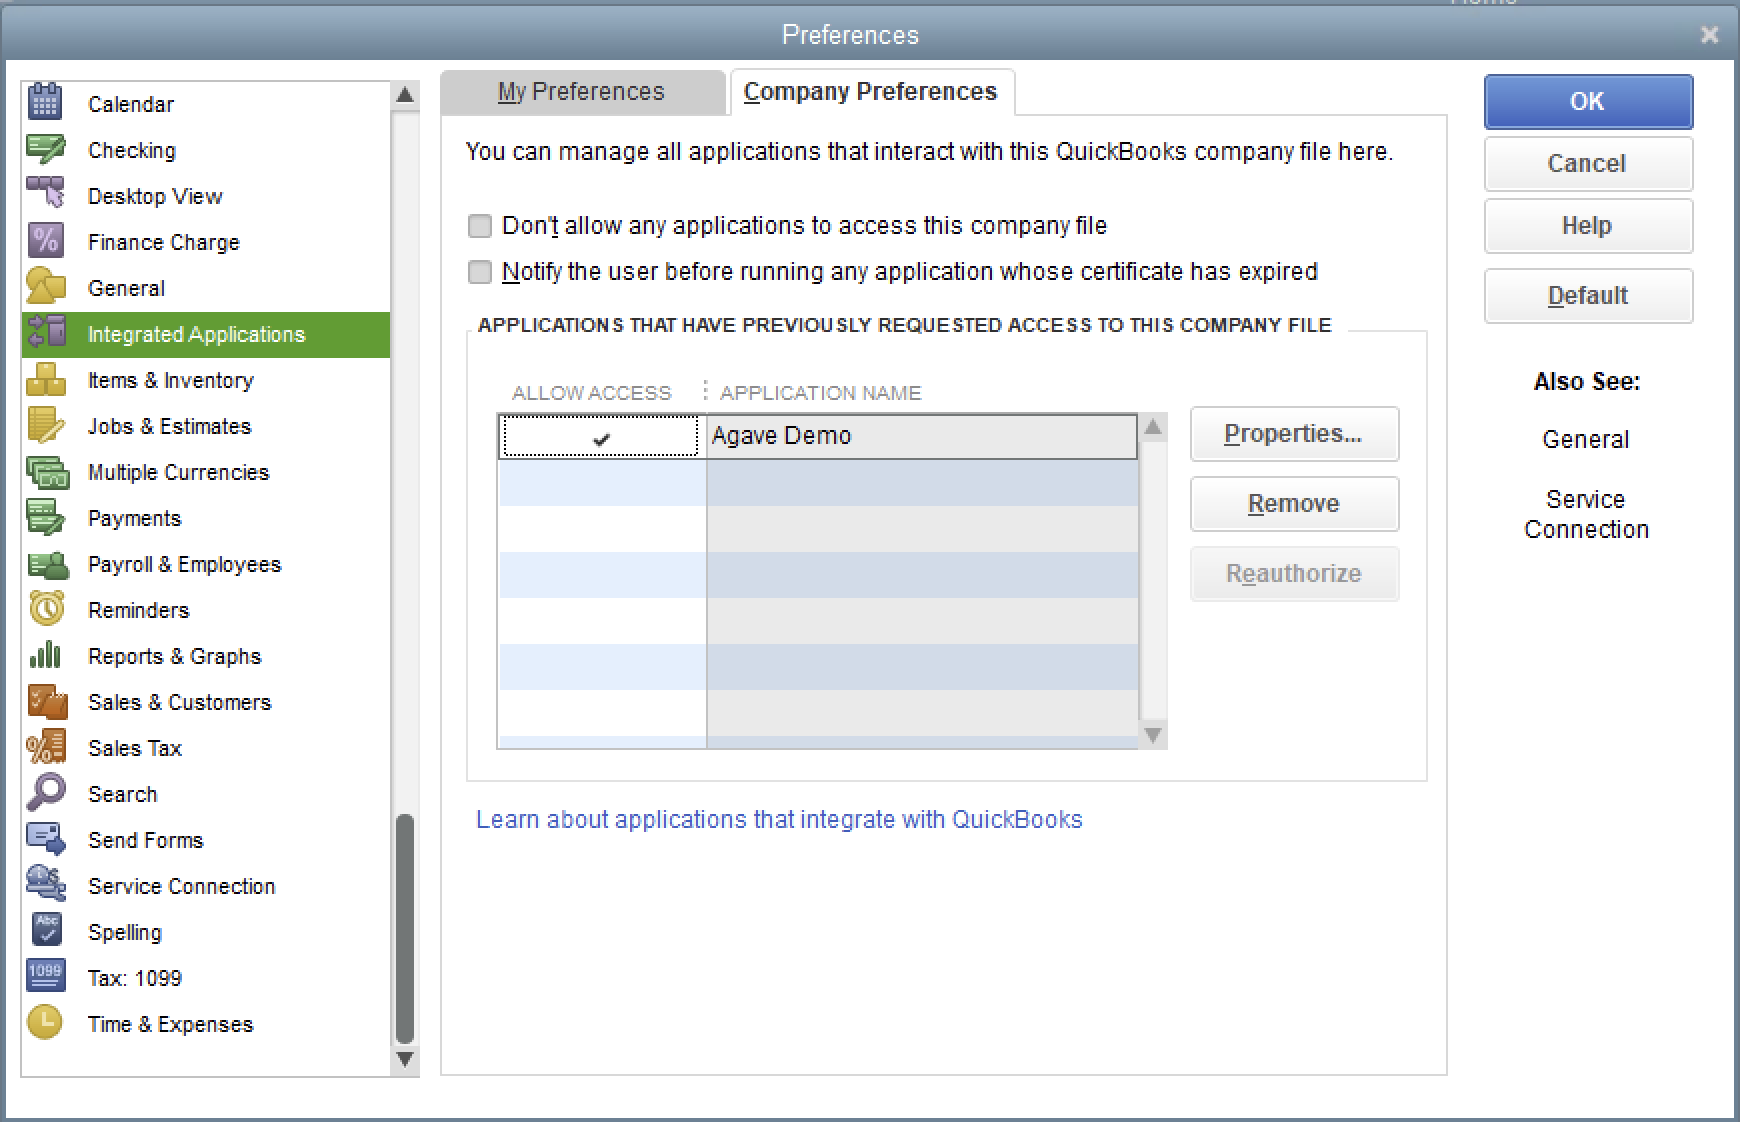
- Select the Application (e.g. Agave Demo), then Properties. The user for the Integrated Application will appear under Login as:.
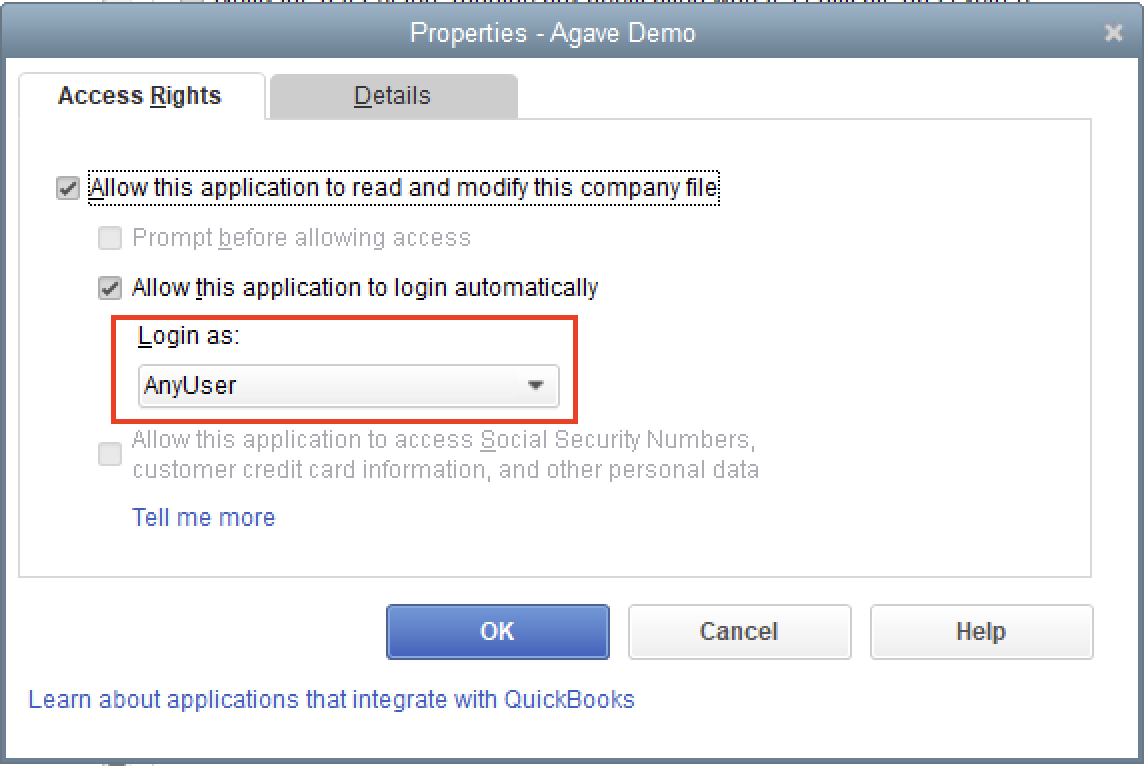
- You can either change the Integrated Application's Login to a User with more permissions, or update the permissions for the Role associated with the User (see Step 2 below).
Step 2: Update Permissions for Integrated Application User’s Role
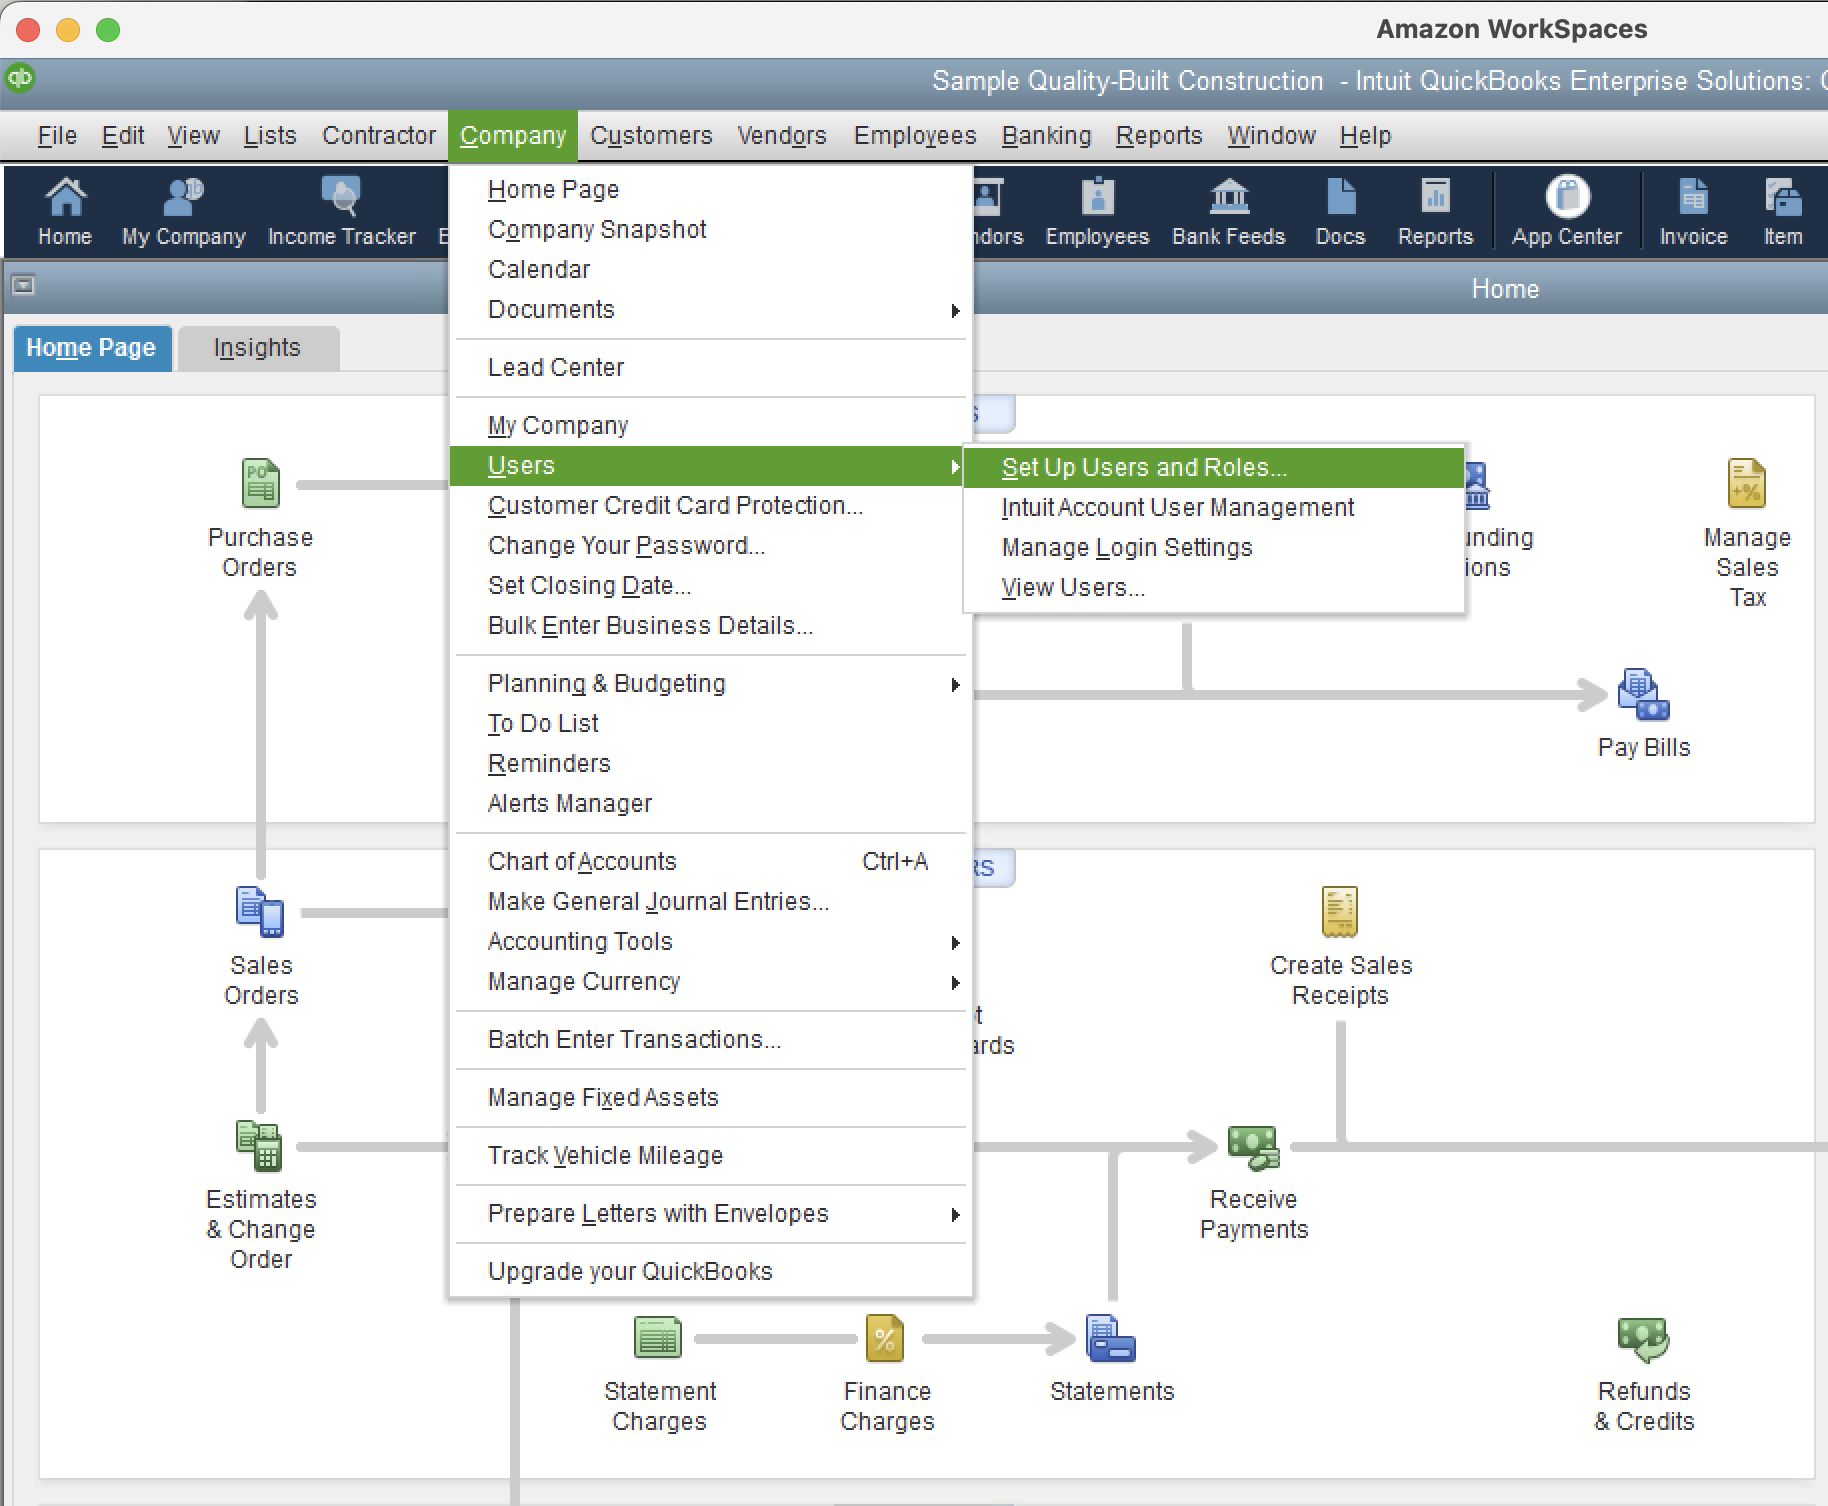
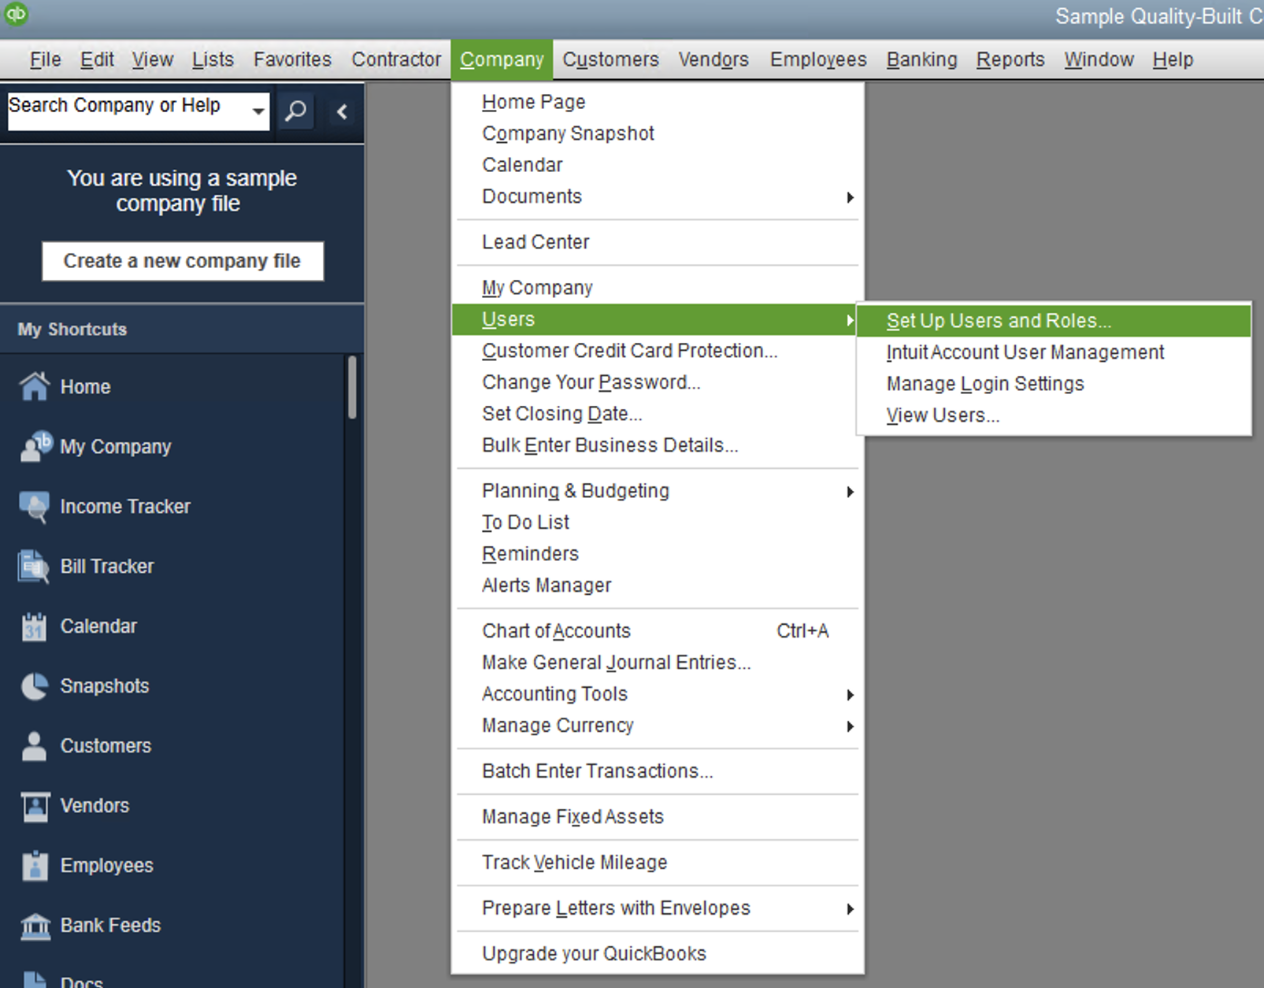
- From the Home Page, select Company → Users → Set Up Users and Roles...:
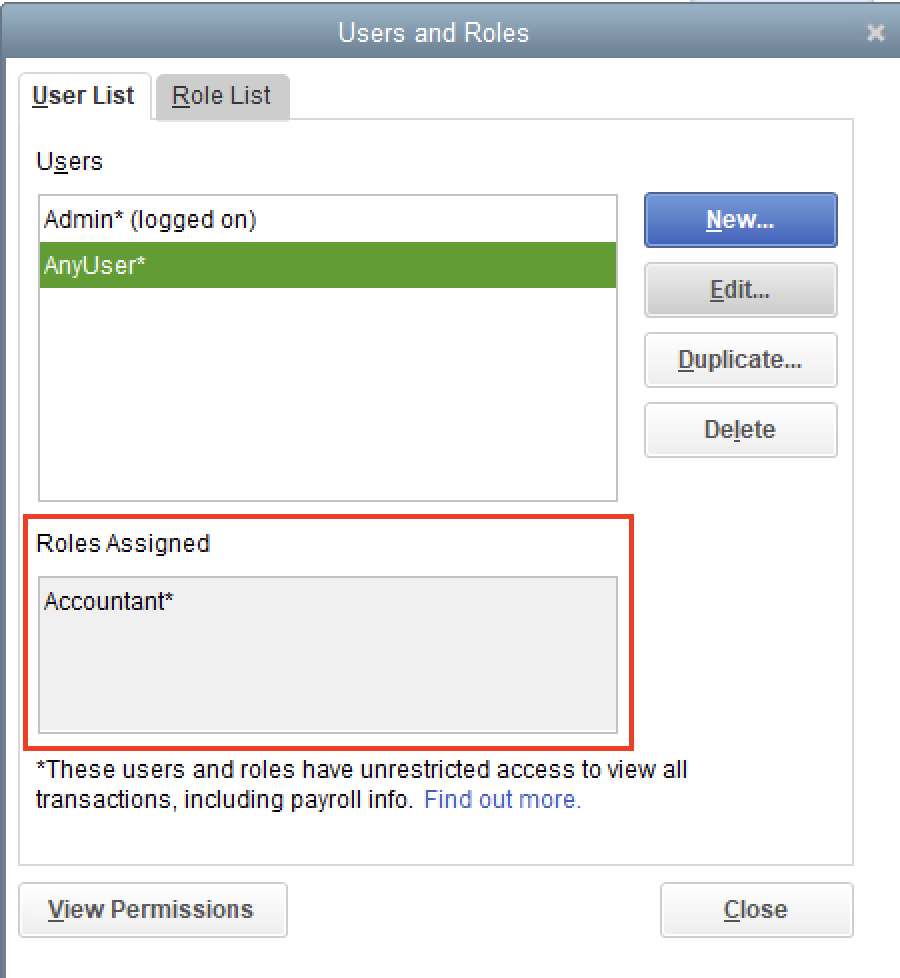
- Select the User from the list to see which Roles have been assigned to it:
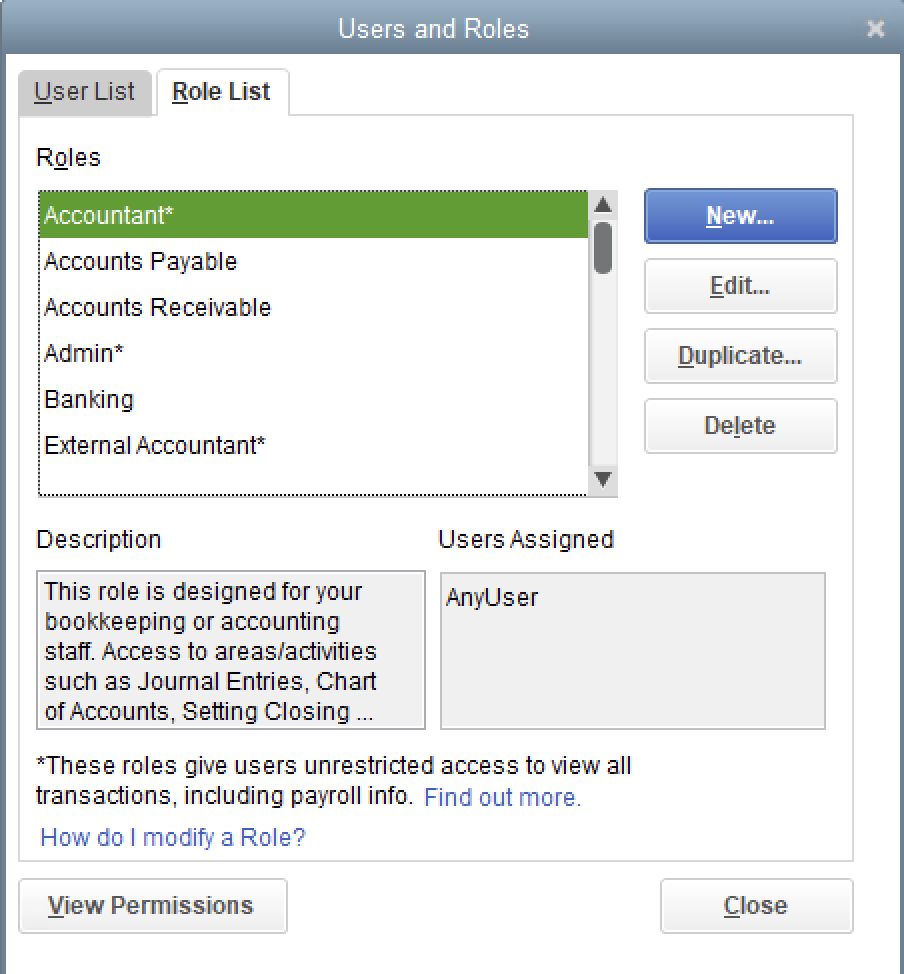
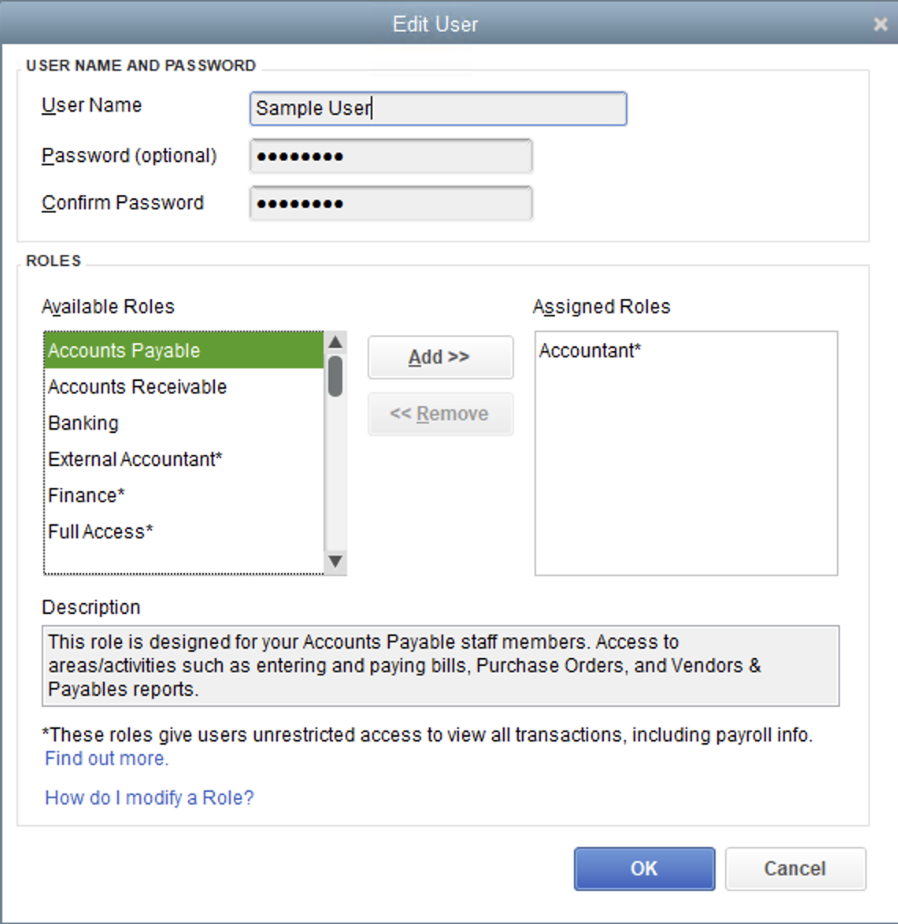
- You can either change to role for the User to a Role with more permissions (e.g. “Full Access”), or alternatively update the Role’s permissions. To see and change a Role�’s permissions, select the Role List tab. Then select the User’s Role and press Edit.
- In the directory, navigate to the relevant data object you would like to enable access to. For example, the below enables access to viewing, creating, updating, and deleting Estimates:
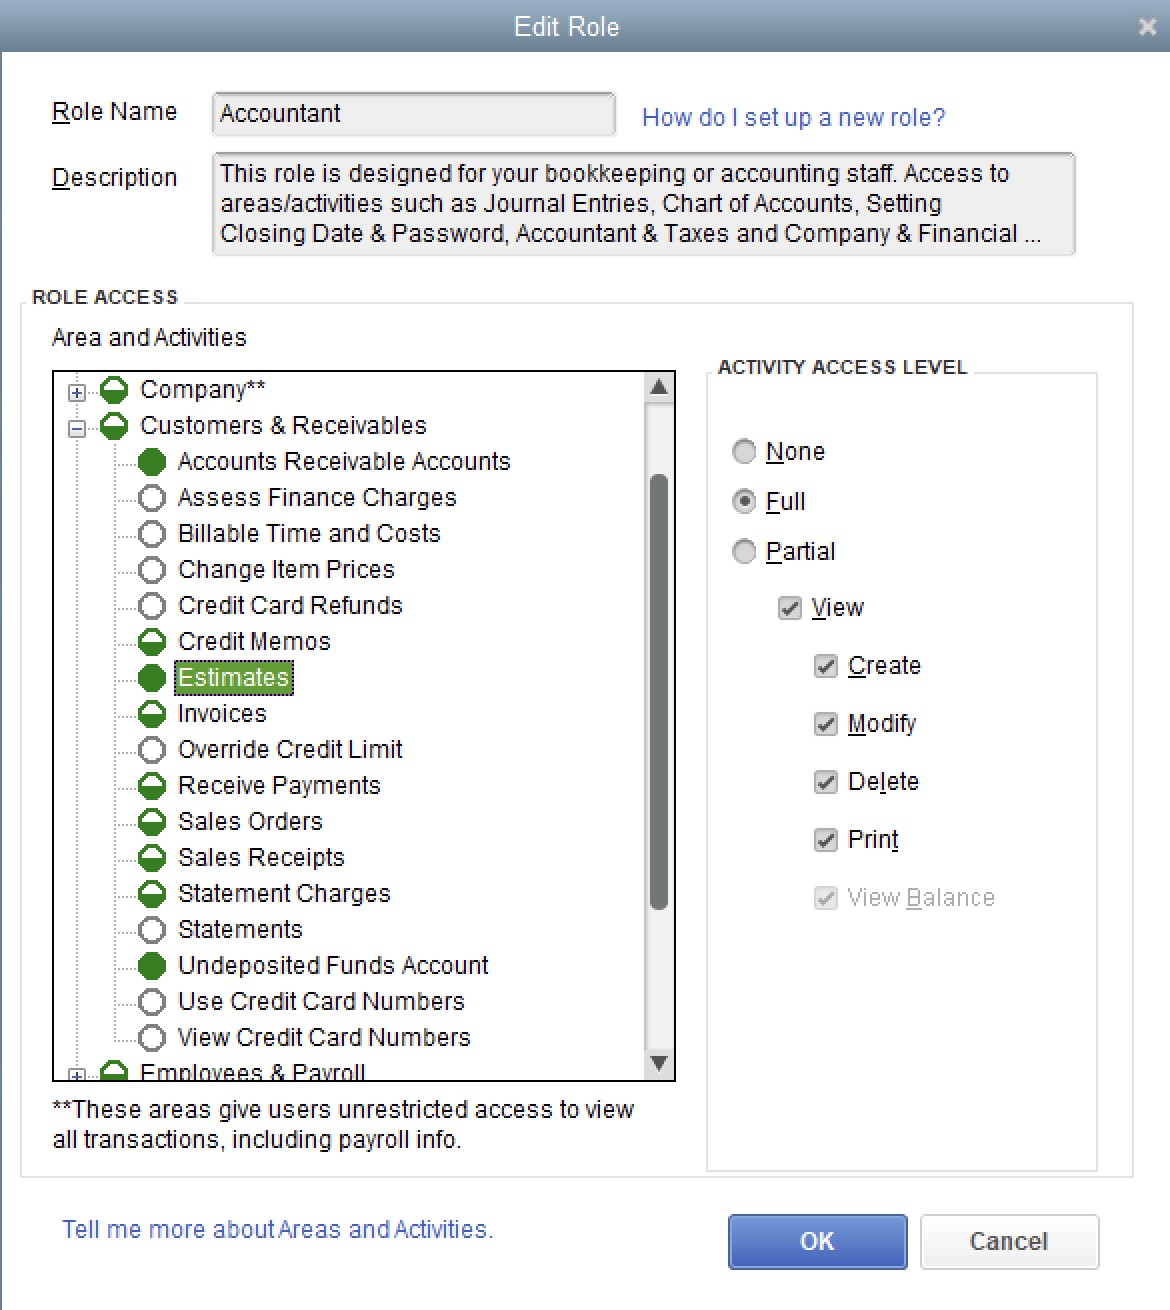
- Once you have selected an option, select OK, then Close. Your User should now have the appropriate permissions and you should no longer encounter the "Insufficient Permissions" error.
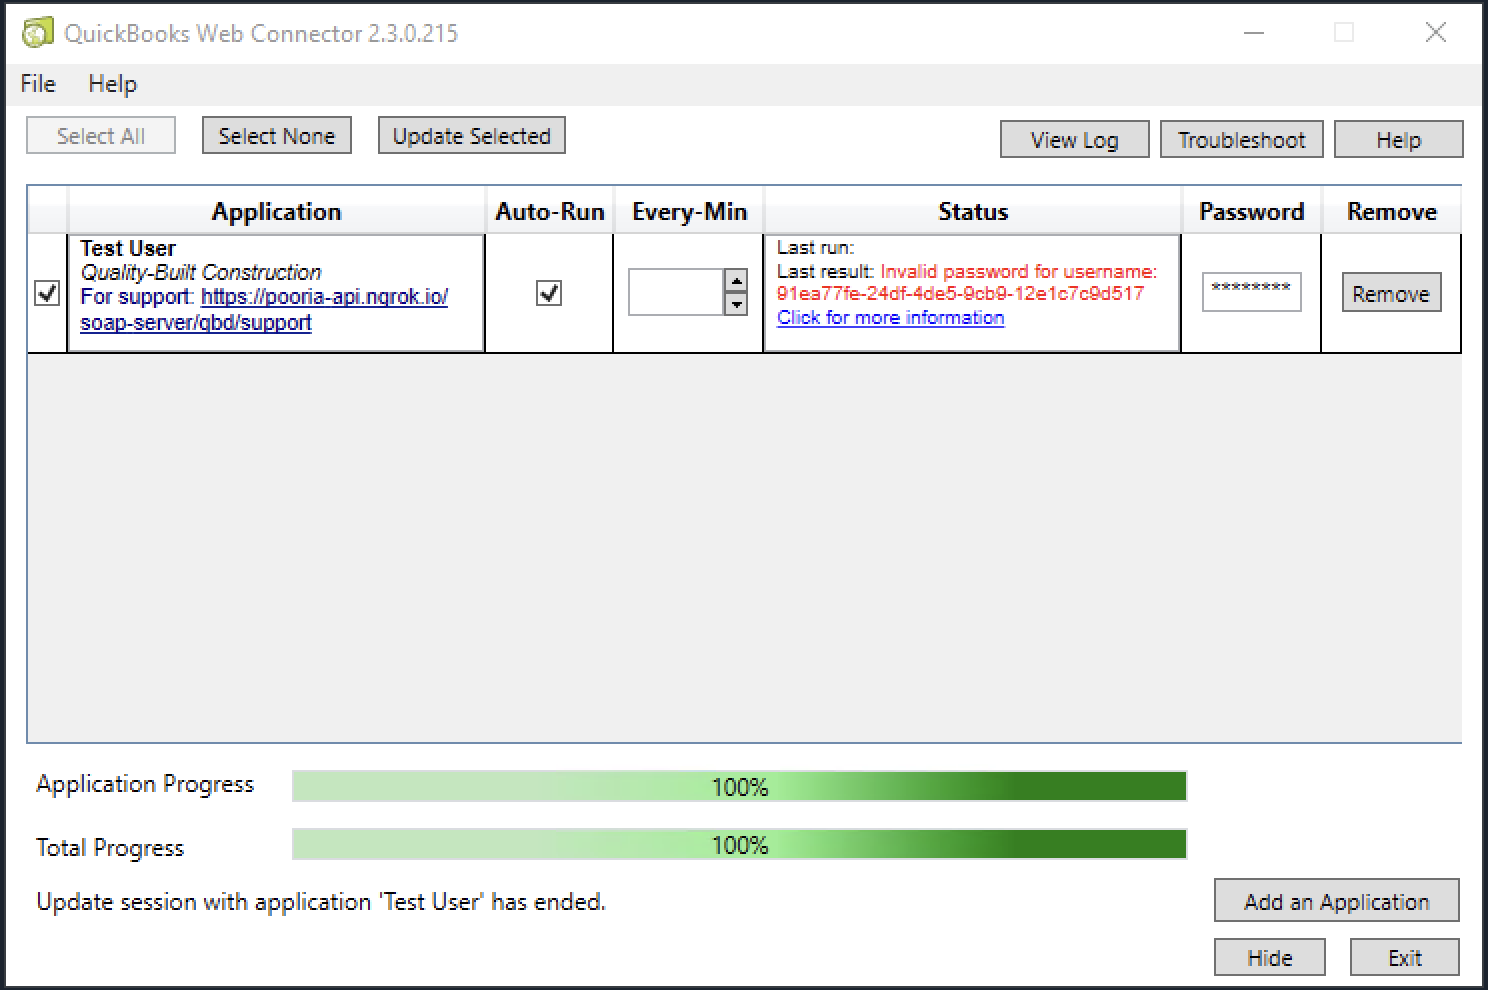
Error: Invalid password for username.
This error means the password you entered is incorrect. Make sure you have entered it exactly as it appears on Agave Link (e.g. doesn't have any extra spaces in it).
Error: Units of Measure are not enabled.
If you receive an error message when attempting to pass unit_of_measure in AP Invoices, Estimates, or Expenses Line Items, you will need to enable Units of Measure for your QuickBooks Desktop company.
To enable Units of Measure:
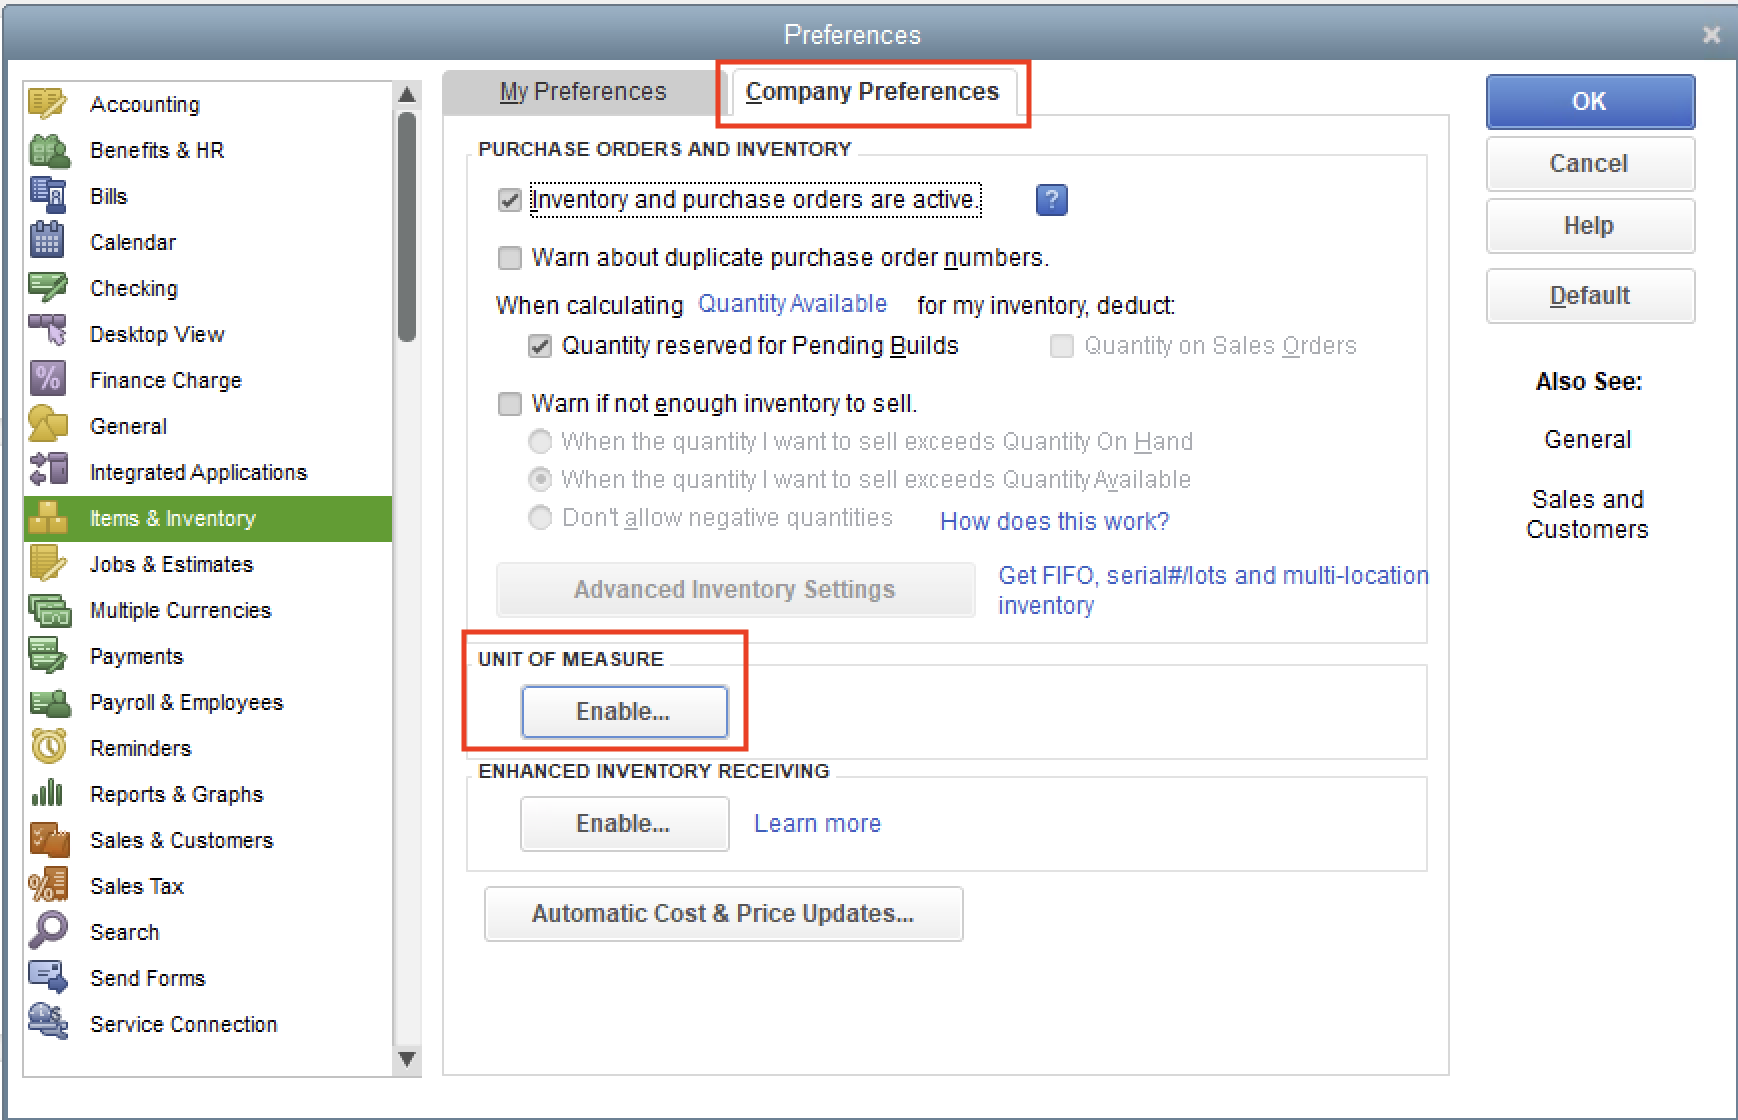
- In QuickBooks Desktop, select Edit and then select Preferences.

- Select Items & Inventory from the left hand rail, and then Company Preferences at the top. Under Unit of Measure, select Enable.
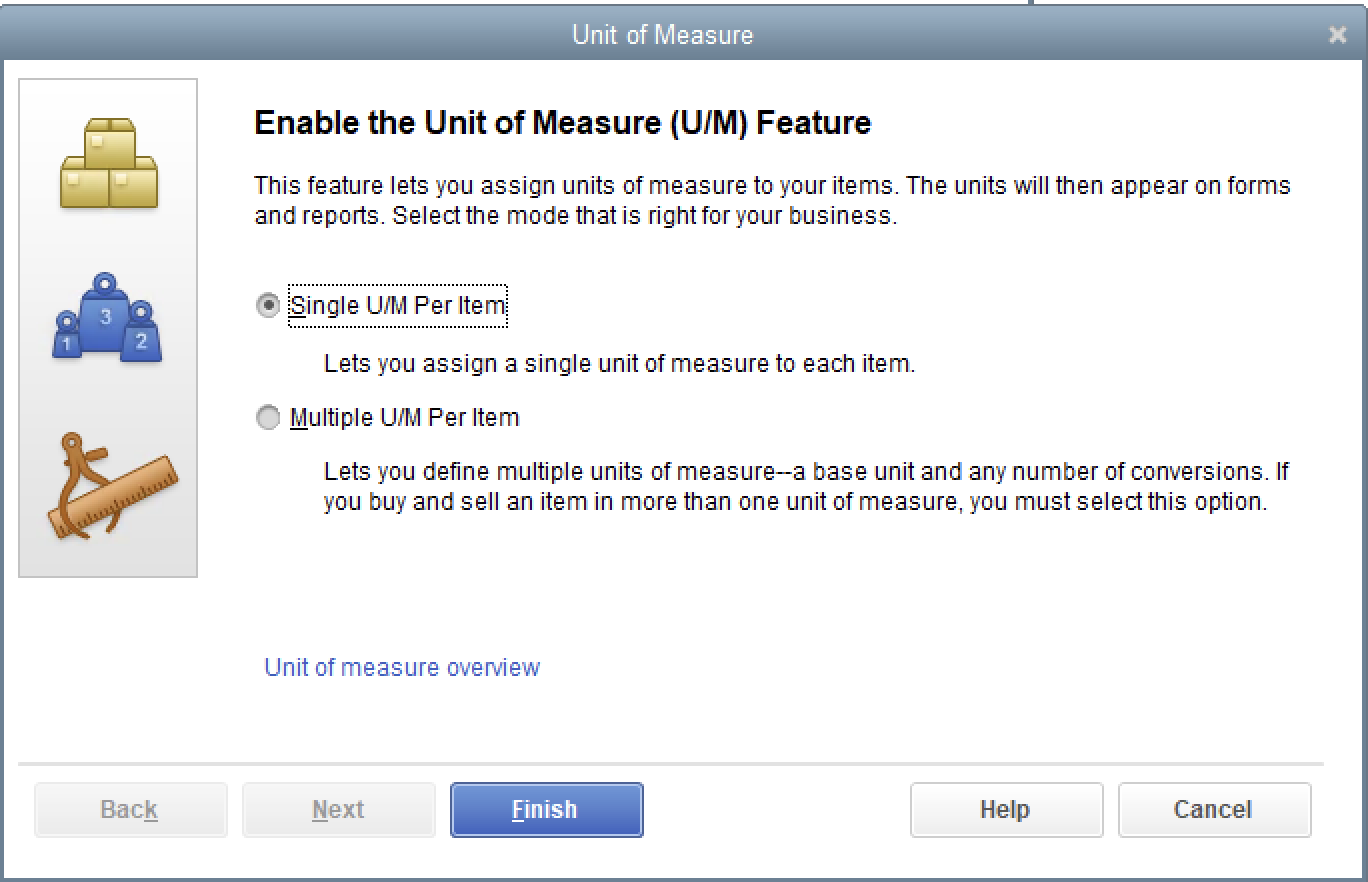
- Select Single U/M Per Item, then Finish.
FAQs
What versions of QuickBooks Desktop do you support?
Agave follows Intuit's service discontinuation policy for QuickBooks Desktop. Generally, we support the last three major versions of the US and Canadian editions of QuickBooks Desktop.
Currently, we support the following versions of QuickBooks Desktop:
- US/Canada Editions of QuickBooks Pro, Premier, and Enterprise 2025
- US/Canada Editions of QuickBooks Pro, Premier, and Enterprise 2024
- US/Canada Editions of QuickBooks Pro, Premier, and Enterprise 2023
- US/Canada Editions of QuickBooks Pro, Premier, and Enterprise 2022
- US/Canada Editions of QuickBooks Pro, Premier, and Enterprise 2021
If you are using a version of QuickBooks Desktop that is not listed above, please contact us at support@agaveapi.com.
What versions of Windows do you support?
Agave follows Microsoft's Product Lifecycle policy for Windows.
Currently, we support the following versions of QuickBooks Desktop:
- Windows 10
- Windows 11
- Windows Server 2016
- Windows Server 2019
- Windows Server 2022
As of Octover 2023, Windows 8.1 and Windows Server 2012 have reached end of support and do not receive security updates. If you are using either version, we recommend upgrading immediately. Agave does not support these versions of Windows.
For more information, see this link.
Do I have to keep QuickBooks Desktop and QuickBooks Web Connector running?
Yes. QuickBooks Desktop and QuickBooks Web Connector both need to be running to enable real-time data syncing.
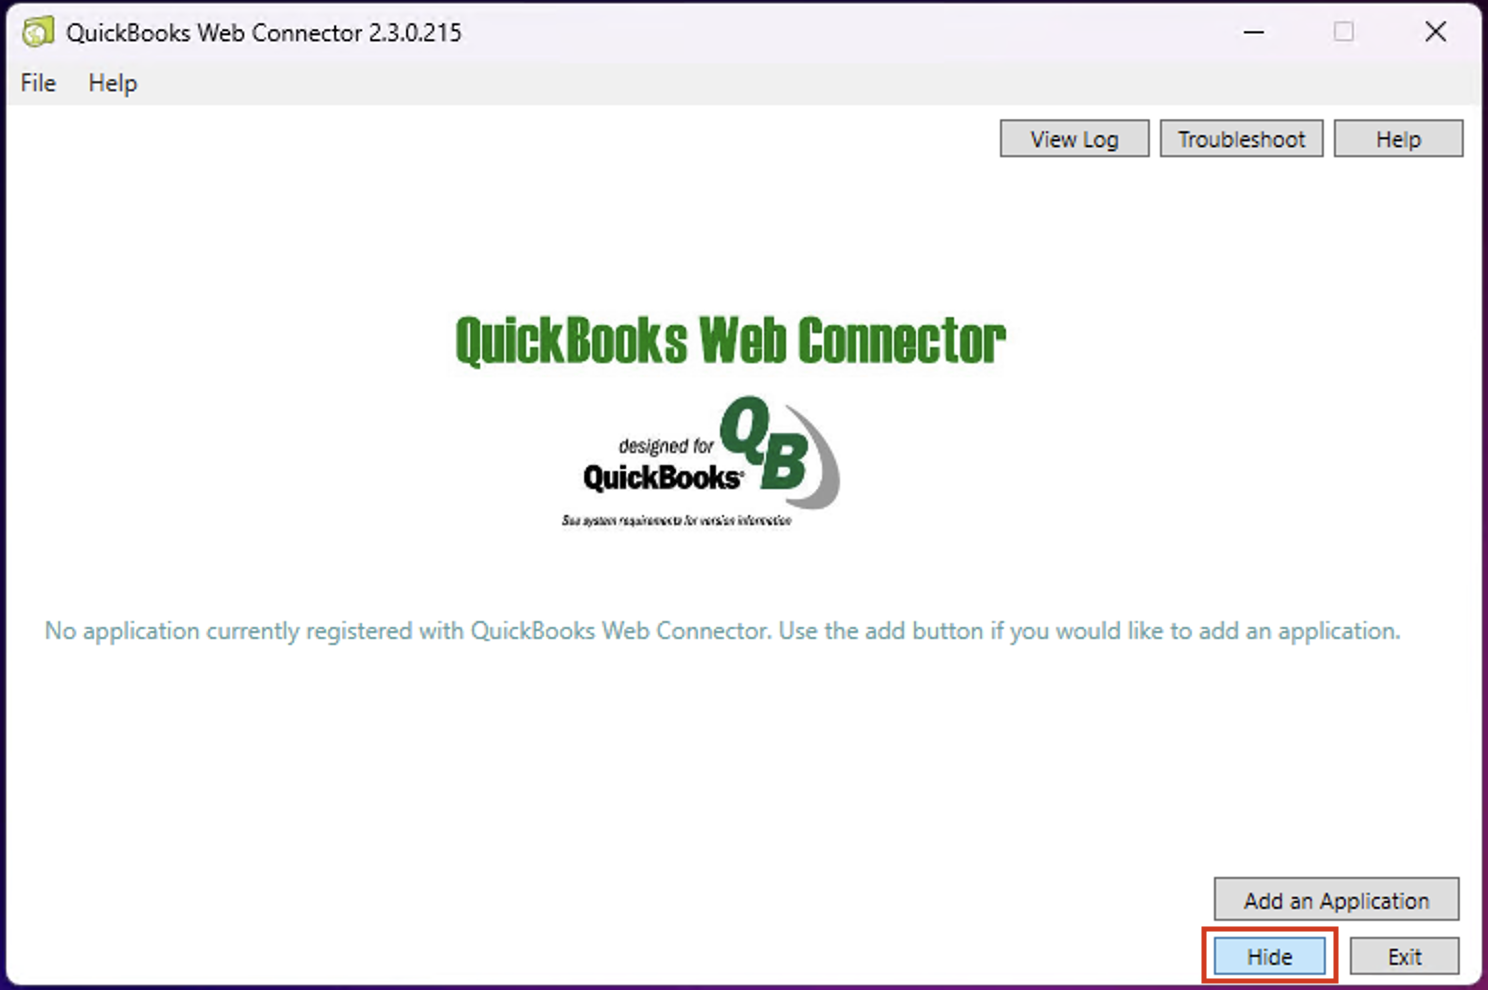
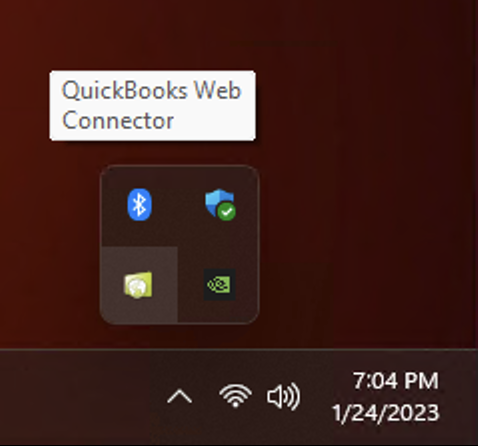
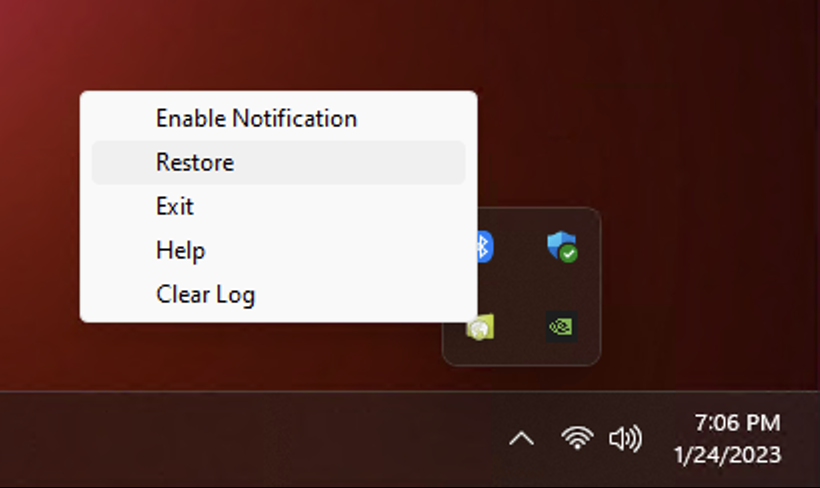
If you minimize the app, it will disappear into your Windows Tray. To re-open it, you have to click "Restore".
How often does Agave sync my data?
Agave will attempt to sync your data every 15 seconds. Note, syncing can take longer depending on the amount of data being synced.
Do I need to disable my firewall?
No. You do not need to disable your firewall when using QuickBooks Web Connector with Agave.
Can I manually sync my data?
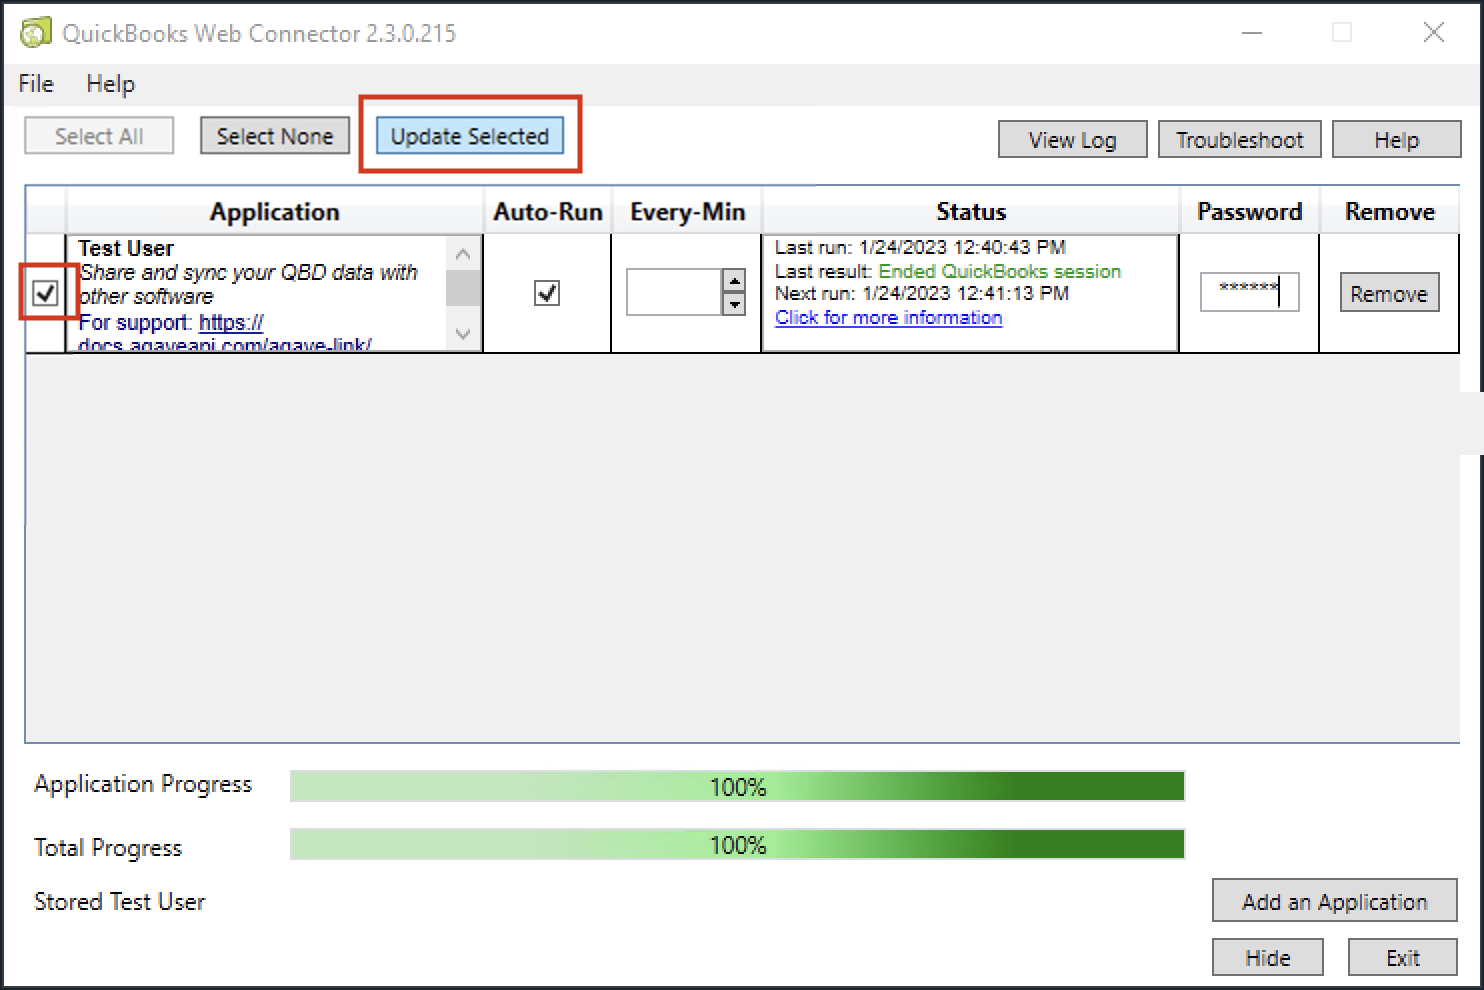
Yes. To manually sync your data, open QuickBooks Web Connector and select "Update Selected"
What User does the QuickBooks Desktop Web Connector run as?
You can select which User the QuickBooks Desktop Web Connector runs as if more than one User exists in a QuickBooks Desktop instance. If only one User exists, the QuickBooks Desktop Web Connector will default to the Admin User.
You can select the User when authorizing the Application with the QuickBooks Desktop Web Connector in the drop-down next to Login as:
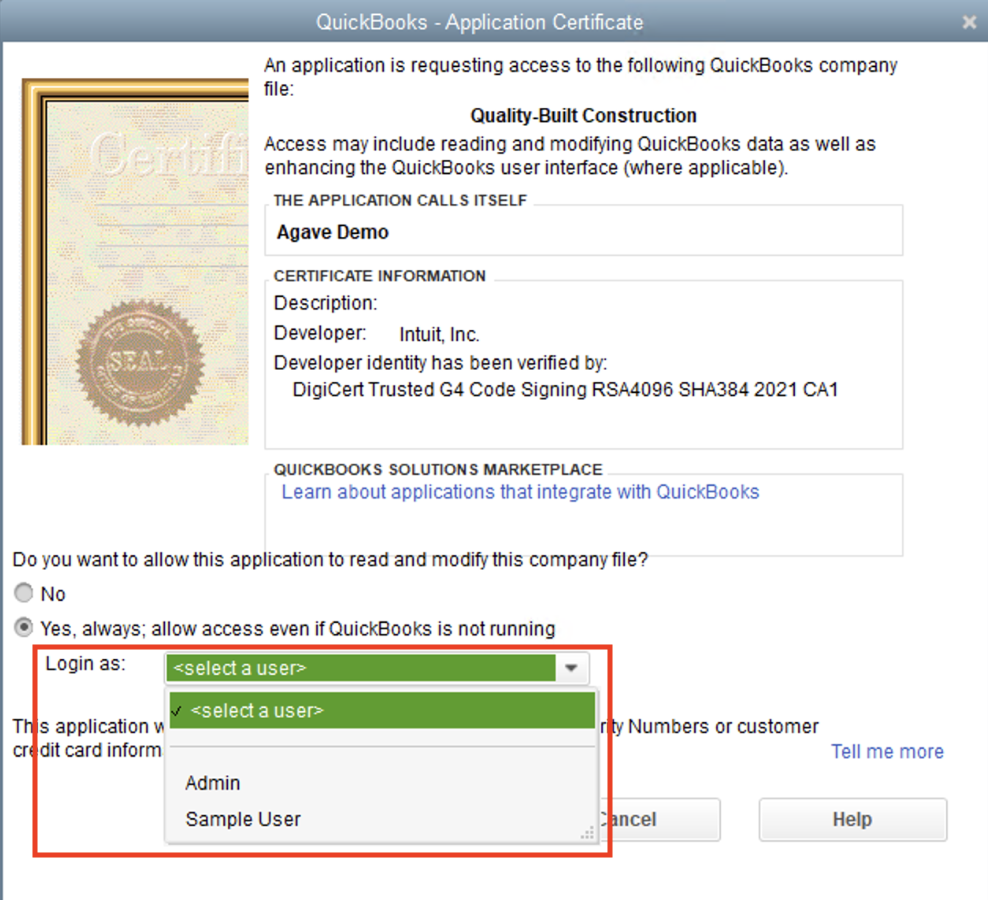
Note, Agave API will inherit the permissions of the User. To specify permissions that a User has, see the next FAQ.
Where can I specify permissions for a User?
- In the Company drop-down, select Users, then Set Up Users and Roles:
- Select an existing User and press Edit. Alternatively, you can press New to add a User.
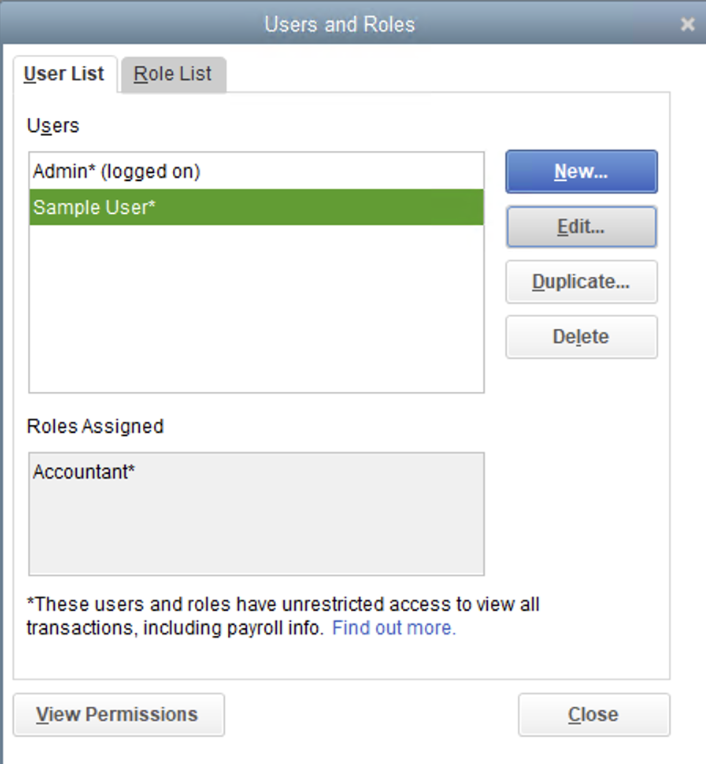
- You can then see and modify the Roles assigned to a User. To modify the permissions for a Role, see the next FAQ.
Where can I specify permissions for a Role?
- In the Company drop-down, select Users, then Set Up Users and Roles:
- Select Role List. You can then either select an existing Role and press Edit. Alternatively, you can press New to add a Role.

- You can then see and modify the Role. For each Area and Activity, you can either select None, Full, or Partial access for the Role. For example, the Accountant Role below has Partial access for Enter Bills:

Is QuickBooks Desktop getting discontinued?
Intuit plans to continue supporting QuickBooks Desktop Enterprise for the forseeable future. For information on other versions, see here.