Jobs
Agave Sync allows you to export ServiceTitan Jobs to Vista JC Jobs.
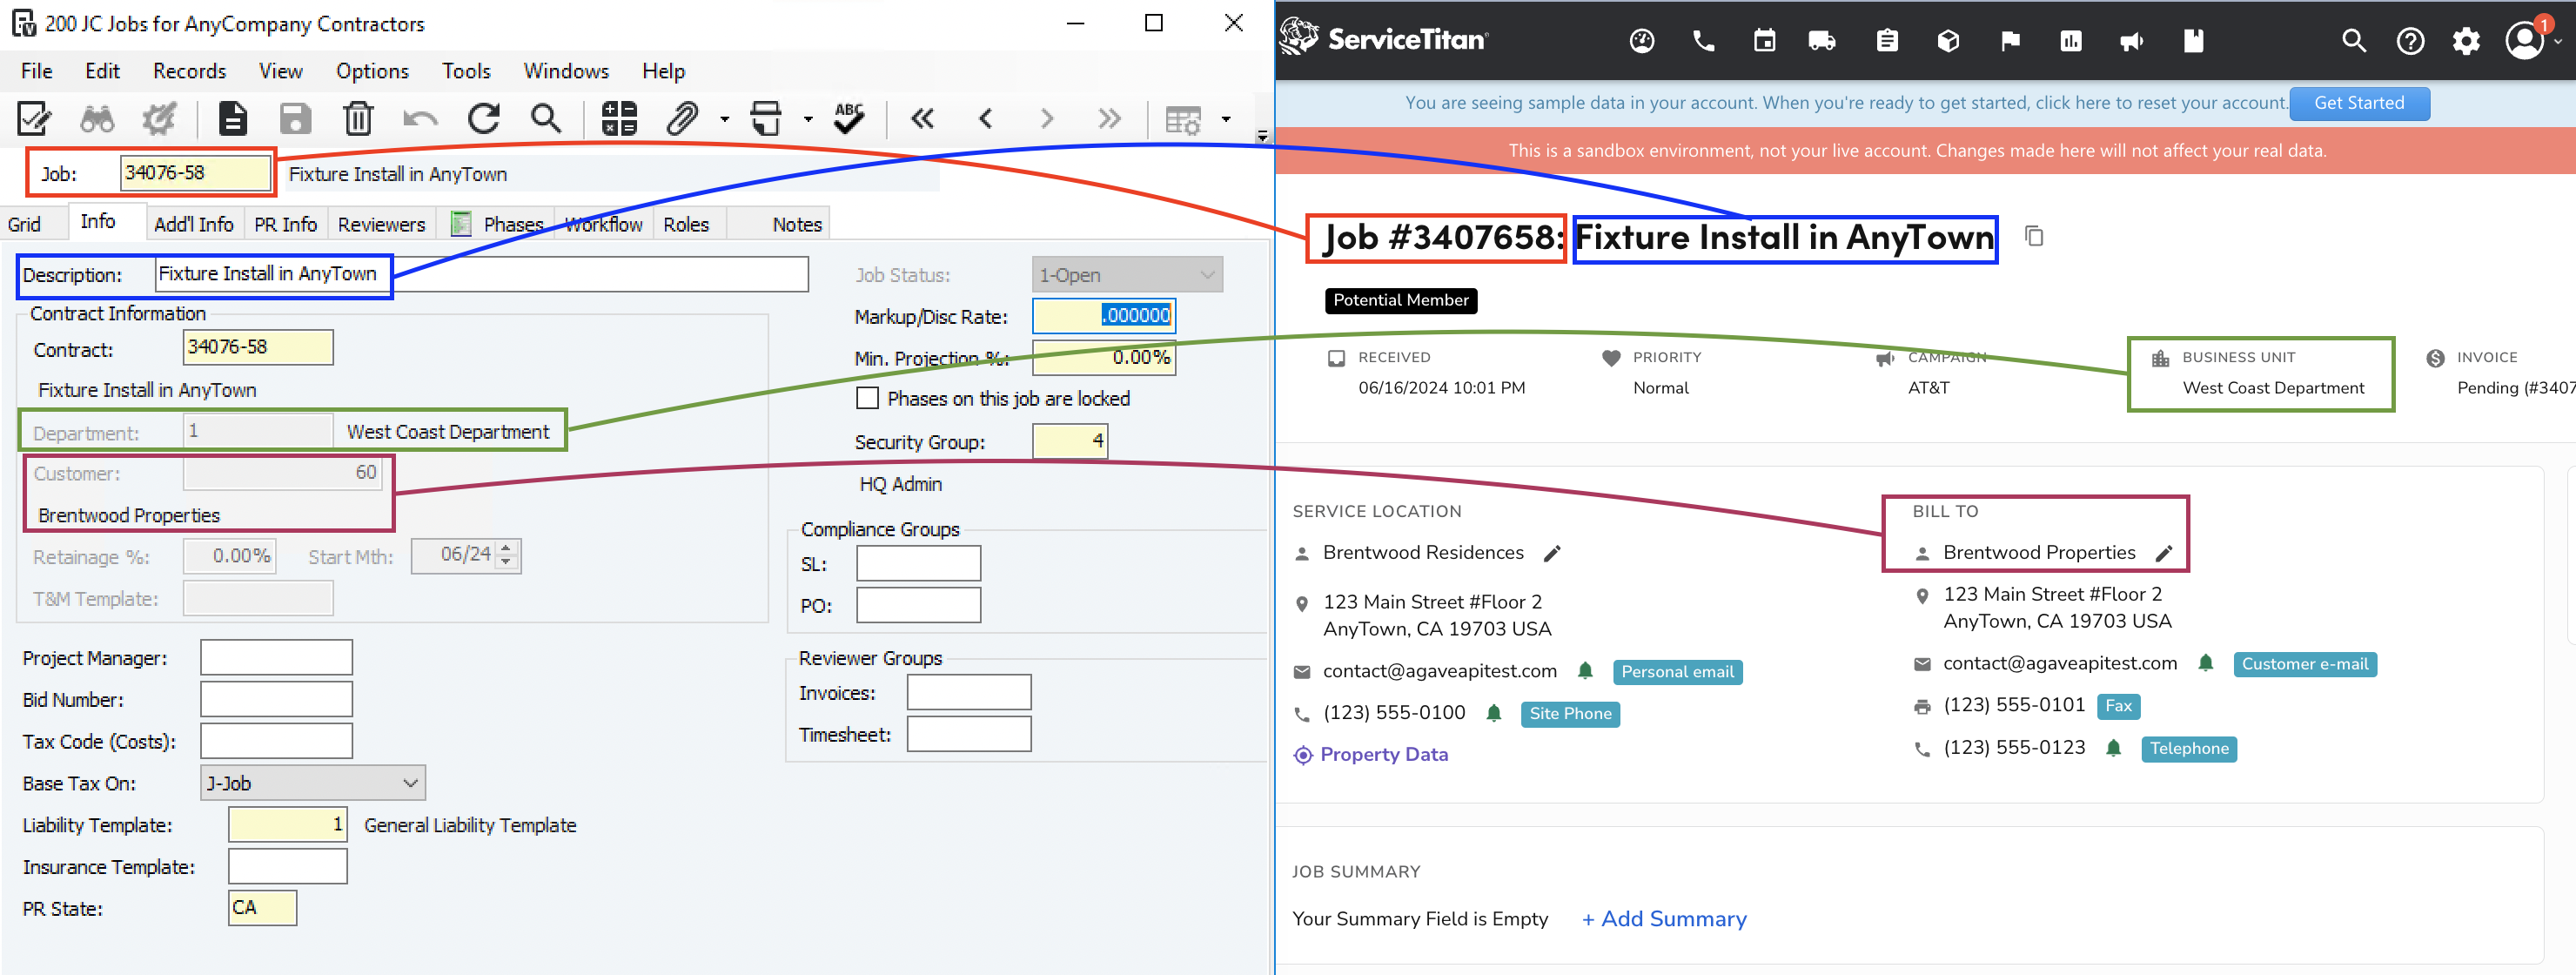
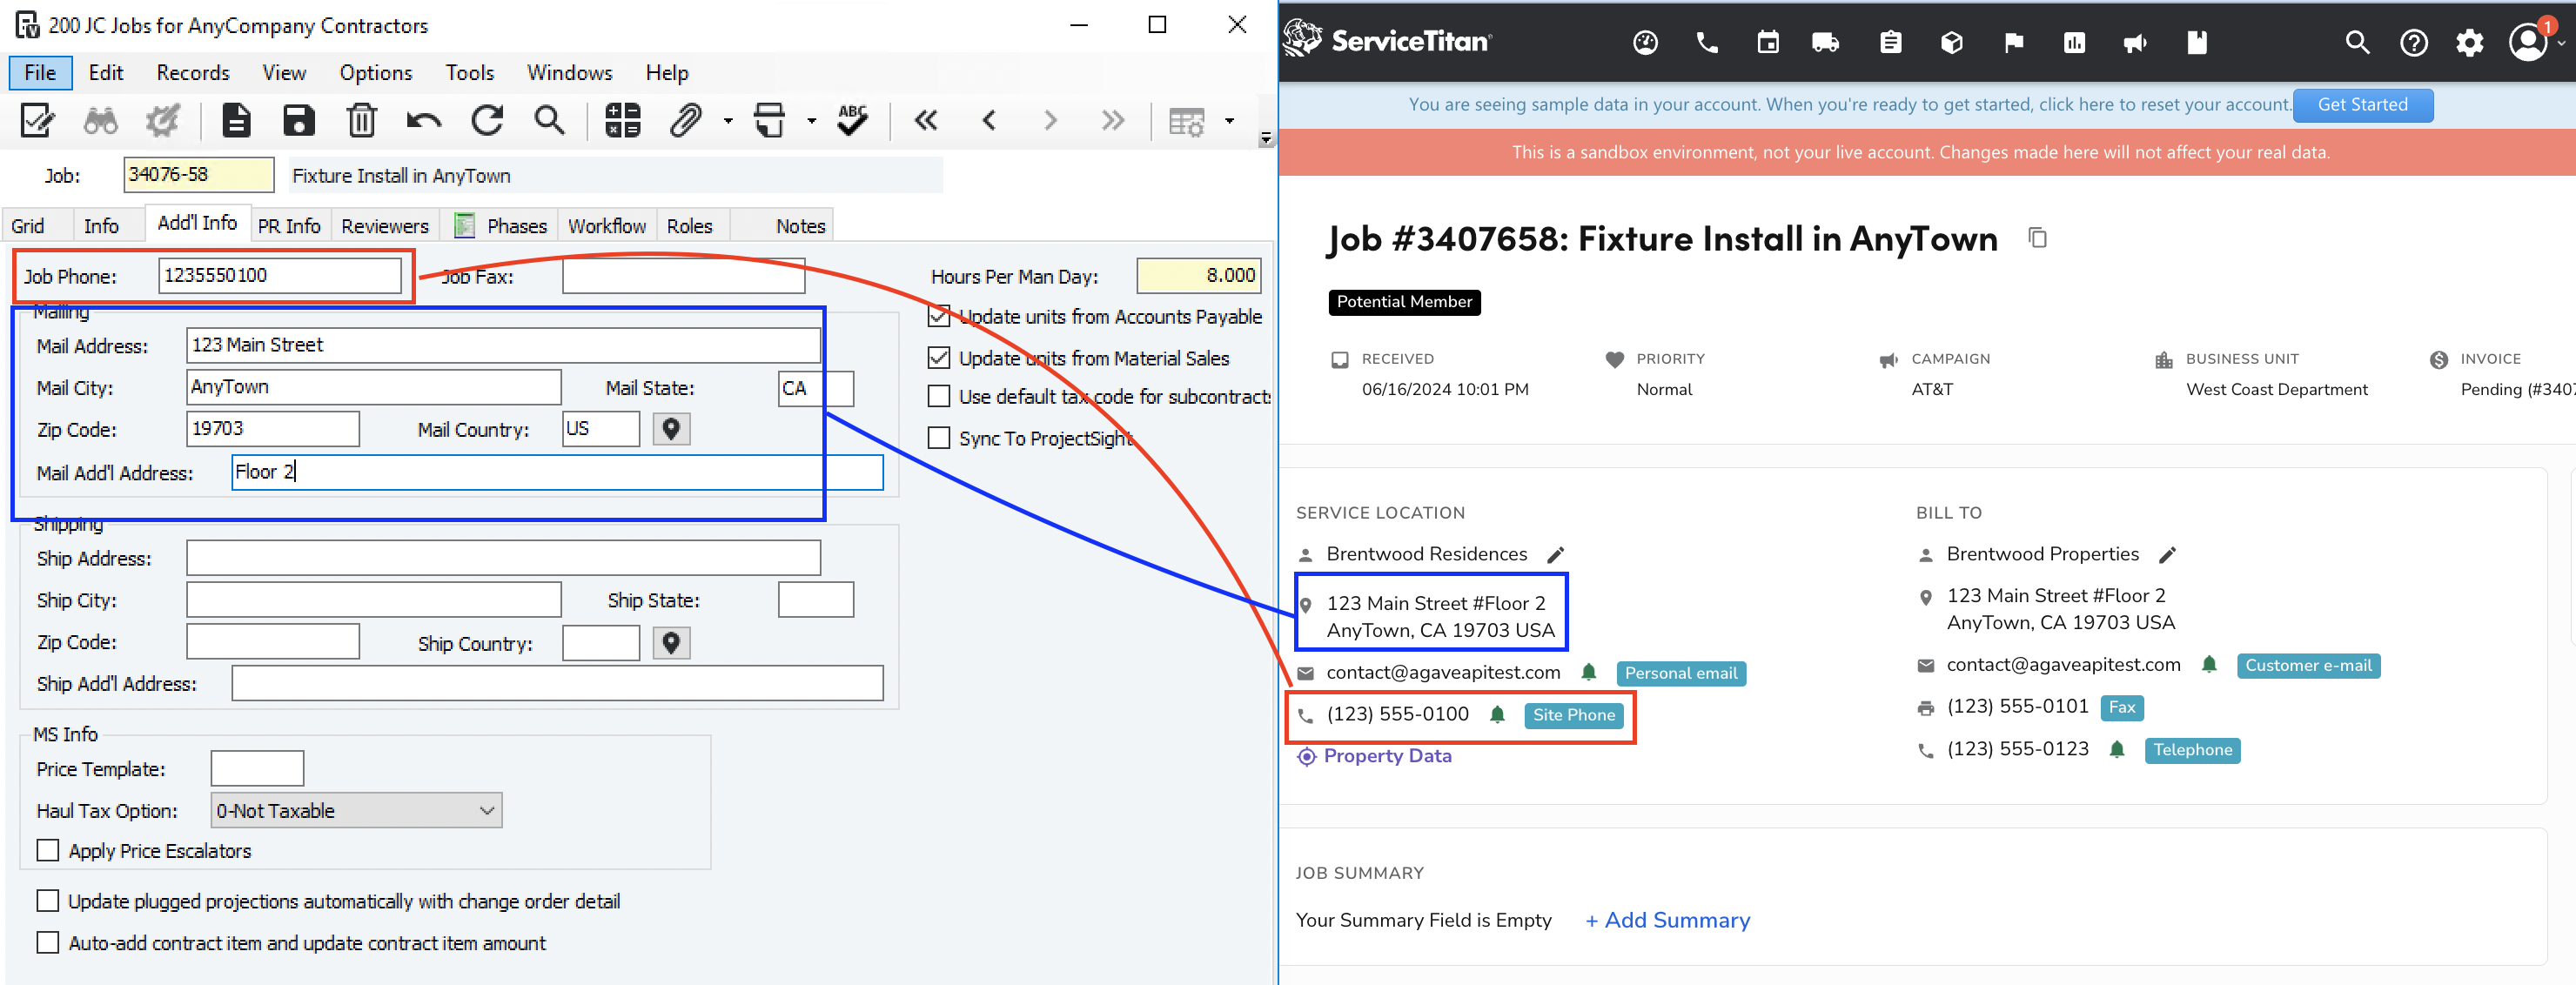
Visual Mapping - Syncing ServiceTitan Jobs to JC Jobs
Video Tutorial
FAQs and Common Errors
What are pre-requisites to syncing Jobs?
- A ServiceTitan Business Unit and JC Department must be linked. Note, if you have a single JC Department, your Agave Account Manager can apply a setting for you to use this as a default,
- A default Liability Template must be applied,
- The associated Customer must be linked, and
- There must be some alignment on syncing Job Numbers if they differ (see below)
What fields does Agave Sync "Auto-link" on?
Agave Sync will auto-link on the following fields for Jobs:
- Name
- Address
- Code/Number
How do I determine a default Liability Template?
Vista requires a Liability Template is specified when a Job is created. These templates are used to define how Payroll burden (Employer-paid liabilities) is charged to Job Cost.
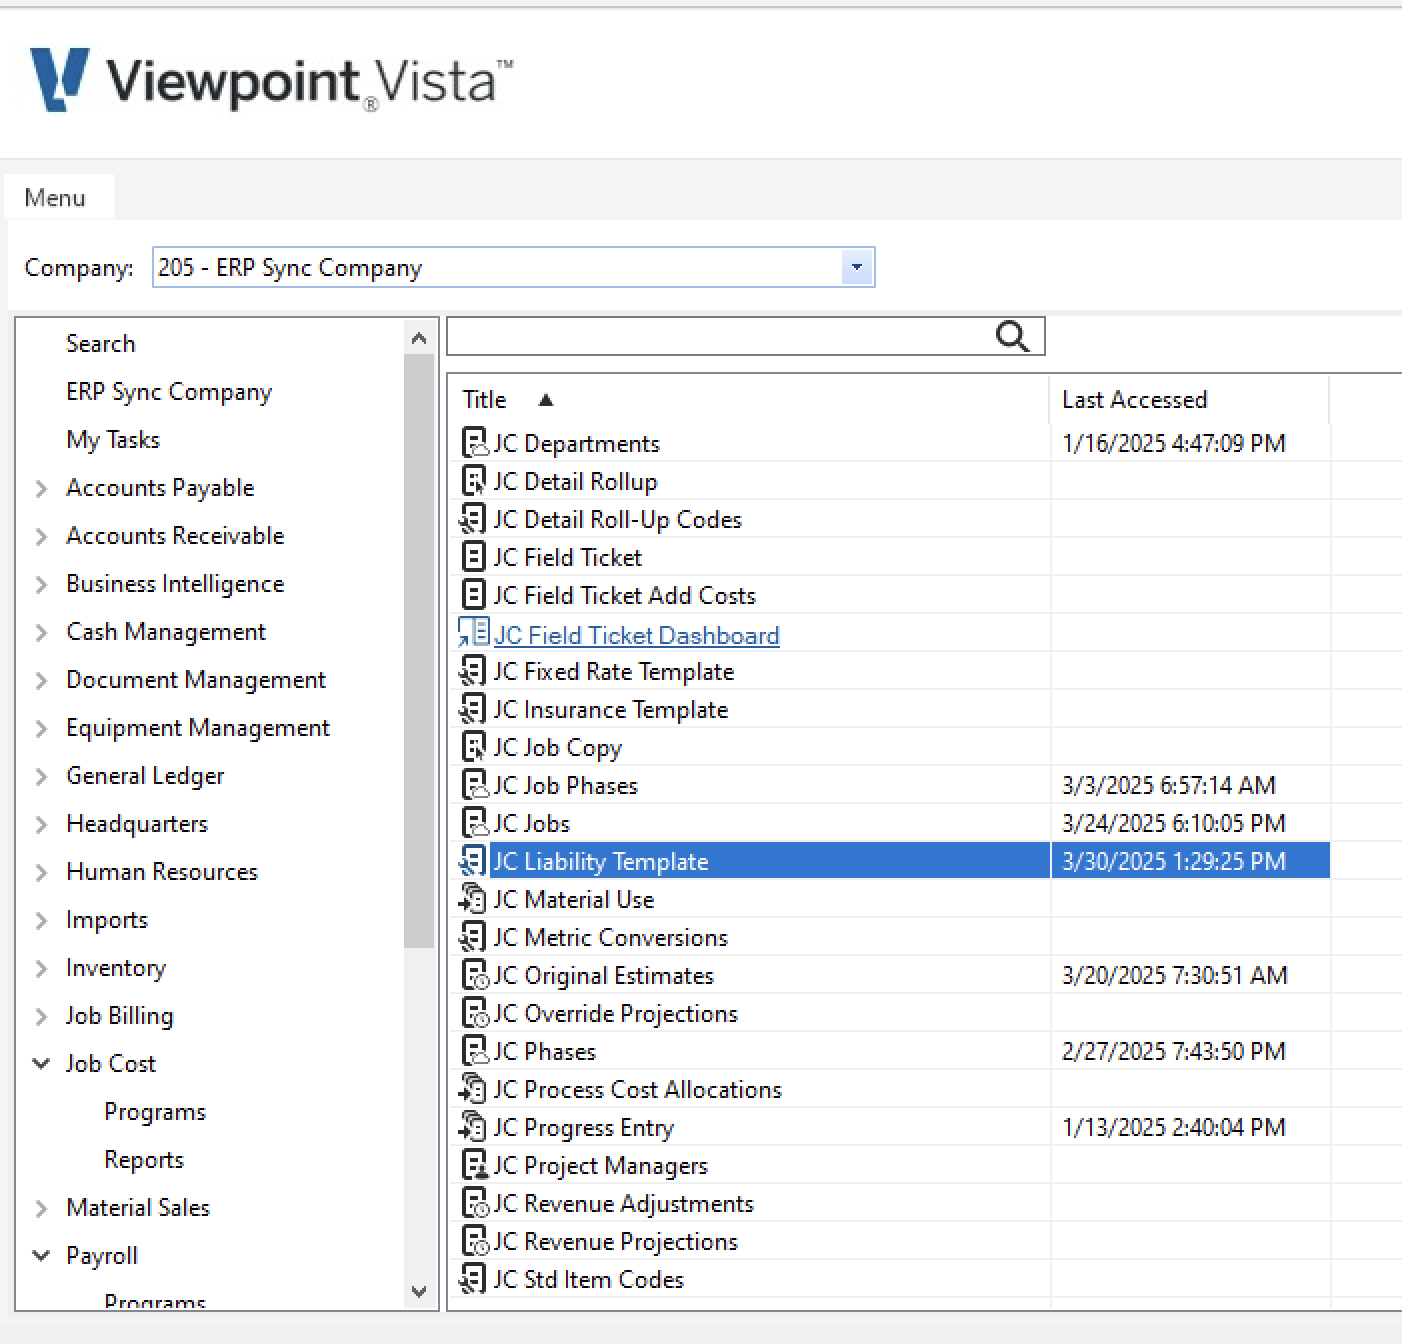
To determine a default Liability Template:
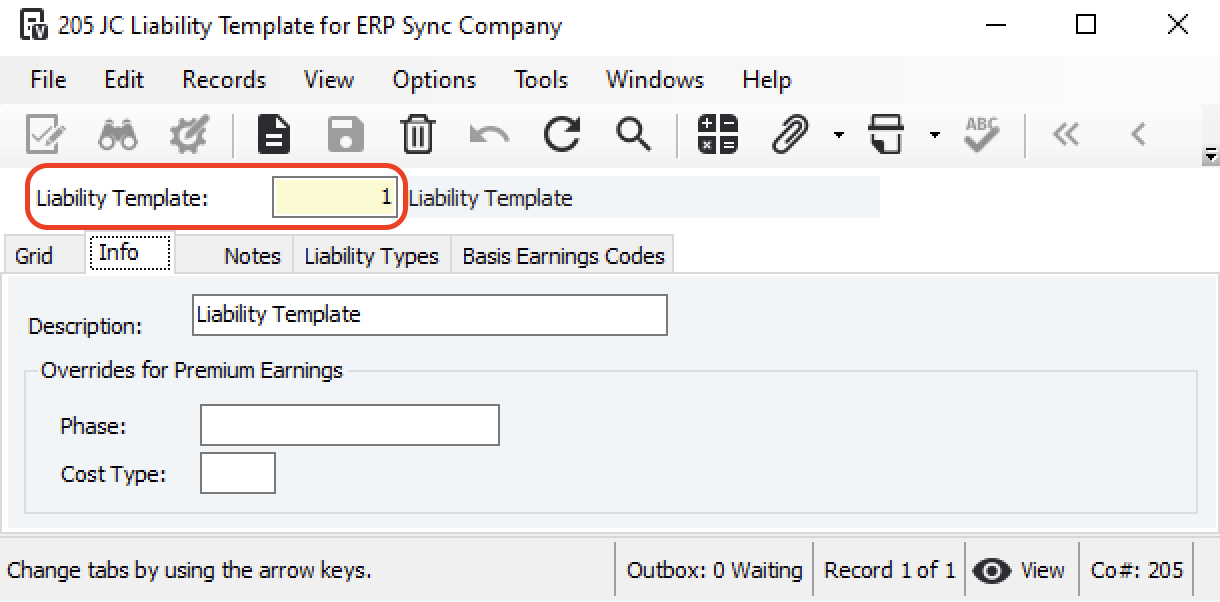
- Go to JC Liability Template:
- Identify the Liability Template number and share it with your Agave Account Manager to apply as a default to all Jobs synced from ServiceTitan to Vista:
What are my options for syncing ServiceTitan Jobs to Vista?
You have three options for syncing ServiceTitan Jobs to Vista:
-
Sync ServiceTitan Jobs to Vista JC Jobs:
- Pros: you can maintain Job tracking in both ServiceTitan and Vista. You can also keeps profitability and other job-related reports accessible in Vista.
- Cons: you may create a high volume of Jobs in Vista, increasing complexity of your reports in the JC module. You could mix up ServiceTitan Jobs with other types of Jobs in Vista (e.g. Construction).
-
Not Sync ServiceTitan Jobs to Vista:
- Pros: this approach simplifies your syncs and reduces costs from eliminating JC and SM licenses.
- Cons: you lose granularity of reporting in Vista (e.g. profitability by Job).
Once you have decided on the approach you would like to take, let your Agave Account Manager know and they can update your Agave Sync configuration.
Agave does not support syncing ServiceTitan Jobs to Vista SM Work orders.
What if my Job Numbers do not match?
ServiceTitan autogenerates Job Numbers, whereas Vista has a fixed scheme for Job Numbers. As a result, your Job Numbers might not match between the two systems.
There are two approaches you can take to having your Job Numbers match between ServiceTitan and Vista:
- If you have a predictable format to your Job Number structure in Vista, let your Agave Account Manager know and we can likely accommodate it with custom logic.
- If you want control over the Job Number scheme in ServiceTitan, you can use a custom field in ServiceTitan. Your Agave Account Manager can then apply a setting to use this custom field when setting the Job Number in Vista (see below)
Can I write custom fields to Vista?
Yes. Custom fields are typically prefaced with “ud” in Vista (e.g. "udCustomField"). If you would like to write custom fields to Vista, let your Agave Account Manager know.
Can I customize the Job number I sync to my accounting system?
Yes. By default, Agave Sync will either use the next available Job number or the auto-generated ServiceTitan number when syncing Jobs to your accounting system. However, you may want to use a custom value you set in ServiceTitan.
If you would like to use a custom value in ServiceTitan, you can add a custom field. To add a custom field to ServiceTitan Jobs:
- Go to the ServiceTitan Settings page and press Custom Fields:
- On the Custom Fields page, press Add:

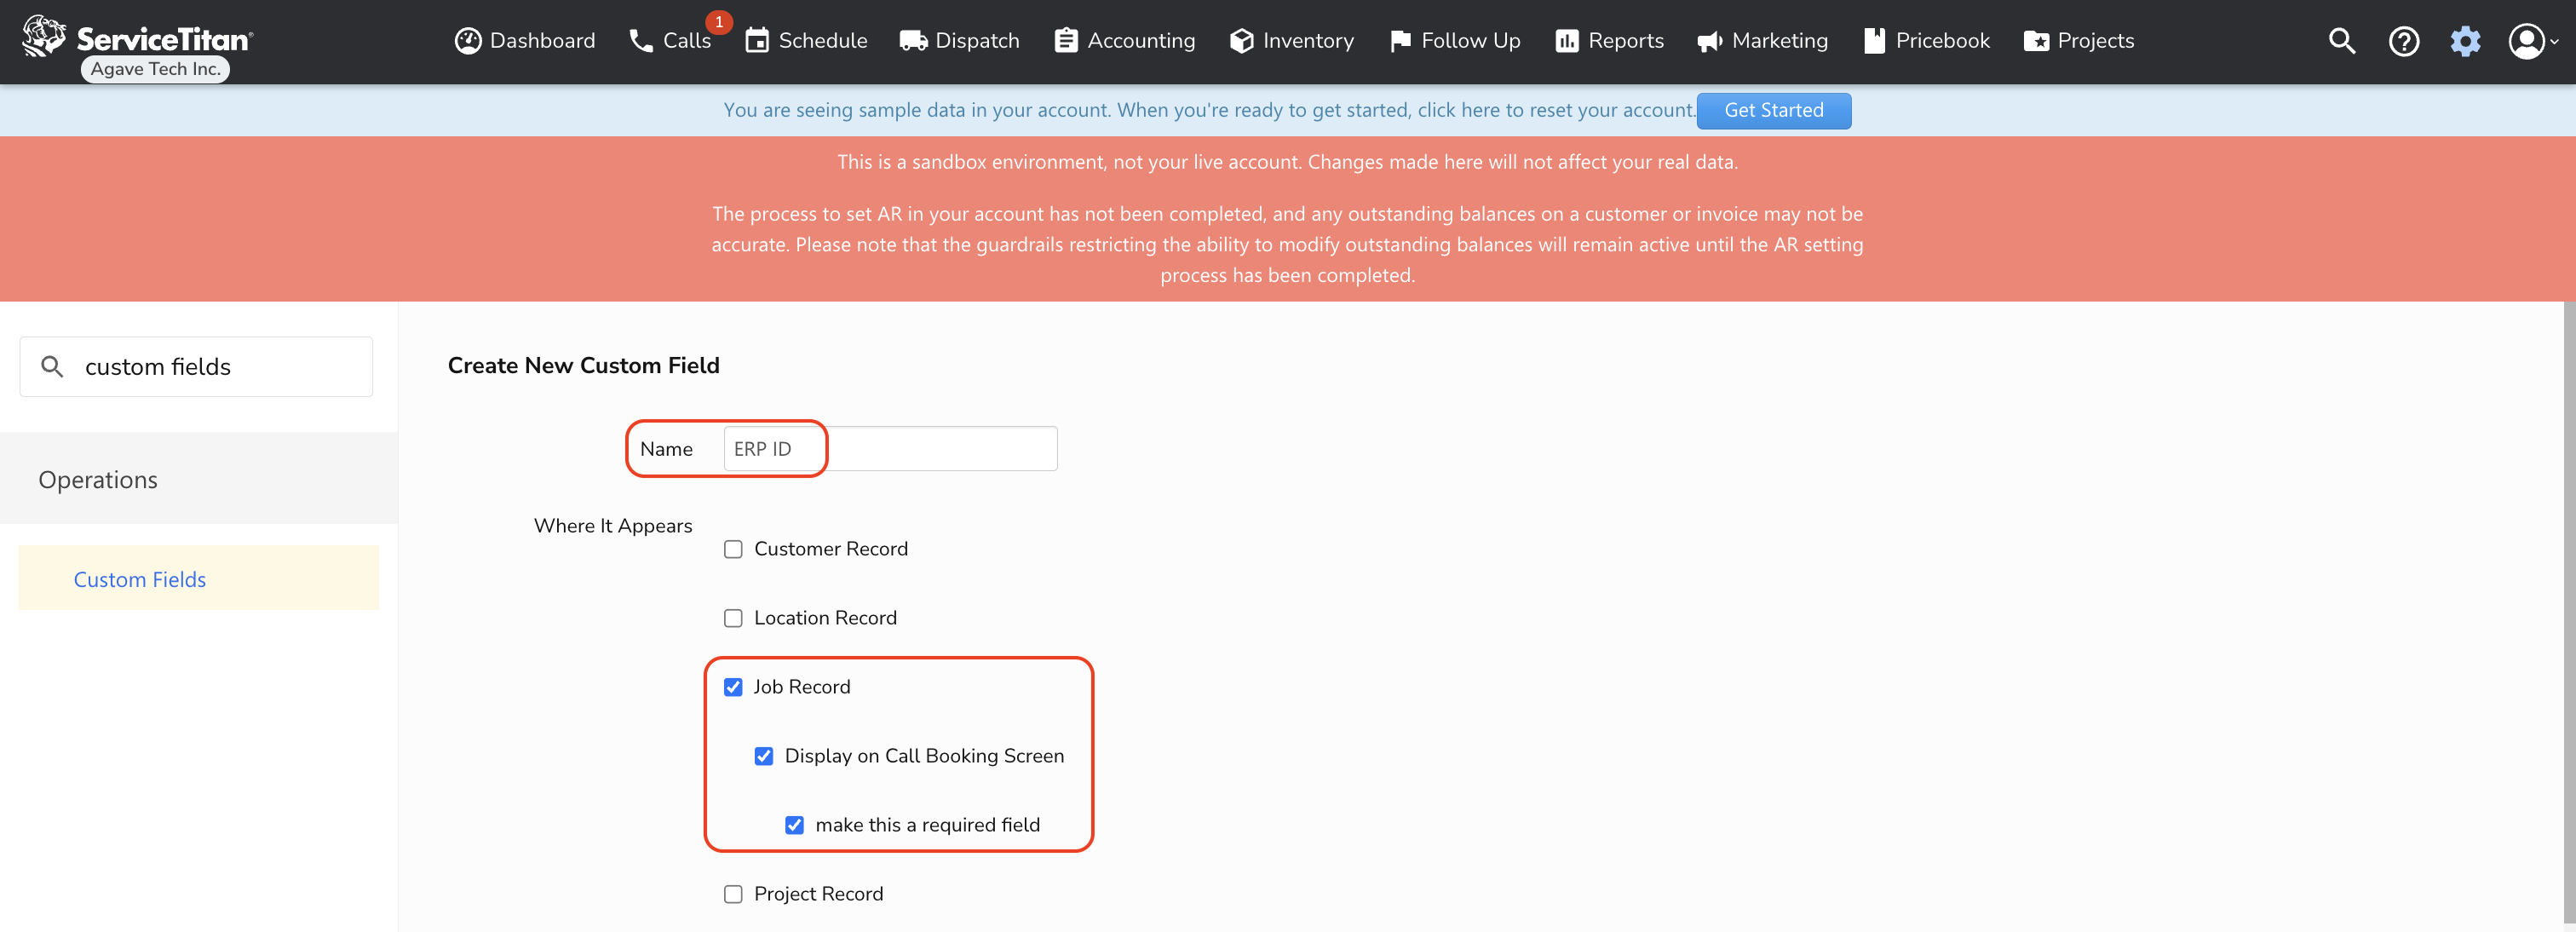
- Enter the Custom Field name (e.g. "ERP ID"). Select Job Record under "Where It Appears". We also recommend selecting "Display on Call Booking Screen" and "Make this a required field" so this field is always added when creating Jobs in ServiceTitan:
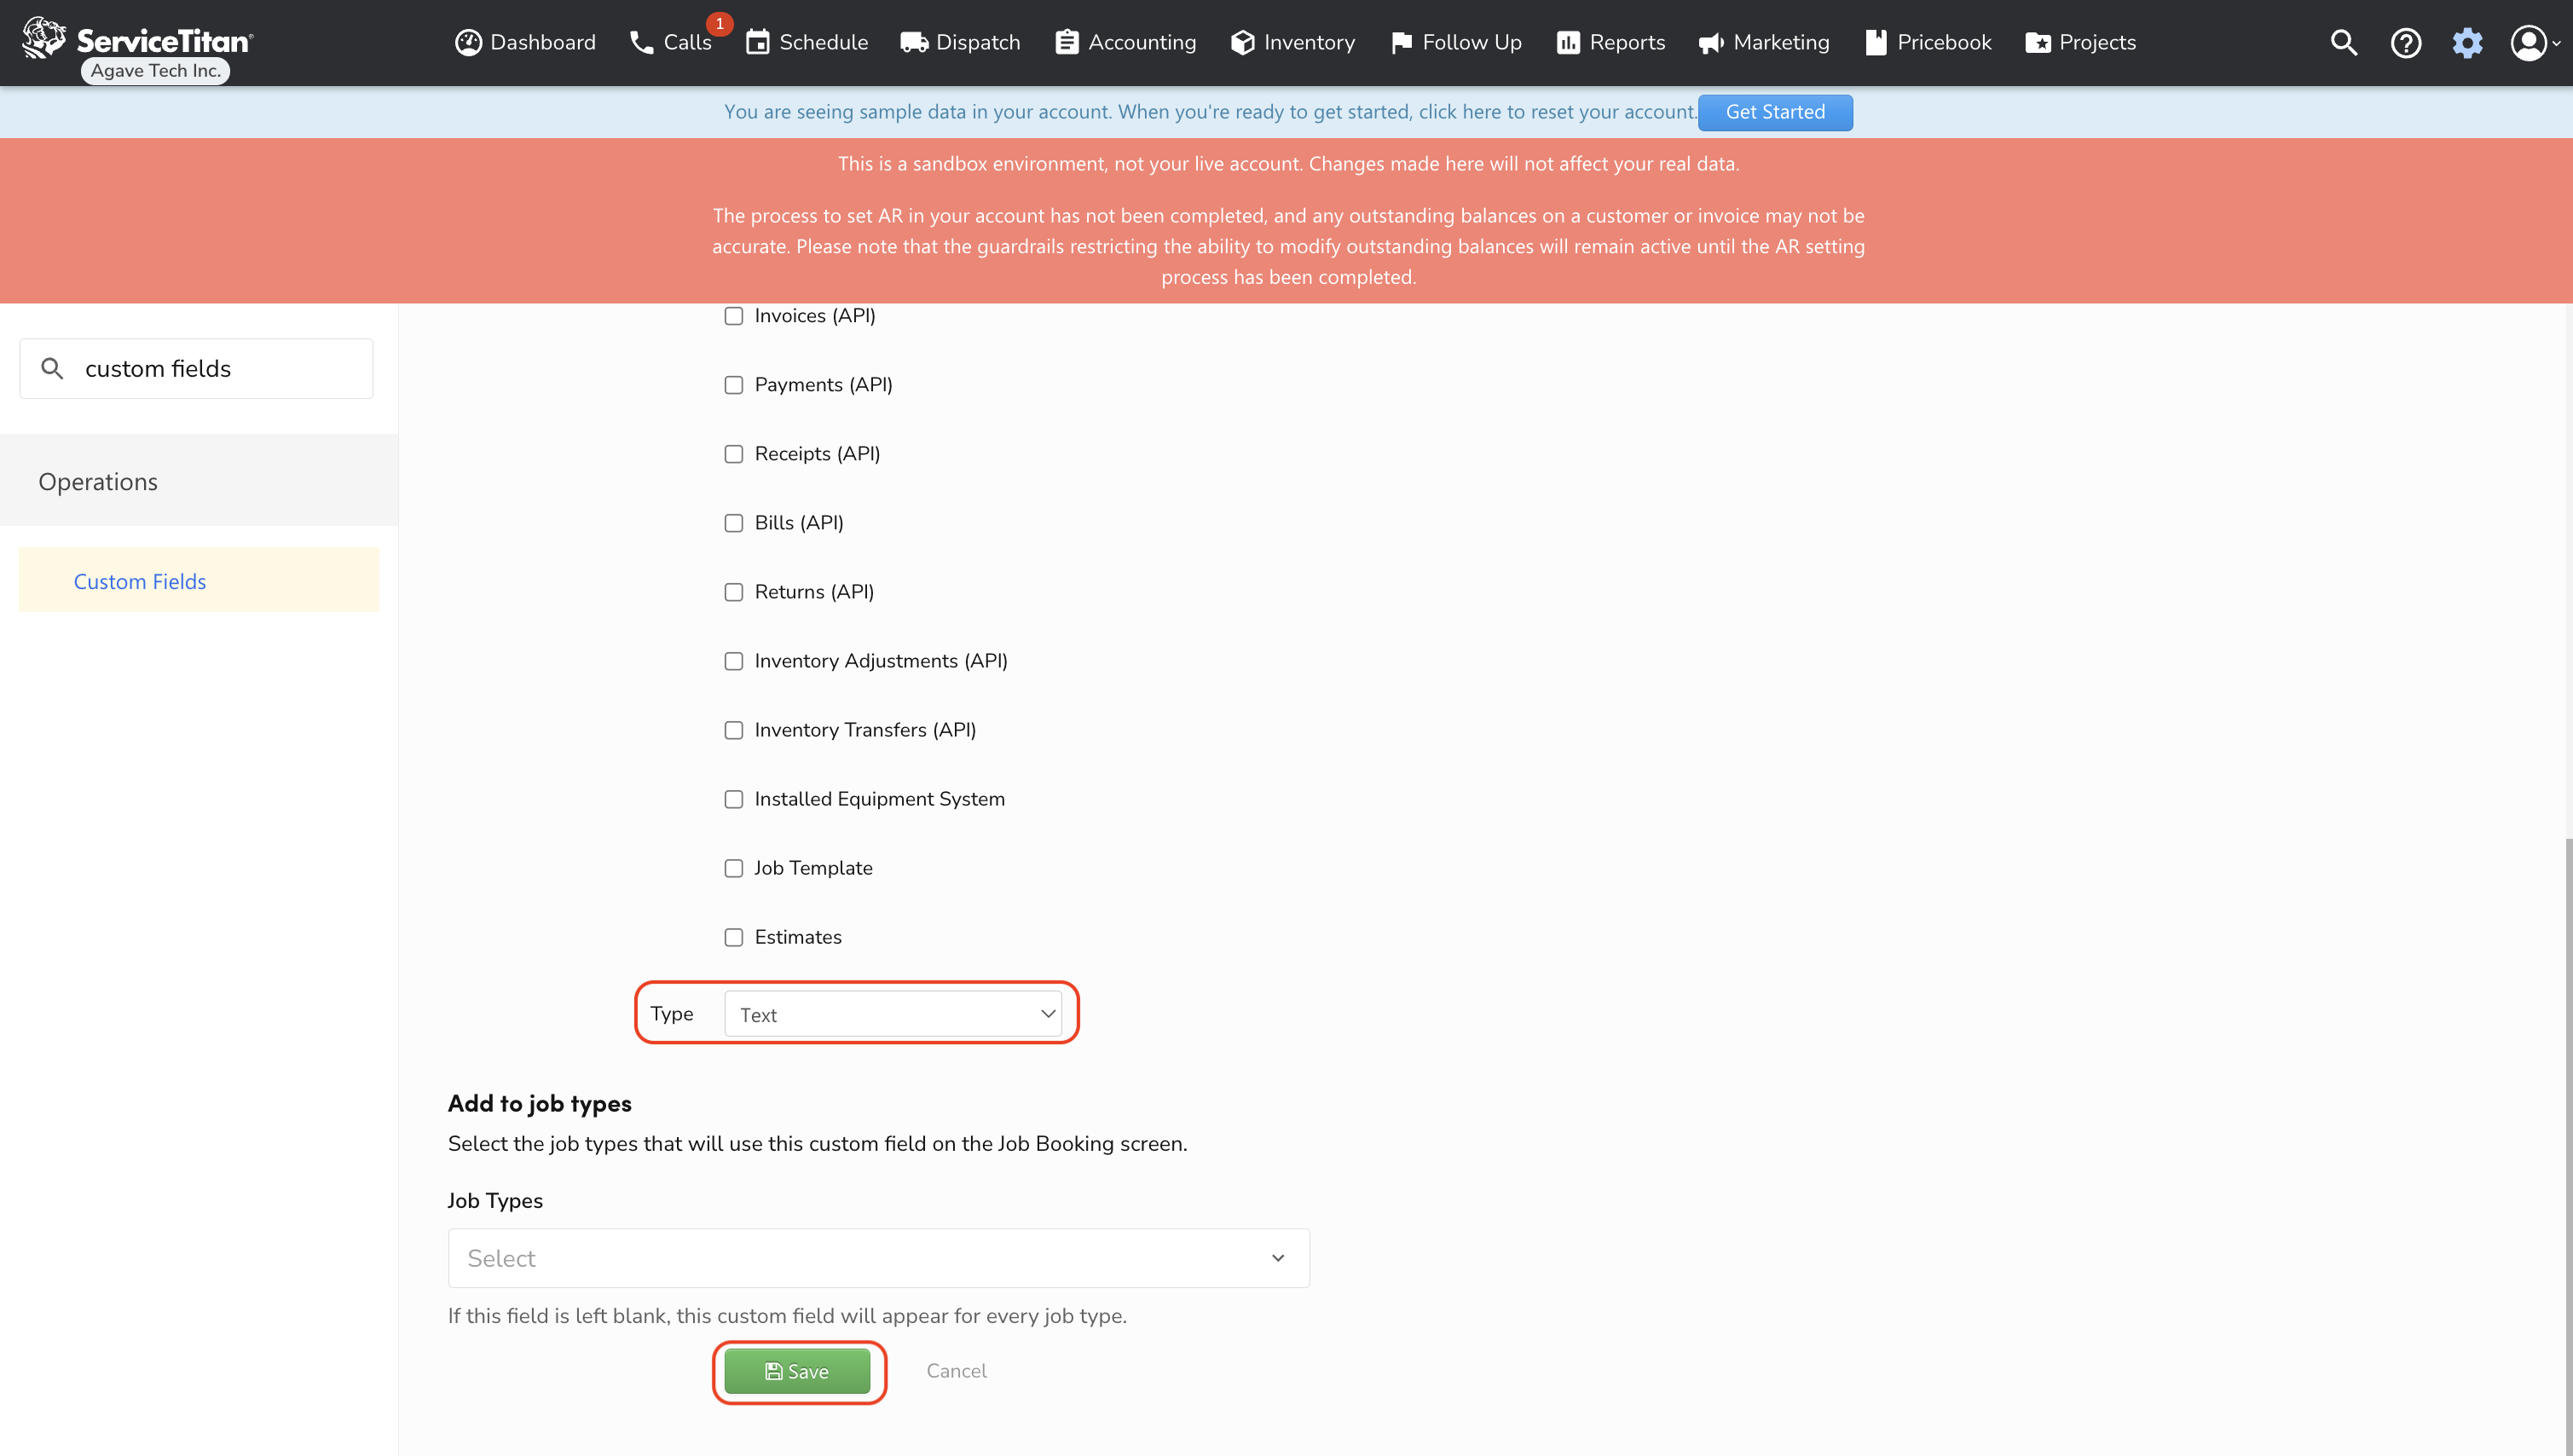
- Scroll to the bottom of the page. Under Type, select "Text". Then press Save:
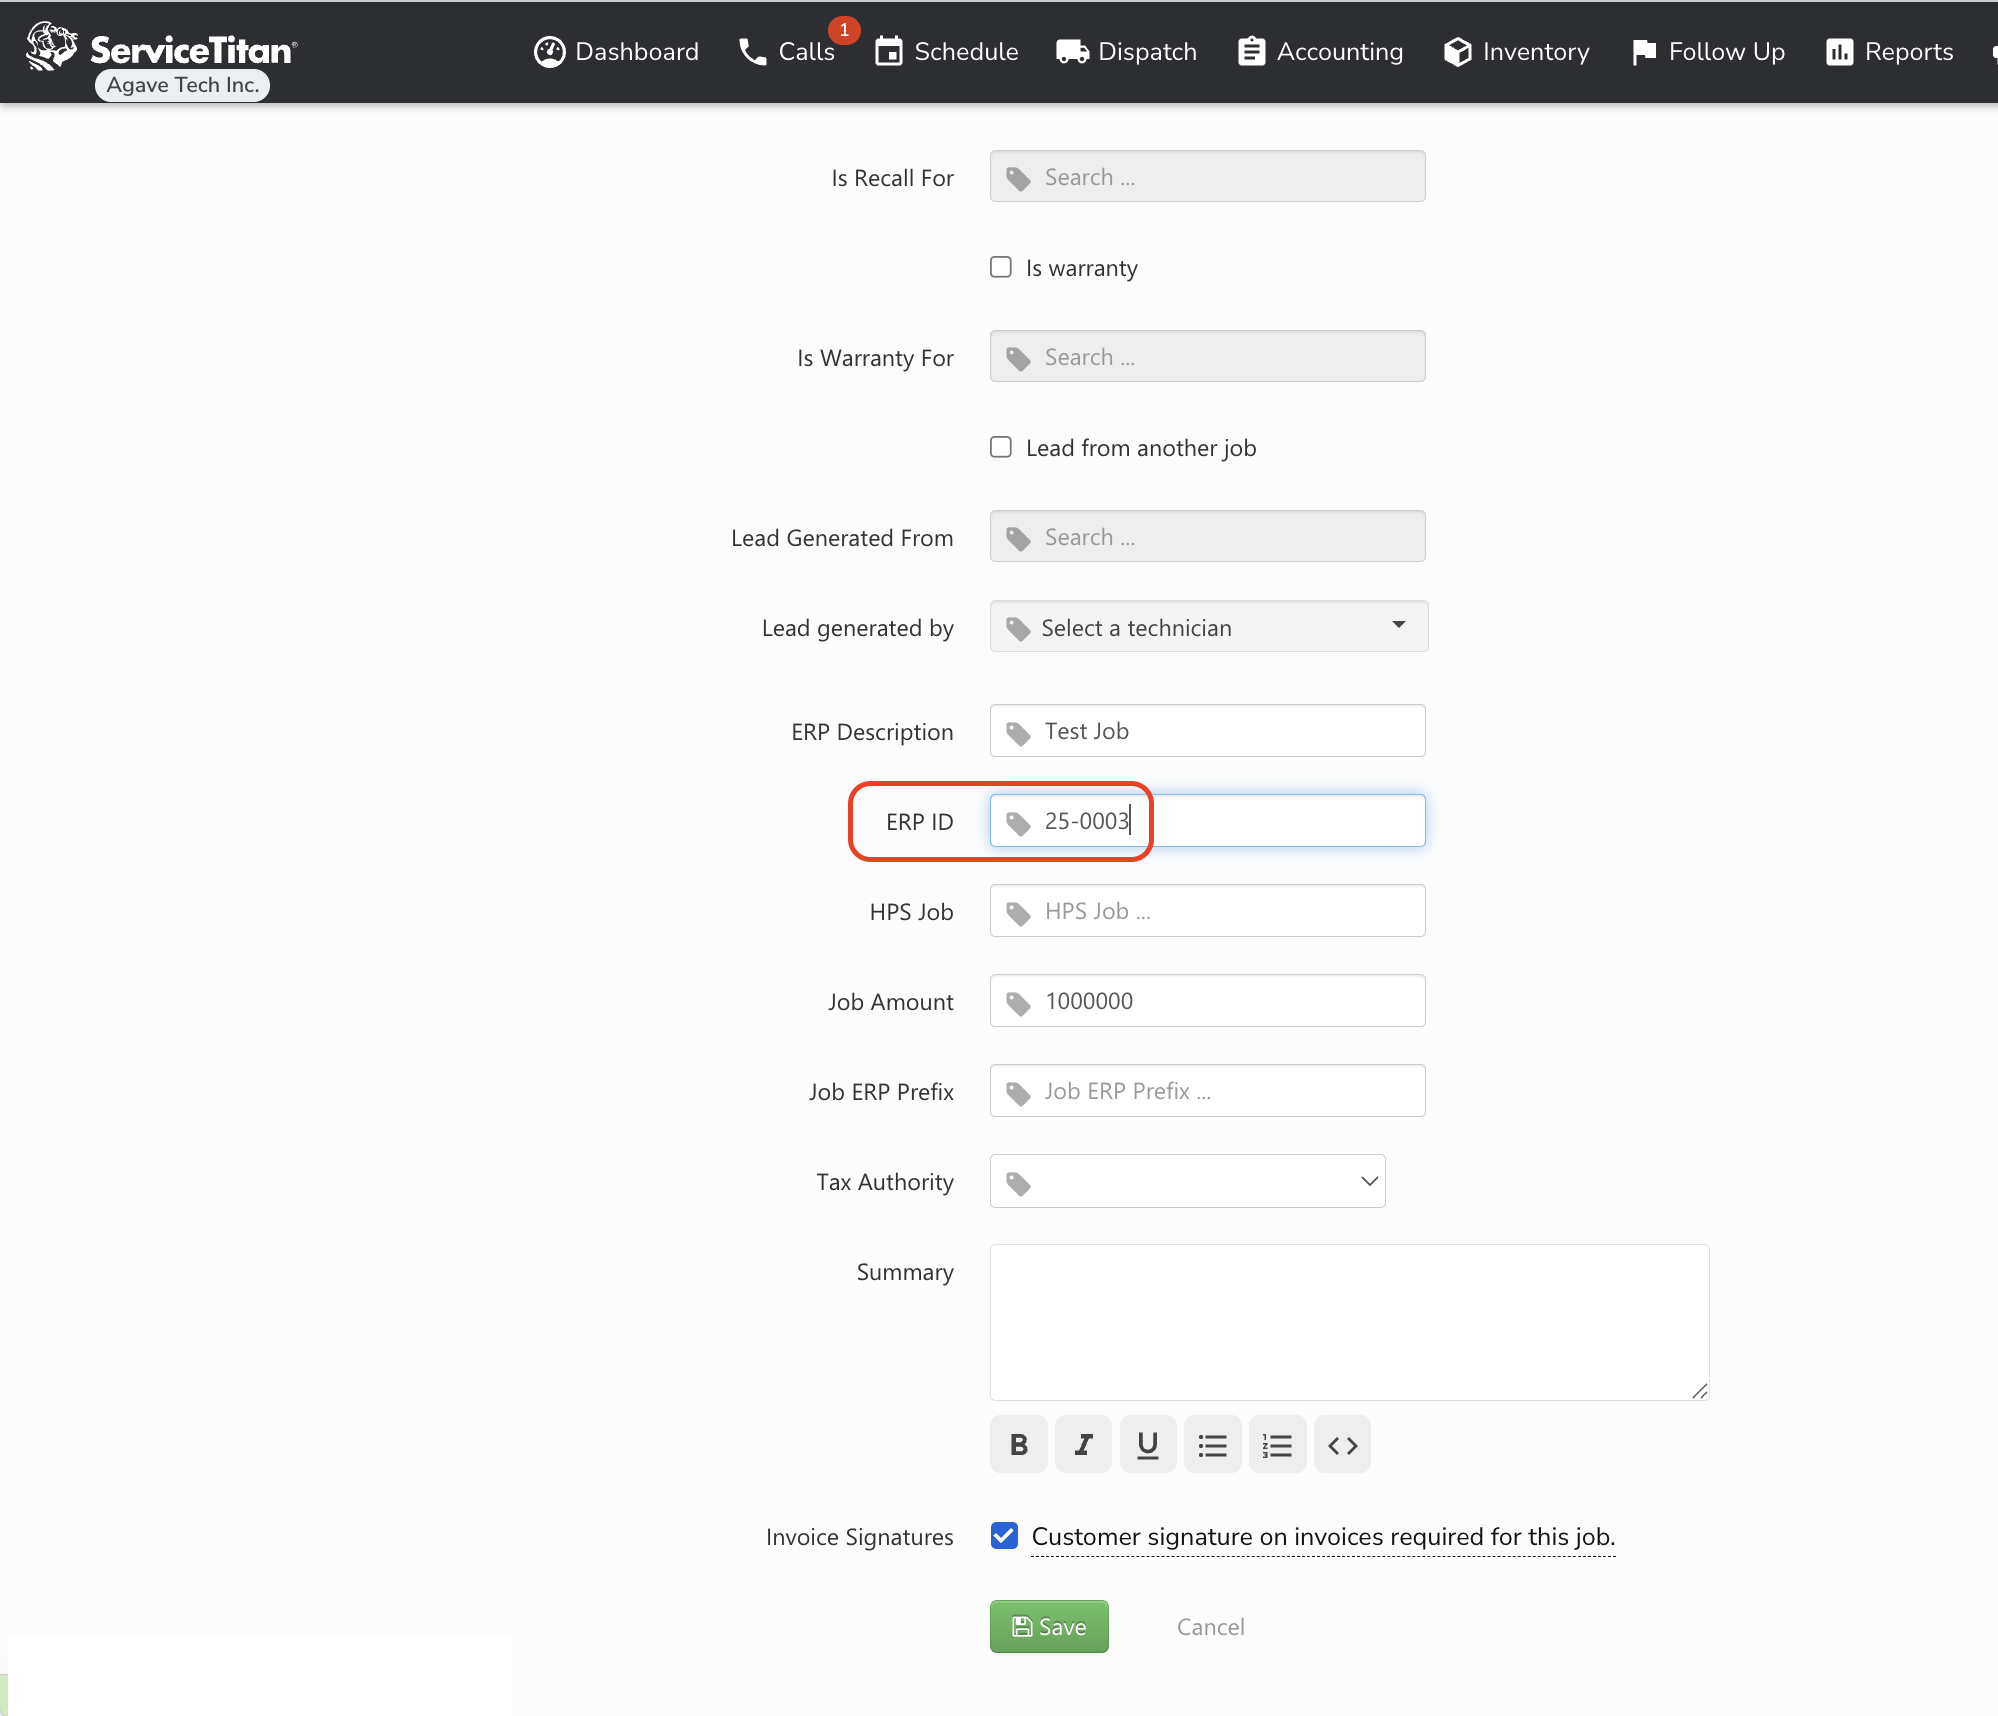
- The Custom Field will appear as editable on Job records. Note, it usually takes a few minutes for the Custom Field to become available:
Two-tier Job Setup
You might manage Jobs differently in ServiceTitan compared to your accounting system (ERP). For instance, you may have many Jobs for a specific Customer in ServiceTitan. However, you might expect to roll up all of these ServiceTItan Jobs into a single catch-all Job in your ERP to make it easier to track costs and revenue for a Customer's Jobs.
To support this, your Agave Account Manager can activate a setting that instructs Agave Sync to use a specific custom field in ServiceTitan (e.g., "Bill to Parent ID") when syncing records. The logic works like this:
- If the custom field (e.g., "Bill to Parent ID") has a value for a ServiceTitan Job, Agave Sync will use that value instead of the ServiceTitan Job ID.
- If the custom field is empty, Agave Sync will default to using the ServiceTitan Job ID.
In case 1 (when the custom field is filled in), the ServiceTitan Job does not need to be directly synced or linked to the ERP.
In case 2 (when the custom field is empty), the ServiceTitan Job must be synced/linked to the ERP.
Please contact your Agave Account Manager if you would like to enable this setting.