FAQs
Connecting Your Sage 300 CRE System
This guide will help you connect your Sage 300 Construction and Real Estate (CRE) system to enable automatic data synchronization with Agave. The setup process typically takes 15-30 minutes and ensures secure, reliable data flow between your systems.
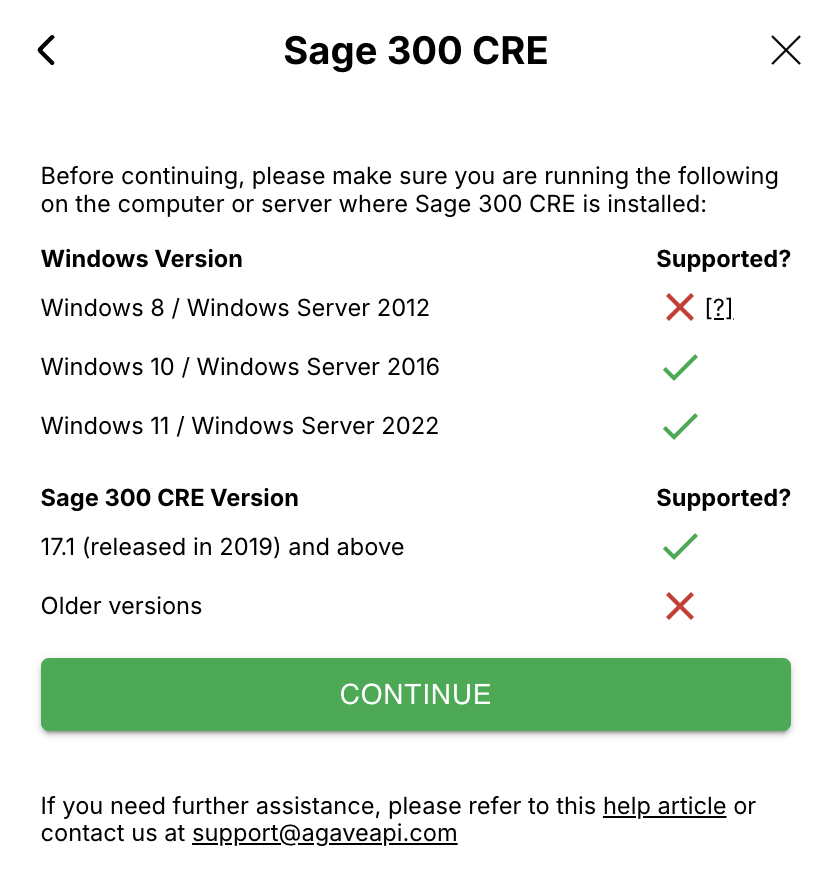
Important: Before installing the Agave Connector, we recommend confirming you are on a supported version of Windows.
Firewall Configuration (If Applicable)
If your team has an on-premise instance of Sage 300 CRE and uses a firewall that restricts outbound traffic, you will need to whitelist the following domains to allow Agave to communicate with your instance. This is only required for teams with firewalls that block outbound connections by default — most teams will not need to complete this step.
Whitelist the following domains on port 443 (HTTPS/WSS):
| Domain | Purpose |
|---|---|
rest.ably.io | REST API requests |
realtime.ably.io | Realtime WebSocket connections |
a.ably-realtime.com | Fallback host |
b.ably-realtime.com | Fallback host |
c.ably-realtime.com | Fallback host |
d.ably-realtime.com | Fallback host |
e.ably-realtime.com | Fallback host |
internet-up.ably-realtime.com | Connectivity check |
ws-up.ably-realtime.com | WebSocket connectivity check |
For forward compatibility, we also recommend whitelisting the following CNAME targets that these domains resolve to:
main.realtime.ably.netmain.a.fallback.ably-realtime.commain.b.fallback.ably-realtime.commain.c.fallback.ably-realtime.commain.d.fallback.ably-realtime.commain.e.fallback.ably-realtime.com
Ably does not publish static IP addresses, as their service uses dynamically assigned IPs. Domain-based whitelisting is the recommended approach.
Step 1: Install the Agave Connector
Install the Agave Connector on your Sage 300 CRE server rather than individual workstations for better performance and reliability.
For enhanced security, consider running the connector under a dedicated service account rather than an administrator account. Make sure to install while logged in as the account that will run the connector.
The Agave Connector is a lightweight Windows application that you will install to establish a secure connection between your Sage 300 CRE system and Agave. This connector runs in the background and handles all data synchronization while maintaining your system's security standards.
To install the connector:
-
Contact the Agave support team at support@useagave.com to request the installer download link.
-
Download the installer file and run it as an administrator. The installation wizard will guide you through the process:

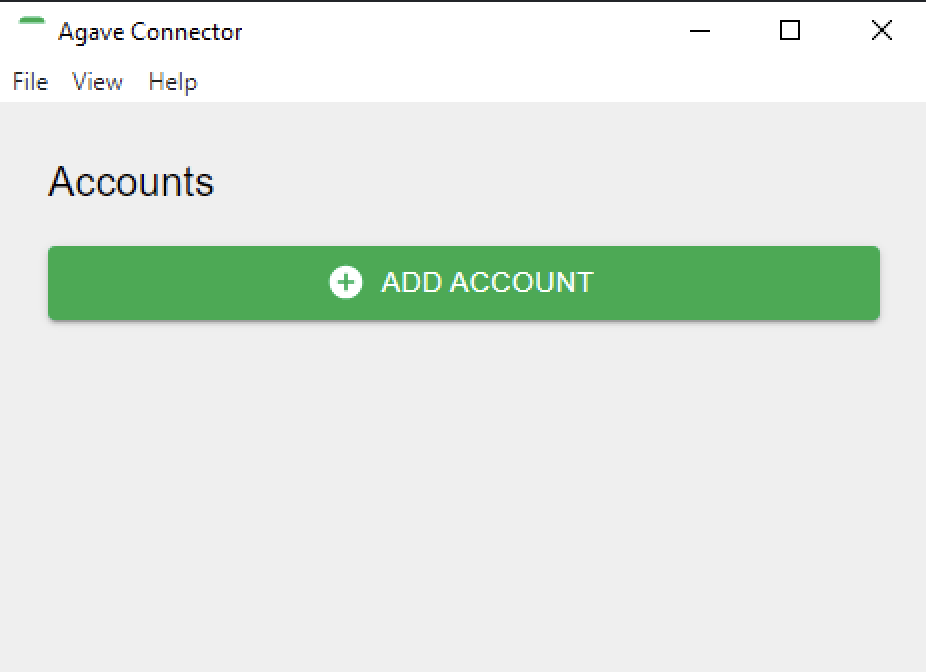
- Once installation is complete, the Agave Connector will launch automatically and create a desktop shortcut for easy access:
Step 2: Locate Your Company Database Path
You will need to identify the file path where your Sage 300 CRE company data is stored. This information is required for the connector to access your construction data.
To find your company database path:
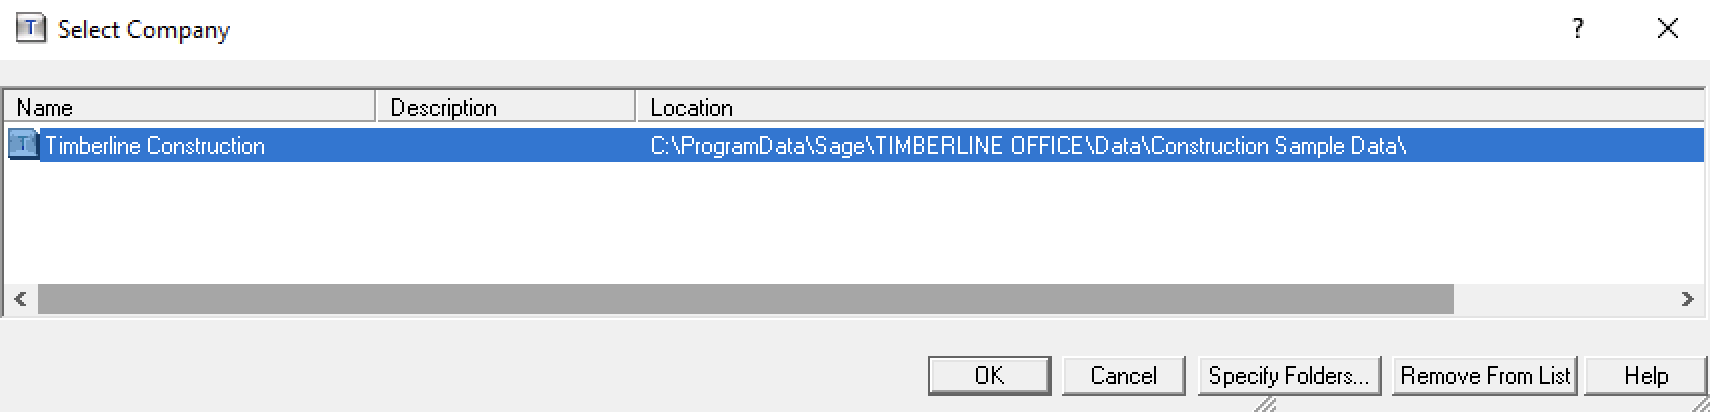
- Open Sage 300 CRE on the server where it's installed.
- In the Select Company window, copy the path shown in the Location column. This is your company database path that you'll need in Step 4.
Step 3: Set Up a dedicated Account for Agave Sync
For security and operational best practices, you should create a dedicated Sage 300 CRE user account exclusively for data synchronization. This approach isolates the sync process from regular user accounts and provides better audit trails and system stability.
To create a dedicated account:
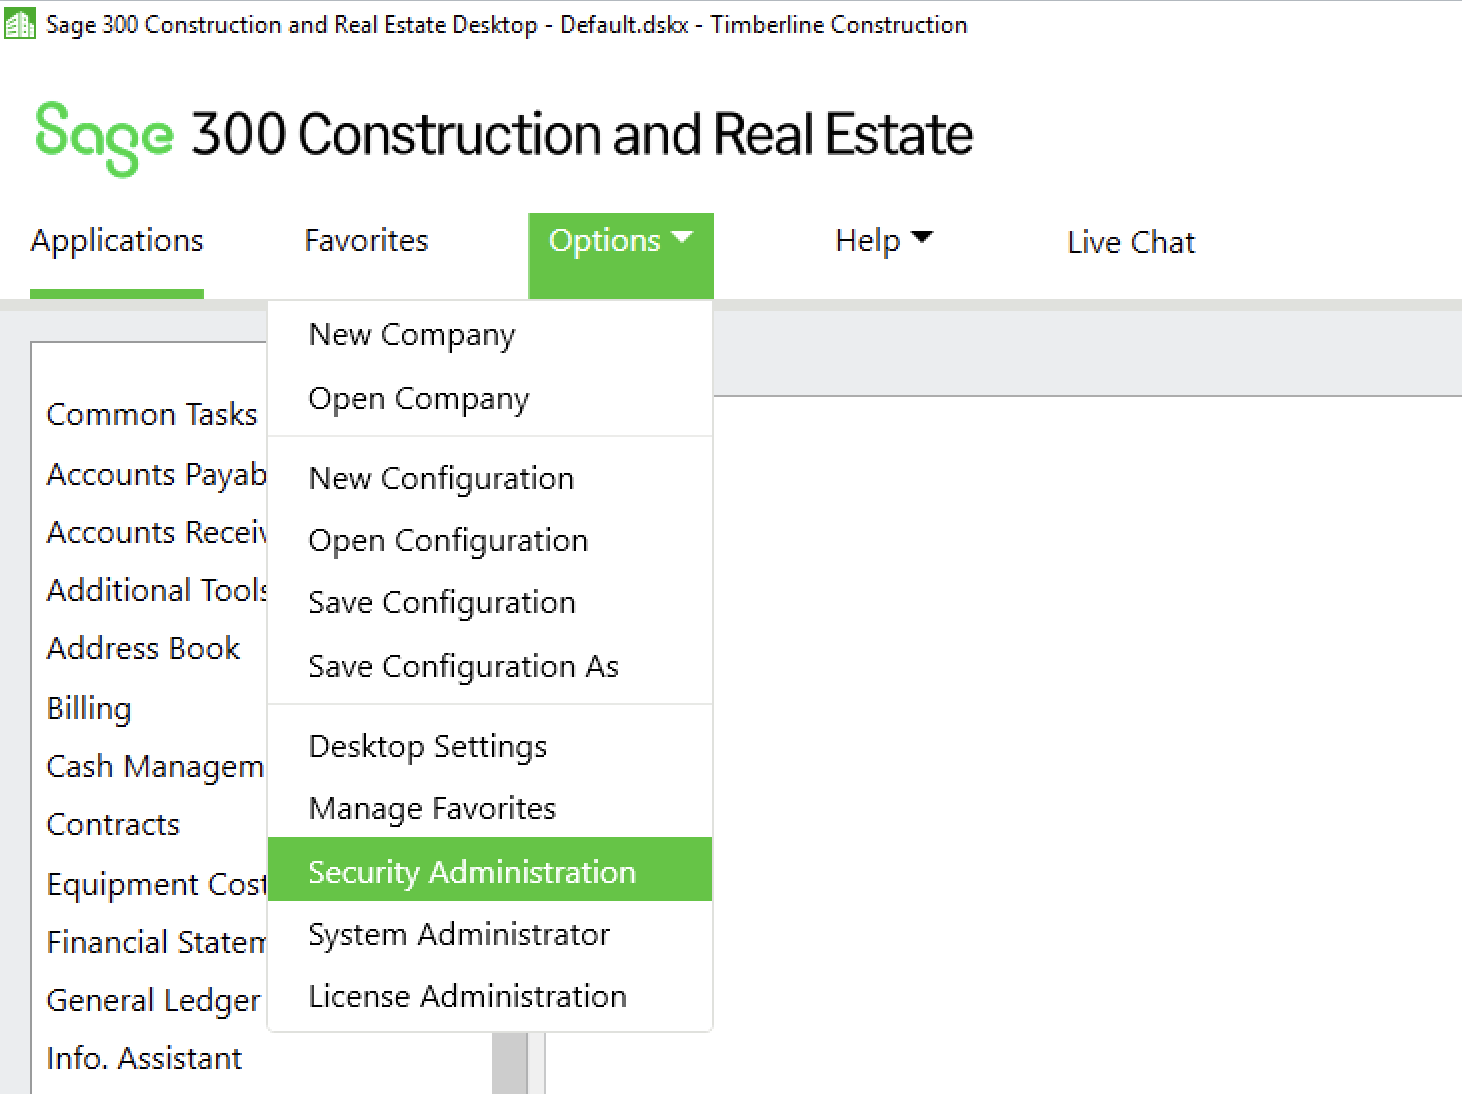
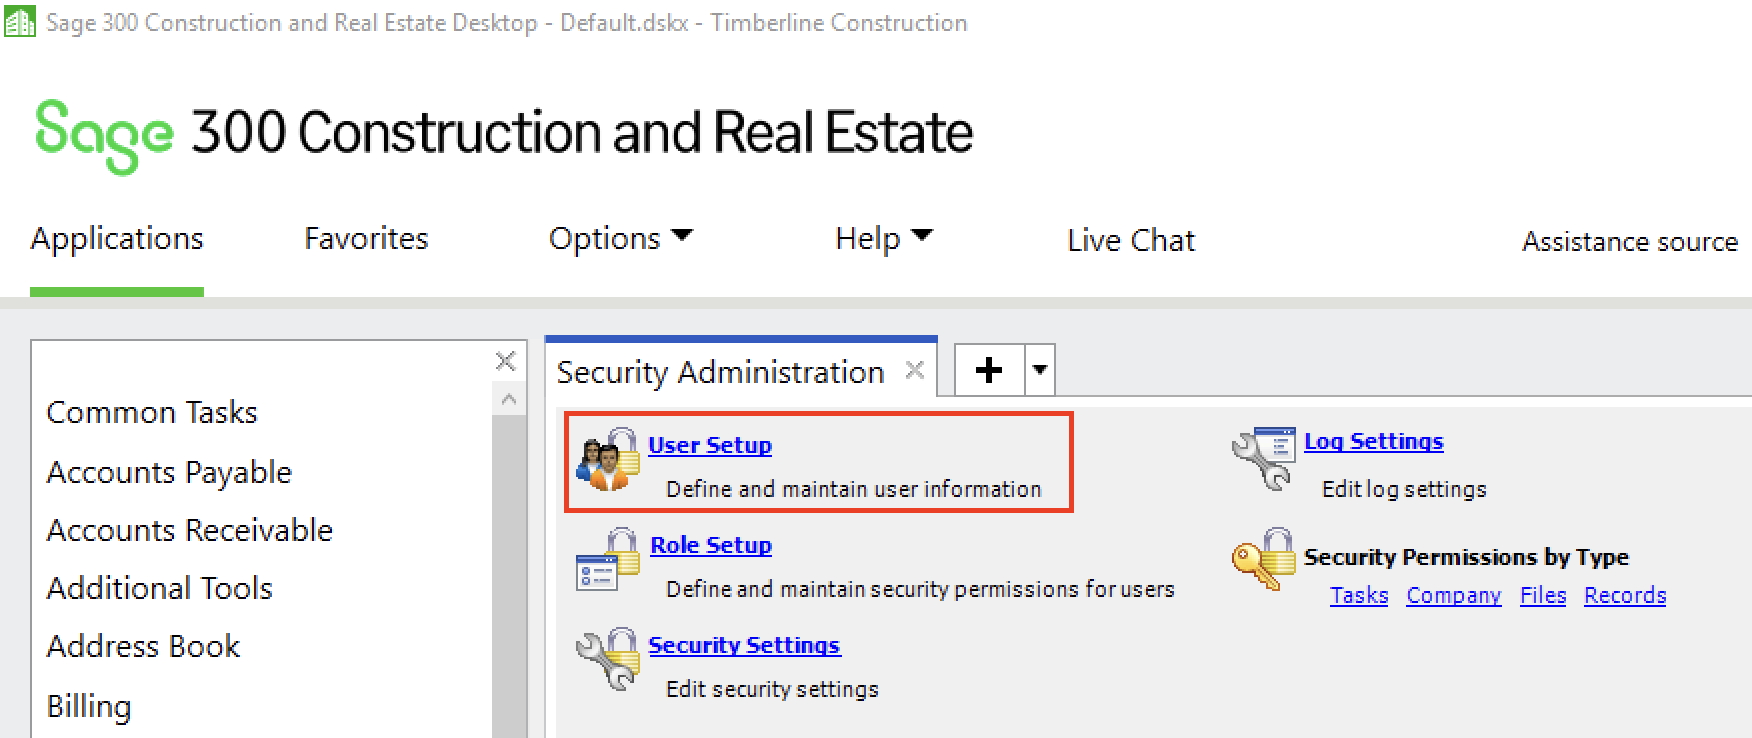
- In Sage 300 CRE, go to Options then Security Administration:
- Select User Setup:
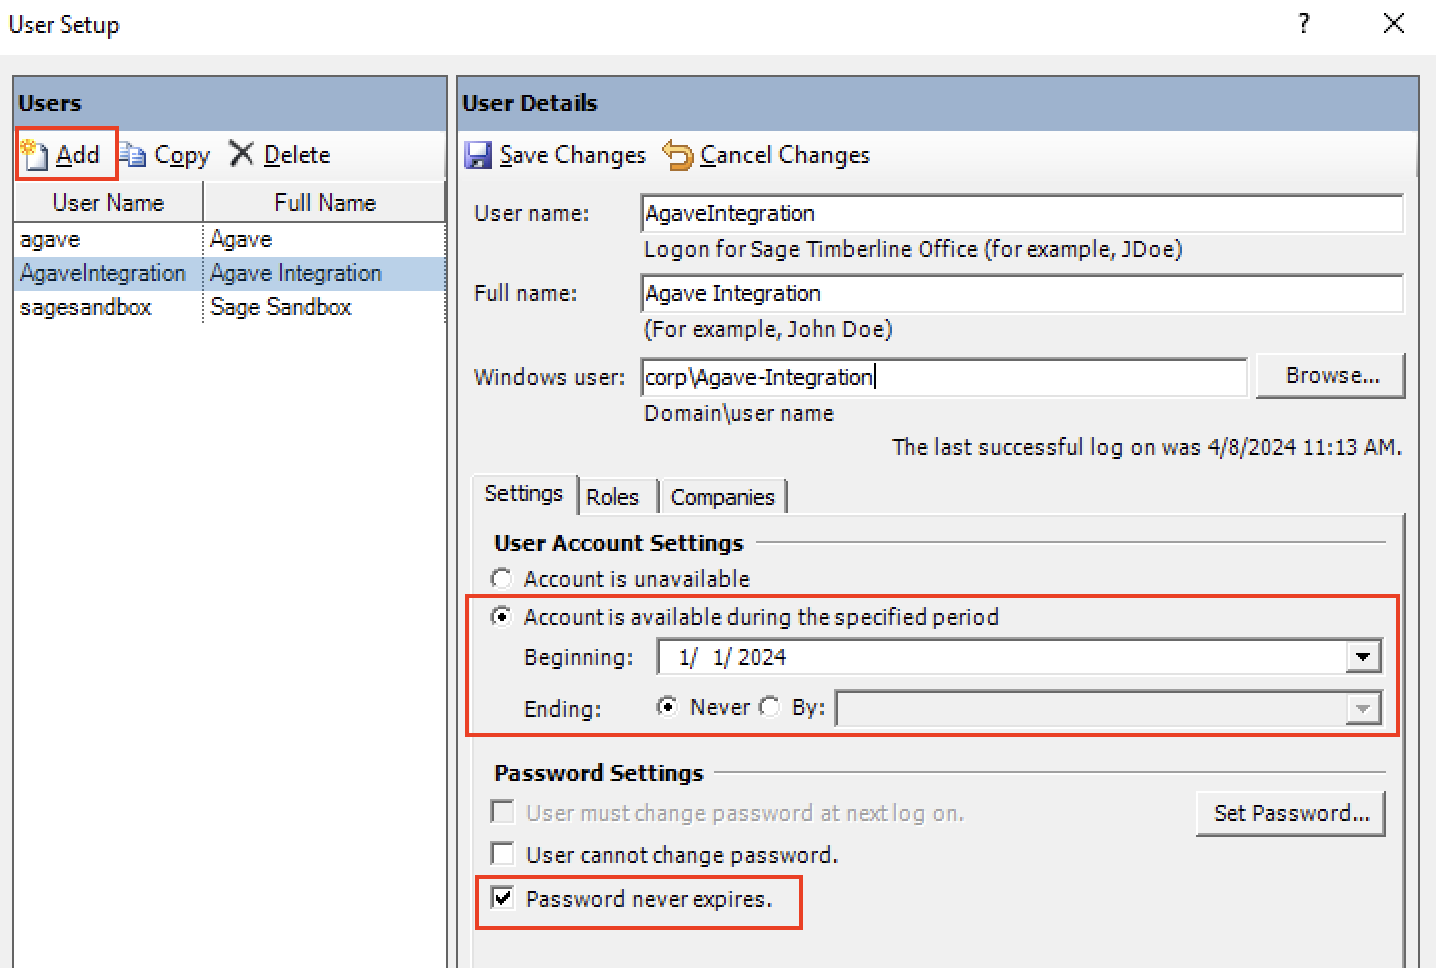
- Click Add to create a new user account. Configure the following settings:
- User name and Full name: Use descriptive names like "AgaveSync" or "DataSyncService"
- Windows User: Associate with the Windows account that will run the connector
- User Account Settings: Select "Account is available during the specified period" and set Ending to "Never"
- Password Settings: Select "Password Never Expires" for uninterrupted service
- Go to the Roles tab and assign the necessary permissions by checking:
- "Application administrator" - for system access
- "ODBC R/W" - for database read/write operations
- "Security Administrator" - for user management capabilities
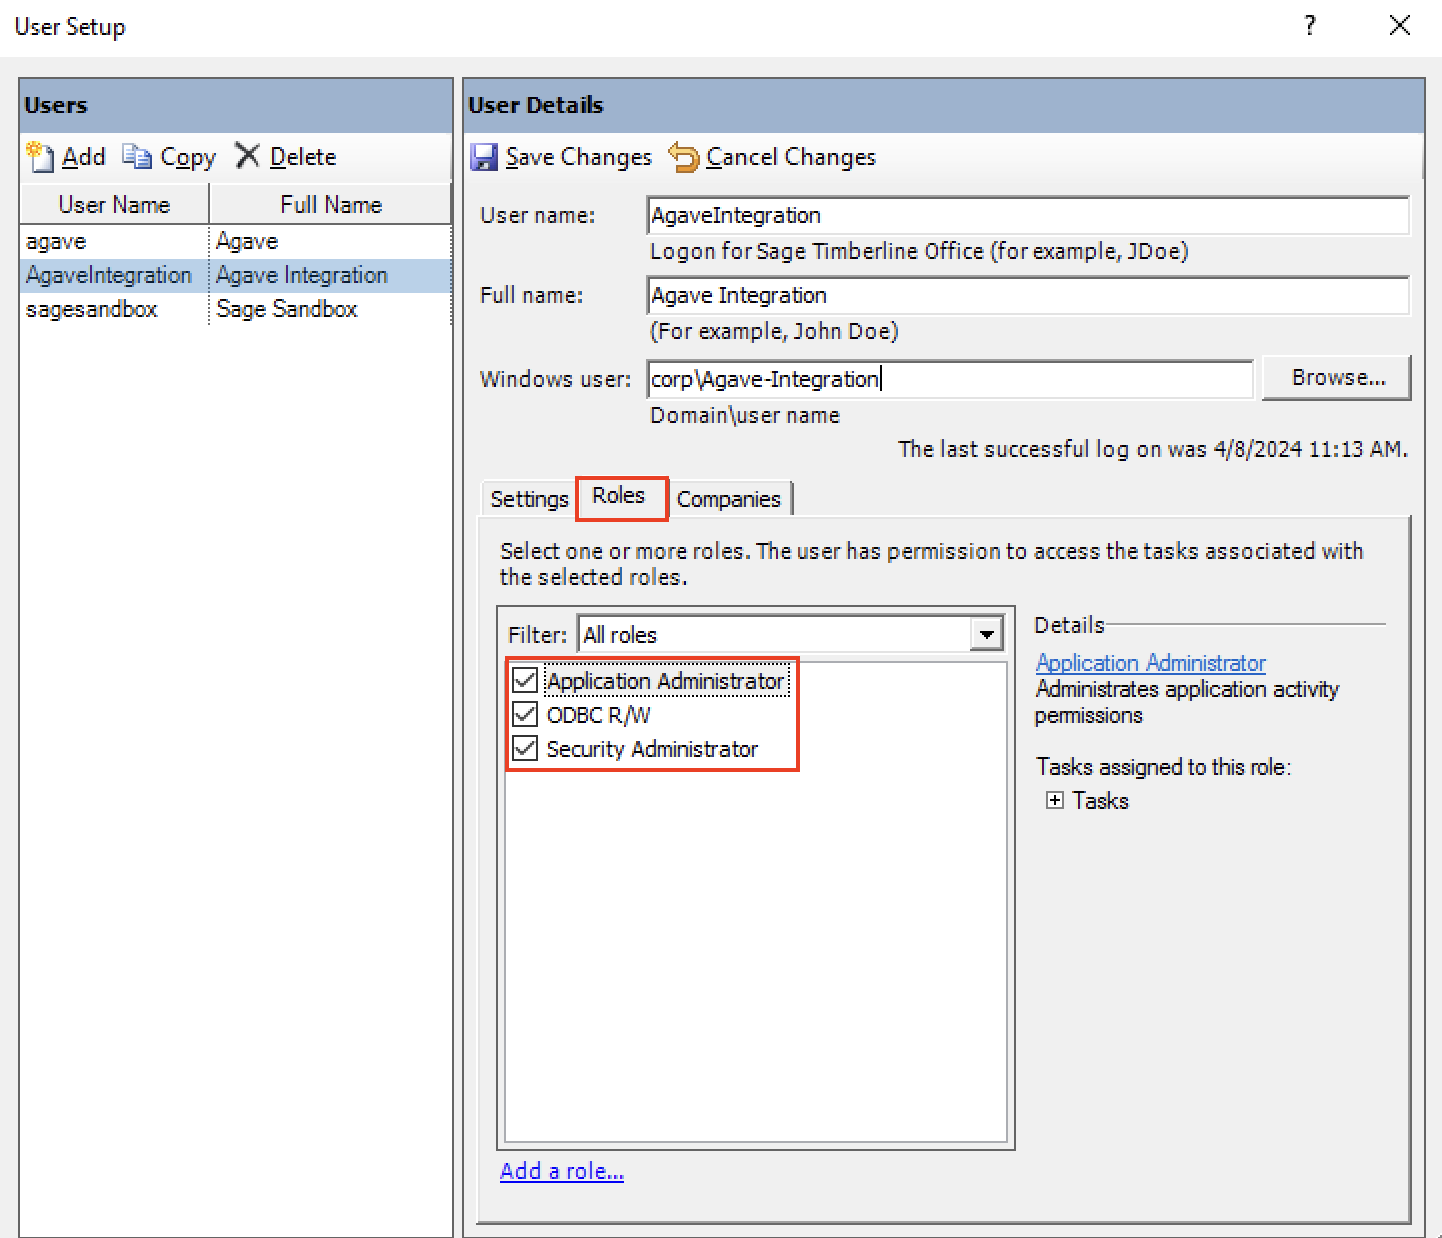
- Click Save Changes to create the service account.
Step 4: Connect Your Systems
To set up data syncing from your Sage 300 CRE system, complete the following steps.
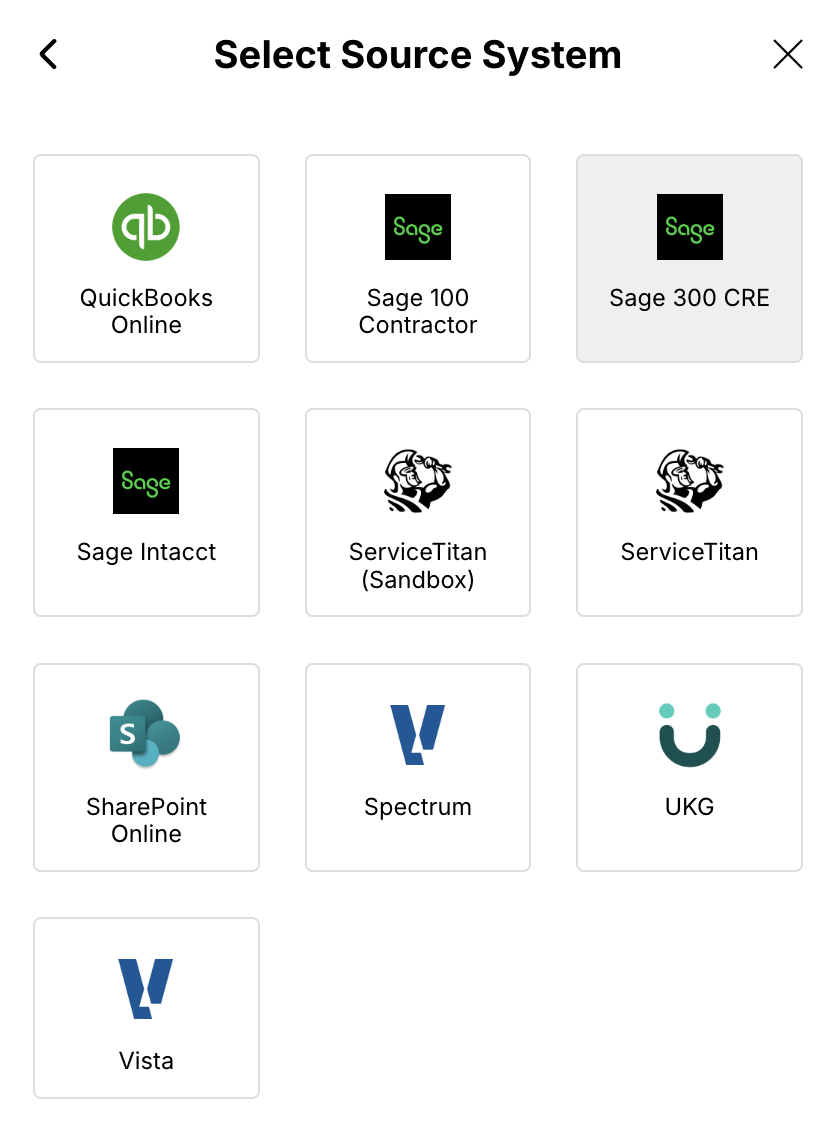
- In Agave, navigate to the system integration settings and select "Sage 300 CRE":
- Review the integration requirements to ensure your system is compatible, then click "Continue":
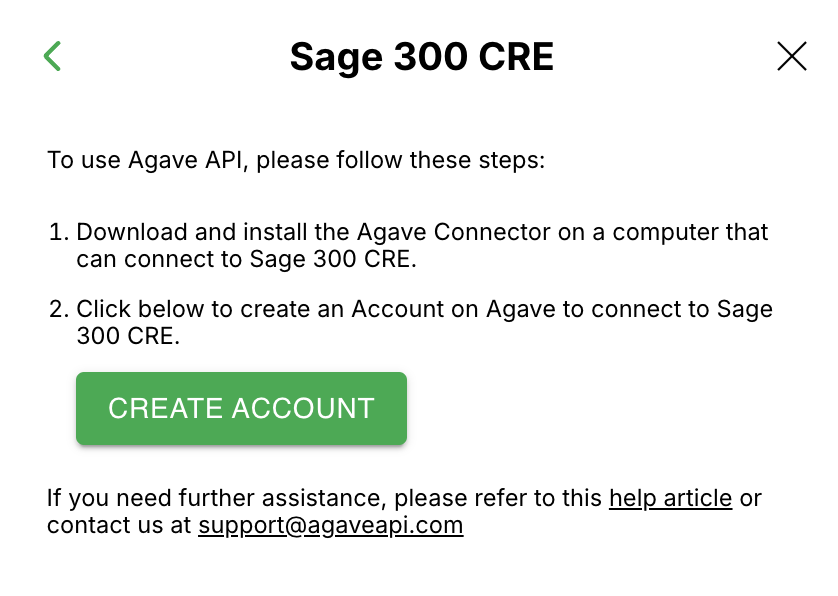
- Click "Create Account" to begin the connection process:
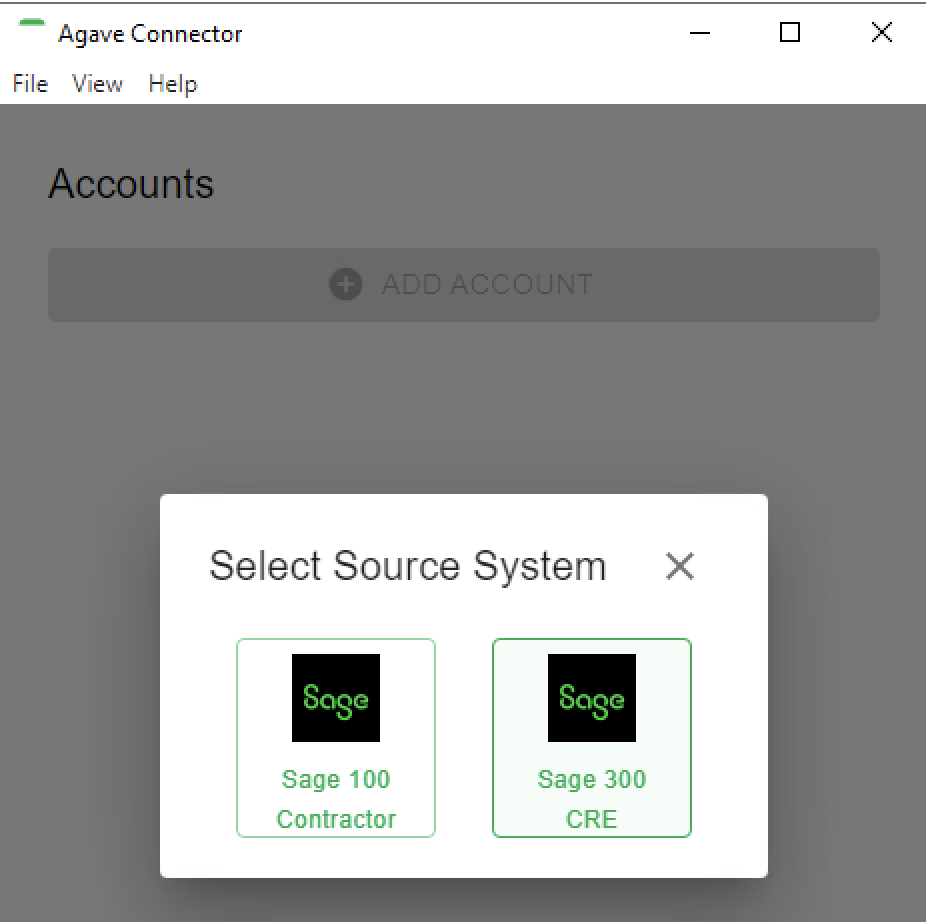
- Now switch to your server and open the Agave Connector application. Click "Add Account", then select Sage 300 CRE:
-
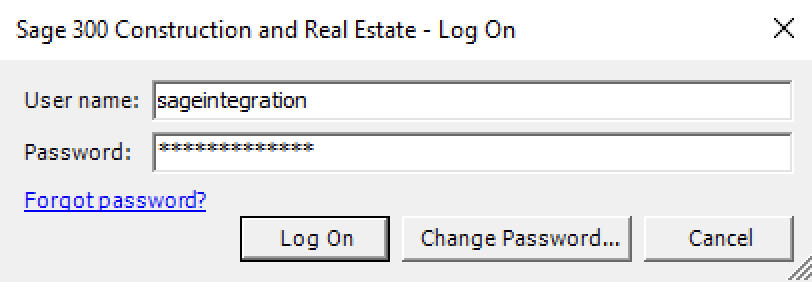
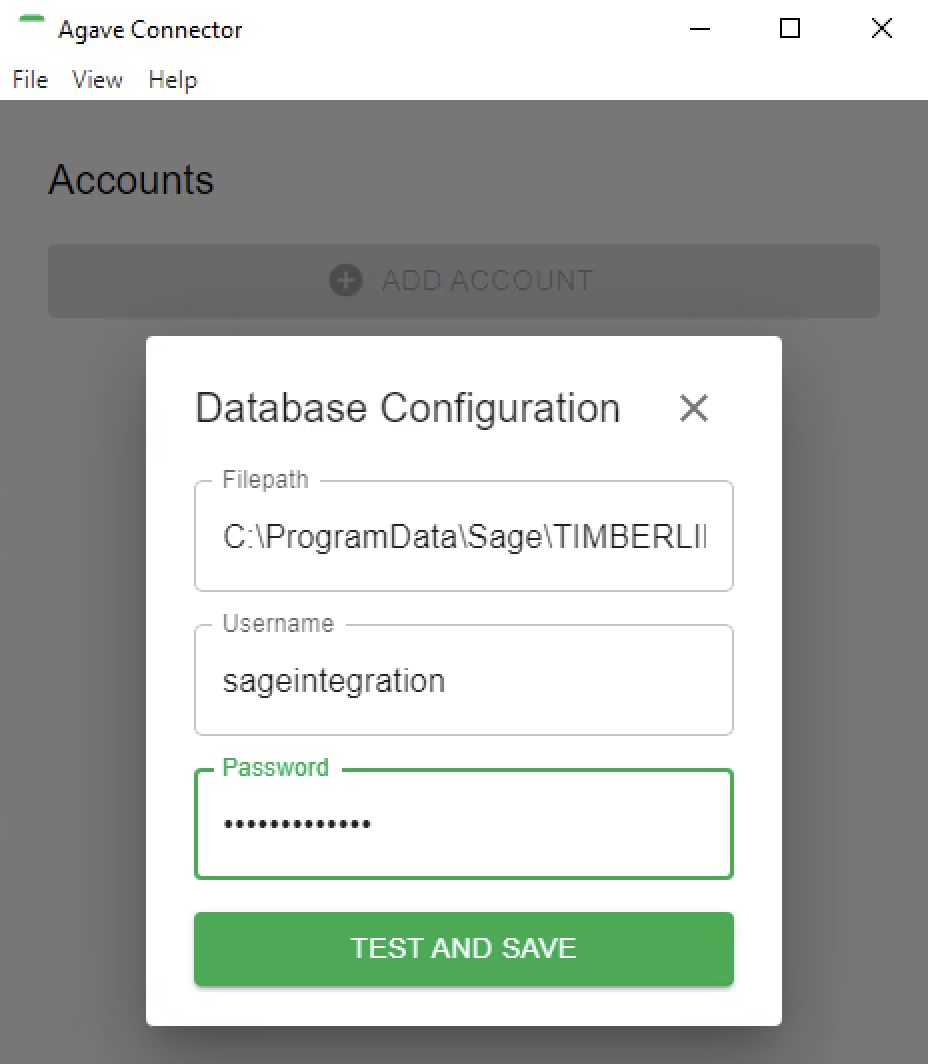
Enter your Sage 300 CRE connection details and click Test and Save:
- Filepath: Enter the company database path you copied from Step 2
- Username: Enter the service account username you created in Step 3 (e.g., "AgaveSync")
- Password: Enter the password for your service account
- The connector will display an "API Configuration" screen with connection credentials. Copy the Account ID and Token from this screen, then return to Agave Connector to complete the setup:
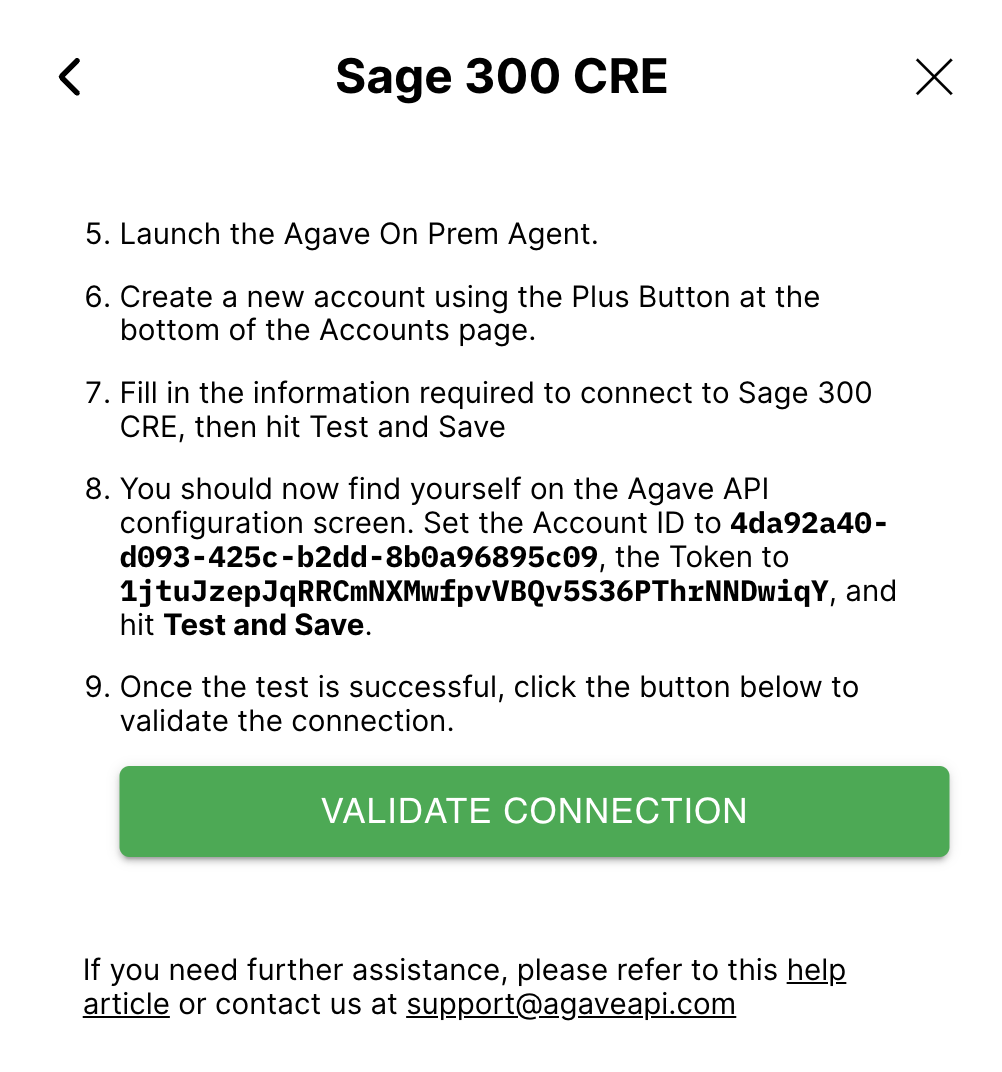
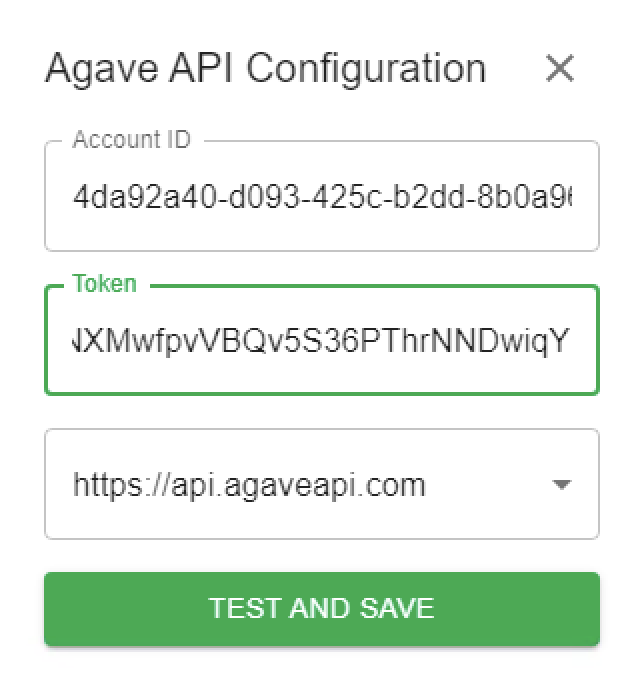
- Back in Agave Connector, paste the Account ID and Token, then click "Validate Connection". If successful, the setup wizard will close and data synchronization will begin automatically.
Step 5: Ensure Continuous Operation
For uninterrupted data synchronization, the Agave Connector must remain running on your server. You can minimize the application to run in the background during normal operations.
To ensure data syncing continues even when users log out of the server, we strongly recommend configuring the connector as a Windows service using Task Scheduler. This ensures 24/7 operation and automatic startup after server reboots.